
Oh, cheesecake. Just the word conjures up images of creamy, dreamy dessert perfection. But let’s be honest, making a classic cheesecake can sometimes feel like a high-stakes gamble. Will it crack? Won’t it crack? The dreaded crack has haunted many a baker, turning a beautiful creation into… well, a slightly less beautiful creation.
I’ve been there! So many hours poured into mixing, baking, and cooling, only to find that tell-tale line marring the smooth surface. It was heartbreaking! But through trial and error, and a little bit of culinary detective work, I unlocked the secret to consistently crack-free cheesecakes, even in adorable Mini Strawberry Cheesecakes form.
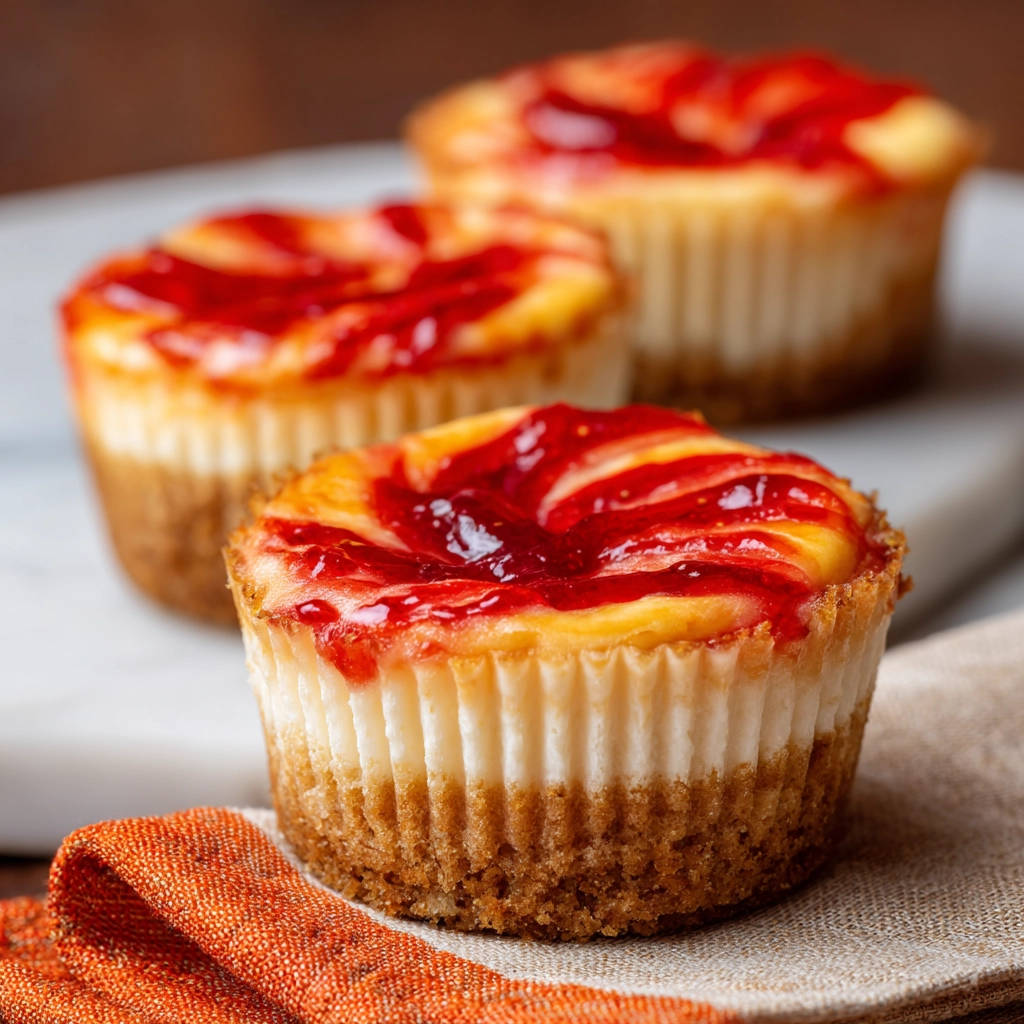
These little bites are packed with creamy cheesecake goodness and topped with a sweet, tangy strawberry sauce that just screams fresh flavor. They’re easier than a full-sized cheesecake (hello, no scary water bath!) and the crack-prevention method is so simple, you’ll wonder why you didn’t try it sooner. Get ready to impress everyone with these picture-perfect mini desserts!
Reasons These Mini Strawberry Cheesecakes Are a Keeper
Why should you choose this recipe for your next baking adventure? Let me count the ways:
- No Cracks, Guaranteed: The unique cooling method is a game-changer. Say goodbye to unsightly cracks!
- Perfectly Portioned: Mini size means no slicing mess and built-in portion control (if you can stop at just one!).
- Fresh Strawberry Flavor: The simple homemade strawberry topping elevates these from great to absolutely divine.
- Impressive Yet Easy: They look fancy and sophisticated, but the process is straightforward enough for bakers of all levels.
- Make Ahead Friendly: These need chill time, making them ideal for prepping before a party or gathering.
Gathering Your Ingredients for Sweet Mini Strawberry Cheesecakes
Creating these delightful cheesecake bites starts with rounding up the right components. Each ingredient plays a crucial role, from the sturdy, buttery crust to the luscious, smooth filling and the vibrant fruit topping. Let’s look at what you’ll need and why.
For the base, we rely on the classic crunch of graham cracker crumbs. These provide a slightly sweet, sandy foundation that pairs wonderfully with the creamy filling. You can buy pre-crushed crumbs or make your own by pulsing graham crackers in a food processor until fine. Granulated sugar adds a touch of sweetness to the crust, while melted unsalted butter acts as the binding agent, holding everything together and giving it that rich, satisfying flavor and texture once baked.
The heart of our mini cheesecakes is the rich and tangy cream cheese filling. Using softened cream cheese is absolutely non-negotiable here; it ensures a smooth, lump-free batter. If your cream cheese isn’t soft enough, the batter won’t emulsify properly, leading to a less creamy texture. Granulated sugar sweetens the filling to perfection, balancing the tang of the cream cheese. We use large eggs, ideally at room temperature, as they integrate more smoothly into the batter, contributing to the cheesecake’s structure and richness. A splash of vanilla extract enhances all the sweet flavors, adding a comforting, classic note.
Finally, the star topping requires fresh strawberries, chopped into bite-sized pieces. Using fresh, ripe strawberries is key for the best flavor and texture in the simple sauce. We add a little granulated sugar to sweeten the berries and help them release their juices as they cook. A touch of lemon juice is crucial for brightness; it cuts through the sweetness of the berries and the richness of the cheesecake, making the strawberry topping truly pop.
Here’s the full list to make sure you have everything ready:
- 1 and 1/2 cups graham cracker crumbs
- 1/4 cup granulated sugar (for the crust)
- 5 tablespoons unsalted butter melted
- 16 ounces cream cheese softened
- 3/4 cup granulated sugar (for the filling)
- 2 large eggs room temperature
- 1 teaspoon vanilla extract
- 1 cup chopped fresh strawberries
- 2 tablespoons granulated sugar (for the topping)
- 1 teaspoon lemon juice
Gathering these simple ingredients is the first step towards enjoying these luscious mini delights. Having everything prepped and ready before you start mixing makes the process even smoother!
Crafting Your Cheesecake Masterpieces: Step-by-Step
Ready to dive in and create these gorgeous, crack-free mini cheesecakes? The process is broken down into simple, manageable steps. Pay close attention to the notes on mixing and cooling – they are key to your success!
- Prep Your Pan: Start by preheating your oven to a gentle 325 degrees F (160 degrees C). Cheesecake loves a moderate temperature, which helps it bake evenly and prevents the edges from setting too fast, contributing to cracks. Line a standard 12-cup muffin tin with paper liners. This makes removing the finished mini cheesecakes a breeze and helps them hold their individual shape.
- Make the Crust Mixture: In a medium-sized bowl, combine your graham cracker crumbs with the 1/4 cup of sugar. Pour in the melted butter and stir everything together until all the crumbs are moistened and clump together slightly when you pinch them. This indicates they’re ready to form a stable crust.
- Form the Crusts: Divide the buttery crumb mixture evenly among the 12 prepared muffin cups. Use the back of a spoon or a small flat-bottomed glass to press the crumbs firmly and evenly into the bottom of each liner. A well-compacted crust prevents crumbling when you remove the cheesecake.
- Mix the Cream Cheese (Gently!): In a large bowl, add the softened cream cheese and the 3/4 cup of sugar for the filling. Use an electric mixer on low speed to beat them together until they are just combined and smooth. The key here is to avoid incorporating too much air. Overmixing cream cheese can create air pockets that expand and contract during baking, leading to cracks. Mix only until you see no more dry sugar or cream cheese streaks.
- Incorporate the Eggs and Vanilla: Add the room temperature eggs one at a time, beating on low speed just until each egg is incorporated into the mixture before adding the next. This slow, gentle addition helps the eggs integrate smoothly without developing too much gluten from the cream cheese (yes, cream cheese has proteins that can behave like gluten when overmixed!) or adding excess air. Stir in the vanilla extract. Remember the mantra: mix on low speed and do not overmix.
- Fill the Cups: Carefully pour the creamy cheesecake batter evenly over the pressed graham cracker crusts in each muffin cup. Fill each cup about two-thirds full. This leaves enough room for the cheesecake to rise slightly as it bakes without overflowing and ensures a good crust-to-filling ratio.
- Initial Bake: Bake in the preheated oven for 18 to 22 minutes. You’ll know they’re ready when the edges look slightly puffed and appear set, but the centers still look a little soft and jiggly when you gently nudge the pan. Don’t wait until the centers are completely firm; they will continue to set as they cool.
- The Crack Prevention Secret: This is the most critical step! Once the baking time is up, turn off the oven. Do not open the door immediately. Instead, prop the oven door open slightly, about an inch or two, using a wooden spoon. Leave the mini cheesecakes inside the cooling oven for at least 30 minutes. This gradual decrease in temperature prevents the sudden contraction that causes cracks. It’s simple, but incredibly effective!
- Cool Completely: After the oven rest, remove the muffin tin from the oven and place it on a wire rack. Let the mini cheesecakes cool completely at room temperature in the tin. Once they are fully cooled, transfer the entire tin to the refrigerator and chill for at least 2 hours. This chilling time is essential for the cheesecakes to set properly and develop their firm, creamy texture.
- Prepare the Strawberry Topping: While the cheesecakes are cooling (either after baking or while they are chilling), prepare the delightful strawberry sauce. In a small saucepan, combine the chopped fresh strawberries, 2 tablespoons of sugar, and the teaspoon of lemon juice. Cook this mixture over medium heat, stirring occasionally. The strawberries will soften and release their juices, and the mixture will thicken slightly into a lovely sauce. Cook until it reaches your desired consistency – some like it more chunky, others smoother.
- Cool the Topping: Once the strawberry sauce is ready, remove it from the heat and let it cool completely. Warm topping will melt the chilled cheesecake, so patience is key here! You can speed this up by placing the saucepan in an ice bath if you’re in a hurry.
- Serve with Style: Just before serving, spoon the cooled strawberry topping generously over each chilled mini cheesecake. Carefully peel away the paper liners. Arrange them on a platter and admire your crack-free creations! You might find yourself wanting another delightful strawberry dessert after this, perhaps our Strawberry Crumble Parfaits.
Tips for Perfect Mini Strawberry Cheesecakes Every Time
Achieving cheesecake perfection is easy with a few key tips in mind:
- Room Temperature Ingredients: Ensure your cream cheese and eggs are at room temperature. This is vital for a smooth, lump-free batter. Cold ingredients won’t emulsify properly, leading to a less desirable texture and potential mixing issues.
- Do Not Overmix: We’ve said it before, but it bears repeating! Mixing cream cheese on low speed and stopping as soon as ingredients are incorporated is crucial. Overmixing adds air, which is the enemy of a smooth, crack-free cheesecake.
- Gentle Egg Addition: Add eggs one at a time and mix just until the yolk disappears. This minimizes air incorporation.
- The Slow Cool is Mandatory: Don’t skip the oven cooling step! It’s the secret weapon against cracks. Sudden temperature changes shock the delicate cheesecake structure.
- Chill Time is Essential: The minimum 2-hour chilling time allows the cheesecake to set properly. For the absolute best texture and flavor, chilling for 4 hours or even overnight is ideal.
- Customizing the Topping: While strawberry is classic, you can swap it! Try making a quick blueberry sauce, or a simple chocolate ganache. For another no-crack cheesecake experience with a different flavor profile, you might enjoy our Coconut Caramel Chocolate Cheesecake.
What to Serve With Your Mini Strawberry Cheesecakes
These Mini Strawberry Cheesecakes are delightful on their own, but they also pair well with a few additions. A dollop of freshly whipped cream is always a welcome touch. A sprig of fresh mint adds a pop of color and aromatic freshness. If you’re serving them as part of a dessert spread, they go beautifully alongside other small bites. Consider something like Simple Sugar Cookie Bars or maybe even some Easy Beignets for a lovely variety of textures and flavors.
Your Mini Strawberry Cheesecake Questions Answered (FAQ)
Let’s tackle some common questions you might have about making these small batch delights.
Can I use frozen strawberries for the topping?
Yes, absolutely! Frozen strawberries work wonderfully for the topping. Just be aware that they will release more liquid than fresh berries as they cook, so you might need to cook the sauce slightly longer to achieve the desired thickness. Thawing them first isn’t necessary; you can put them directly into the saucepan.
Do I have to use paper liners?
While not strictly mandatory, paper liners make removing the mini cheesecakes incredibly easy and ensure clean edges. If you don’t use them, you’ll need to grease the muffin tin very well to prevent sticking.
My cheesecakes still cracked a little, what went wrong?
Even with the oven cooling method, tiny cracks can sometimes appear if the batter was overmixed, if the oven temperature was too high initially, or if they were slightly overbaked (the centers should still be a bit soft). Ensure your ingredients are room temperature and you’re mixing on the lowest speed possible. The good news? A crack doesn’t affect the taste, and the strawberry topping hides any imperfections beautifully!
How long do Mini Strawberry Cheesecakes last?
Stored in an airtight container in the refrigerator, these mini cheesecakes will last for 3-4 days. The strawberry topping is best added just before serving, or stored separately and added to each cheesecake as it’s served, to prevent the crust from getting soggy.
Can I freeze these mini cheesecakes?
Yes! Mini cheesecakes freeze very well. Cool them completely and chill them thoroughly without the strawberry topping. Wrap each cheesecake individually in plastic wrap, then place them in a freezer-safe container or bag. They can be frozen for up to 1 month. Thaw them overnight in the refrigerator before adding the fresh strawberry topping.
What if I don’t have graham cracker crumbs?
No problem! You can substitute other cookie crumbs for the crust. Vanilla wafers, shortbread cookies, or even chocolate cookies (like chocolate sandwich cookies without the filling) would make delicious alternatives. Just use the same amount of crumbs and melted butter as the recipe calls for.
Enjoy Your Homemade Mini Strawberry Cheesecakes!
There you have it! The secret to gorgeous, crack-free Mini Strawberry Cheesecakes ready to grace your table. These small batch desserts are perfect for parties, weeknight treats, or whenever a cheesecake craving strikes. The combination of the crunchy crust, creamy vanilla filling, and bright strawberry topping is simply irresistible.
Give this recipe a try and experience the joy of baking mini cheesecakes without the stress of cracking. I can’t wait to hear how they turn out for you!
Happy baking, and happy eating!
Mini Strawberry Cheesecakes

Ingredients
- 1 and 1/2 cups graham cracker crumbs
- 1/4 cup granulated sugar
- 5 tablespoons unsalted butter melted
- 16 ounces cream cheese softened
- 3/4 cup granulated sugar
- 2 large eggs room temperature
- 1 teaspoon vanilla extract
- 1 cup chopped fresh strawberries
- 2 tablespoons granulated sugar
- 1 teaspoon lemon juice
Directions
- Preheat oven to 325 degrees F (160 degrees C). Line a 12-cup muffin tin with paper liners.
- In a medium bowl, combine graham cracker crumbs and 1/4 cup sugar. Stir in melted butter until crumbs are moistened.
- Divide crumb mixture evenly among the muffin cups, pressing firmly into the bottom to form the crust.
- In a large bowl, beat softened cream cheese and 3/4 cup sugar with an electric mixer on low speed until just combined and smooth. Do not overmix.
- Gently beat in eggs one at a time, mixing only until each egg is incorporated. Stir in vanilla extract. Avoid whipping air into the batter; this helps prevent cracks.
- Pour batter evenly over the crusts in the muffin cups, filling each about two-thirds full.
- Bake for 18 to 22 minutes, or until the centers are almost set but still look a little soft. The edges should be slightly puffed.
- This is the key to preventing cracks: Once baking is complete, turn off the oven. Prop the oven door open slightly with a wooden spoon. Leave the mini cheesecakes inside the cooling oven for at least 30 minutes. This slow, gradual cooling prevents sudden temperature changes that cause cracking.
- Remove from oven and let cool completely in the muffin tin on a wire rack before refrigerating for at least 2 hours.
- While cheesecakes cool, combine chopped strawberries, 2 tablespoons sugar, and lemon juice in a small saucepan. Cook over medium heat, stirring occasionally, until strawberries soften and release juices, and the mixture thickens slightly into a sauce. Let cool completely.
- Spoon cooled strawberry topping over each chilled mini cheesecake before serving.