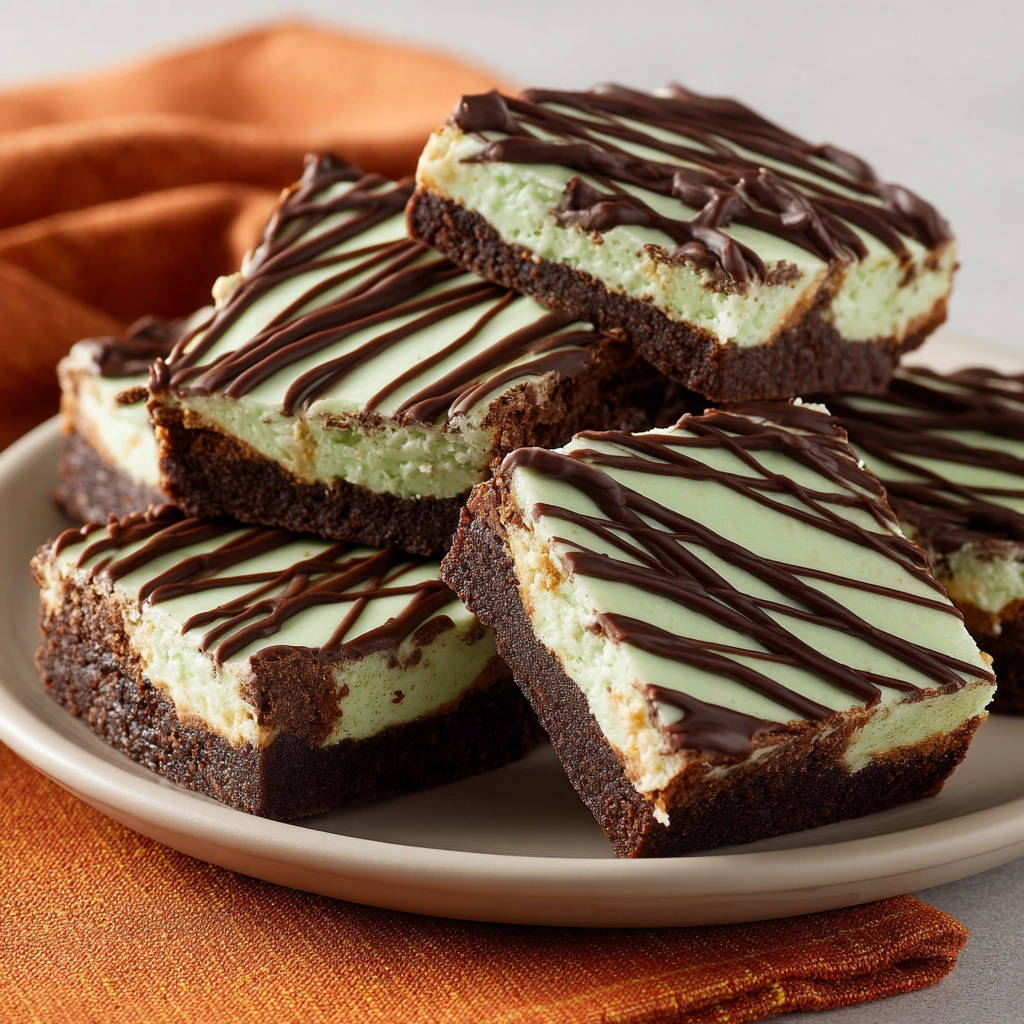
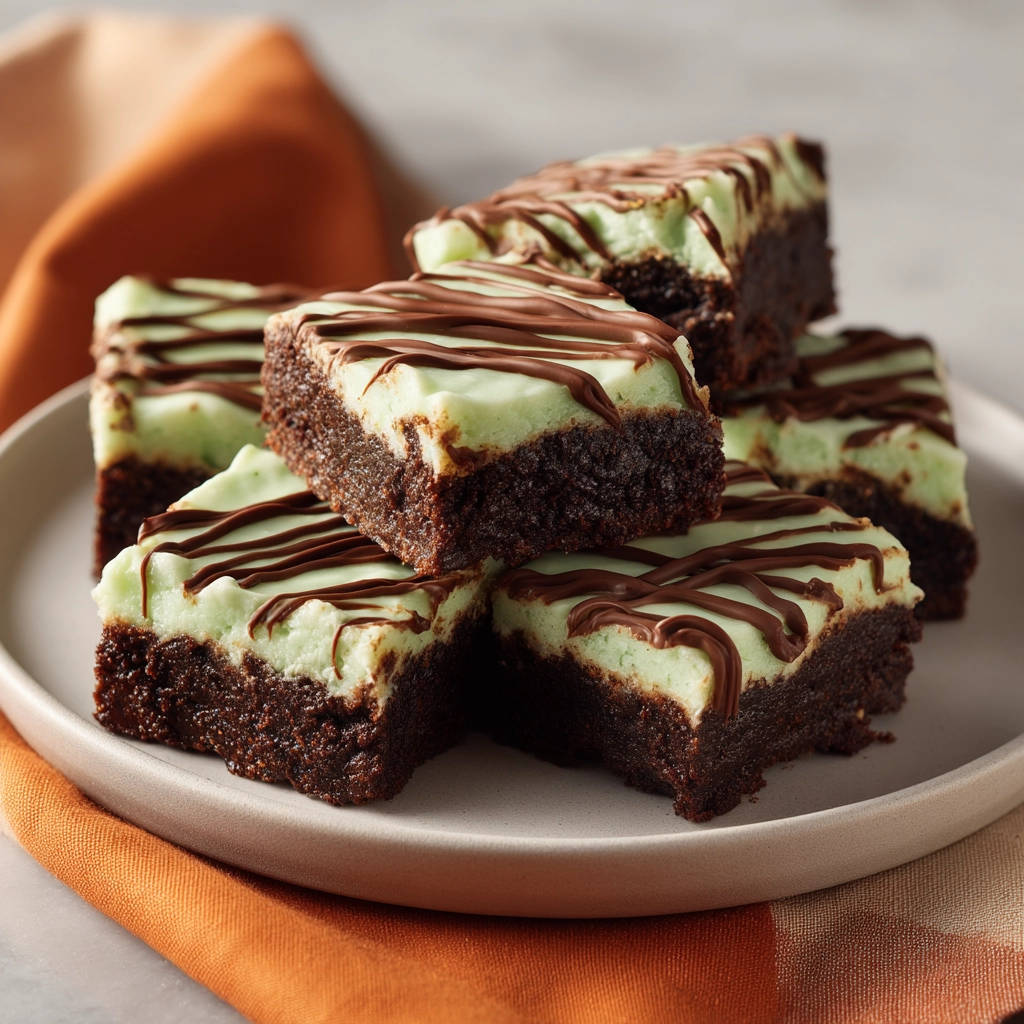
Is there a more iconic flavor combination than mint and chocolate? That refreshing coolness paired with rich, decadent chocolate is a match made in dessert heaven. But let’s be honest, achieving those perfect, clean layers in a mint chocolate bar can sometimes feel like a culinary challenge. No more! This recipe for Mint Chocolate Layered Bars guarantees beautifully set, easily sliceable bars every single time. Get ready for a game-changer!
Why You’ll Love These Mint Chocolate Layered Bars
These bars aren’t just delicious; they’re also surprisingly easy to make. Here’s what makes them so irresistible:
- Perfect Layers: The secret chilling technique ensures each layer sets beautifully, preventing crumbling and messy slices.
- Intense Flavor: From the fudgy brownie base to the cool mint frosting and rich chocolate drizzle, every bite is an explosion of flavor.
- Make-Ahead Friendly: These bars are perfect for making ahead of time, making them ideal for parties or simply satisfying your sweet tooth throughout the week.
- Impressive Presentation: The vibrant green frosting and glossy chocolate drizzle create a visually stunning dessert that’s sure to impress.
Gathering Your Ingredients for Mint Chocolate Layered Bars
Before we dive into the baking process, let’s talk about the ingredients. Each component plays a crucial role in creating the perfect balance of flavors and textures. We’re aiming for a rich, fudgy brownie base, a refreshing mint frosting, and a decadent chocolate topping. Let’s take a closer look:
For the Decadent Brownie Layer:
- Unsalted Butter: Using melted butter adds moisture and richness to the brownie base. Make sure it’s unsalted so you can control the overall saltiness of the bars.
- Granulated Sugar: This provides sweetness and contributes to the chewy texture of the brownie.
- Large Eggs: Eggs bind the ingredients together and add richness and moisture. Use large eggs for the best results.
- Vanilla Extract: A touch of vanilla extract enhances the other flavors and adds a subtle warmth. Opt for a good quality, pure vanilla extract for the best flavor.
- Unsweetened Cocoa Powder: This gives the brownie its characteristic chocolate flavor. Choose a high-quality cocoa powder for a richer, more intense chocolate taste.
- Baking Powder: A little baking powder helps the brownie rise slightly, creating a light and airy texture.
- Salt: Salt balances the sweetness and enhances the other flavors.
- All-Purpose Flour: This provides structure to the brownie. Be careful not to overmix the batter once you add the flour, as this can result in a tough brownie.
For the Refreshing Mint Frosting:
- Unsalted Butter: Softened butter is essential for creating a smooth and creamy frosting. Make sure it’s at room temperature before you start.
- Cream Cheese: Cream cheese adds tanginess and richness to the frosting. Use full-fat cream cheese for the best flavor and texture.
- Powdered Sugar: This sweetens the frosting and helps to create a smooth, stable texture.
- Milk: A little milk helps to thin out the frosting and create a creamy consistency.
- Mint Extract: This is the key ingredient for the mint flavor. Start with 1/2 teaspoon and add more to taste, depending on your preference.
- Green Food Coloring: A few drops of green food coloring give the frosting its characteristic minty hue. Use gel food coloring for the most vibrant color.
For the Luxurious Chocolate Drizzle:
- Semi-Sweet Chocolate Chips: Semi-sweet chocolate chips provide a balance of sweetness and bitterness. You can also use dark chocolate chips for a richer flavor.
- Vegetable Oil: A teaspoon of vegetable oil helps to thin out the melted chocolate and create a smooth, glossy drizzle.
Crafting Your Mint Chocolate Layered Bars: Step-by-Step
Now for the fun part! Don’t be intimidated by the multiple layers; this recipe is actually quite straightforward. The key is to follow the instructions carefully and allow each layer to set properly. Ready to get started?
- Preheat and Prep: Begin by preheating your oven to 350 degrees F (175 degrees C). While the oven is heating, grease and flour an 8×8 inch baking pan. This will prevent the brownie from sticking and make it easier to remove the bars later. A little extra attention to this step saves a lot of frustration!
- Building the Brownie Base: In a medium bowl, whisk together the melted butter and granulated sugar until well combined. This creates a smooth base for the brownie batter. Then, beat in the eggs one at a time, followed by the vanilla extract. Whisking in the eggs one at a time ensures they are fully incorporated and helps to create a smooth batter.
- Combining Dry Ingredients: In a separate small bowl, whisk together the cocoa powder, baking powder, salt, and flour. Whisking the dry ingredients ensures that they are evenly distributed, which will help the brownie bake evenly.
- Creating the Brownie Batter: Gently add the dry ingredients to the wet ingredients and stir until just combined. Important: Do not overmix! Overmixing can develop the gluten in the flour, resulting in a tough brownie.
- Baking to Fudgy Perfection: Spread the batter evenly into the prepared pan and bake for 20-25 minutes. The key to a fudgy brownie is to slightly underbake it. A toothpick inserted into the center should come out with moist crumbs. Let the brownie cool completely in the pan on a wire rack before adding the frosting. This is crucial to prevent the frosting from melting.
- Preparing the Mint Frosting: While the brownie is cooling, make the mint frosting. In a large bowl, beat the softened butter and cream cheese with an electric mixer until smooth and creamy. This is the foundation of your perfect frosting, so take the time to get it right.
- Achieving the Perfect Minty Hue: Gradually add the powdered sugar, alternating with the milk, beating until smooth and fluffy. Then, beat in the mint extract and green food coloring until you reach your desired color. Remember, a little food coloring goes a long way!
- Frosting the Brownie: Once the brownie layer is completely cool, spread the mint frosting evenly over the top. Ensure the brownie is fully cooled; otherwise, your frosting will melt and be a drippy mess.
- The Secret to Clean Slices: This is the critical step for setting! Cover the pan tightly with plastic wrap and refrigerate for at least 2 hours, or until the frosting is firm to the touch. This chilling step is essential for clean slicing and stable layers. Don’t skip it!
- Crafting the Chocolate Drizzle: In a small microwave-safe bowl, combine the chocolate chips and vegetable oil. Microwave in 30-second intervals, stirring between each interval, until completely melted and smooth. Be careful not to overheat the chocolate, as it can burn.
- Adding the Finishing Touch: Drizzle the melted chocolate over the chilled frosting. Get creative with your drizzle!
- Final Chill Time: Chill again for at least 30 minutes to allow the chocolate drizzle to set before cutting. For the cleanest cuts, use a sharp knife and wipe the blade clean between each slice. This prevents the chocolate from cracking and ensures a professional-looking result. Now cut into bars and enjoy!
Tips for Perfect Mint Chocolate Layered Bars Every Time
Want to ensure your Mint Chocolate Layered Bars are a total success? Here are a few extra tips to keep in mind:
- Don’t Overbake the Brownies: Slightly underbaking the brownie layer is key to achieving a fudgy texture.
- Use Room Temperature Ingredients: Softened butter and cream cheese will cream together more easily, resulting in a smoother frosting.
- Chill, Chill, Chill: The chilling steps are essential for setting the layers and preventing the bars from crumbling. Don’t rush the process!
- Get Creative with the Drizzle: Use a piping bag or a plastic bag with a corner snipped off for a more precise chocolate drizzle.
- Storage: Store leftover bars in an airtight container in the refrigerator for up to 5 days.
- If you are looking for another chocolatey recipe, check out this easy delicious chocolate sheet cake recipe!
What to Serve With Mint Chocolate Layered Bars
These bars are delicious on their own, but they also pair well with a variety of other desserts and drinks. Consider serving them with a scoop of vanilla ice cream, a dollop of whipped cream, or a cup of coffee or tea. For an extra-special treat, try serving them with our chocolate-covered apple dessert cups.
Your Mint Chocolate Layered Bars Questions Answered (FAQ)
Can I make these bars gluten-free?
Yes! Simply substitute the all-purpose flour in the brownie layer with a gluten-free all-purpose flour blend. Be sure to choose a blend that is designed for baking and contains xanthan gum or another binder to help with the texture. Also, you can check out this decadent chocolate topped cream cake recipe for another delicious gluten-free dessert option!
Can I use a different type of chocolate for the drizzle?
Absolutely! Feel free to use dark chocolate chips, milk chocolate chips, or even white chocolate chips for the drizzle. You can also use a combination of different types of chocolate for a more complex flavor.
How do I prevent the chocolate drizzle from cracking when I cut the bars?
The key to preventing the chocolate drizzle from cracking is to ensure that it is fully set before cutting the bars. Chill the bars for at least 30 minutes after drizzling the chocolate. Also, use a sharp knife and wipe the blade clean between each slice.
Can I freeze these bars?
Yes, these bars freeze well. Wrap them tightly in plastic wrap and then place them in a freezer-safe bag or container. They can be frozen for up to 2 months. Thaw them in the refrigerator overnight before serving.
Enjoy Your Homemade Mint Chocolate Layered Bars!
There you have it – a foolproof recipe for Mint Chocolate Layered Bars that are guaranteed to impress. With their rich brownie base, refreshing mint frosting, and decadent chocolate drizzle, these bars are the perfect treat for any occasion. So go ahead, bake up a batch and enjoy the deliciousness! Don’t forget to leave a comment below and let me know how they turned out!