Have you ever spent time creaming butter and sugar, mixing dough, scooping perfect little balls, only to watch them melt into thin, sad puddles on your baking sheet in the oven? It’s disheartening, isn’t it? That dream of a thick, chewy cookie with perfect edges vanishes in a puff of defeat.
For years, I struggled with this exact problem, especially with loaded cookies like these incredible White Chocolate & Caramel Cookies. All those delicious mix-ins seemed to weigh the dough down, encouraging the dreaded spread. But I discovered one simple, game-changing step that transformed my cookie baking forever. Now, every batch of these chewy delights bakes up beautifully thick and holds its shape like a champ.
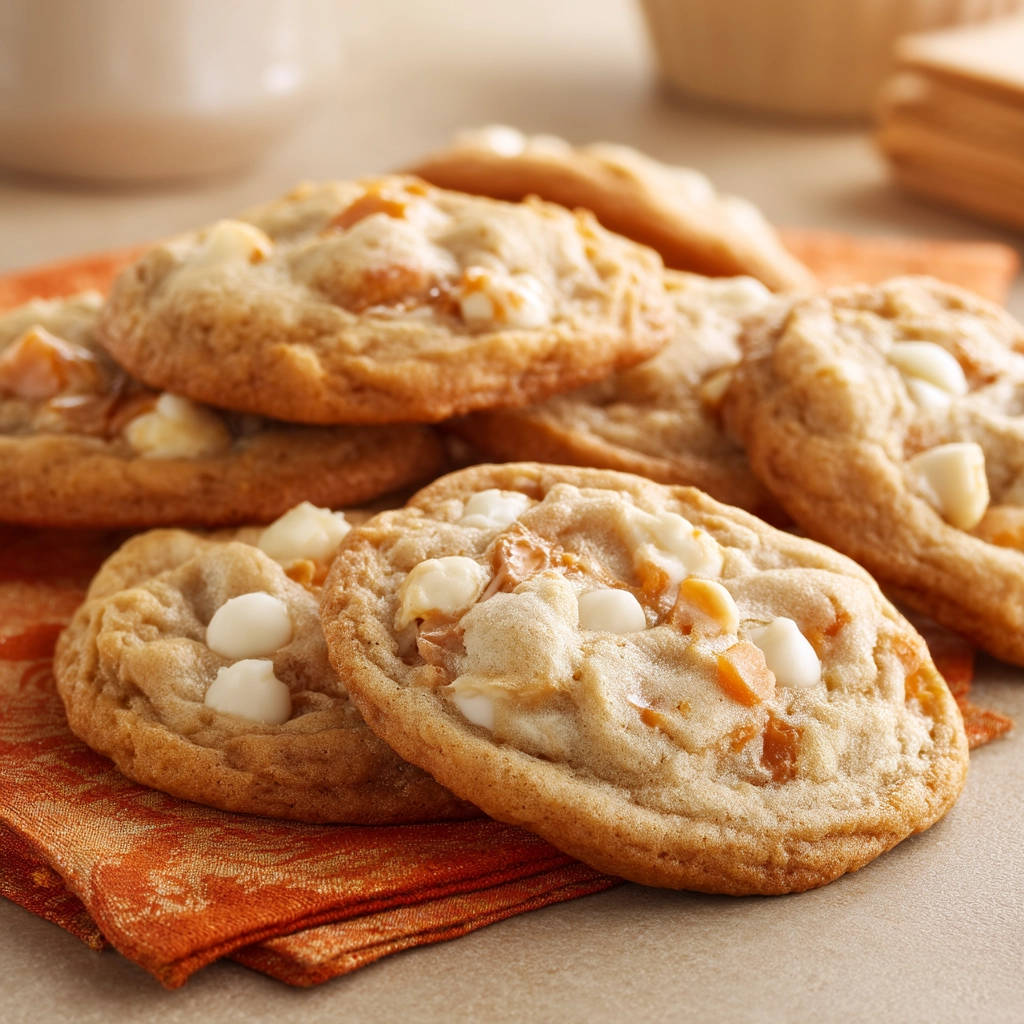
Get ready to say goodbye to flat cookies and hello to bakery-worthy chewy cookies filled with pockets of creamy white chocolate and gooey caramel. This recipe is about more than just flavor; it’s about achieving that perfect texture every single time.
Why You’ll Fall in Love with These Cookies
Aside from solving the flat cookie dilemma, these White Chocolate & Caramel Cookies offer a multitude of reasons to bake them:
- Irresistible Flavor Combo: The classic pairing of sweet white chocolate and rich caramel is pure magic in every bite.
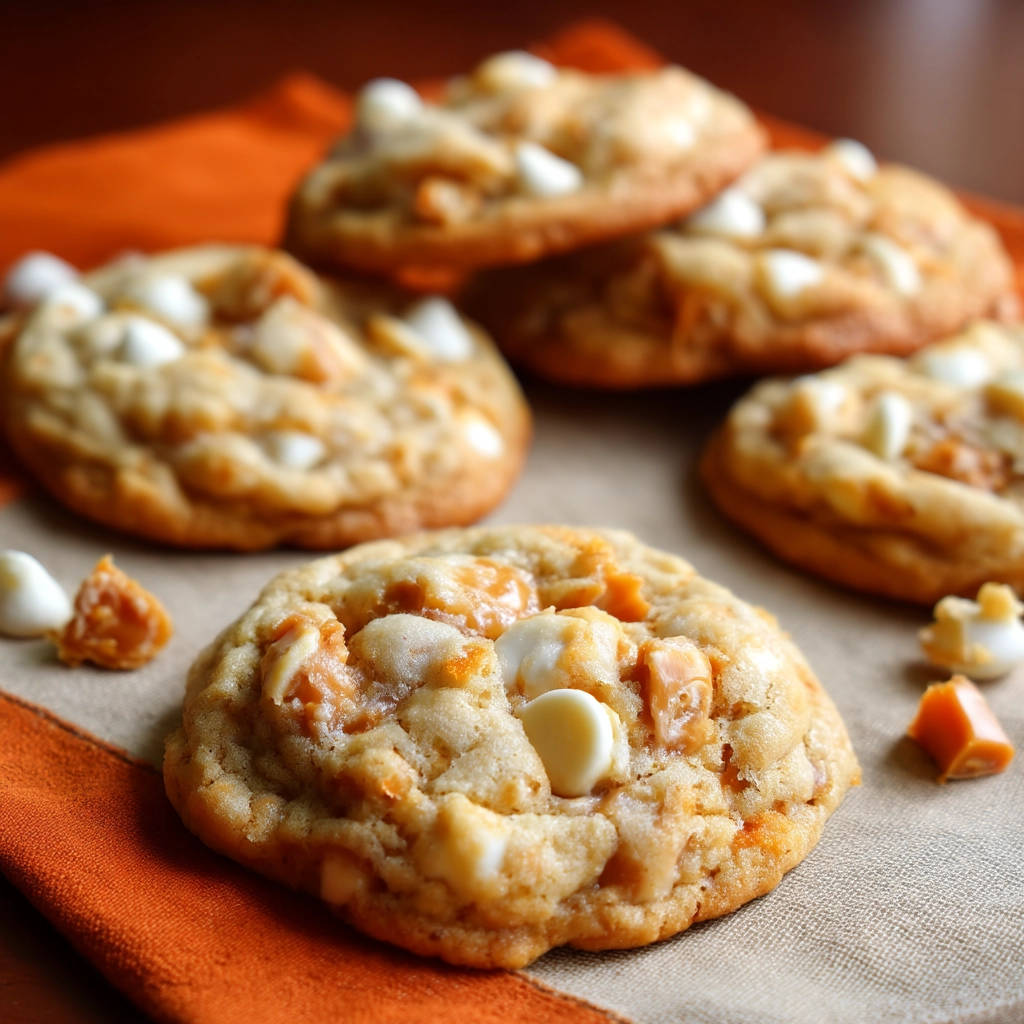
- Perfect Texture: They bake up with slightly crisp edges and wonderfully chewy centers, thanks to a specific technique we’ll cover.
- Foolproof Method: Once you learn the secret to preventing spread, this recipe becomes incredibly reliable.
- Crowd-Pleaser: These cookies disappear fast! They’re perfect for parties, bake sales, or just a cozy night in.
Gathering Your Ingredients for These Gorgeous Cookies
Crafting cookies that boast both fantastic flavor and perfect structure starts with understanding the role each ingredient plays. This recipe calls for pantry staples, but quality and temperature make a big difference in achieving that desired thick, chewy texture.
We begin with the foundation: the fats and sugars. We’ll need softened butter – and I mean truly softened, not melted – which is crucial for creaming properly and incorporating air. The combination of granulated sugar and packed light brown sugar is key. The granulated sugar helps with spread and creates a crisp edge, while the brown sugar, with its molasses content, adds moisture, chewiness, and a lovely depth of flavor that complements the caramel beautifully. The packed measurement is important here to ensure you get the right amount of that moist, flavorful sugar.
Next, we bring in the wet elements. Large eggs bind everything together and add richness, contributing to the cookie’s structure and chewiness. They should ideally be at room temperature so they emulsify better with the creamed butter and sugar. A splash of pure vanilla extract enhances all the other flavors, adding that classic bakery aroma.
For the dry team, we rely on standard all-purpose flour. It provides the structure for the cookies. We pair it with baking soda, a leavening agent that helps the cookies rise slightly while still maintaining their density. A touch of salt is essential; it balances the sweetness and highlights the rich caramel and white chocolate flavors.
And finally, the stars of the show: the White Chocolate Chips and Caramel Baking Bits. You’ll want a full cup of each for maximum flavor and those delightful pockets of melty goodness. White chocolate adds a creamy, sweet contrast, while the caramel bits melt just enough to create chewy swirls and pockets without making the cookie too flat or greasy.
Here’s a breakdown of what you’ll need:
- 1 cup (2 sticks) unsalted butter, truly softened
- 3/4 cup granulated sugar
- 3/4 cup packed light brown sugar
- 2 large eggs, ideally at room temperature
- 1 teaspoon vanilla extract
- 2 1/4 cups all-purpose flour
- 1 teaspoon baking soda
- 1/2 teaspoon salt
- 1 cup white chocolate chips
- 1 cup caramel baking bits or chips
Crafting Your White Chocolate & Caramel Cookies: Step-by-Step Guide
Making these cookies is straightforward, but paying attention to a couple of key techniques will ensure perfect results. Let’s walk through each step, focusing on how to build that ideal chewy texture and prevent any unwanted spreading.
Start by getting your base ready. In a large mixing bowl, combine your softened butter, granulated sugar, and that packed light brown sugar. Using an electric mixer (or some serious arm power!), beat these together until the mixture becomes noticeably lighter in color and fluffy in texture. This creaming process incorporates air, which is important for the cookie’s structure, but don’t overdo it – we aren’t trying to make a cake here.
Next, add your eggs, one at a time, beating well after each addition to ensure they are fully incorporated. This helps create a stable emulsion. Once the eggs are mixed in, stir in your vanilla extract. It’s easier to mix the liquid vanilla into the wet ingredients before adding the dry.
While the wet ingredients are mingling, prepare your dry components. In a separate medium bowl, whisk together the all-purpose flour, baking soda, and salt. Whisking ensures that the leavening agent and salt are evenly distributed throughout the flour, so you don’t end up with pockets of salty or extra-puffy bits in your cookies.
Now, it’s time to bring the wet and dry together. Add the dry ingredients to the wet mixture gradually, mixing on the lowest speed of your electric mixer. Stop mixing just as the flour disappears and everything is combined. Overmixing at this stage can develop the gluten in the flour too much, leading to tougher cookies. We want chewy, not tough!
Fold in the delicious additions. By hand, using a spatula or wooden spoon, gently stir in your white chocolate chips and caramel bits. This is important because using the mixer can break up the chips and bits too much. Hand-mixing allows you to evenly distribute them throughout the dough without overworking it.
Here is the absolute game-changer, the secret weapon against flat cookies: Chilling the dough. Scoop your dough into uniform balls. I like using a cookie scoop for consistency, but you can use two spoons. Place these dough balls directly onto your baking sheets lined with parchment paper (parchment is key for non-stick and easy cleanup!). Once your sheets are filled, place the entire baking sheet with the scooped dough balls into the refrigerator. Chill for a minimum of 30 minutes, but you can leave them in there for up to 2 days if you’re prepping ahead! This chilling step solidifies the butter in the dough. When the cold dough hits the hot oven, the butter melts more slowly, giving the cookie time to set and puff up slightly before it spreads. This is what creates those perfectly thick, chewy cookies!
While your dough is chilling (or towards the end of the chilling time), preheat your oven to 375 degrees F (190 degrees C). Make sure your oven is fully preheated before putting the cookies in.
Grab a chilled baking sheet from the fridge and place it directly into the preheated oven. Bake the chilled cookie dough balls for 9 to 11 minutes. You’re looking for the edges to be lightly golden, but the centers should still look a little soft and slightly underbaked. The chilling helps them bake more evenly, preventing overdone edges while the center stays gooey.
Once baked, resist the urge to move them immediately! Let the cookies cool on the hot baking sheets for about 5 minutes. They continue to set up during this time. After 5 minutes, use a spatula to transfer them to a wire rack to cool completely. Allowing them to cool fully on the rack helps them achieve that ideal chewy texture.
Tips for Perfect White Chocolate & Caramel Cookies Every Time
Even with the chilling trick, a few extra tips can elevate your cookie game and ensure consistent, delicious results.
- Measure Your Flour Correctly: Don’t scoop the flour directly from the bag with your measuring cup. This can compact the flour, leading to too much dry ingredient. Instead, fluff the flour in its container with a spoon, then gently spoon it into your measuring cup, leveling off the excess with a straight edge. Too much flour can make your cookies dry and less likely to spread at all, while too little can make them spread too much.
- Room Temperature Eggs & Butter: This isn’t just a suggestion! Softened butter creams properly, and room temperature eggs emulsify better with the fat and sugar, creating a smoother dough. If you forget to take eggs out, place them in a bowl of warm (not hot) water for 5-10 minutes.
- Don’t Skip the Chill Time: Seriously, this is the most crucial step for preventing flat cookies. The colder the dough (within reason – 30 minutes to 2 days is ideal), the better the butter will hold its shape initially in the oven, leading to thicker cookies. Chilling also deepens the flavors.
- Use Parchment Paper: It prevents sticking and helps the cookies bake more evenly. Silicone baking mats work well too.
- Don’t Overcrowd the Baking Sheet: Give the cookies space to spread just a little. Placing too many on one sheet can lead to uneven baking and edges that stick together.
- Know Your Oven: Ovens can have hot spots. If you bake multiple sheets, rotate them halfway through the baking time for more even browning.
- Look for the Right Visual Cues: Those slightly underbaked centers are key for chewiness. The cookies will continue to cook slightly as they cool on the hot baking sheet.
- Experiment with Caramel: While caramel baking bits work wonderfully, you can sometimes find caramel squares meant for melting. If using those, chop them into smaller pieces. Just be aware they might melt more significantly and create larger caramel pools.
- Storage: Store cooled cookies in an airtight container at room temperature for up to 3-4 days. For longer storage, freeze the baked cookies in a single layer on a baking sheet until solid, then transfer to a freezer-safe bag or container for up to 3 months. Thaw at room temperature.
Variations to Try
Once you’ve mastered the basic White Chocolate & Caramel Cookies, feel free to experiment!
Consider adding a sprinkle of flaky sea salt on top of the warm cookies right when they come out of the oven for a delicious sweet and salty kick. This is one of my favorite finishing touches for caramel desserts.
Swap out the white chocolate chips for dark or milk chocolate chips for a different flavor profile. Or do half white chocolate, half semi-sweet! You could even add a handful of chopped pecans or walnuts along with the chips and bits for extra texture and nutty flavor.
Serving Suggestions for White Chocolate & Caramel Cookies
These cookies are absolutely divine on their own, but pairing them can make them even more special. A tall glass of cold milk is a classic companion. For adults, a cup of hot coffee or tea makes for a perfect afternoon treat.
They are also wonderful served as dessert after a simple meal. Thinking of easy dinners? You could whip up some classic pot roast or creamy chicken and rice casserole and follow it with these delightful cookies.
Having friends over? Arrange them on a platter with other treats like soft sugar cookie bars or mini cheesecakes for a dessert spread that will impress.
Your White Chocolate & Caramel Cookie Questions Answered (FAQ)
Why is chilling the cookie dough so important?
Chilling the dough is the secret weapon against cookies spreading too much. When the dough is cold, the fat (butter) is solid. As the cold dough enters the hot oven, the butter melts slowly. This slow melting process allows the edges of the cookie to set and the leavening agent (baking soda) to do its work and help the cookie puff up slightly before the butter fully melts and causes spread. Without chilling, the butter melts too quickly, and the dough collapses into a thin disk.
How long do I really need to chill the dough?
The recipe calls for a minimum of 30 minutes, and this is enough to see a noticeable difference in spread. However, chilling for 24 hours or even up to 2 days often yields the best results in terms of both texture and flavor depth. The longer chill time allows the dry ingredients to fully hydrate and the flavors to meld.
My cookies still spread flat! What went wrong?
Several factors can contribute to cookies spreading flat, even with chilling. Common culprits include: 1) Your butter was too soft or even slightly melted when you started. 2) You measured too little flour or too much sugar/butter. 3) Your baking soda might be old and inactive. 4) Your oven temperature might not be accurate (it could be running low). 5) You didn’t chill the dough long enough, or the dough warmed up too much on the counter before going into the oven. 6) Overmixing the dough after adding flour can also contribute.
Can I use salted butter instead of unsalted?
Yes, you can, but you should reduce the amount of added salt in the recipe. Since the amount of salt in salted butter varies by brand, it’s tricky to get it exact. A good rule of thumb is to omit the 1/2 teaspoon of salt called for in the recipe if using salted butter. The flavor might be slightly different, but the cookies will still work.
What if I can’t find caramel baking bits?
Caramel baking bits are formulated to hold their shape better in the oven than softer caramel candies. If you can’t find them, your next best bet is to chop up firmer caramel candies (like Kraft caramels). Chop them into small pieces (about the size of chocolate chips). Be aware they may melt a bit more and create larger, potentially messier, caramel puddles within the cookie. You could also swirl caramel sauce after baking, but that won’t give you the same gooey pockets throughout.
Can I freeze the cookie dough?
Absolutely! Scooping and chilling the dough is also a great way to prep for future baking. Scoop the dough balls onto a parchment-lined baking sheet, chill them until solid (about 1-2 hours), then transfer the frozen dough balls to a freezer-safe bag or container. They will keep for up to 3 months. When ready to bake, you can bake them directly from frozen, adding 1-3 minutes to the baking time. Just keep an eye on them.
Enjoy Your Homemade White Chocolate & Caramel Cookies!
There’s nothing quite like the smell of freshly baked cookies filling your home. And when those cookies are loaded with creamy white chocolate and sweet, chewy caramel, and they’ve baked up perfectly thick instead of flat? That’s a baking win!
Give this recipe a try and experience the magic of a properly chilled cookie dough. It truly is the simple step that makes all the difference. These White Chocolate & Caramel Cookies are sure to become a new favorite.
Did you try this recipe? Let me know how they turned out in the comments below! What’s your favorite trick for perfect cookies?
White Chocolate & Caramel Cookies

Ingredients
- 1 cup (2 sticks) unsalted butter, softened
- 3/4 cup granulated sugar
- 3/4 cup packed light brown sugar
- 2 large eggs
- 1 teaspoon vanilla extract
- 2 1/4 cups all-purpose flour
- 1 teaspoon baking soda
- 1/2 teaspoon salt
- 1 cup white chocolate chips
- 1 cup caramel baking bits or chips
Directions
- In a large bowl, cream together the softened butter, granulated sugar, and brown sugar until light and fluffy.
- Beat in the eggs one at a time, then stir in the vanilla extract.
- In a separate medium bowl, whisk together the flour, baking soda, and salt.
- Gradually add the dry ingredients to the wet ingredients, mixing on low speed just until combined. Be careful not to overmix.
- Stir in the white chocolate chips and caramel bits by hand.
- This is the critical step to prevent spreading: Scoop your cookie dough into desired size balls and place them directly onto your baking sheets lined with parchment paper. Once the baking sheets are full of dough balls, place the entire baking sheet with the scooped dough into the refrigerator to chill for at least 30 minutes, or up to 2 days. This solidifies the fat in the dough, preventing it from spreading too quickly in the hot oven.
- Preheat your oven to 375 degrees F (190 degrees C).
- Bake the chilled cookie dough balls for 9 to 11 minutes, or until the edges are lightly golden but the centers still look slightly soft. The chilling helps them hold their shape and bake more evenly.
- Let cookies cool on the baking sheets for 5 minutes before transferring them to a wire rack to cool completely.