Have you ever spent time making a beautiful no-bake chocolate cream pie, only to cut into it and have the filling ooze everywhere? Ugh. It’s one of the most frustrating kitchen moments! You dream of those clean, defined slices of creamy chocolate goodness, and instead, you get a runny mess.
I used to experience this all the time. I’d follow the box instructions, wait the recommended chill time, and still, disappointment. But after much experimenting (and a few messy pies!), I discovered the simple, foolproof trick that guarantees your silky smooth chocolate filling sets up beautifully every single time. This Rich Chocolate Cream Pie isn’t just delicious; it’s reliably firm and sliceable, making it the perfect dessert for any occasion.
Why You’ll Love This Rich Chocolate Cream Pie
Beyond finally achieving that elusive firm set, there are so many reasons this particular chocolate cream pie recipe will become a staple in your dessert repertoire:
- Effortlessly Easy: This is a no-bake wonder! Minimal cooking involved, mostly just mixing and chilling.
- Classic Comfort: It delivers that nostalgic, deeply satisfying chocolate flavor we all crave in a creamy pie.
- Foolproof Setting: With the key technique we’ll cover, say goodbye to runny pie filling forever.
- Quick Prep: Active preparation time is less than 15 minutes, leaving you free to do other things while it chills.
- Crowd-Pleaser: Who doesn’t love a slice of rich, chocolatey pie? It’s perfect for parties, holidays, or just a Tuesday treat.
- Customizable: Easy to adapt with different crusts or toppings.
It’s the kind of dessert that looks impressive but is secretly super simple. My friends and family now ask for this specific rich chocolate cream pie because they know it’s guaranteed deliciousness.
Gathering Your Ingredients for This Perfect Chocolate Pie
One of the beauties of this no-bake rich chocolate cream pie is its simplicity. You don’t need a long list of fancy ingredients. Everything you need is easily found at your local grocery store. Each component plays a vital role in building layers of texture and flavor, from the crisp crust to the creamy, chocolate-studded filling.
Let’s look at what makes this chocolate dessert so special:
- Chocolate Sandwich Cookie Crumbs: About 1 ½ cups, which is roughly 20 standard chocolate sandwich cookies. These provide the perfect chocolatey base with a delightful crunch. Using the whole cookie, including the cream filling, adds extra richness and helps the crust bind together. You can buy pre-crushed crumbs for convenience, or easily crush whole cookies in a food processor or by placing them in a bag and crushing with a rolling pin.
- Melted Unsalted Butter: ¼ cup is all it takes to bind those cookie crumbs into a sturdy, pressable crust. Using unsalted butter allows you to control the overall saltiness of the pie.
- Large Box (5.1 ounce) Instant Chocolate Pudding Mix: This is the heart of our filling and the key setting agent. It MUST be instant pudding mix. Regular cooked pudding mix will not work for a no-bake pie. The 5.1-ounce size ensures you have enough pudding powder relative to the liquid for optimal setting. Choose a good quality instant chocolate pudding for the best flavor.
- Ice Cold Milk: Exactly 3 cups. This is perhaps the most crucial ingredient temperature-wise! The colder your milk is, the better and faster the instant pudding powder will hydrate and activate its thickeners. Using milk (as opposed to water or non-dairy alternatives, which can yield inconsistent results with instant pudding) also provides richness and a creamy texture to the filling. Keep your milk in the back of the fridge until the very last moment before you need it.
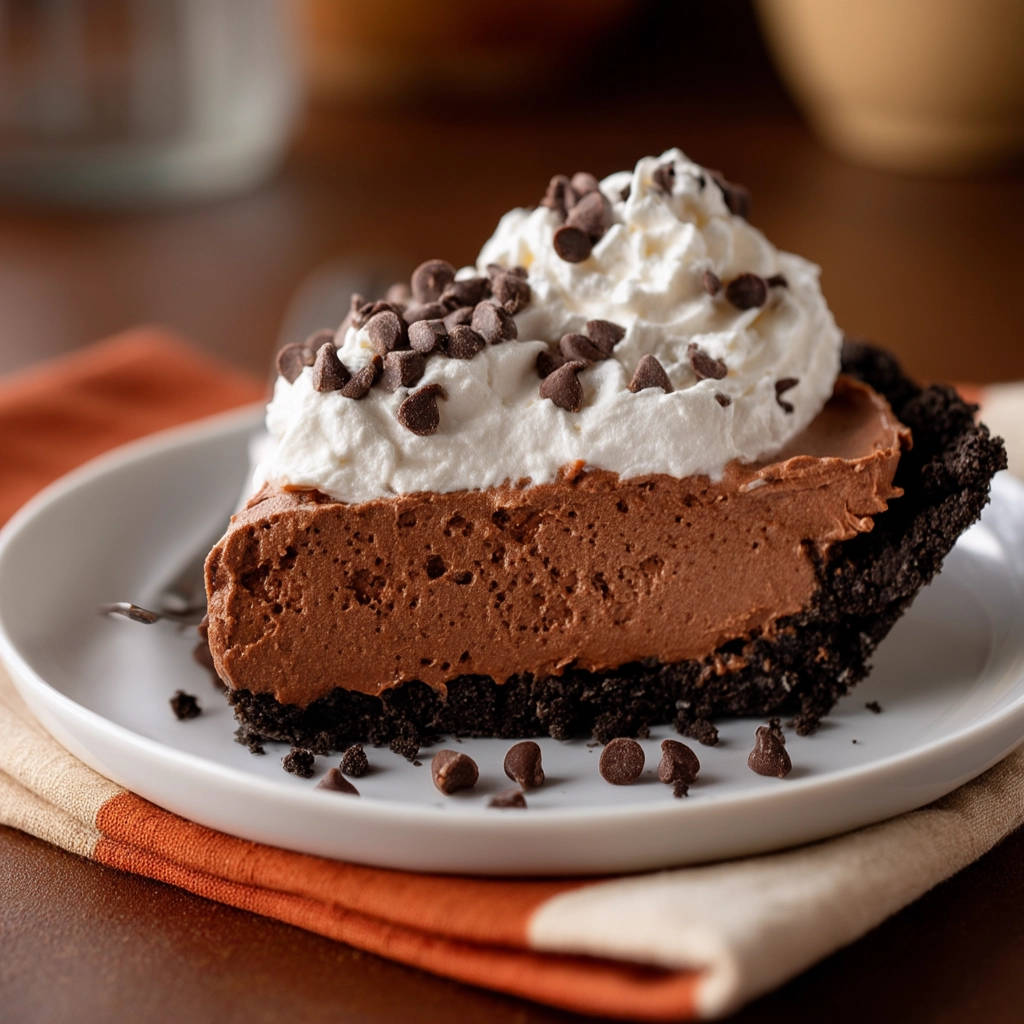
- Frozen Whipped Topping, Thawed: One 8-ounce container, fully thawed in the refrigerator. This adds lightness and airy creaminess to the dense pudding base. It transforms the pudding into a true cream pie filling. Make sure it’s thawed but still very cold.
- Mini Chocolate Chips: ½ cup stirred into the filling, plus more for topping. These mini chips provide little pockets of intense chocolate flavor and a slight textural contrast within the smooth filling. Using mini chips ensures they distribute nicely and you get chocolate in every bite.
Gathering everything before you start ensures a smooth process. Having your milk ice cold and your whipped topping thawed and ready are the two most important prep steps!
Crafting Your Rich Chocolate Cream Pie: Step-by-Step Perfection
Now for the fun part! Putting it all together. This recipe is designed to be straightforward, even for beginners. The magic lies in a couple of simple techniques that ensure that picture-perfect slice every time.
Begin with the crust. In a medium-sized mixing bowl, combine the chocolate sandwich cookie crumbs and the ¼ cup of melted unsalted butter. Stir them together thoroughly until all the crumbs are moistened and resemble wet sand. This wet texture is what allows the crumbs to hold their shape once pressed. Transfer this mixture to a 9-inch pie dish. Using the bottom of a glass or measuring cup, press the mixture firmly and evenly into the bottom of the dish and up the sides. Take your time here to create a compact, sturdy shell. This crust will hold your creamy filling, so you want it to be solid. Once pressed, pop the pie dish into the refrigerator. Letting the crust chill for at least 15 minutes before adding the filling helps the butter firm up, making the crust less likely to crumble when you add the wet filling.
While your crust is chilling, prepare the star of the show: the filling base. In a large mixing bowl, combine the large box (5.1 ounce) of instant chocolate pudding mix and the 3 cups of ice cold milk. Remember, the milk temperature is your secret weapon here! Grab a whisk – you’ll need to whisk these two ingredients together vigorously. Don’t just stir; really whisk with some energy for about 2 minutes straight. You’ll notice the mixture start to thicken up quite a bit as you whisk. This vigorous whisking ensures the instant pudding powder fully dissolves and activates its gelling agents properly with the cold liquid. It’s the key step that guarantees a firm set.
Once your pudding base has thickened after whisking, it’s time to introduce the thawed whipped topping. Add the entire 8-ounce container to the bowl. Now, switch to a spatula or a large spoon for this step. Gently fold the whipped topping into the thickened pudding mixture. This means using a cutting and scooping motion to combine the two without deflating the whipped topping. Continue folding until there are absolutely no white streaks remaining from the whipped topping and the filling is a uniformly smooth, light brown color and has a wonderfully fluffy consistency. Don’t overmix, or you’ll lose that lovely airy texture.
Next, add a little extra chocolatey delight! Stir the ½ cup of mini chocolate chips into the fluffy filling. Just a few stirs are enough to distribute them throughout the mixture. They add a lovely texture and bursts of extra chocolate flavor in every bite.
Retrieve your chilled cookie crust from the refrigerator. Carefully pour the finished chocolate filling into the crust, using your spatula to scrape every last bit from the bowl (trust me, you won’t want to waste any!). Spread the filling evenly across the crust using the back of the spatula or spoon, creating a smooth surface.
Now comes the patience part! This pie needs ample time to set up correctly. Place the filled pie dish back into the refrigerator to chill for a minimum of 4 hours. However, for the best, most reliably firm and sliceable pie, I highly recommend letting it chill overnight or until it feels completely firm to the touch. This extended chilling period is non-negotiable for a clean slice. It allows all the components to meld and set properly, ensuring a beautiful presentation when you cut into it.
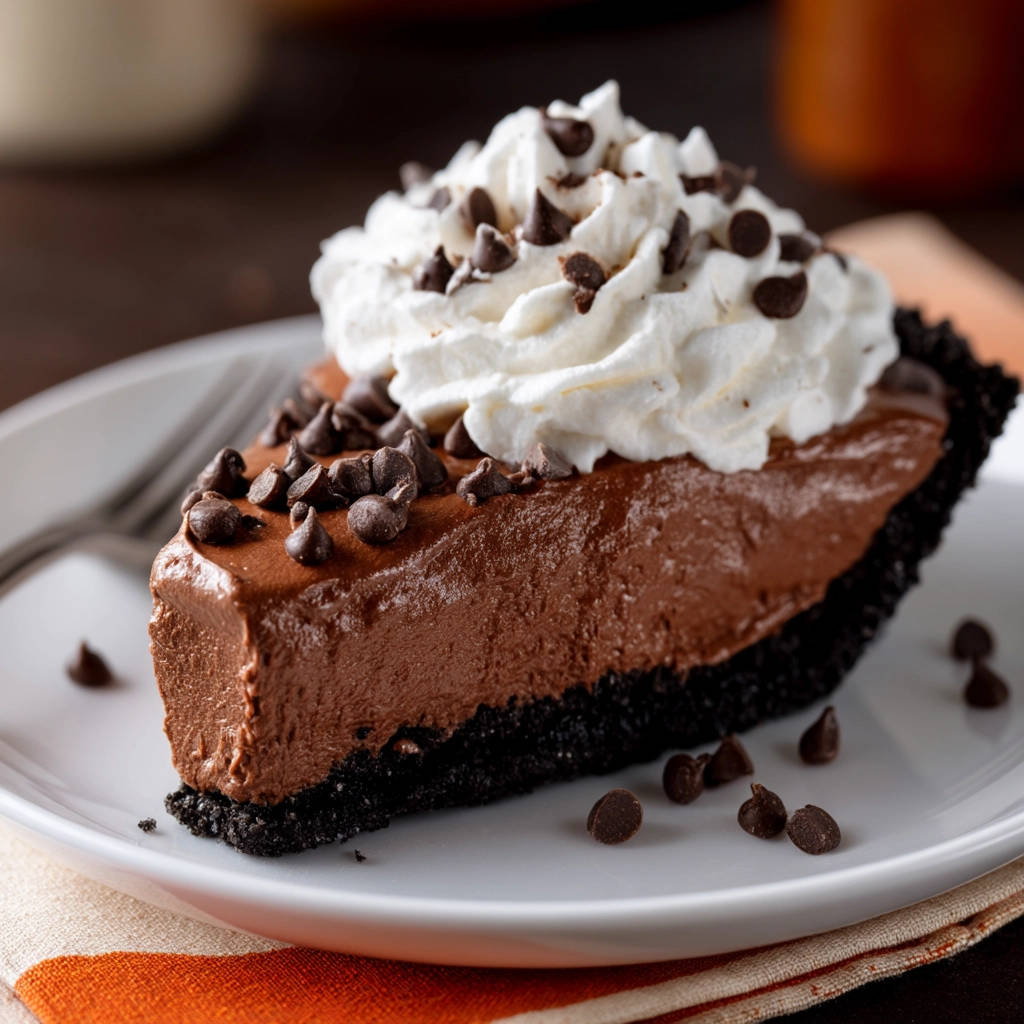
When you’re ready to serve your magnificent Rich Chocolate Cream Pie, retrieve it from the fridge. If you like, you can add additional dollops of thawed whipped topping and sprinkle more mini chocolate chips or even chocolate shavings over the top for extra flair. Slice the pie into generous wedges using a sharp knife dipped in hot water and wiped clean between cuts for the cleanest slices. Serve immediately and enjoy the fruits of your simple labor!
Following these steps, particularly the vigorous whisking with ice-cold milk and the extended chilling time, will ensure your chocolate cream pie sets up firmly, delivering perfect slices every time.
Tips for a Perfectly Set Chocolate Pie Every Time
Getting that perfect set isn’t hard, but a few things can make all the difference. Here are my top tips for ensuring your Rich Chocolate Cream Pie is a sliceable triumph:
- Temperature is Key (Again!): I cannot stress this enough – your milk must be ice cold. Pop it in the freezer for 15-20 minutes before you need it, just to get it extra frosty around the edges, but don’t let it freeze solid. This significantly helps the pudding set faster and firmer.
- Whisk Like You Mean It: Don’t just gently stir the pudding mix and milk. Whisk vigorously for the full 2 minutes. This introduces air and helps activate the setting agents in the instant pudding. Think of it as giving the pudding a jump start!
- Don’t Rush the Chill Time: While 4 hours is the minimum, letting the pie chill for 6 hours or even overnight is truly best. Patience here is rewarded with a perfect slice. A pie that looks set might still be slightly soft in the center; extended chilling ensures it’s firm throughout.
- Check Your Pudding Date: Instant pudding mix has a shelf life. If your mix is old, it might not set properly. Check the expiration date on the box.
- Consider Milk Fat: While any milk can work, whole milk or 2% milk tend to yield a creamier, slightly firmer set than skim milk due to the fat content. Stick to dairy milk for best results with instant pudding.
- Crust Variations: Don’t have chocolate sandwich cookies? A classic graham cracker crust or even a store-bought shortbread crust would work beautifully with this filling.
- Flavor Boost: For an extra rich, deep chocolate flavor, you can add a teaspoon of vanilla extract or a tiny pinch of salt to the pudding mixture before adding the whipped topping.
- Make it Minty: Swap the chocolate sandwich cookies for mint chocolate sandwich cookies and use mint chocolate chips for a refreshing twist! Or try adding a drop of peppermint extract to the filling.
What to Serve With This Delightful Dessert
This Rich Chocolate Cream Pie is rich and satisfying enough to stand entirely on its own. It’s the perfect sweet ending to any meal, whether it’s a simple family dinner or a special occasion. A scoop of vanilla ice cream or an extra dollop of whipped cream is always a welcome addition, offering a delightful contrast in temperature and texture.
For a slightly lighter contrast after a heavier meal, consider serving it with fresh berries like raspberries or strawberries, which cut through the richness beautifully. It also pairs wonderfully with a hot cup of coffee or tea.
Rich Chocolate Cream Pie Questions Answered (FAQ)
Got questions about making this dreamy chocolate dessert? Here are some common ones I hear:
Can I use non-dairy milk for this recipe?
Instant pudding mixes are specifically formulated to set with dairy milk proteins. While some people have success using non-dairy alternatives like almond milk or soy milk, the results can be inconsistent, and the pudding may not set as firmly or might take much longer to set. For a guaranteed firm Rich Chocolate Cream Pie, dairy milk is recommended.
Why did my chocolate cream pie filling not set?
The most common culprits are using milk that wasn’t cold enough, not whisking the pudding mix and milk vigorously for the full 2 minutes, or not allowing sufficient chilling time. Ensure your milk is ice cold, whisk with energy to fully activate the pudding, and give it at least 4 hours (preferably longer!) in the refrigerator.
Can I use regular cooked pudding mix instead of instant?
No, instant pudding mix is essential for this no-bake recipe. Regular pudding mix requires cooking on the stovetop to activate its thickeners and will not set properly when simply mixed with cold milk.
How long does this pie last in the refrigerator?
When stored properly, covered tightly with plastic wrap or in an airtight container, your Rich Chocolate Cream Pie will last for 3-4 days in the refrigerator. The crust may soften slightly over time, but the filling should remain firm.
Can I freeze this chocolate cream pie?
Freezing is generally not recommended for pies made with instant pudding and whipped topping. The texture of the whipped topping can become watery or separate upon thawing, affecting the overall creaminess and texture of the filling. It’s best enjoyed fresh from the refrigerator.
Can I make the crust ahead of time?
Yes, you can make the cookie crust a day in advance. Press it into the pie dish, cover it tightly with plastic wrap, and keep it chilled in the refrigerator until you’re ready to add the filling.
If you enjoy making desserts that require chilling to set, you might also like to try making Mini Cheesecakes or a classic Swirled Cheesecake, both of which rely on refrigerator time for their wonderful texture.
Enjoy Your Homemade Rich Chocolate Cream Pie!
There you have it – the secret to a truly perfect, sliceable Rich Chocolate Cream Pie. This recipe brings together simple ingredients and straightforward steps to create a dessert that’s rich, creamy, and reliably firm. No more runny disappointment!
Whether you’re making it for a special occasion or just because you’re craving something sweet and chocolatey, this no-bake chocolate pie is sure to hit the spot. Give it a try, and let me know how it turns out!
Leave a comment below and tell me what you think, or share your favorite topping ideas! Happy baking (or rather, no-baking!).
Rich Chocolate Cream Pie

Ingredients
- 1 1/2 cups chocolate sandwich cookie crumbs (about 20 cookies)
- 1/4 cup melted unsalted butter
- 1 large box (5.1 ounce) instant chocolate pudding mix
- 3 cups ice cold milk
- 1 container (8 ounce) frozen whipped topping, thawed
- 1/2 cup mini chocolate chips, plus more for topping
Directions
- Combine cookie crumbs and melted butter in a medium bowl. Press firmly into the bottom and up the sides of a 9-inch pie dish to form the crust. Chill the crust in the refrigerator for at least 15 minutes while you prepare the filling.
- In a large bowl, whisk together the instant chocolate pudding mix and the ice cold milk. This is the crucial step for ensuring your pudding sets properly. Whisk vigorously for about 2 minutes until the mixture starts to thicken significantly.
- Gently fold in the thawed whipped topping into the thickened pudding mixture until no streaks remain and the filling is uniformly light and fluffy.
- Stir in the 1/2 cup of mini chocolate chips into the filling.
- Pour the filling into the chilled cookie crust. Spread evenly.
- Chill the pie in the refrigerator for a minimum of 4 hours, or preferably until completely firm. This extended chilling time allows the filling to set completely, ensuring a beautiful, sliceable pie.
- Before serving, top with additional whipped topping and mini chocolate chips, if desired. Slice and enjoy your perfectly set chocolate pie.