Alright, let’s talk about a baking frustration many of us have faced: beautiful hand pies, only to see that delicious filling ooze out all over the baking sheet, burning and creating a sticky mess. It’s disappointing after all that effort! I used to struggle with this constantly, pulling sad, leaky sweet berry hand pies from the oven. But I finally cracked the code to keeping that sweet fruit filling perfectly contained inside a flaky, golden crust. This isn’t just another sweet berry hand pies recipe; it’s a guide to making them perfectly, every single time, without the dreaded leak.
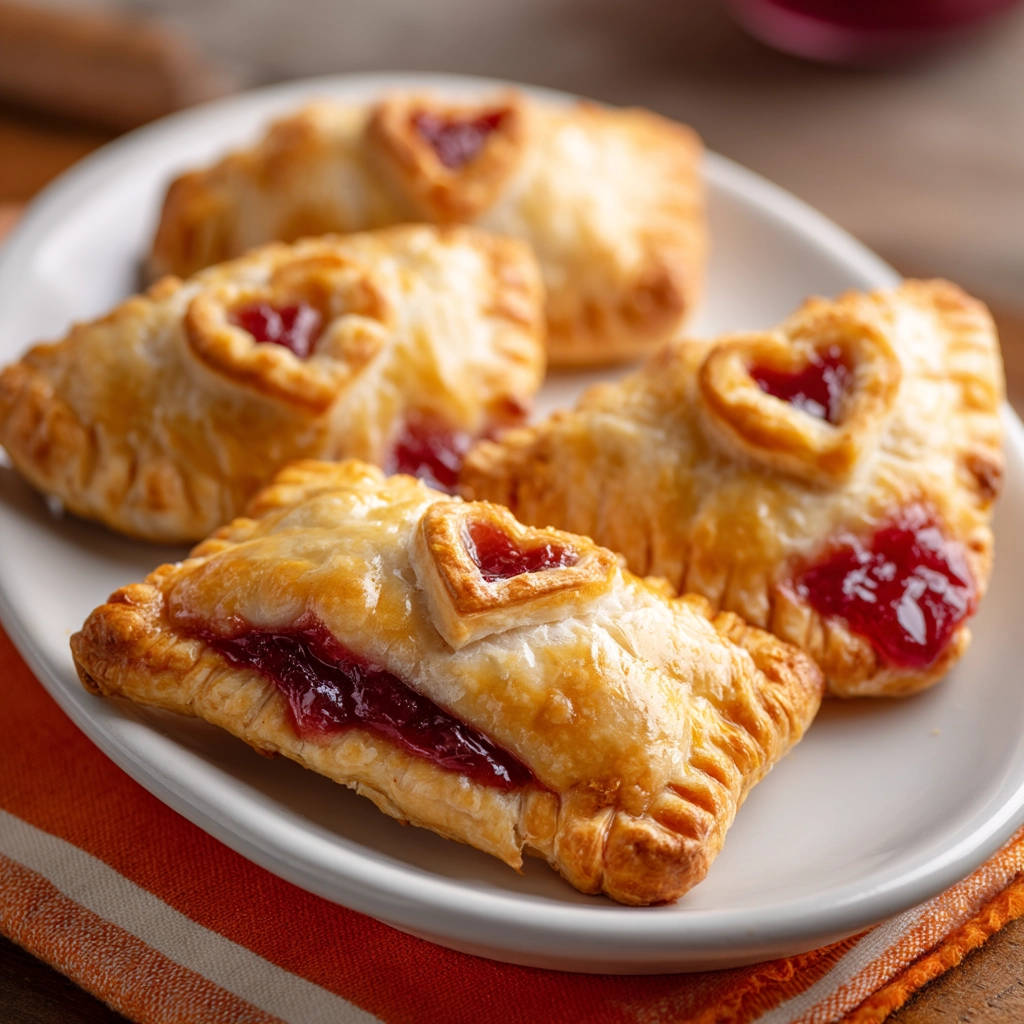
Imagine a perfectly portable package of warm, sweet berry goodness, encased in buttery, flaky pastry. That’s the dream, right? Hand pies are wonderful for so many occasions – picnics, lunchboxes, desserts on the go, or just a little treat with your afternoon coffee. This recipe delivers on that promise, giving you beautiful, mess-free results.
Say goodbye to scrubbing burned jam off your baking pans! These sweet berry hand pies are not only incredibly delicious and easy to make, but they come with a simple, foolproof trick to prevent leaky filling. Whether you’re a seasoned baker or just starting out, you can achieve bakery-worthy results with this method.
Why You’ll Absolutely Love These Sweet Berry Hand Pies
Beyond solving the leaky filling problem, these hand pies offer so much to love. They are:
Perfectly Portable: Their individual size makes them ideal for taking along or serving at gatherings.
Quick & Easy: Using store-bought dough dramatically cuts down on prep time.
Versatile: While we’re focusing on berry today, you can adapt the filling to your heart’s content.
Consistently Perfect: With the sealing and venting tricks, you’ll get gorgeous, non-leaky pies every time.
Deliciously Flaky: The pastry bakes up golden and flaky, providing the perfect contrast to the sweet, warm filling.

Gathering Your Simple Ingredients for Sweet Berry Hand Pies
Part of what makes these hand pies so accessible is the simplicity of the ingredients. You don’t need a long list of fancy items; just a few basics come together to create something truly special. The magic isn’t just in the components, but in how we prepare them to ensure everything stays tucked neatly inside that wonderful crust.
The foundation of our hand pies is the pastry. We’re using refrigerated dough to keep things super simple and quick. You have a choice here: classic refrigerated pie crusts give you that traditional flaky texture, or you can opt for a sheet of puff pastry for a lighter, more airy result. Either way, make sure it’s thawed according to package directions before you begin.
For the heart of the pie, we need the filling. About half a cup of your favorite berry jam or fruit pie filling is all it takes. Think strawberry, raspberry, blueberry, mixed berry – whatever your berry-loving heart desires! The key here is that jam or a pre-made fruit filling is often thicker than fresh fruit, which also helps significantly in preventing leaks.
Finally, our secret weapon and finishing touch comes in the form of an egg and a little water, whisked together to create a simple egg wash. This humble mixture serves two vital purposes: it acts as the “glue” that seals our pies shut and provides that beautiful, glossy golden brown finish once baked.
Here is the simple list of what you’ll need:
2 refrigerated pie crusts or 1 sheet of puff pastry, thawed
1/2 cup berry jam or fruit pie filling
1 large egg
1 tablespoon water
Crafting Your Sweet Berry Hand Pies: Step-by-Step Perfection
Making these hand pies is a straightforward process, but paying attention to a couple of key steps will make all the difference between a messy bake and perfectly sealed treats. Let’s walk through it together, focusing on how each action contributes to achieving those beautiful, leak-free results.
Prepare Your Workspace: Begin by getting your oven ready. Preheat it to a temperature of 400 degrees F (200 degrees C). While the oven heats, prepare a baking sheet by lining it with parchment paper. Parchment paper is a real lifesaver here, preventing any potential sticky situations even if a tiny bit of filling manages to escape.
Ready the Dough: Take your refrigerated pie crusts out of their packaging and gently unroll them. If you’re using puff pastry, unfold the sheet. Next, use a knife or pastry wheel to cut the dough into individual pieces. Rectangles or squares that are roughly 4×5 inches are a good size, yielding about 4 to 6 pieces from each crust or sheet of pastry. Aim for consistency in size so they bake evenly.
Mix the Egg Wash: In a small bowl, crack the large egg and add the tablespoon of water. Use a fork or a small whisk to thoroughly beat them together until the mixture is smooth and well combined. This is your egg wash, essential for both sealing and browning.
Apply the Sealing Layer (The Key Step!): Here’s where the magic happens! Take half of your cut dough pieces and lay them out. Using a pastry brush, apply a thin, even layer of the egg wash along the entire perimeter of each of these pieces, leaving the center clear. Think of this egg wash border as a type of glue; it helps the top and bottom layers of dough fuse together firmly during baking, creating a strong barrier against leaks.
Add the Filling Carefully: Now, place a dollop of your chosen berry jam or fruit filling onto the center of each dough piece that you just brushed with egg wash. Use about 1 to 1.5 tablespoons of filling per pie. It’s crucial to leave a clean border of about 1/2 inch around the edge – this is the area where your seal will form. Do not overfill, no matter how tempting it is! Too much filling is one of the main culprits for leaks.
Top and Gently Press: Take the remaining dough pieces (the ones without egg wash on the edges) and carefully place one on top of each filled piece. Align the edges as best you can. Once placed, gently press down with your fingertips around the mound of filling, working outwards towards the edges. This starts the process of joining the two dough layers together.
Crimp the Edges Firmly: To truly secure the seal and give your hand pies that classic look, use the tines of a fork. Press down firmly and completely all the way around the edges of each hand pie. Don’t be shy with the pressure – a strong, complete crimp is absolutely vital for locking that filling inside and preventing any escape routes during baking.
Create Vent Holes: Before baking, you need to give steam a place to escape. If steam builds up inside the pies without vents, it can cause them to burst open and, you guessed it, leak! Use a small, sharp knife to cut at least two small slits in the top of each hand pie. Alternatively, you can use a small cookie cutter (like a mini heart or star) to cut out decorative vent holes.
Brush for Golden Finish: With the pies sealed and vented, brush the tops of each hand pie with the remaining egg wash. This gives the pastry a beautiful sheen and helps it bake to a lovely, inviting golden brown color.
Transfer to Baking Sheet: Carefully lift each prepared hand pie and arrange them on the parchment-lined baking sheet. Leave a little space between each one to allow for even baking and puffing.
Bake Until Golden: Place the baking sheet in your preheated oven. Bake for 15 to 20 minutes. Keep an eye on them; they are done when the pastry is visibly puffed up and has turned a rich golden brown color. You might see the filling bubbling slightly through the vents, which is perfectly normal – the important thing is that it’s staying inside the pie!
Cool Slightly and Serve: Once baked, carefully remove the hot hand pies from the oven. Let them cool slightly on the baking sheet for a few minutes. This cooling time allows the filling to set a little, making them easier and safer to handle. Serve warm and enjoy the fruits of your leak-proof labor!
Tips for Perfect Sweet Berry Hand Pies Every Time
Achieving bakery-quality hand pies is totally within reach! Here are a few extra pointers to help you get the best results with your sweet berry hand pies:
Chill the Dough: Keep your refrigerated dough chilled until you’re ready to work with it. Cold dough is much easier to handle and results in a flakier crust.
Don’t Skip the Egg Wash Seal: Seriously, this is the absolute key! A thin layer on the edge of the bottom piece acts like a super-strong adhesive.
Mind the Filling Amount: It’s tempting to stuff them full, but stick to the recommended 1 to 1.5 tablespoons. Less is more when it comes to preventing blowouts.
Crimp with Conviction: Press that fork down firmly! You want a complete seal all the way around.
Vent Properly: Those little holes are crucial for steam escape. Make sure they go all the way through the top layer of pastry.
Experiment with Fillings: Once you’ve mastered the berry, try other fruit jams or fillings! Apple butter, cherry pie filling, or even a thick lemon curd can be delicious. Just ensure the filling isn’t too watery.
Consider a Sugar Sparkle: For an extra touch, sprinkle the tops of the hand pies with coarse sugar (like turbinado or sanding sugar) after brushing with the egg wash but before baking. It adds a lovely sparkle and a little extra crunch.
What to Serve With Your Sweet Berry Hand Pies
These sweet berry hand pies are delightful on their own, but you can elevate the experience with a few simple additions. A scoop of vanilla ice cream melting over a warm hand pie is pure bliss. A dollop of whipped cream is also a classic pairing.
For a simple snack or breakfast treat, just enjoy them with a cup of coffee or tea. If you’re serving them as part of a larger dessert spread, they pair wonderfully with other fruity or pastry-based treats. Consider serving alongside classic peach crumble or some strawberry crumble parfaits for a variety of textures and flavors.
Your Sweet Berry Hand Pies Questions Answered (FAQ)
Have a few lingering questions about making the best sweet berry hand pies? Here are some common ones:
Can I use homemade pie dough or puff pastry?
Absolutely! If you have a favorite homemade recipe for pie dough or puff pastry, feel free to use it. Just make sure it’s well-chilled and rolled out to the appropriate thickness before cutting and filling. The key sealing and venting techniques apply regardless of whether the dough is homemade or store-bought.
My jam seems a bit runny. What can I do?
If your jam or filling is on the looser side, you can try thickening it slightly before using. One way is to mix about a teaspoon of cornstarch with a tablespoon of cold water to create a slurry, then stir this into your jam in a small saucepan over medium heat. Cook and stir gently until it thickens up, then let it cool completely before using it in the pies. Using a thicker, fruit-only filling designed specifically for pies also works well.
Can I make these ahead of time?
Yes, you can assemble the hand pies and then cover and refrigerate them for up to 24 hours before baking. You can also freeze assembled, unbaked hand pies. Place them on a baking sheet lined with parchment paper and freeze until solid, then transfer them to a freezer-safe bag or container. Bake from frozen, adding a few extra minutes to the baking time, until golden brown and cooked through.
Why did my pies still leak a little?
While the egg wash seal and crimping are designed to prevent leaks, a tiny bit of bubbling is sometimes inevitable with fruit fillings. However, significant leaking usually comes down to a few things:
Overfilling the pies.
Not leaving a clean border around the filling.
Not pressing the edges firmly enough when crimping with the fork.
Not creating adequate vent holes for steam to escape.
Using a filling that is too watery.
Double-check these steps next time to ensure a tighter seal!
Can I make savory hand pies?
While this recipe focuses on sweet berry hand pies, the technique for sealing and venting works for savory fillings too! You would just swap the jam for a savory mixture like cooked, seasoned vegetables, cheese, or meat fillings. The egg wash seal and proper crimping are just as important for savory pies as they are for sweet ones.
Enjoy Your Homemade Sweet Berry Hand Pies!
There’s something incredibly satisfying about biting into a warm, homemade hand pie. The flaky pastry, the sweet burst of berry filling – it’s pure comfort food in a convenient package. By following this recipe and implementing the simple trick of using egg wash on the edges and ensuring a firm crimp and proper venting, you can confidently bake batch after batch without worrying about messy leaks.
Give these sweet berry hand pies a try and see how easy it is to achieve perfect results. They’re sure to become a favorite in your home!
Did you try this recipe? What’s your favorite berry filling? Leave a comment below and let me know!
Sweet Berry Hand Pies

Ingredients
- 2 refrigerated pie crusts or 1 sheet of puff pastry, thawed
- 1/2 cup berry jam or fruit pie filling
- 1 large egg
- 1 tablespoon water
Directions
- Preheat oven to 400 degrees F (200 degrees C). Line a baking sheet with parchment paper.
- If using pie crusts, unroll them. If using puff pastry, unfold it. Cut the dough into rectangles or squares, about 4×5 inches each. You should get about 4-6 pieces per crust/sheet.
- In a small bowl, whisk the egg with the water to make an egg wash.
- This is the key to preventing leaks: Brush a thin layer of egg wash along the edges of half of your dough pieces. This helps create a strong seal.
- Place about 1 to 1.5 tablespoons of jam or filling onto the center of each dough piece that has egg wash on the edges, leaving a clear border about 1/2 inch wide around the edges. Do not overfill.
- Place the remaining dough pieces on top of the filling. Gently press down around the filling to start sealing the edges together.
- Secure the seal: Use the tines of a fork to firmly press and crimp the edges of each hand pie all around. Pressing firmly and completely around the edge is crucial for locking the filling in and preventing leaks.
- Use a small cookie cutter (like a heart) or a sharp knife to cut small vent holes (at least two per pie) in the top of each hand pie. Venting allows steam to escape and prevents pressure buildup that can cause the pies to burst open and leak.
- Brush the tops of the sealed hand pies with the remaining egg wash for a beautiful golden brown finish.
- Carefully transfer the hand pies to the prepared baking sheet.
- Bake for 15-20 minutes, or until the pastry is puffed and golden brown. The filling may bubble slightly but should stay inside.
- Let cool slightly on the baking sheet before serving.