There’s nothing quite as disappointing as slicing into a beautiful, vibrant red velvet cake only to find the inside dry and crumbly. It’s a common baking heartbreak! I’ve certainly experienced my fair share of those sad cake moments over the years. But after much testing, tweaking, and a few happy accidents, I finally unlocked the secrets to a Classic Red Velvet Cake that stays incredibly moist, tender, and utterly delicious, bite after glorious bite.
This isn’t just another red velvet recipe; it’s the recipe if you’ve ever struggled with dryness. It combines traditional flavors with a few clever ingredient choices and a method tweak that makes all the difference. Paired with tangy cream cheese frosting and a sweet cherry filling, it’s pure dessert perfection.
Reasons This Red Velvet Cake is a Keeper
So, what makes this particular recipe stand out from the rest? Why is it destined to become your go-to whenever a red velvet craving hits? Let me tell you:
- Unbeatable Moisture: This is the star. Thanks to a combination of ingredients like vegetable oil, buttermilk, and a specific mixing method, this cake remains wonderfully moist for days. Forget dry crumbs!
- Perfect Crumb Texture: The method we use helps create a fine, tender crumb that melts in your mouth, rather than being dense or tough.
- Classic Flavor Profile: It hits all the right notes – a delicate balance of subtle cocoa, tang from the buttermilk and vinegar, and the essential richness of cream cheese frosting.
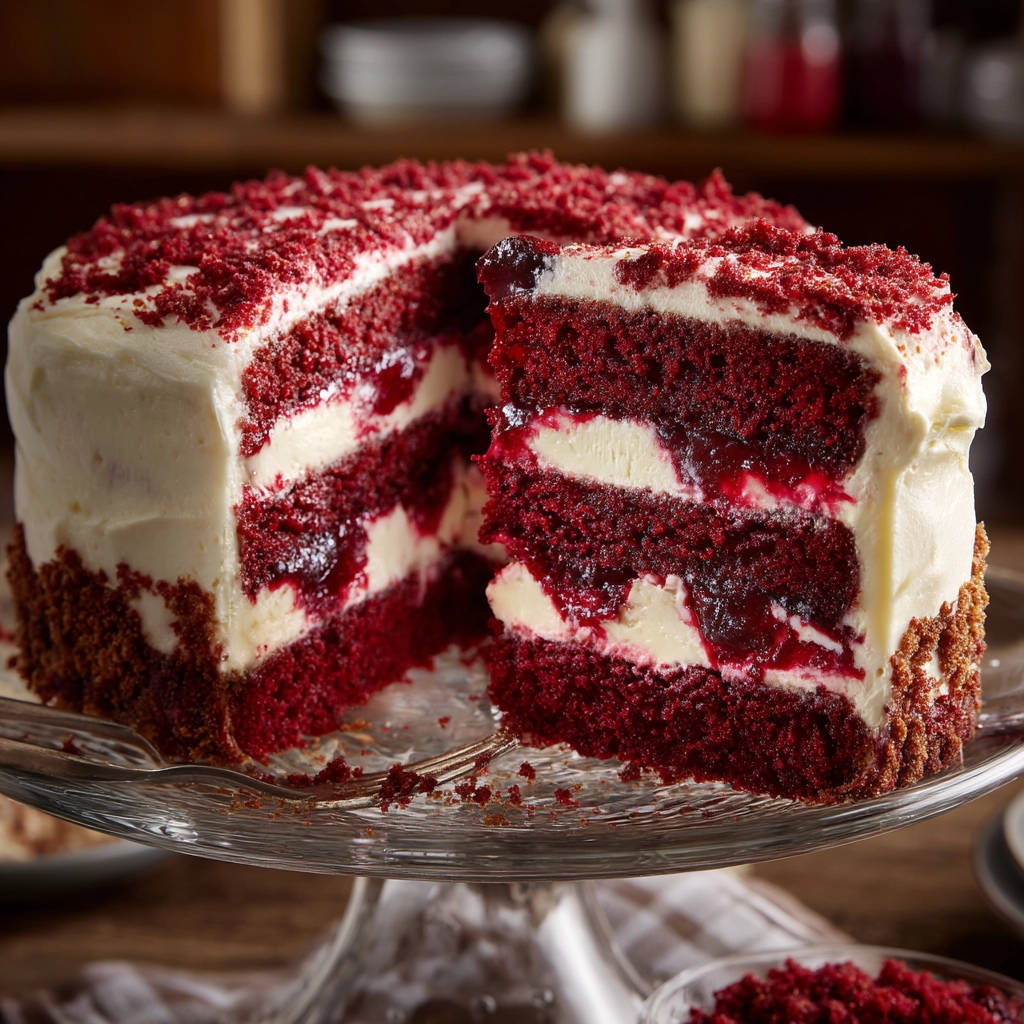
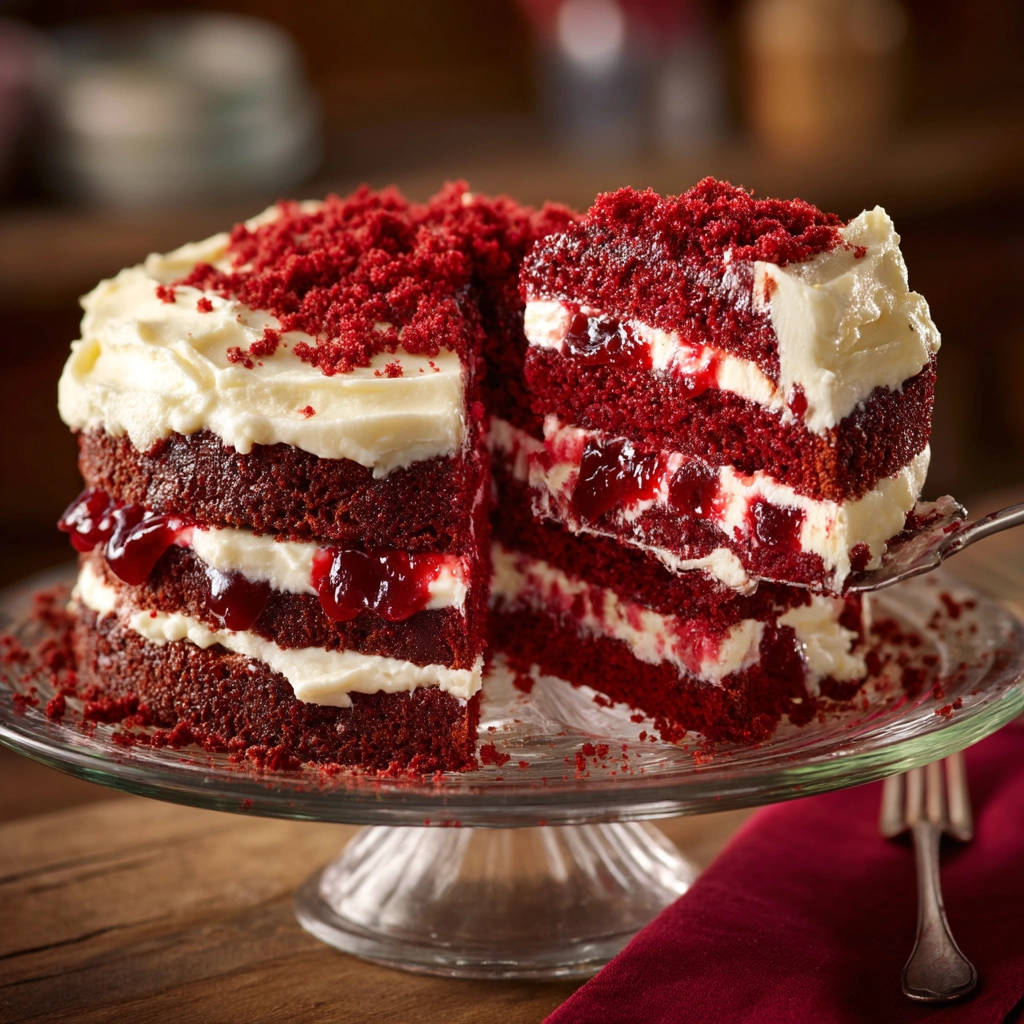
- The Joyful Addition of Cherry Filling: While optional in some versions, the sweet and slightly tart cherry filling elevates this cake, adding another layer of flavor and moisture that complements the cake and frosting beautifully.
- Visually Stunning: That iconic deep red hue layered with creamy white frosting and pops of red cherry is simply gorgeous and always impressive.
Gathering Your Ingredients for the Ultimate Moist Red Velvet Cake
The magic of this cake lies in its ingredients, each playing a specific role in achieving that coveted moist texture and classic flavor. Let’s break down what you’ll need and why:
For the cake layers, we start with the dry components that form the structure. You’ll need 2 1/2 cups of all-purpose flour. It’s the foundation, providing structure to the cake. Next up is 1 1/2 cups of granulated sugar, which doesn’t just sweeten; it also attracts and holds onto moisture, contributing significantly to the cake’s tenderness. We add 1 teaspoon of baking soda as a leavening agent – it works in tandem with the acidic ingredients to give the cake its lift and tender crumb. A teaspoon of salt is crucial to balance the sweetness and enhance all the other flavors.
Now for the ingredients that bring that unique red velvet character and ensure moisture. You’ll need 2 tablespoons of unsweetened cocoa powder. This provides the subtle chocolate flavor inherent in red velvet and also reacts with the acid to enhance the red color. The fat sources are key: 1/2 cup of softened unsalted butter contributes classic buttery flavor, while a full 1 cup of vegetable oil is a secret weapon for moisture. Oil coats flour proteins more effectively than solid fat, inhibiting gluten development and keeping the cake incredibly tender and moist for longer.
Binding and liquid ingredients add structure, moisture, and flavor. You’ll incorporate 2 large eggs, which provide structure and richness. 1 teaspoon of vanilla extract is a must for that comforting, familiar flavor. The acidic liquids are vital: 1 cup of buttermilk interacts with the baking soda for leavening and adds a pleasant tang and incredible moisture. 2 teaspoons of white vinegar boost the acidity, further reacting with the baking soda and intensifying the red color from the cocoa. Finally, red food coloring is essential for achieving that signature vibrant hue; the amount depends on how deep you want the red to be.
The frosting is a classic, rich cream cheese frosting. You’ll need 16 ounces of softened cream cheese for that essential tangy base. Paired with 1 cup of softened unsalted butter, you get a creamy, decadent foundation. 4 cups of powdered sugar provide the sweetness and structure needed for frosting. 1 teaspoon of vanilla extract enhances the flavor. You might also need 1-2 tablespoons of milk or heavy cream to achieve the perfect, spreadable consistency.
Our delightful cherry filling requires 2 cups of frozen or fresh pitted cherries. Frozen cherries work beautifully and are available year-round. 1/4 cup of granulated sugar sweetens the tart fruit. 1 tablespoon of cornstarch mixed with 2 tablespoons of cold water creates a slurry, which is used to thicken the cherry juices into a luscious filling.
Crafting Your Classic Red Velvet Cake: Step-by-Step
Alright, gathering the ingredients is half the battle! Now comes the fun part – bringing it all together. Follow these steps carefully, paying attention to the little details that make a big difference in achieving that perfect moist crumb.
Prep Your Workspace: Start by preheating your oven to 350 degrees F (175 degrees C). Properly preparing your cake pans is essential for preventing sticking and ensuring nice, clean layers. Grease and flour three 8-inch cake pans thoroughly. This creates a barrier that helps the cakes release easily after baking.
Combine Dry Ingredients: In a large mixing bowl, whisk together the dry ingredients: the all-purpose flour, granulated sugar, baking soda, salt, and unsweetened cocoa powder. Whisking ensures they are evenly distributed before adding the wet ingredients, preventing pockets of leavening or salt in your finished cake.
Add Fats to Dry Ingredients (The ‘Secret’ Method): This is where a little magic happens for moisture! Add the softened butter and vegetable oil directly into the bowl with the dry ingredients. Using an electric mixer on low speed, beat this mixture until it resembles coarse crumbs or wet sand. This method, sometimes called reverse creaming, coats the flour particles with fat early on, which helps to limit gluten development when the liquid is added. Less gluten means a more tender, moist cake!
Whisk Wet Ingredients: In a separate medium bowl, whisk together the eggs, vanilla extract, buttermilk, white vinegar, and the red food coloring. Whisking these together ensures they are fully combined and the color is evenly dispersed throughout the batter. Make sure your buttermilk and eggs are at room temperature for better emulsification and a smoother batter.
Combine Wet and Dry Ingredients (The Crucial Moment!): Pour the wet ingredients into the bowl with the dry ingredients and fat mixture. Now, mix on medium speed just until everything is combined and the batter looks smooth. This is the most critical step for preventing a dry cake. You must resist the urge to overmix! Overmixing develops gluten, which makes cakes tough and dry. Mix only until you no longer see any dry streaks of flour in the batter – stop the mixer as soon as that happens.
Divide the Batter: Divide the beautifully red batter evenly among the three prepared 8-inch cake pans. You can eyeball it, or use a kitchen scale for precise measurement to ensure your layers are the same size and bake evenly.
Bake Until Just Done: Transfer the pans to the preheated oven. Bake for 25-30 minutes. The key to a moist cake is baking it just until it’s done, and no longer. Check for doneness by inserting a wooden skewer or toothpick into the center of a cake layer. It should come out clean, with perhaps a few moist crumbs attached, but no wet batter. The cake should also spring back slightly when gently pressed in the center. Slight underbaking is better than overbaking for moisture.
Cool the Cake Layers: Once baked, remove the cakes from the oven. Let them cool in their pans on a wire rack for about 10 minutes. This allows the cake to set slightly before you try to move it. After 10 minutes, carefully invert the cakes onto the wire rack to cool completely. Cooling on a wire rack allows air to circulate around the layers, preventing them from becoming soggy from trapped steam.
While your cake layers are cooling completely, you can prepare the delightful fillings and frosting.
Preparing the Sweet Cherry Filling
This filling adds a wonderful fruity contrast and extra moisture to the cake. It’s quite simple to make!
Cook Cherries and Sugar: In a medium saucepan, combine the pitted cherries (fresh or frozen) and granulated sugar. Place the saucepan over medium heat, stirring occasionally. As the cherries heat, they will release their beautiful juices, and the sugar will dissolve, creating a sweet syrup.
Prepare Cornstarch Slurry: In a small separate bowl, whisk together the cornstarch and cold water until you have a smooth, lump-free mixture. This is your thickening agent.
Thicken the Filling: Once the cherries are juicy and the sugar is dissolved, pour the cornstarch mixture into the saucepan with the cherries. Stir constantly with a spoon or spatula. You will notice the mixture begin to thicken relatively quickly, usually within 1-2 minutes, into a glossy, spoonable filling. Be sure to stir continuously to prevent lumps.
Cool the Filling: Remove the thickened cherry filling from the heat. Transfer it to a bowl or container and let it cool completely before you even think about assembling the cake. Warm filling can melt your frosting, causing a messy situation!
Whipping Up the Cream Cheese Frosting
No red velvet cake is complete without a rich, tangy cream cheese frosting. This recipe delivers a smooth, creamy, and perfectly spreadable frosting.
Cream the Fats: In a large bowl, beat the softened cream cheese and softened butter together until they are completely smooth and creamy. Using softened ingredients (not melted!) is crucial here for a lump-free frosting. Beat them together thoroughly to get a nice, airy base.
Add Powdered Sugar Gradually: Gradually add the powdered sugar, one cup at a time, beating on low speed until it is well combined after each addition. Adding it slowly prevents a cloud of sugar from taking over your kitchen and helps ensure a smooth frosting texture. Scrape down the sides of the bowl as needed.
Add Vanilla and Adjust Consistency: Beat in the vanilla extract for flavor. Check the consistency of the frosting. If it seems too thick to spread easily, add milk or cream, one tablespoon at a time, beating after each addition, until you reach your desired spreadable consistency. Be careful not to add too much liquid at once.
Assembling Your Layer Cake Masterpiece
With all your components cooled and ready, it’s time to bring this beautiful cake together. The assembly is straightforward, resulting in a stunning centerpiece.
Place the First Layer: Choose your serving plate or cake stand and place the first cooled cake layer onto it. A little dab of frosting on the stand first can help secure the cake layer.
Frost the First Layer: Spread an even layer of the cream cheese frosting over the top of the first cake layer. Get it close to the edges, but no need for perfection yet.
Add Cherry Filling: Spoon half of the completely cooled cherry filling over the frosting on the first layer. Gently spread it out, but leave a small border (about 1/2 inch) around the edge. This helps prevent the filling from squeezing out when you add the next layer. For more delightful fruit desserts, you might enjoy our Classic Peach Crumble.
Add the Second Layer: Carefully lift the second cake layer and place it directly on top of the cherry filling and frosting. Try to line up the edges.
Repeat Layers: Repeat the process: spread another layer of cream cheese frosting evenly over the second cake layer, then spoon the remaining cooled cherry filling over the frosting, again leaving a border.
Top with the Third Layer: Carefully place the third and final cake layer on top.
Crumb Coat and Final Frosting: Apply a thin layer of frosting all over the cake – sides and top. This is called a crumb coat and helps trap any loose crumbs, giving you a clean surface for the final layer. Chill the cake in the refrigerator for about 15-20 minutes to set the crumb coat. Then, apply the remaining cream cheese frosting, creating smooth sides and a smooth or decorative top. For more frosting inspiration, see how we use creamy frostings in our Deep Dark Chocolate Layer Cake.
Decorate (Optional): If you trimmed the cake layers or have any small leftover cake pieces, you can crumble them up and gently press them onto the sides or top of the frosted cake for that classic red velvet look.
Chill Before Slicing: This step is crucial for clean slices! Chill the assembled cake in the refrigerator for at least 30 minutes (or even longer) before you plan to slice and serve it. The frosting and filling will firm up, allowing for easier handling and picture-perfect cuts.
Tips for Perfect Red Velvet Cake Every Time
Achieving a truly moist and delicious red velvet cake isn’t difficult with this recipe, but a few insider tips can help ensure your success:
- Room Temperature is Key: Make sure your butter, cream cheese, and eggs are truly softened (butter and cream cheese should yield easily to a gentle press) and eggs and buttermilk are at room temperature. Cold ingredients don’t emulsify properly, leading to a less smooth batter and potentially a less tender cake.
- Measure Flour Correctly: Don’t scoop flour directly from the bag with your measuring cup. This can compact the flour, leading to too much flour and a dry cake. Instead, spoon the flour lightly into your measuring cup and level it off with a straight edge (like a knife).
- Don’t Overmix the Batter: I cannot stress this enough! Overmixing develops gluten, making the cake tough. Mix only until the ingredients are just combined.
- Do Not Overbake: Start checking for doneness at the lower end of the suggested time range. A minute or two too long in the oven can dry out even the best recipe.
- Cool Completely: Ensure your cake layers are completely cool before you attempt to frost or fill them. Warm cake will melt the frosting, making a mess and potentially sliding layers. Similarly, ensure the cherry filling is cool.
- Chill the Cake: After assembling and frosting, chilling the cake solidifies the frosting and filling, making it much easier to slice cleanly. It also allows the flavors to meld.
Red Velvet Cake Questions Answered (FAQ)
Let’s tackle some common questions you might have about baking this delicious Classic Red Velvet Cake.
What gives Red Velvet cake its unique flavor and color?
The color comes from a combination of red food coloring and the interaction between the acidic ingredients (buttermilk, vinegar) and the cocoa powder. Traditional red velvet used non-Dutched cocoa, which contains anthocyanins that turn reddish-brown when they react with acid. While modern cocoa is often Dutched (which neutralizes the acid and prevents this reaction), the vinegar and buttermilk still react with the baking soda for lift and moisture, and food coloring provides the intense red hue we expect today. The flavor is a subtle blend of vanilla, faint chocolate from the cocoa, and a distinct tang from the buttermilk and cream cheese frosting.
Why do you use both butter and oil in this cake?
Using both butter and oil gives you the best of both worlds. Butter provides rich flavor, while vegetable oil ensures exceptional moisture and tenderness. Oil remains liquid at room temperature, keeping the cake soft and moist longer than butter alone.
Can I use regular milk instead of buttermilk?
Buttermilk is key to the classic flavor, texture, and moisture of red velvet cake because of its acidity and fat content. You can make a buttermilk substitute by adding 1 tablespoon of white vinegar or lemon juice to a cup of milk and letting it sit for 5-10 minutes until it slightly curdles. However, for the best results, I highly recommend using real buttermilk.
Can I make this cake ahead of time?
Absolutely! You can bake the cake layers a day or two in advance, wrap them tightly in plastic wrap, and store them at room temperature or in the refrigerator. The cream cheese frosting can also be made a day ahead and stored in an airtight container in the refrigerator; let it soften slightly and re-whip it before frosting the cake. The cherry filling can also be made ahead and stored in the fridge. Assemble the cake within a day or two of baking the layers for the freshest taste and best texture.
How should I store leftover Classic Red Velvet Cake?
Because of the cream cheese frosting, this cake should be stored in the refrigerator. Keep it in an airtight cake carrier or covered loosely with plastic wrap. It’s best enjoyed within 3-4 days. For easier slicing, you can let a chilled slice sit at room temperature for 15-20 minutes before eating.
What if I don’t want the cherry filling?
That’s perfectly fine! This cake is still incredibly delicious without the cherry filling. Simply omit the filling steps and use only the cream cheese frosting between the layers and on the outside of the cake.
Enjoy Your Homemade Classic Red Velvet Cake!
There you have it – my tried and true recipe for a Classic Red Velvet Cake that promises moisture and deliciousness in every slice. The vibrant color, the tender crumb, the tangy cream cheese frosting, and the sweet burst of cherry create a truly unforgettable dessert experience. Whether you’re baking it for a special occasion or just because, this cake is sure to impress.
I hope you give this recipe a try and see for yourself just how wonderfully moist red velvet cake can be. If you bake it, I’d love to hear about it! Leave a comment below and let me know how it turned out. Happy baking!
Classic Red Velvet Cake

Ingredients
- For the Cake:
- 2 1/2 cups all-purpose flour
- 1 1/2 cups granulated sugar
- 1 teaspoon baking soda
- 1 teaspoon salt
- 2 tablespoons unsweetened cocoa powder
- 1/2 cup unsalted butter, softened
- 1 cup vegetable oil
- 2 large eggs
- 1 teaspoon vanilla extract
- 1 cup buttermilk
- 2 teaspoons white vinegar
- Red food coloring (amount depends on desired color intensity)
- For the Cream Cheese Frosting:
- 16 ounces cream cheese, softened
- 1 cup unsalted butter, softened
- 4 cups powdered sugar
- 1 teaspoon vanilla extract
- 1-2 tablespoons milk or heavy cream (if needed for consistency)
- For the Cherry Filling:
- 2 cups frozen or fresh cherries, pitted
- 1/4 cup granulated sugar
- 1 tablespoon cornstarch
- 2 tablespoons cold water
Directions
- Prepare the Cake Layers:
- Preheat oven to 350 degrees F (175 degrees C). Grease and flour three 8-inch cake pans.
- In a large bowl, whisk together flour, sugar, baking soda, salt, and cocoa powder.
- Add softened butter and vegetable oil to the dry ingredients. Beat with an electric mixer on low speed until the mixture resembles coarse crumbs.
- In a separate medium bowl, whisk together the eggs, vanilla extract, buttermilk, white vinegar, and red food coloring.
- Pour the wet ingredients into the dry ingredients. Mix on medium speed just until combined and smooth. DO NOT overmix; mixing too much will develop gluten and make the cake tough and dry. Mix only until no dry streaks remain.
- Divide the batter evenly among the three prepared pans.
- Bake for 25-30 minutes, or until a wooden skewer inserted into the center comes out clean. The cake should spring back slightly when gently pressed. Baking just until done is key to moisture.
- Let the cakes cool in the pans for 10 minutes before inverting them onto a wire rack to cool completely.
- Prepare the Cherry Filling:
- In a medium saucepan, combine the pitted cherries and sugar. Cook over medium heat, stirring occasionally, until the cherries release their juices and the sugar dissolves.
- In a small bowl, whisk together the cornstarch and cold water until smooth.
- Pour the cornstarch mixture into the saucepan with the cherries. Stir constantly until the filling thickens, about 1-2 minutes.
- Remove from heat and let the cherry filling cool completely before assembling the cake.
- Prepare the Cream Cheese Frosting:
- In a large bowl, beat the softened cream cheese and softened butter together until smooth and creamy.
- Gradually add the powdered sugar, one cup at a time, beating until well combined after each addition.
- Beat in the vanilla extract. If the frosting is too thick, add milk or cream one tablespoon at a time until it reaches a spreadable consistency.
- Assemble the Cake:
- Place one cooled cake layer on a serving plate or cake stand.
- Spread a layer of cream cheese frosting evenly over the first cake layer.
- Spoon half of the cooled cherry filling over the frosting, spreading it slightly while leaving a border.
- Carefully place the second cake layer on top.
- Repeat with another layer of cream cheese frosting and the remaining cherry filling.
- Place the third cake layer on top.
- Cover the entire cake with the remaining cream cheese frosting, creating smooth sides and top.
- If desired, crumble some leftover cake scraps and press them onto the sides or top of the cake for decoration.
- Chill the cake for at least 30 minutes before slicing for easier handling and clean cuts.