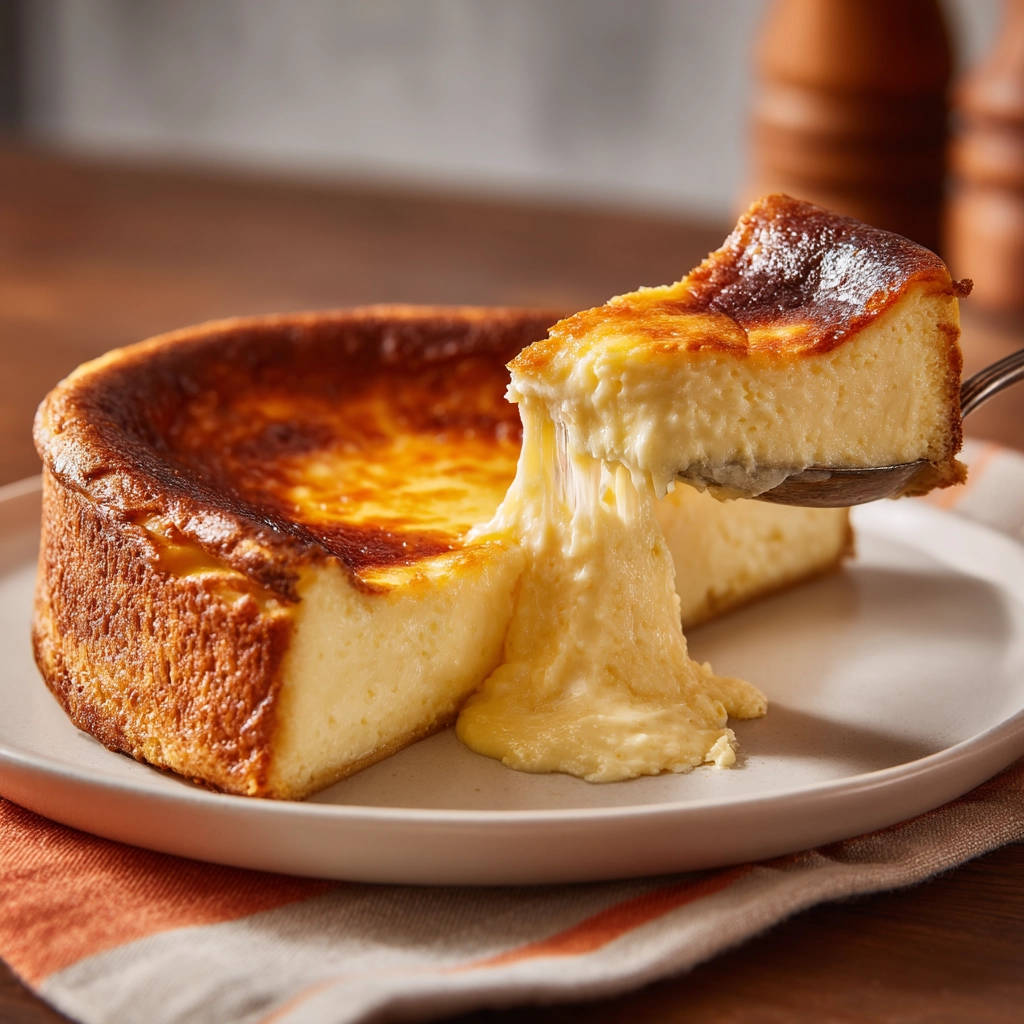
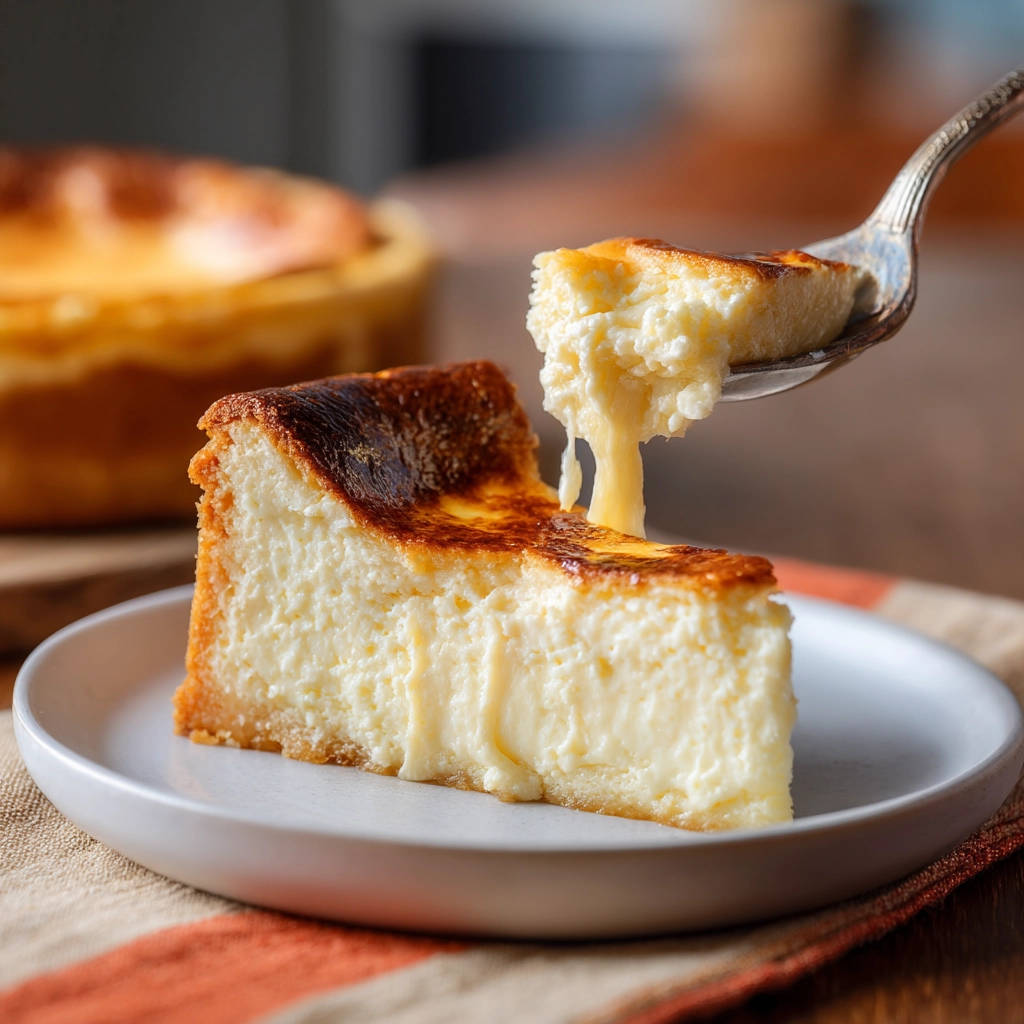
Hello fellow dessert lovers! There’s truly nothing quite like that first slice of a Basque cheesecake. You know the one – with its distinctively dark, almost “burnt” top that gives way to an unbelievably creamy, melt-in-your-mouth center. It’s rustic, it’s elegant in its simplicity, and it’s completely divine. While it might look straightforward, achieving that signature gooey, molten middle can sometimes feel like chasing a culinary unicorn.
But guess what? I’ve finally cracked the code after many attempts, and I am absolutely thrilled to share the secret with you. This isn’t just any Basque cheesecake recipe; it’s the one that guarantees that dreamy, perfectly runny center every single time. Get ready to create some serious cheesecake magic in your own kitchen!
Why You Need This Basque Cheesecake Recipe
What sets a Basque cheesecake apart from its classic American cousin? Several things! First, there’s that dramatic, caramelized dark top. It’s not actually burnt in a bad way, but intentionally browned at a high temperature, which creates a beautiful contrast in flavor and texture.
Then there’s the texture. Traditional cheesecakes are dense and smooth. Basque cheesecake, or ‘Tarta de Queso’ as it’s known in San Sebastian, Spain, is all about that incredible creamy, often “molten” or very soft, middle. It’s less structured, more freeform, and utterly decadent.
This particular recipe focuses on the one crucial technique that ensures you get that perfect, slightly sunken, molten center that makes this dessert so unique and utterly irresistible. It’s surprisingly simple once you know the trick!
Essential Ingredients for Your Basque Cheesecake
Creating this dreamy dessert requires just a handful of simple ingredients, but using good quality items is key to the final flavor and texture. Each component plays a vital role in achieving that signature Basque cheesecake perfection.
Let’s break down what you’ll need and why:
- 2 pounds cream cheese, softened: This is the heart of your cheesecake! Using full-fat cream cheese is non-negotiable for that rich, creamy texture. Make sure it’s completely softened to room temperature before you begin. Cold cream cheese will lead to lumps in your batter, which nobody wants.
- 1 and 1/2 cups granulated sugar: Sugar sweetens the cheesecake, of course, but it also contributes to the browning of the top in the high-heat oven.
- 6 large eggs, room temperature: Eggs are essential for structure and richness. Using large eggs at room temperature helps them incorporate smoothly into the batter, creating a more uniform custard base. Cold eggs can seize the cream cheese mixture, leading to a less smooth result.
- 2 cups heavy cream: This is where a lot of the luscious, creamy texture comes from. Heavy cream adds fat and moisture, contributing significantly to the molten center.
- 1 teaspoon vanilla extract: A touch of vanilla enhances the sweet, creamy flavors of the cheesecake. Use good quality vanilla extract for the best results.
- 1/4 cup all purpose flour: Just a small amount of flour provides a little bit of structure to the cheesecake, helping it set just enough around the edges while allowing the center to remain beautifully soft. It also helps prevent cracking, though a few small cracks are totally fine and part of the rustic charm of a Basque cheesecake.
Mastering the Molten Middle: Step-by-Step Guide
Ready to bake? Follow these steps carefully, paying special attention to the techniques that will give you that perfect texture. Remember, the magic is in the method!
- Prepare Your Baking Environment: Begin by preheating your oven to a hot 400 degrees Fahrenheit (200 degrees Celsius). High heat is crucial for developing that iconic dark top quickly. Take a 9 or 10-inch round cake pan and line it with two layers of parchment paper. Don’t be neat here! Let the parchment paper extend generously above the rim of the pan and crinkle naturally. This isn’t just for aesthetics; it helps the cheesecake bake evenly and protects the sides from over-browning while contributing to the rustic, imperfect edges characteristic of this style. Place the prepared pan on a baking sheet; this will catch any potential drips during baking and makes it easier to handle.
- Cream the Base: In a large mixing bowl, combine your completely softened cream cheese with the granulated sugar. Beat these together using an electric mixer (handheld or stand mixer) on medium speed. Beat until the mixture is incredibly smooth and creamy, with absolutely no lumps of cream cheese remaining. This could take a few minutes, so be patient! Scraping down the sides and bottom of the bowl with a rubber spatula periodically is essential to ensure everything is evenly mixed.
- Incorporate the Eggs Slowly: Add the large, room-temperature eggs one at a time to the cream cheese mixture. After adding each egg, beat well until it is fully incorporated before adding the next one. This gradual addition helps emulsify the batter, ensuring a smooth, cohesive mixture. Continue to scrape down the sides of the bowl as needed.
- Add the Cream and Vanilla: Pour the heavy cream and vanilla extract into the bowl. Mix on low speed just until everything is combined. This is a critical stage where you want to avoid incorporating too much air into the batter. Overmixing after the eggs and cream are added can lead to a more cake-like or dry texture and may increase the likelihood of cracks on the surface, which we want to minimize for that smooth, albeit dark, top.
- Gently Fold in the Flour: Sift the 1/4 cup of all-purpose flour directly over the batter in the bowl. Sifting helps prevent any flour lumps. Using a rubber spatula, gently fold the flour into the batter until you no longer see any dry streaks of flour. Again, be very careful not to overmix at this stage. Just incorporate it until it disappears into the batter.
- Pour and Prepare for Baking: Carefully pour the smooth cheesecake batter into the prepared parchment-lined cake pan sitting on your baking sheet. Give the pan a gentle tap on the counter to help any large air bubbles rise to the surface and pop.
- Bake Until Deeply Colored and Jiggly: Place the baking sheet with the cheesecake into your preheated 400°F oven. Bake for 50 to 60 minutes. Keep a close eye on it towards the end of the baking time. You are looking for the top to turn a deep, dark brown, almost mahogany color – it should truly look “burnt.” The edges should appear set and slightly puffy, but the center should still be very jiggly when you gently shake the pan. This significant jiggle in the center is exactly what you want for that molten texture later. The high heat caramelizes the top beautifully while allowing the interior to cook less fully.
- The Crucial Room Temperature Cool: This is the absolute key step for achieving that guaranteed molten middle! Once the cheesecake comes out of the oven with its gorgeously dark top and jiggly center, resist the urge to move it or put it in the refrigerator. Leave the cheesecake completely undisturbed in its pan on the baking sheet at room temperature to cool fully. This means several hours, potentially 3-4 hours or even longer, depending on your room temperature. It will deflate significantly and sink in the center – this is perfectly normal and expected! The residual heat from the pan and the outer layers continues to cook the interior gently and gradually as it cools, setting the outer ring while leaving the center wonderfully soft and creamy. Moving it or chilling it too early stops this crucial process and can result in a firmer, less molten middle.
- Chill Before Serving: Once the cheesecake has reached room temperature and is completely cool to the touch, you can transfer it to the refrigerator. Chill it for at least 4 hours. This chilling period helps the cheesecake firm up enough to be sliced cleanly, but because of the crucial room temperature cool, the center will retain its signature soft, molten texture. While refrigeration is needed for slicing, the initial room temp cool is what defines the texture.
- Serve and Enjoy: When you are ready to serve this masterpiece, gently lift the cheesecake out of the pan using the excess parchment paper as handles. Carefully peel away the parchment paper from the sides of the cheesecake. Don’t worry if the sides aren’t perfectly smooth; the rustic look is part of its charm! Use a sharp knife dipped in hot water and wiped clean for each slice to get the cleanest cuts possible. Slice into generous wedges and prepare to be amazed by that beautiful, guaranteed molten middle!
Expert Tips for Your Basque Cheesecake
Even with the detailed steps above, a few extra pointers can help ensure your Basque cheesecake turns out perfectly every time.
- Temperature Matters: As mentioned in the ingredients and steps, ensure your cream cheese and eggs are truly at room temperature. This is paramount for a smooth batter without lumps or curdling, leading to a better final texture.
- Parchment Power: Don’t be afraid to use plenty of parchment and let it hang way over the edges. It protects the cheesecake, gives it those lovely crinkled sides, and makes removal incredibly easy.
- Trust the Jiggly Center: It can be nerve-wracking to take something out of the oven that looks so… unset in the middle. But trust the process! The high heat is doing its job on the outside, and the prolonged room-temperature cooling will finish the job gently inside without solidifying the center.
- Patience in Cooling: I cannot stress this enough. Giving the cheesecake ample time to cool completely at room temperature is the single most important step for that molten middle. Rushing this step will result in a cheesecake that is too firm throughout.
- Achieving the Dark Top: Ovens can vary. If your top isn’t getting dark enough after 50-60 minutes, you can carefully tent the edges with foil if they are browning too fast, or you can even briefly use the broiler for a minute or two at the very end to get that intense color, watching it like a hawk to prevent burning.
Pairing Your Basque Cheesecake
Basque cheesecake is so rich and flavorful on its own that it truly doesn’t need much adornment. However, a few simple additions can elevate the experience. Fresh berries like raspberries or strawberries make a fantastic partner, offering a bright, slightly tart contrast to the creamy richness. A simple dollop of lightly sweetened whipped cream is also never a bad idea. If you enjoy pairing desserts, you might also appreciate something light and fruity like our easy Strawberry Trifle, though the cheesecake stands alone beautifully!
Basque Cheesecake FAQs
Got questions? It’s common to have a few when making this unique dessert. Here are answers to some frequently asked questions:
Why is the top of Basque cheesecake supposed to be burnt?
The dark top is intentional! It’s not burnt in a negative sense, but rather deeply caramelized. The high baking temperature causes the sugars and dairy proteins on the surface to undergo the Maillard reaction and caramelization. This creates complex, slightly smoky, bittersweet notes that provide a perfect counterpoint to the sweet, creamy interior, adding depth and flavor complexity.
Can I use low-fat cream cheese or different sweeteners?
For that signature creamy, molten texture, full-fat block cream cheese is essential. Low-fat varieties contain more water and less fat, which will significantly change the texture and likely prevent you from achieving the desired gooey center. Similarly, while substituting some of the sugar with other sweeteners might be possible, it could affect the caramelization and texture, so stick to granulated sugar for the best results.
My cheesecake didn’t get molten in the middle! What happened?
The most common culprits are either overbaking or not allowing the cheesecake to cool completely at room temperature before refrigerating. Overbaking will set the center too much in the oven. Removing it and immediately chilling it prevents the residual heat from the outer layers from gently cooking the center, leaving it too firm. Ensure it has that significant jiggle when it comes out of the oven and let it sit at room temperature for several hours until fully cooled before chilling.
Can I make this cheesecake ahead of time?
Absolutely! In fact, since it requires significant cooling and chilling time, it’s an excellent dessert to make ahead. Bake it the day before you plan to serve it. Allow it to cool completely at room temperature as instructed (Step 8), and then chill it for the required 4+ hours (Step 9). It will be perfectly set and ready to slice and enjoy.
How do I know when the center is jiggly enough but not raw?
This comes with a little practice, but the visual cues are key. The edges should look set and perhaps slightly puffed, and the top should be that characteristic deep brown. When you gently nudge the pan (carefully, it’s hot!), the entire center circle of the cheesecake should wobble quite a bit, like thick pudding or panna cotta. It shouldn’t splash or look completely liquid, but it should have significant movement. The residual cooling time handles the rest.
Enjoy Every Creamy, Molten Bite!
There you have it! The secret to a perfect Basque cheesecake with a guaranteed molten middle. This recipe is a game-changer for anyone who loves this unique and utterly delicious dessert. It’s simple to make, requires minimal ingredients, and the results are nothing short of spectacular. Prepare for oohs and aahs when you present this beauty!
Give this recipe a try, and let me know in the comments below how it turns out for you! Did you get that perfect molten center? What did you pair it with? Don’t forget to rate the recipe and share your photos with us on social media!
Perfect Basque Cheesecake

Ingredients
- 2 pounds cream cheese softened
- 1 and 1/2 cups granulated sugar
- 6 large eggs room temperature
- 2 cups heavy cream
- 1 teaspoon vanilla extract
- 1/4 cup all purpose flour
Directions
- Preheat your oven to 400 degrees Fahrenheit. Line a 9 or 10 inch round cake pan with two layers of parchment paper, letting the paper extend well above the rim. This is key for achieving the rustic look and helping it cook properly.
- In a large bowl, beat the softened cream cheese with the sugar until very smooth and creamy. Make sure there are no lumps.
- Add the eggs one at a time, beating well after each addition. Scrape down the sides of the bowl as needed.
- Pour in the heavy cream and vanilla extract and beat until just combined. Do not overmix at this stage.
- Sift the flour over the batter and gently fold it in until just incorporated. Again, be careful not to overmix.
- Pour the batter into the prepared pan. Place the pan on a baking sheet to catch any drips.
- Bake for 50 to 60 minutes, or until the top is deeply dark brown and looks burnt, and the edges are set but the center is still very jiggly. This high heat baking is essential for the color and texture contrast.
- This is the crucial step for the molten middle: Once baked, remove the cheesecake from the oven and let it cool completely at room temperature in the pan. It will deflate significantly, which is normal. Do not move it or refrigerate it until it is fully cooled. The residual heat continues to cook the outer parts while leaving the center soft and creamy.
- Once completely cooled, you can chill it in the refrigerator for at least 4 hours before serving. While chilling firms it slightly, the initial room temperature cool is key to that signature texture.
- To serve, lift the cheesecake out of the pan using the parchment paper and carefully peel away the paper. Slice and enjoy that beautiful, guaranteed molten middle.