Oh, hello there! Come on in, it’s chilly outside. What you need right now is a big, warm hug in a bowl. And let me tell you, nothing fits that description quite like a truly great creamy white bean soup. I used to struggle, ending up with watery, frankly disappointing attempts. You know the kind – where the broth and the beans seem to exist in two separate universes? Ugh. But then I discovered a simple, magical trick that changed everything. Now, this creamy white bean soup is a staple in my kitchen, turning out perfectly rich, comforting, and full of flavor every single time, without needing any actual cream!
This isn’t just any bean soup; it’s the kind that makes you feel instantly cozy, warming you from the inside out. It’s surprisingly easy to make, incredibly satisfying, and wonderfully versatile. Whether you’re looking for a simple weeknight dinner or a hearty lunch, this recipe delivers. Get ready to say goodbye to watery soup forever!
Why This Creamy White Bean Soup is a Keeper
So, what makes this particular white bean soup stand out from the rest? Beyond its incredible texture, there are a few key reasons why this recipe has become a firm favorite:
- Naturally Creamy Texture: The secret technique uses the beans themselves to create a velvety smooth consistency without any dairy or heavy cream. It feels indulgent but is surprisingly light.
- Packed with Flavor: Simple aromatics and herbs build a deep, comforting base that perfectly complements the mild, earthy flavor of the beans.
- Quick & Easy: With pantry staples and minimal prep, this soup comes together in under 30 minutes from start to finish. It’s perfect for those busy nights.
- Nutritious & Filling: White beans are a fantastic source of plant-based protein and fiber, making this soup a truly hearty and wholesome meal.
- Adaptable: This recipe is a wonderful base for adding other vegetables, greens, or even some cooked sausage if you like!
- Budget-Friendly: Made primarily from canned beans and broth, this soup is incredibly economical without sacrificing taste or satisfaction.
Gathering Your Ingredients for This Hearty Bean Soup
One of the joys of making this creamy white bean soup is that it relies on humble, readily available ingredients that transform into something truly special. Let’s look at what you’ll need to bring this comforting bowl to life. Each component plays a vital role in building the depth of flavor and achieving that perfect, non-watery consistency we’re after.
We start with a good quality olive oil. This is your foundation, where all the initial flavors begin to bloom. Using extra virgin olive oil adds a nice subtle fruitiness right from the start.
The aromatic base comes from a small onion, finely chopped, and a couple of cloves of fresh garlic, minced. These two are the classic dynamic duo of soup making, lending sweetness and pungency that form the soul of the dish.

For herbaceous warmth, we turn to thyme. Whether you choose dried or fresh, thyme brings an earthy, slightly minty note that pairs beautifully with the beans. Using fresh thyme will give you a brighter flavor, but dried thyme works perfectly and is often more convenient.
The liquid base is crucial. Four cups of vegetable or chicken broth provide the volume and much of the initial flavor. Choose a broth you love – a good quality store-bought one is fine, or if you’re feeling ambitious, homemade broth is always wonderful. Using vegetable broth keeps this dish vegetarian-friendly.
The stars of the show are two cans of cannellini beans. These particular white beans are ideal because of their naturally creamy texture, which is essential for our thickening trick. Remember to rinse and drain them well, but here’s a key tip: reserve about 1/2 cup of the liquid from one of the cans. Don’t discard it! This starchy liquid is another component that contributes to the soup’s body and adds extra bean flavor.
Salt and black pepper are your essential seasonings. You’ll add these to taste, starting with a general guideline and adjusting as the flavors meld. Don’t be shy about seasoning; beans need a good amount of salt to really sing!
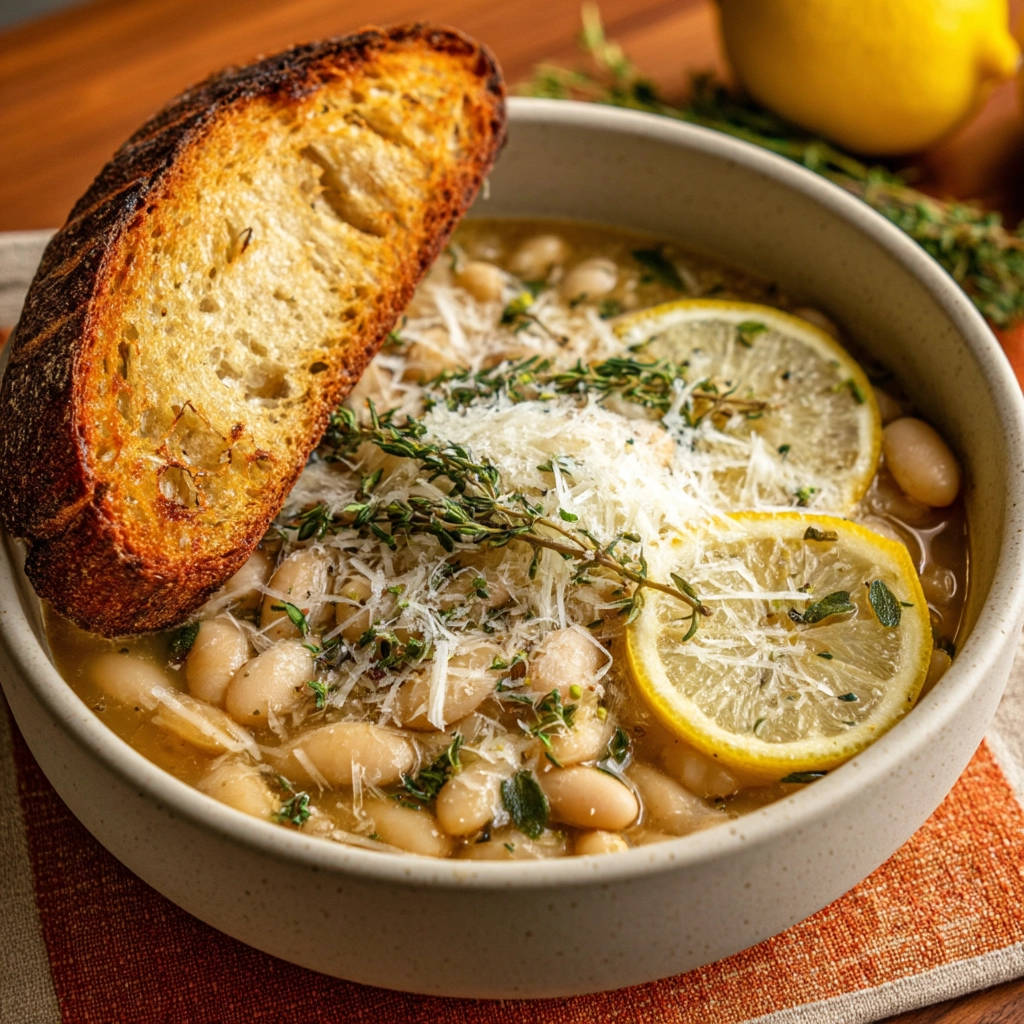
Finally, we have the garnishes that elevate the finished bowl. Optional lemon slices add a bright, zesty pop that cuts through the richness. Grated Parmesan cheese melts into the hot soup, adding a salty, nutty depth. And no cozy soup is complete without crusty bread for dipping!
- 2 tablespoons olive oil
- 1 small onion, finely chopped
- 2 cloves garlic, minced
- 1 teaspoon dried thyme OR 1 tablespoon fresh thyme leaves
- 4 cups vegetable or chicken broth
- 2 cans (15 ounces each) cannellini beans, rinsed and drained, reserve about 1/2 cup of the liquid from one can
- Salt to taste
- Black pepper to taste
- 1 lemon, sliced for garnish (optional)
- Grated Parmesan cheese for serving
- Crusty bread for serving
Crafting Your Creamy White Bean Soup: Step-by-Step
Let’s walk through the simple steps to turn these basic ingredients into a bowl of pure comfort. This process is straightforward, but paying attention to a few details ensures you get that luxurious texture and rich flavor every time.
- Begin by heating the olive oil in a large, heavy-bottomed pot or Dutch oven over medium heat. A Dutch oven is excellent for soups as it distributes heat evenly, preventing scorching on the bottom. Once the oil shimmers slightly, add the finely chopped onion. Stir them occasionally, letting them cook gently for about 5 to 7 minutes. You’re aiming for soft and translucent, not browned. This initial step is crucial for building the foundational flavor of the soup.
- Next, add the minced garlic and the thyme to the softened onions. Stir and cook for just about one minute more. You’ll notice the kitchen filling with wonderful aromas as the garlic becomes fragrant and the thyme releases its oils. It’s really important here to keep a close eye on the garlic; it can go from perfectly fragrant to burnt and bitter in mere seconds!
- Pour in the 4 cups of vegetable or chicken broth into the pot, followed by the rinsed and drained cannellini beans. Give everything a good stir to combine. Turn the heat up slightly and bring this mixture to a gentle simmer. You’ll see small bubbles beginning to break the surface, but avoid a rolling boil at this stage.
- Now, for the magical trick that banishes watery soup! Carefully scoop out about 1 cup of the soup mixture. Try to get mostly beans in your scoop, but a little broth is fine. Transfer this cup to a separate bowl. Using a fork or a potato masher, mash these beans into a coarse paste. It doesn’t need to be perfectly smooth; some texture is actually desirable. This mashing process releases the natural starches from the beans, which is what will thicken the soup.
- Return the mashed bean paste from the bowl back into the pot of simmering soup. Stir it in thoroughly, making sure the paste is completely incorporated. You’ll immediately notice the soup starting to look a little cloudier and more substantial as the starch begins to work its magic.
- Remember that reserved bean liquid? Add that about 1/2 cup of liquid from the can to the pot now. This not only adds back some subtle bean flavor but also helps you fine-tune the soup’s consistency. Give it another stir.
- Season the soup generously with salt and black pepper. A good starting point is about a teaspoon of salt and a quarter teaspoon of pepper, but everyone’s taste and broth differ. Stir it in, let it simmer for a moment, and then taste the soup. This is where you become the chef! Adjust the seasoning, adding more salt or pepper as needed until the flavor pops. Beans really benefit from adequate seasoning.
- Once seasoned to your liking, let the soup continue to simmer gently for at least 15 to 20 minutes. Keep the heat low enough that it’s just barely bubbling. Stir it occasionally to prevent anything from sticking to the bottom. This simmering time is essential for the flavors to meld together beautifully and for the soup to thicken naturally from the mashed beans. Simmering it gently for longer, even up to 30-40 minutes, can deepen the flavor even further, but a rolling boil should be avoided as it can cause the beans to break down too much or scorch.
- When the soup has reached your desired thickness and the flavors are harmonious, it’s time to serve! Ladle the hot, creamy soup into bowls. Add your desired garnishes: a sprinkle of grated Parmesan cheese, a few fresh thyme sprigs, or a bright, acidic slice of lemon. Serve immediately alongside plenty of warm, crusty bread for dipping and soaking up every last drop. Speaking of crusty bread, have you tried our recipe for Crusty Artisan Loaf? It would be absolutely perfect with this soup!
Tips for Perfect Creamy White Bean Soup Every Time
Achieving that ideal creamy texture and rich flavor is easy with this recipe, but a few extra pointers can help you make it truly spectacular:
- Bean Choice Matters: While cannellini beans are recommended for their creamy texture, other white beans like Great Northern or even navy beans can work. However, cannellini beans give the smoothest, most luxurious result.
- Don’t Skip the Mashing Trick: Seriously, this is the key! Mashing just a portion of the beans is what provides the natural starch needed to thicken the soup without adding flour or cream. It’s simple and incredibly effective.
- Simmer Gently: Avoid boiling the soup vigorously once the beans are added and mashed. A gentle simmer allows the flavors to develop slowly and prevents the beans from breaking down into a mushy consistency.
- Taste and Adjust Seasoning: Broths vary in saltiness, and beans soak up flavor. Always taste before serving and adjust the salt and pepper. A little extra salt can truly elevate the soup.
- Boost the Aromatics: For even deeper flavor, consider adding a chopped carrot and a celery stalk along with the onion at the beginning. Sauté them until tender before adding the garlic and thyme. This creates a classic mirepoix base.
- Add Greens: Stir in a few handfuls of fresh spinach or chopped kale during the last 5-10 minutes of simmering. The greens will wilt beautifully and add extra nutrition and color.
- Spice it Up: A pinch of red pepper flakes added with the garlic can give the soup a lovely, subtle warmth.
- Make it Vegan: This recipe is naturally vegan if you use vegetable broth and skip the Parmesan cheese. You could garnish with nutritional yeast for a cheesy flavor, or a swirl of your favorite plant-based cream or coconut milk for extra richness (though the mashing trick makes dairy unnecessary!).
What to Serve With Your Creamy White Bean Soup
This creamy white bean soup is incredibly satisfying on its own, but pairing it with the right sides can turn it into a complete and delightful meal. As mentioned, crusty bread is a must for soaking up the delicious broth. A fresh, simple salad provides a nice contrast to the warmth and richness of the soup. Think greens with a light vinaigrette, or perhaps our Elevated Avocado Salad for something a bit more substantial.
For a heartier meal, consider serving it alongside a light sandwich or wrap. Or, if you’re looking for another cozy dish to complement it on a chilly evening, perhaps something like Creamy Cashew Dream Sauce Penne Pasta (hold the chicken if serving together) would be a wonderful option for a larger gathering.
Your Creamy White Bean Soup Questions Answered (FAQ)
Got questions about making this comforting soup? Here are some common ones, along with my best tips:
Can I use dried beans instead of canned?
Absolutely! Cooking with dried beans requires soaking them overnight (or using a quick soak method) and then simmering them until tender before adding them to the soup base. You’ll need about 1 cup of dried cannellini beans, which will yield roughly the equivalent of two canned beans once cooked. You’ll also need to adjust the amount of broth needed as the dried beans will absorb more liquid during cooking. Cook the dried beans separately in plenty of water or broth until very tender, then proceed with the recipe, using some of their cooking liquid in place of the reserved can liquid.
How can I make the soup thicker?
The mashing trick should provide plenty of thickness! However, if you prefer an even thicker soup, you can scoop out another half cup or cup of the soup, mash those beans more thoroughly, and return them to the pot. Alternatively, you can use an immersion blender to blend a portion of the soup directly in the pot until it reaches your desired consistency. Avoid blending the entire pot unless you want a completely smooth soup.
How can I make the soup thinner?
If your soup turns out too thick, simply stir in a little extra vegetable or chicken broth (or even just water) a quarter cup at a time until you reach your preferred consistency. Heat it through before serving.
Can I add other vegetables to this soup?
Yes! This creamy white bean soup is very forgiving and works well with added vegetables. Carrots, celery, potatoes, zucchini, bell peppers, or hardy greens like kale or collards are great additions. Add root vegetables like carrots and potatoes along with the broth so they have time to soften. Softer vegetables like zucchini or greens can be added during the last 10-15 minutes of simmering.
How long does creamy white bean soup last in the refrigerator?
Stored in an airtight container, this soup will keep well in the refrigerator for 3-4 days. The soup will likely thicken further as it cools, so you may need to add a splash of broth or water when reheating.
Can I freeze this soup?
Yes, creamy white bean soup freezes beautifully. Allow the soup to cool completely before transferring it to freezer-safe containers or bags. It can be frozen for up to 3 months. Thaw it overnight in the refrigerator and reheat gently on the stovetop, adding more broth or water as needed to thin it out.
What’s the best way to reheat leftovers?
The best way to reheat is gently on the stovetop over medium-low heat, stirring occasionally. Add a little extra broth or water if it has thickened too much in the fridge. You can also microwave individual portions, stirring halfway through the reheating time.
Is this soup gluten-free?
Yes, as written, this creamy white bean soup is naturally gluten-free, assuming your broth is gluten-free. Cannellini beans are gluten-free, and the thickening method doesn’t rely on flour or other gluten-containing ingredients.
Enjoy Your Homemade Creamy White Bean Soup!
There you have it – the secret to making the most wonderfully creamy and flavorful white bean soup you’ve ever tasted, all thanks to a simple trick leveraging the magic of the beans themselves! This recipe is proof that simple ingredients, handled with a little bit of know-how, can create something truly extraordinary and comforting. It’s perfect for a chilly evening, a nourishing lunch, or whenever you need a bowl of pure, unadulterated coziness.
I hope you give this recipe a try and fall in love with its ease and deliciousness just like I have. Don’t forget to load up on that crusty bread! If you make it, please come back and leave a comment below to let me know how it turned out. I love hearing from you!
Creamy White Bean Soup

Ingredients
- 2 tablespoons olive oil
- 1 small onion, finely chopped
- 2 cloves garlic, minced
- 1 teaspoon dried thyme or 1 tablespoon fresh thyme leaves
- 4 cups vegetable or chicken broth
- 2 cans (15 ounces each) cannellini beans, rinsed and drained, reserve about 1/2 cup of the liquid from one can
- Salt to taste
- Black pepper to taste
- 1 lemon, sliced for garnish (optional)
- Grated Parmesan cheese for serving
- Crusty bread for serving
Directions
- Heat olive oil in a large pot or Dutch oven over medium heat. Add the chopped onion and cook until softened, about 5 to 7 minutes.
- Add the minced garlic and thyme, cooking for another minute until fragrant. Do not let the garlic burn.
- Add the 4 cups of broth and the rinsed and drained beans to the pot. Bring the mixture to a simmer.
- This is the trick to avoiding watery soup and getting great texture: Scoop out about 1 cup of the soup mixture (mostly beans) and place it in a separate bowl. Use a fork or potato masher to mash these beans into a coarse paste.
- Return the mashed bean paste to the pot. This starchiness from the beans will thicken the soup naturally as it simmers. Stir well to combine.
- Add the reserved bean liquid (about 1/2 cup) to the pot. This adds flavor and helps adjust the consistency.
- Season the soup generously with salt and black pepper. Start with a teaspoon of salt and a quarter teaspoon of pepper, then taste and adjust as needed.
- Let the soup simmer gently for at least 15 to 20 minutes, stirring occasionally, allowing the flavors to meld and the soup to thicken slightly. The longer it simmers (gently), the better the flavor, but avoid a rolling boil which can break down the beans too much.
- Ladle the hot soup into bowls. Garnish with grated Parmesan cheese, fresh thyme sprigs, and lemon slices if desired. Serve immediately with crusty bread.