
Oh, the humble biscuit. When done right, it’s a cloud of buttery perfection, a comforting bite that feels like a warm hug. But we’ve all been there, haven’t we? The anticipation builds, you bite into what looks like a beautiful biscuit, and… crumbly dryness. It’s heartbreaking! For years, my biscuit attempts were frustratingly inconsistent. Some batches were okay, others were destined for the trash bin. It felt like biscuit-making was some ancient, guarded secret.
Well, I’m here to tell you that the secret isn’t magic; it’s a simple, yet powerful, technique. And once I unlocked it, my homemade biscuits transformed. Now, I bake Savory Herb Jam Biscuits that are reliably tender, incredibly fluffy, and bursting with flavor. This recipe takes that classic comfort and adds a delightful twist with fresh herbs and a dollop of sweet or spicy jam right in the center. Get ready to say goodbye to dry biscuits forever!
Why These Savory Herb Jam Biscuits Are Game Changers
These aren’t just any biscuits. They’re the kind that disappear from the plate in minutes, sparking conversations and requests for the recipe. Their secret lies in understanding the fundamental science behind biscuit tenderness and applying a crucial technique consistently.
The star players in achieving that dreamy texture are cold butter and minimal handling. By cutting cold butter into the dry ingredients, you create tiny pockets of butter throughout the dough. As these bake, the water in the butter turns to steam, puffing up the layers and leaving behind tender, flaky voids. Overmixing, on the other hand, develops tough gluten strands, which is exactly what we want to avoid in a tender biscuit.
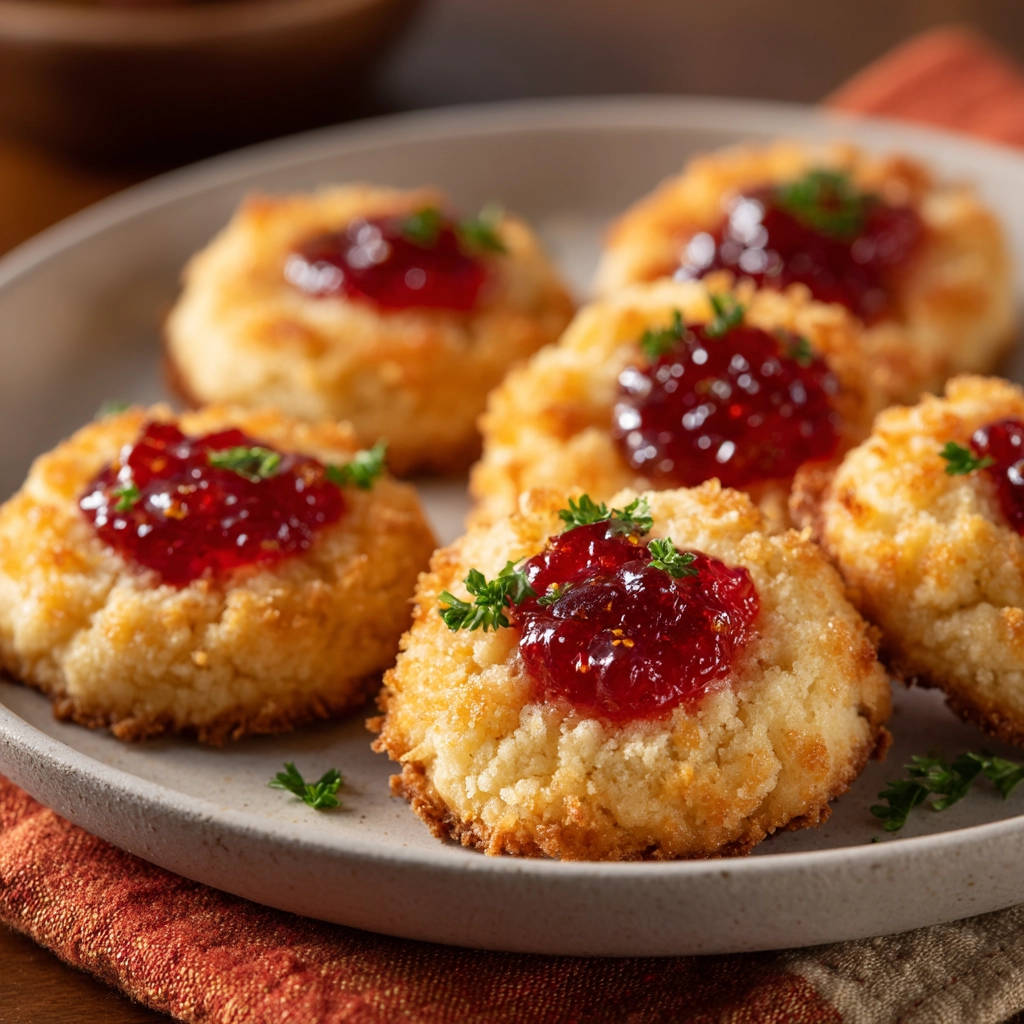
Beyond the texture, the flavor profile here is truly special. The savory notes from fresh herbs like chives or parsley offer a wonderful counterpoint to the sweetness of the jam. And adding the jam after baking, nestled in a cozy indentation, keeps the biscuits from becoming soggy during the cooking process. It’s a combination that works beautifully for breakfast, brunch, or even as a unique side dish.
What You’ll Need: Gathering Your Savory Biscuit Ingredients
Creating these wonderful biscuits starts with a few pantry staples and some fresh additions. The beauty of this recipe is its simplicity; focusing on ingredient quality and temperature is key.
For the base, we rely on simple all-purpose flour. While specialty flours can be fun, good old all-purpose provides reliable structure. We’ll combine this with baking powder, which is absolutely essential for giving these biscuits their significant lift and fluffy texture. Don’t underestimate the power of fresh baking powder – if yours has been sitting in the pantry for ages, it might be time for a new can! A touch of salt is also necessary to balance the flavors and enhance the richness of the butter.
Now, for the magic ingredient: cold, unsalted butter. The temperature is non-negotiable! Using butter straight from the fridge and keeping it cold throughout the mixing process is the single most important factor for tenderness. Unsalted butter allows you to control the saltiness of the final biscuit.
Equally important is the liquid – cold milk or buttermilk. Just like the butter, keeping this cold helps prevent the butter from melting prematurely. Buttermilk adds a touch of tang and reacts with the baking powder for even more lift, though standard cold milk works perfectly well too.
The savory element comes from fresh herbs. Finely chopped chives offer a mild oniony flavor, while parsley provides a fresh, slightly peppery note. You can use one or a combination of both, or even experiment with other soft herbs like dill or a tiny bit of tarragon.
Finally, the delightful filling! About half a cup of red jam or jelly is needed. The recipe specifically mentions options like pepper jelly (for a sweet and spicy kick that pairs wonderfully with the savory biscuit) or classic raspberry jam. But feel free to get creative with other red varieties like strawberry, cherry, or even a tart cranberry relish.
And don’t forget a little extra fresh parsley for a vibrant garnish just before serving!
- 2 cups all-purpose flour
- 1 tablespoon baking powder
- 1 teaspoon salt
- 1/2 cup cold unsalted butter, cut into small cubes
- 3/4 cup cold milk or buttermilk
- 2 tablespoons fresh chives or parsley, finely chopped
- 1/2 cup red jam or jelly (like pepper jelly or raspberry)
- Fresh parsley, chopped, for garnish
How to Make the Most Tender Savory Herb Jam Biscuits: A Detailed Guide
Ready to bake? Let’s walk through the simple steps that will lead you to biscuit bliss. Remember, the key is gentle hands and keeping things cold!
- The first thing you’ll want to do is prepare your oven and baking sheet. Preheat your oven to a hot 400 degrees F (which is 200 degrees C). This high temperature helps the biscuits rise quickly and creates a lovely golden crust. Lining your baking sheet with parchment paper isn’t strictly necessary for the bake itself, but it makes cleanup an absolute breeze and ensures your precious biscuits won’t stick.
- In a large bowl, combine your dry ingredients: the all-purpose flour, baking powder, and salt. Give them a good whisk together to make sure everything is evenly distributed – this is especially important for the baking powder to ensure uniform leavening. Now, stir in your finely chopped fresh chives or parsley, distributing them throughout the dry mixture.
- This next step is the heart of biscuit tenderness! Add the small cubes of cold butter directly into the dry ingredients. Work quickly to cut the butter into the flour mixture. You can use a pastry blender (my preferred tool for speed and efficiency), two forks, or even your fingertips (just make sure your hands are cold!). The goal is to break down the butter until the mixture looks like coarse crumbs. Crucially, you still want to see some larger pieces of butter, about the size of small peas. These chunks are what create those wonderful flaky layers as they melt and steam in the oven. Don’t blend it into a fine powder; visible butter pieces are your friend here.
- Now it’s time for the liquid. Pour in your cold milk or buttermilk. Grab a fork and stir the mixture gently. Stir just until the dry ingredients are moistened and the dough barely comes together. It will look shaggy, a little sticky, and far from smooth – this is exactly what you want! Resist the urge to keep mixing, kneading, or trying to make it look neat. Overmixing develops gluten, and too much gluten means tough biscuits. Stop stirring as soon as there are no large patches of dry flour remaining.
- Turn the shaggy dough out onto a surface that you’ve lightly dusted with flour. Pat the dough out gently with your hands, or use a rolling pin, until it’s about 3/4 inch thick. The less you handle the dough, the more tender your biscuits will be. Use a round biscuit cutter (or even a drinking glass rim), cutting straight down without twisting (twisting can seal the edges and prevent a good rise). You can also simply cut the dough into squares with a knife or bench scraper for minimal handling. If you prefer a more rustic look, you can gently gather small amounts of dough and form rough rounds about 2 inches wide with your hands. Place the shaped biscuits onto your prepared baking sheet.
- Once your biscuits are on the sheet, use your thumb or the back of a small spoon to make a shallow indentation right in the center of each one. This little well is where the delicious jam will sit after baking.
- Pop the baking sheet into your preheated oven. Bake the biscuits for about 12 to 15 minutes. Keep an eye on them; they’re done when they are nicely puffed up and golden brown around the edges and on top. Baking time can vary depending on your oven, so start checking around 12 minutes.
- Carefully remove the baking sheet from the oven. Let the biscuits cool slightly on the sheet for just a few minutes. They’ll still be quite warm.
- While the biscuits are still warm (this is important for the jam to nestle in nicely), take your red jam or jelly and gently fill the indentation you made in the center of each biscuit with a spoonful. Don’t overfill; you want it to sit neatly in the well.
- For a final touch of freshness and color, sprinkle a little extra chopped fresh parsley over the tops of the jam-filled biscuits just before serving.
Expert Tips for Biscuit Perfection
Achieving that perfect, tender biscuit texture is surprisingly simple once you know the tricks. Here are a few extra tips to ensure your Savory Herb Jam Biscuits turn out beautifully every time:
- Keep Everything Cold: I can’t stress this enough! Your butter, your milk, even your hands if possible, should be cold. This prevents the butter from melting before it hits the oven, which is crucial for creating those flaky layers.
- Measure Flour Correctly: Don’t scoop the flour directly from the bag with your measuring cup, as this can compact it and lead to too much flour (and a dry biscuit). Instead, lightly spoon the flour into your measuring cup and level it off with a straight edge.
- Handle With Care: The less you touch and manipulate the dough, the better. Overworking the dough develops gluten, making biscuits tough. Stir just until combined and pat or gently roll to shape.
- Fresh Leavening: Ensure your baking powder is active. You can test it by adding a teaspoon to a bit of hot water; if it fizzes vigorously, it’s good to go!
- Don’t Twist the Cutter: When cutting biscuits, press the cutter straight down and lift up. Twisting can seal the edges of the biscuit layers, hindering their ability to rise and create flaky separation.
- Know Your Oven: Ovens can vary! Use an oven thermometer to check the accuracy of your oven’s temperature. This ensures you’re baking at the correct heat for optimal rise and browning.
- Storage: Once cooled, store biscuits in an airtight container at room temperature for 1-2 days, or in the refrigerator for up to a week.
- Reheating: The best way to reheat biscuits and restore some tenderness is in a warm oven (around 300-325°F or 150-160°C) for 5-10 minutes, or briefly in an air fryer.
Delicious Serving Suggestions
These Savory Herb Jam Biscuits with their sweet and savory filling are incredibly versatile. While they are absolutely divine enjoyed warm straight from the oven, they also make a fantastic addition to various meals.
They’re a natural fit for brunch spreads, pairing wonderfully with eggs, sausage, or a savory breakfast egg bake. Serve them alongside hearty main courses like a classic pot roast or grilled chicken.
Their savory nature makes them a perfect accompaniment to soups and stews. Imagine dipping one into a warm bowl of classic beef and barley soup or a creamy tomato soup. The slight sweetness of the jam offers a delightful contrast to the richness of the soup.
For a simpler option, enjoy them with just a smear of cream cheese or extra butter. They can also be part of a cheese board, offering a unique vehicle for mild cheeses alongside the jam.
Your Savory Herb Jam Biscuits Questions Answered (FAQ)
Making biscuits might seem intimidating, but it doesn’t have to be! Here are answers to some common questions you might have:
Can I use dried herbs instead of fresh?
While fresh herbs provide the best flavor and vibrant color, you can substitute dried herbs in a pinch. Use about 1 teaspoon of dried herbs for every tablespoon of fresh herbs called for. Since dried herbs are more potent, you’ll need less. Stir them in with the dry ingredients.
What kind of jam works best with the savory herbs?
The recipe suggests red jam or jelly like pepper jelly or raspberry, and both are excellent choices! Pepper jelly offers a fantastic sweet-spicy contrast that complements the herbs beautifully. Raspberry is a classic sweet and slightly tart pairing. Other red jams like strawberry or cherry work well too. Don’t be afraid to experiment with your favorite!
Can I make the biscuit dough ahead of time?
Yes, you can! Prepare the dough through step 5 (shaping the biscuits). Place the shaped biscuits on the prepared baking sheet, cover them loosely with plastic wrap, and refrigerate for up to 24 hours before baking. You can also freeze the unbaked shaped biscuits on the baking sheet until firm, then transfer them to a freezer-safe bag or container for up to 2-3 months. Bake frozen biscuits directly from the freezer, adding a few extra minutes to the baking time.
Why are my biscuits tough and not flaky?
The most common culprits for tough biscuits are overmixing the dough and not keeping the butter cold enough. Remember to mix the wet and dry ingredients only until they are just combined and no dry flour remains. Also, ensure your butter is cold and you only cut it in until it resembles coarse crumbs with pea-sized pieces.
How should I store leftover biscuits?
Once completely cooled, store leftover biscuits in an airtight container at room temperature for a day or two. For longer storage, keep them in the refrigerator for up to a week or freeze them (without the jam filling, if possible) for up to a month. Add the jam after reheating frozen biscuits.
Bake Up Some Magic Today!
Say goodbye to dry, disappointing biscuits and hello to a batch of tender, fluffy, Savory Herb Jam Biscuits. This recipe is not only easy to master once you understand the importance of cold ingredients and gentle handling, but it delivers a unique and utterly delicious result that will impress everyone lucky enough to try them. Whether it’s for a weekend brunch, a comforting side dish, or just because you deserve a little homemade goodness, these biscuits are sure to become a favorite.
Give this recipe a try and let me know what you think! Did you use chives or parsley? What kind of jam did you choose? Share your experiences in the comments below – I love hearing from you!
Savory Herb Jam Biscuits

Ingredients
- 2 cups all-purpose flour
- 1 tablespoon baking powder
- 1 teaspoon salt
- 1/2 cup cold unsalted butter, cut into small cubes
- 3/4 cup cold milk or buttermilk
- 2 tablespoons fresh chives or parsley, finely chopped
- 1/2 cup red jam or jelly (like pepper jelly or raspberry)
- Fresh parsley, chopped, for garnish
Directions
- Preheat oven to 400 degrees F (200 degrees C). Line a baking sheet with parchment paper.
- In a large bowl, whisk together the flour, baking powder, and salt. Add the chopped chives or parsley.
- Add the cold butter cubes to the dry ingredients. Use a pastry blender, fork, or your fingertips to cut the butter into the flour mixture until it resembles coarse crumbs with some pea-sized pieces of butter still visible. This step is key to a tender biscuit because those little pockets of cold butter create steam as they melt in the oven, resulting in a light texture.
- Pour in the cold milk. Stir with a fork just until the dough barely comes together. It will be shaggy and a little sticky. Do not overmix! Overmixing develops gluten and leads to tough biscuits.
- Turn the dough out onto a lightly floured surface. Pat or gently roll the dough about 3/4 inch thick. Use a round cutter (or cut into squares) to make biscuits. Or, gently gather small amounts of dough and form into rough rounds, about 2 inches wide. Place the biscuits on the prepared baking sheet.
- Use your thumb or the back of a spoon to make a small indentation in the center of each biscuit.
- Bake for 12-15 minutes, or until golden brown and puffed.
- Let the biscuits cool slightly on the baking sheet.
- While warm, gently fill each indentation with a spoonful of red jam or jelly.
- Garnish with fresh chopped parsley before serving. Enjoy your perfectly tender biscuits!