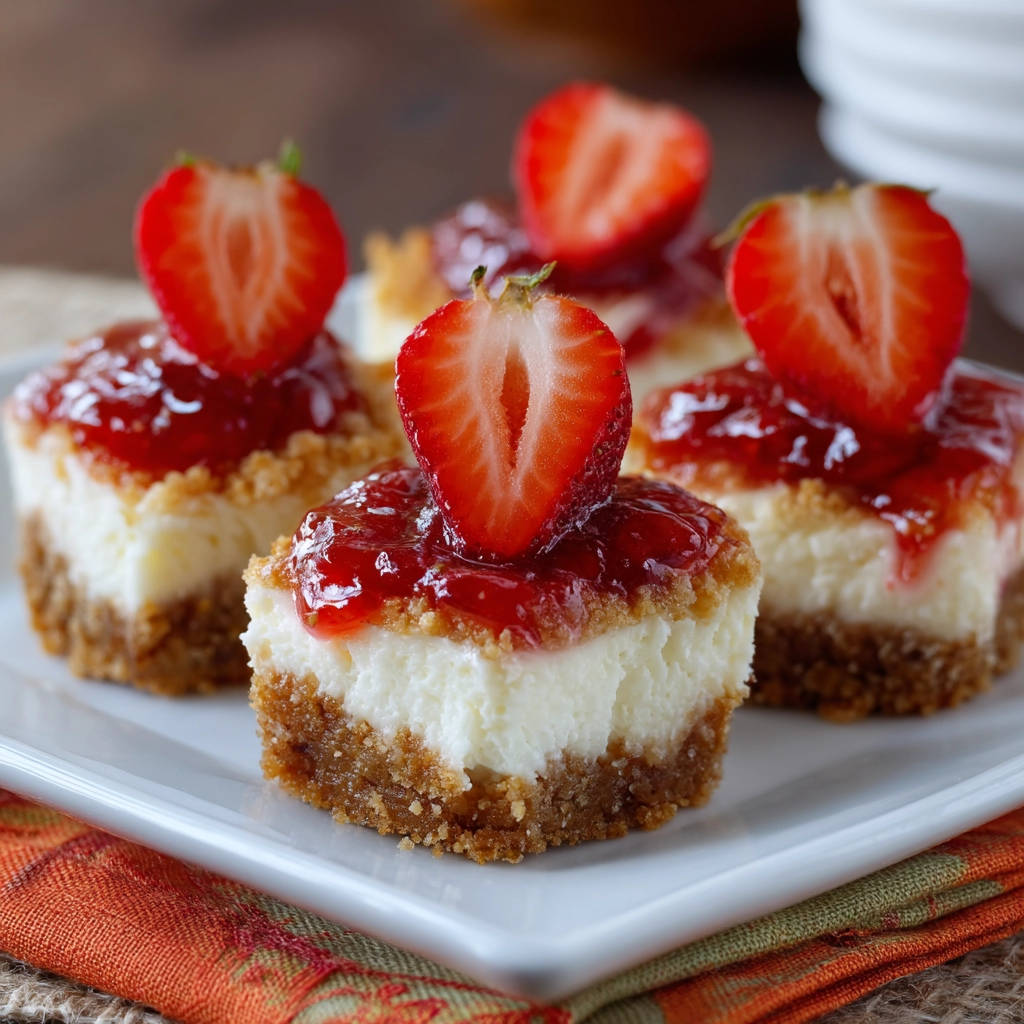
Is there anything more delightful than a bite-sized cheesecake? These Mini Strawberry Cheesecakes are individual portions of creamy, sweet bliss, perfect for parties, holidays, or just a special treat. But let’s be honest, miniature cheesecakes can sometimes be frustrating. Trying to get those beautiful, delicate desserts out of the muffin tin without leaving half of it stuck to the paper liner feels like a culinary challenge. Trust me, I’ve been there – picking broken cheesecake out of paper cups is not fun!
I experimented with countless methods, different pans, various cooling techniques, but nothing seemed to work perfectly until I stumbled upon a simple, yet revolutionary trick for preparing the muffin tin. This one step changed everything! Now, my mini cheesecakes slide out effortlessly, looking pristine and ready for their vibrant strawberry topping. This recipe combines that genius tip with a classic, creamy cheesecake filling and a bright, homemade strawberry sauce, resulting in desserts that are as easy to make as they are delicious to eat. Let’s dive in and make cheesecake magic happen, mess-free!
Reasons These Mini Strawberry Cheesecakes Are a Keeper
Beyond their adorable size and irresistible flavor, these little cheesecakes offer several advantages:
- Effortless Release: That secret pan-prep step truly eliminates the frustration of sticking.
- Perfect Portion Size: No need to slice a large cheesecake; these are ready-to-serve individual treats.
- Make Ahead Friendly: Both the cheesecakes and the strawberry topping can be made in advance, making entertaining a breeze.
- Classic Flavor Combo: The rich, creamy cheesecake pairs perfectly with the sweet and slightly tart fresh strawberry topping.
- Ideal for Any Occasion: From casual gatherings to more formal events, these mini desserts are always a hit.
Gathering Your Ingredients for Mini Strawberry Cheesecakes
Creating these delightful Mini Strawberry Cheesecakes starts with gathering high-quality ingredients. Each component plays a vital role in building layers of flavor and achieving that perfect cheesecake texture. We’ll need ingredients for a buttery graham cracker crust, a smooth and tangy cream cheese filling, and a bright, fresh strawberry topping.
For the Crust:
You’ll need the classic foundation: graham cracker crumbs. About 1 and 1/2 cups will give you enough for a sturdy, flavorful base in each mini cup. Combine these with granulated sugar for a touch of sweetness and melted unsalted butter. The butter binds the crumbs together, creating a cohesive crust that holds its shape beautifully once baked.
For the Creamy Filling:
The heart of any cheesecake is the cream cheese. Make sure you use softened cream cheese – this is crucial for a smooth, lump-free filling. You’ll need 16 ounces. Granulated sugar sweetens the rich cheese base. Two large eggs are essential for structure and richness, binding the filling together. A teaspoon of vanilla extract adds warmth and depth to the flavor profile. Lastly, a quarter cup of sour cream is our secret weapon for that signature tangy flavor and incredibly smooth, creamy texture that prevents the filling from being too dense.
For the Luscious Strawberry Topping:
Fresh strawberries are key here! You’ll need about 1 cup of diced fresh strawberries for the cooked topping. These will be simmered with a quarter cup of granulated sugar to create a syrupy base. To thicken the sauce, we’ll use a simple slurry of 1 tablespoon cornstarch whisked with 1 tablespoon water. For garnish, you’ll want extra fresh strawberries, perhaps sliced or halved, to place on top just before serving.
- 1 and 1/2 cups graham cracker crumbs
- 1/4 cup granulated sugar (for crust)
- 5 tablespoons melted unsalted butter
- 16 ounces cream cheese, softened
- 1/2 cup granulated sugar (for filling)
- 2 large eggs
- 1 teaspoon vanilla extract
- 1/4 cup sour cream
- 1 cup diced fresh strawberries (for topping)
- 1/4 cup granulated sugar (for topping)
- 1 tablespoon cornstarch
- 1 tablespoon water
- Fresh strawberries for garnish
Crafting Your Mini Strawberry Cheesecakes: Step-by-Step
Let’s walk through the process of creating these delightful little treats. Each step is designed to ensure success, from the perfect crust to the creamy filling and shiny strawberry topping.
- Prep the Oven and Pan: Start by preheating your oven to 325 degrees F (160 degrees C). While the oven gets warm, prepare your muffin tin. Line a standard 12-cup muffin tin with paper liners. This provides the individual cups for our mini cheesecakes.
- The Game-Changing Release Trick: Now for the key step that makes these “Easy Pan Release!” mini cheesecakes live up to their name! Once the paper liners are in place, lightly spray the inside of each paper liner with nonstick cooking spray. Be thorough and make sure the spray coats the sides and bottom. This creates a thin barrier between the paper and the cheesecake, allowing for effortless peeling later.
- Mix the Crust Ingredients: In a medium-sized bowl, combine your graham cracker crumbs, the 1/4 cup of sugar designated for the crust, and the 5 tablespoons of melted unsalted butter. Stir everything together until the mixture looks and feels like wet sand – it should hold together when you pinch it.
- Form the Crusts: Spoon about 2 tablespoons of this graham cracker mixture into the bottom of each prepared muffin cup. Use the back of a spoon or the bottom of a small glass to firmly press the crumbs down into an even, compact layer. A well-pressed crust is less likely to crumble when you remove the cheesecakes.
- Bake the Crusts: Place the muffin tin with the pressed crusts into the preheated oven. Bake them for just 5 minutes. This brief bake helps set the crusts and gives them a little head start before the filling is added. Remove them from the oven and let them cool slightly in the pan while you prepare the filling. Make sure to leave your oven on!
- Prepare the Cream Cheese Filling: In a large bowl, beat the softened cream cheese and the 1/2 cup of sugar for the filling using an electric mixer. Beat on medium speed until the mixture is completely smooth and wonderfully creamy. Softened cream cheese is essential here to avoid lumps.
- Add the Eggs: Beat in the two large eggs, but add them one at a time. Mix on low speed until each egg is just combined before adding the next. Be careful not to overmix the batter once the eggs are in, as overmixing can introduce too much air and potentially lead to cracks in the cheesecake surface during baking.
- Stir in Flavor and Tang: Gently stir in the vanilla extract and the sour cream. Mix only until the filling is smooth and everything is incorporated. The sour cream adds that lovely tangy note and contributes significantly to the silky smooth texture of the finished cheesecake.
- Fill the Cups: Carefully pour or spoon the cream cheese filling evenly over the slightly cooled, baked crusts in the muffin tin. Fill each paper liner about two-thirds full. This leaves room for the filling to expand slightly as it bakes and for the strawberry topping later.
- Bake the Cheesecakes: Return the muffin tin to the 325°F (160°C) oven. Bake for 18 to 22 minutes. You’ll know they’re ready when the edges of the cheesecake filling appear set and slightly firm, but the centers are still just a little bit jiggly when you gently tap the side of the muffin tin.
- Gradual Cooling is Key: To help prevent those dreaded cheesecake cracks, we’ll cool them gradually. Turn off the oven but leave the muffin tin inside. Prop the oven door open slightly, perhaps with a wooden spoon. Let the cheesecakes cool in the warm oven for 30 minutes.
- Cool Completely: After the 30 minutes of gradual cooling in the oven, remove the muffin tin from the oven. Place the entire tin on a wire rack to cool completely at room temperature. Do not rush this step! The cheesecakes need to be fully cooled before moving on.
- The Easy Release! Once the cheesecakes are completely cool, it’s time to free them! Carefully lift each cheesecake out of the muffin tin by holding the paper liner. Because you sprayed the liners in step 2, the paper should peel away easily from the cooled cheesecake. Voilà! Perfect, intact mini cheesecakes!
- Make the Strawberry Topping: While the cheesecakes cool (or while they chill later), you can make the topping. Combine the diced strawberries and the 1/4 cup of sugar for the topping in a small saucepan.
- Prepare Cornstarch Slurry: In a separate small cup, whisk together the cornstarch and water until it forms a smooth slurry with no lumps.
- Simmer Strawberries: Heat the strawberries and sugar in the saucepan over medium heat. Stir occasionally until the sugar dissolves completely and the strawberries start to release their juices, creating a syrupy liquid.
- Thicken the Sauce: Pour the cornstarch mixture into the simmering strawberries. Stir continuously for about 1 to 2 minutes until the sauce thickens into a glossy, spoonable consistency. Remove the saucepan from the heat and let the strawberry topping cool completely before using. It will thicken further as it cools.
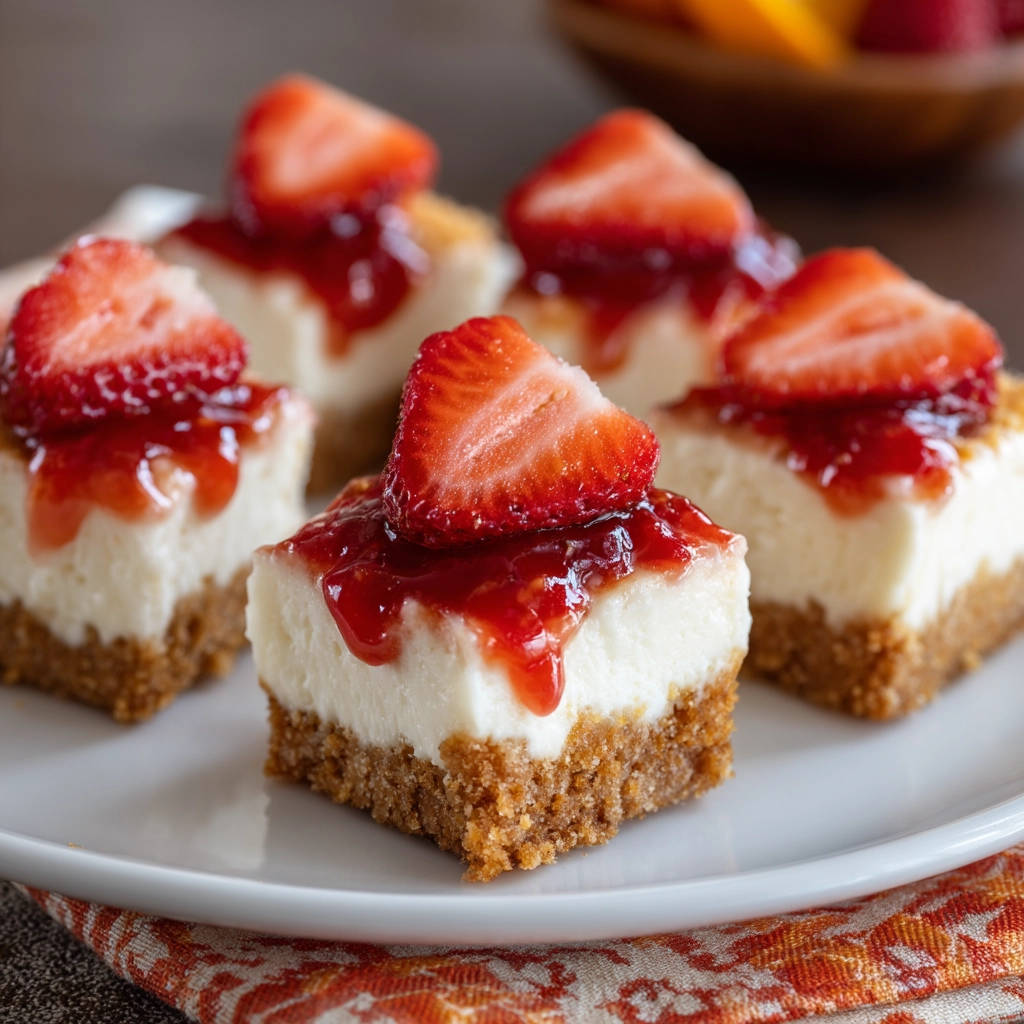
- Top and Garnish: Once the cheesecakes are cool and the strawberry topping is chilled, spoon the cooled topping generously over each mini cheesecake.
- Final Flourish: For a beautiful presentation, garnish each topped cheesecake with a fresh strawberry half just before serving. Store any leftovers in an airtight container in the refrigerator.
Tips for Perfect Mini Strawberry Cheesecakes Every Time
Achieving cheesecake perfection is within reach with a few simple tips. Here are some pointers to help you get the best results with your Mini Strawberry Cheesecakes:
- Room Temperature Ingredients: Ensure your cream cheese, eggs, and sour cream are at room temperature. This is absolutely critical for achieving a smooth, lump-free filling that mixes properly. Set them out on the counter at least 30-60 minutes before you plan to start mixing.
- Don’t Overmix: Once you add the eggs, mix only until they are just incorporated. Overmixing incorporates too much air, which can cause the cheesecake to puff up excessively in the oven and then crack as it cools.
- Gradual Cooling is Gold: The step of turning off the oven and letting the cheesecakes cool inside with the door propped open isn’t just a suggestion – it’s a game-changer for preventing cracks. Cheesecakes are delicate and don’t like sudden temperature changes.
- Chill Time is Crucial: After cooling on the wire rack, these cheesecakes benefit greatly from chilling in the refrigerator for at least a few hours, or ideally longer. Chilling allows the flavors to meld and the texture to set properly, making them much easier to handle and serve.
- Quality of Paper Liners: Use standard, good quality paper cupcake liners. Flimsy ones might not hold their shape as well, even with the spray trick.
- Strawberry Topping Consistency: If your strawberry topping seems too thick after cooling, you can stir in a tiny bit of water, one teaspoon at a time, until it reaches your desired consistency. If it’s too thin, ensure it cooled completely; cornstarch needs cool temperatures to fully set. If still too thin, you can gently reheat it and add another tiny cornstarch slurry (1/2 tsp cornstarch mixed with 1/2 tsp water), simmering gently until thickened.
- Crumb Alternatives: While graham cracker is classic, you could experiment with other crumbs like vanilla wafers or shortbread cookies for a different flavor profile in your crust.
What to Serve With Your Mini Cheesecakes
These Mini Strawberry Cheesecakes are fantastic on their own, but they also pair wonderfully with a few simple additions. Consider serving them with a dollop of fresh whipped cream or a sprinkle of graham cracker crumbs for added texture. They are delightful alongside a cup of tea or coffee. If you’re looking for other fruity dessert pairings for a gathering, our recipe for Strawberry Trifle offers another beautiful layered option.
Your Mini Strawberry Cheesecakes Questions Answered (FAQ)
Can I make the crust ahead of time?
Yes, you can make and bake the graham cracker crusts ahead of time. Let them cool completely in the muffin tin, then cover the tin tightly with plastic wrap and store at room temperature for up to a day, or refrigerate for up to 2-3 days.
Why did my cheesecakes crack?
Cracking is often caused by overmixing the filling after adding the eggs, or by cooling too quickly. Ensure all your ingredients are at room temperature, mix gently, and follow the gradual cooling step in the oven carefully.
Can I use frozen strawberries for the topping?
Yes, you can use frozen strawberries. Thaw them first and drain off any excess liquid before dicing and using them in the topping recipe. The cooking time might be slightly longer as they heat up.
How should I store these mini cheesecakes?
Store the completed Mini Strawberry Cheesecakes in an airtight container in the refrigerator. They will keep well for 3-4 days.
Can I freeze Mini Strawberry Cheesecakes?
Yes, you can freeze the baked and cooled cheesecakes without the strawberry topping. Wrap each cheesecake tightly in plastic wrap, then place them in a freezer-safe container. They can be frozen for up to 1-2 months. Thaw them overnight in the refrigerator before adding the fresh strawberry topping.
Can I make a different flavored topping?
Absolutely! The cheesecake base is versatile. You could easily substitute the strawberries for blueberries, raspberries, or even a drizzle of caramel sauce. If you enjoy caramel, you might like our recipe for Swirled Cheesecake for inspiration on incorporating sauces.
Enjoy Your Homemade Mini Strawberry Cheesecakes!
There you have it – a foolproof recipe for beautiful, creamy Mini Strawberry Cheesecakes that come out of the pan effortlessly thanks to that one simple trick. The combination of the crunchy graham cracker crust, the smooth, tangy cheesecake filling, and the bright, fresh strawberry topping is truly heavenly. Whether you’re baking for a special occasion or just craving a small indulgence, these mini delights are sure to impress.
Give this recipe a try and experience the joy of perfectly released cheesecakes! Let me know how yours turn out in the comments below. Happy baking!
Mini Strawberry Cheesecakes

Ingredients
- 1 and 1/2 cups graham cracker crumbs
- 1/4 cup granulated sugar
- 5 tablespoons melted unsalted butter
- 16 ounces cream cheese softened
- 1/2 cup granulated sugar
- 2 large eggs
- 1 teaspoon vanilla extract
- 1/4 cup sour cream
- 1 cup diced fresh strawberries
- 1/4 cup granulated sugar
- 1 tablespoon cornstarch
- 1 tablespoon water
- Fresh strawberries for garnish
Directions
- Preheat oven to 325 degrees F (160 degrees C). Line a 12 cup muffin tin with paper liners. This is important!
- Here is the key to easy removal: Lightly spray the inside of each paper liner with nonstick cooking spray. Make sure the spray coats the sides and bottom of the liner.
- In a medium bowl combine the graham cracker crumbs, 1/4 cup sugar, and melted butter. Mix until it resembles wet sand.
- Spoon about 2 tablespoons of the graham cracker mixture into the bottom of each prepared muffin cup. Press firmly down with the back of a spoon or a small glass to form a compact crust.
- Bake the crusts for 5 minutes. Remove from oven and let cool slightly while you make the filling. Leave the oven on.
- In a large bowl beat the softened cream cheese and 1/2 cup sugar with an electric mixer until smooth and creamy.
- Beat in the eggs one at a time, mixing until just combined after each addition. Do not overmix after adding eggs.
- Stir in the vanilla extract and sour cream until smooth.
- Pour the cream cheese filling evenly over the baked crusts in the muffin tin, filling each liner about two-thirds full.
- Bake for 18 to 22 minutes, or until the edges are set and the centers are just slightly jiggly.
- Turn off the oven and prop the oven door open slightly with a wooden spoon. Leave the cheesecakes in the oven for 30 minutes to cool gradually. This helps prevent cracking and makes them easier to remove later.
- Remove the muffin tin from the oven and let the cheesecakes cool completely in the pan on a wire rack.
- Once completely cool, carefully lift each cheesecake out of the muffin tin by holding the paper liner. The greased liner should peel away easily thanks to step 2.
- To make the strawberry topping, combine the diced strawberries and 1/4 cup sugar in a small saucepan.
- In a small cup whisk together the cornstarch and water until smooth.
- Heat the strawberries and sugar over medium heat, stirring occasionally, until the sugar dissolves and the strawberries release some juice.
- Pour the cornstarch mixture into the saucepan and stir continuously until the sauce thickens, about 1 to 2 minutes. Remove from heat and let it cool completely.
- Spoon the cooled strawberry topping over each mini cheesecake.
- Garnish each cheesecake with a fresh strawberry half before serving. Store in the refrigerator.