We’ve all been there, right? You spend precious time crafting a beautiful layered dessert, slice into it with eager anticipation, and… sad trombone… the filling oozes everywhere! It’s the dessert equivalent of a collapsing soufflé, utterly heartbreaking. For years, I struggled to achieve that perfect, clean slice with creamy fillings that actually held their shape. But after much testing (and sadly, many runny cake incidents!), I finally perfected a method that guarantees a beautifully firm, yet still incredibly luscious, filling every single time for this dreamy Caramel Crumb Cream Cake.
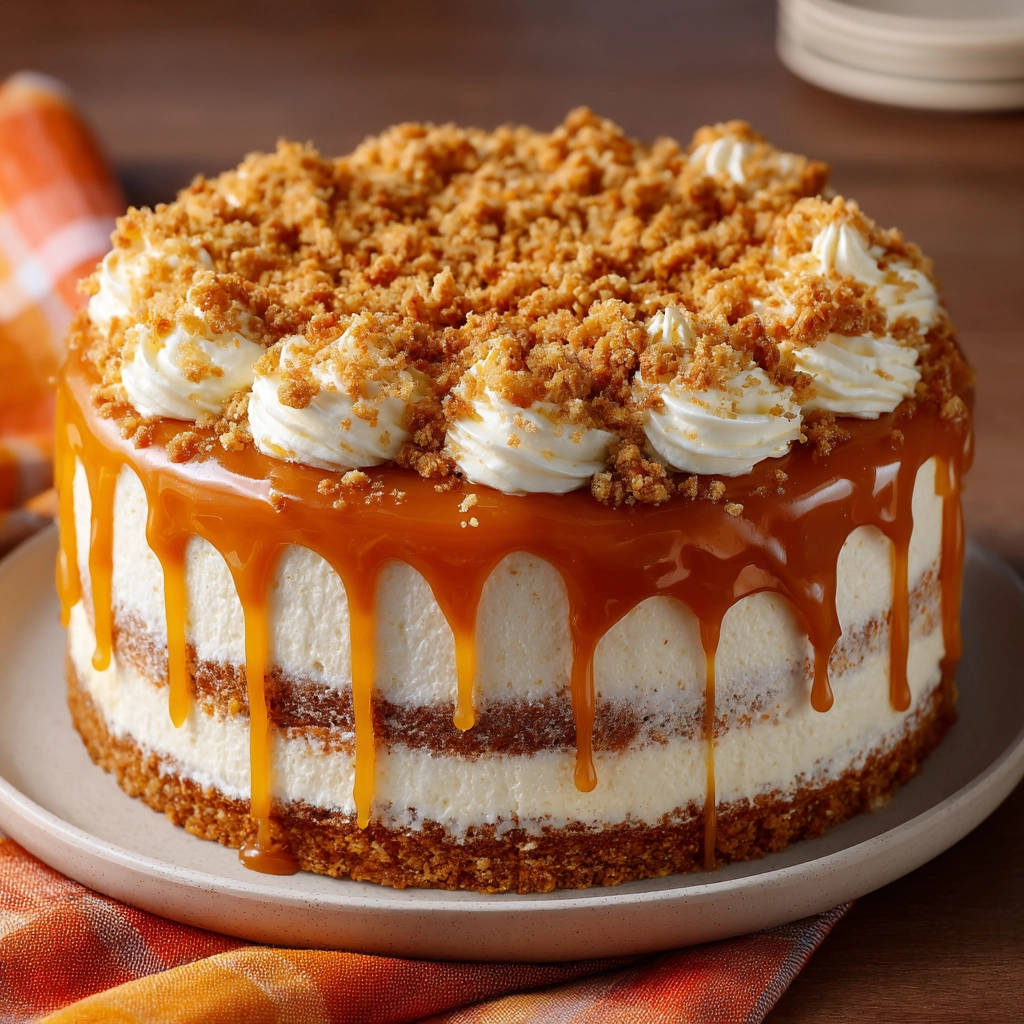
This isn’t just any layered dessert; it’s a harmonious blend of textures and flavors. Imagine a buttery, crunchy graham cracker crust, topped with a thick, cloud-like vanilla cream cheese filling, a whisper-thin layer of soft cake, more creamy filling, and finally, draped in rich caramel sauce and topped with more glorious crumbs and fluffy whipped cream. It’s pure dessert heaven, and the best part? The filling stays put!
Reasons This Caramel Crumb Cream Cake is a Keeper
Why should this recipe become your go-to for show-stopping, no-stress layered cakes? Let me count the ways:
- Say Goodbye to Runny Filling: This recipe’s secret is a simple, foolproof method using gelatin that ensures your cream filling is perfectly set, offering clean slices without any mess.
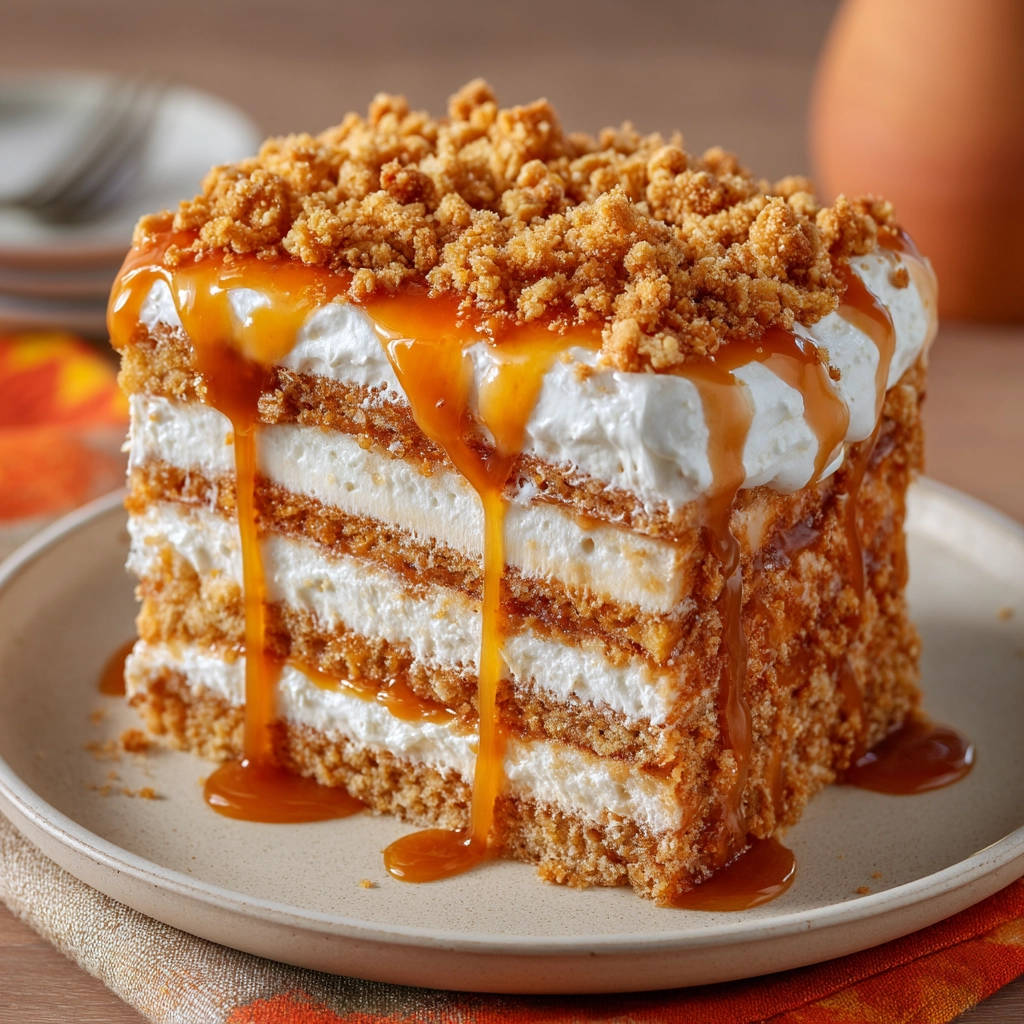
- Texture Perfection: You get the satisfying crunch of the graham cracker crust and topping, the smooth, rich cream filling, the tender cake layer, and the gooey caramel drip. It’s a textural masterpiece.
- Caramel Lover’s Dream: Generous amounts of luscious caramel sauce are woven throughout and poured over the top, delivering that irresistible sweet and slightly salty flavor.
- Relatively Easy to Make: While it has a few components, none are particularly complex. The chilling time does most of the work!
- Impressive Presentation: This cake looks absolutely stunning with its caramel drip and crumb topping, making it perfect for celebrations, holidays, or just because!
Gathering Your Ingredients for This Dreamy Dessert
Creating this spectacular cake starts with gathering the right components. Each ingredient plays a vital role in building the layers of flavor and texture, ensuring that creamy filling holds its shape beautifully. Let’s break down what you’ll need:
For the Foundation and Crumbly Crown: The base of our cake is a classic graham cracker crust. Graham cracker crumbs provide that essential sandy, buttery texture. We bind them together with melted unsalted butter – using unsalted allows you to control the saltiness, ensuring it complements the sweet caramel. A touch of granulated sugar sweetens the crust just enough. For the signature “crumb,” you’ll need extra graham cracker crumbs or crushed cookies for sprinkling over the finished cake. This adds another layer of texture and visual appeal.
The Star: That Perfectly Set Creamy Filling: This is where the magic happens, preventing that dreaded ooze. You’ll need softened cream cheese, the backbone of the creamy texture and tangy flavor. Ensure it’s truly softened to room temperature for a lump-free filling. Powdered sugar sweetens and helps achieve a smooth consistency. Pure vanilla extract adds warmth and classic dessert flavor. Cold heavy cream is whipped to create a light and airy base for the filling. The secret weapon is unflavored gelatin powder, which, when properly dissolved in hot water, provides the necessary structure to keep the filling firm even at room temperature.
The Optional Heart: A thin round cake layer is included in this recipe (and often shown in pictures). While optional, it adds another dimension and makes the dessert feel more like a traditional layered cake. You can use a store-bought plain cake layer or make a simple homemade one, cut to fit your pan.
The Irresistible Finish: Topping it all off requires more delights. A generous amount of prepared caramel sauce is essential for the drizzle and top layer. You can use your favorite store-bought caramel or make your own if you prefer. For the finishing flourish, beat cold heavy cream with powdered sugar to make a simple, fluffy whipped cream.
Here’s a complete list for your shopping trip:
- For the Crust and Topping:
- 2 cups graham cracker crumbs
- 1/2 cup melted unsalted butter
- 1/4 cup granulated sugar
- 1 cup extra graham cracker crumbs or crushed cookies for topping
- For the Filling:
- 16 ounces cream cheese, fully softened at room temperature
- 1/2 cup powdered sugar
- 1 teaspoon vanilla extract
- 2 cups heavy cream, very cold
- 2 teaspoons unflavored gelatin powder
- 1/4 cup hot water
- For the Cake Layer:
- One thin round cake layer (store-bought or homemade), cut to fit your 9-inch springform pan (optional)
- For the Topping and Drip:
- 1 and 1/2 cups prepared caramel sauce
- 1 cup heavy cream for whipped cream, very cold
- 1/4 cup powdered sugar for whipped cream
Crafting Your Caramel Crumb Cream Cake: Step-by-Step
Ready to build this masterpiece? Follow these detailed steps to ensure every layer is perfect, especially that crucial, non-runny filling.
Create the Sturdy Base: Start by making the graham cracker crust. In a medium bowl, combine the 2 cups of graham cracker crumbs with the 1/2 cup of melted butter and 1/4 cup of granulated sugar. Stir everything together until the crumbs are evenly moistened by the butter. The mixture should resemble wet sand and hold together when you squeeze a bit in your hand. Pour this mixture into the bottom of a 9-inch springform pan. Use the bottom of a glass or a flat measuring cup to firmly press the crumb mixture into an even layer across the base. Compact it as much as possible – a tight crust is less likely to crumble when sliced. Pop this crust into the refrigerator to chill and firm up while you work on the filling. This initial chill time is important for setting the butter and sugar binder.
Activate the Setting Power: This step is critical for preventing a runny filling! Measure 2 teaspoons of unflavored gelatin powder into a small heatproof bowl. Sprinkle the powder evenly over 1/4 cup of hot water. The water should be hot enough to dissolve the gelatin, around 100-115°F (not boiling). Immediately whisk or stir vigorously until the gelatin powder is completely dissolved. You shouldn’t see any granules floating or settled at the bottom. If you do, gently heat it slightly (a few seconds in the microwave or over a double boiler) and stir again until clear. Set this dissolved gelatin aside to cool slightly for a few minutes while you prepare the cream cheese base. It needs to cool so it doesn’t curdle the cream cheese, but don’t let it sit too long and start to set up – you want it still liquid and pourable.
Whip Up the Creamy Core: In a large mixing bowl, place your softened cream cheese (it should be soft enough to easily dent with your finger). Add the 1/2 cup of powdered sugar and the 1 teaspoon of vanilla extract. Beat this mixture with an electric mixer (handheld or stand mixer) on medium speed until it’s completely smooth and creamy. Scrape down the sides and bottom of the bowl to ensure no lumps of cream cheese remain. You want a uniform, airy base.
Create the Airy Fold: In a separate, clean bowl (preferably chilled!), pour the very cold heavy cream (2 cups). Beat the cream with an electric mixer on high speed until stiff peaks form. This means when you lift the beater out of the cream, the peaks stand up straight without drooping. Be very careful not to overbeat, as this can quickly turn whipped cream into butter!
Gently Combine the Bases: Now, it’s time to bring the creamy components together. Take about one-third of the whipped cream and add it to the cream cheese mixture. Gently fold it in using a rubber spatula until mostly combined. Then add the remaining whipped cream in two batches, folding gently after each addition until everything is just incorporated. The key here is not to overmix. Overmixing will deflate the whipped cream and make your filling less light and potentially softer. Stop folding as soon as you see no more streaks of plain cream cheese.
Integrate the Secret Weapon: This is the step that guarantees a firm filling! Take your slightly cooled, dissolved gelatin solution. With the electric mixer running on low speed (or whisking gently by hand), slowly and steadily pour the liquid gelatin in a thin stream into the cream cheese and whipped cream mixture. Continue to mix or whisk gently for just 20-30 seconds until you are absolutely certain the gelatin is thoroughly incorporated throughout the entire filling. Work relatively quickly but gently to ensure even distribution; you don’t want pockets of unset filling. This step ensures the gelatin’s setting power is distributed throughout the mixture, giving you that beautiful, sliceable result.
Layer Your Creation: Retrieve your chilled graham cracker crust from the refrigerator. Carefully pour about half of the prepared filling mixture over the crust, spreading it gently into an even layer. If you are using the optional thin cake layer, carefully place it centered on top of this first layer of filling. Then, pour the remaining filling mixture over the cake layer (or directly onto the first layer if omitting the cake). Gently smooth the top surface of the filling with your spatula.
Allow the Magic to Happen: Cover the springform pan loosely. Plastic wrap is fine, or if your pan came with a lid, use that. Place the covered cake back into the refrigerator. This is the crucial setting time. It needs to chill for at least 4-6 hours, but for the best, most reliable result, leaving it overnight is highly recommended. Don’t rush this! The gelatin needs ample time in the cold environment to fully set the filling. You’ll know it’s ready when the top surface is firm and doesn’t yield when gently touched.
Prepare for the Grand Reveal & Drip: Once the cake is completely set and firm, it’s time to decorate! Carefully unlatch and remove the springform ring. If you encounter any resistance, you can gently warm the sides of the pan with a warm, damp towel for just a moment to help release it. Gently warm your prepared caramel sauce if needed; it should be fluid enough to drizzle but not so hot it melts the filling. You can warm it gently on the stovetop or in the microwave in short bursts, stirring between. Pour the warmed caramel over the top outer edge of the cake, allowing it to cascade down the sides in appealing drips. Then, pour more caramel onto the top surface of the cake, spreading it slightly to cover the top filling layer.
Whip the Finishing Touch: In a clean bowl, pour the remaining 1 cup of very cold heavy cream. Add the 1/4 cup of powdered sugar. Beat with an electric mixer until stiff peaks form. This whipped cream will be used for decoration.
Add the Final Flourishes: Transfer the whipped cream to a piping bag fitted with your favorite tip, or simply use a spoon to dollop mounds of whipped cream around the top edge of the cake, perhaps over the caramel drips. Take your extra graham cracker crumbs or crushed cookies (the 1 cup set aside) and sprinkle them generously over the top surface of the cake, letting some fall onto the whipped cream dollops as well. This adds a beautiful visual contrast and that extra crumbly texture.
Serve and Enjoy: Your stunning Caramel Crumb Cream Cake is ready! Keep it refrigerated until just before you’re ready to slice and serve. Use a sharp knife dipped in hot water and wiped clean between slices for the cleanest cuts.
Tips for Perfect Caramel Crumb Cream Cake Every Time
Making this cake is straightforward, but a few insider tips can elevate it from great to absolutely phenomenal:
- Cream Cheese Temperature is Key: Seriously, ensure your cream cheese is fully softened to room temperature. Cold cream cheese will result in a lumpy filling, no matter how much you beat it.
- Chill Your Tools: For the quickest and fluffiest whipped cream, chill your mixing bowl and beaters in the freezer for 10-15 minutes before whipping.
- Gelatin Gurus: Make sure the gelatin is completely dissolved in the hot water. Any undissolved granules will result in grainy spots in your filling. Also, don’t let the dissolved gelatin sit too long before incorporating it, or it will start to set in the bowl.
- Don’t Rush the Chill: The 4-6 hours is a minimum, but overnight chilling truly provides the best, firmest set. Plan accordingly!
- Caramel Consistency: If your store-bought caramel is too thick, warm it gently, a tablespoon of milk or cream stirred in can help reach the perfect drizzling consistency.
- Crumb Alternatives: While graham crackers are classic, feel free to experiment with other cookies for the topping crumb! Vanilla wafers, shortbread, or even crushed speculoos cookies could add a fun twist. If you loved making the base, you might enjoy trying other crumb-based desserts like our apple cinnamon crumb cake.
Your Caramel Crumb Cream Cake Questions Answered (FAQ)
Can I use homemade caramel sauce?
Absolutely! Using homemade caramel sauce will add another layer of depth and richness to this cake. Just ensure it’s cooled slightly but still pourable before drizzling. If you enjoy working with caramel, you might also love our Caramel Swirl Cookie Bars!
What if my filling is still runny after chilling?
The most common culprit is either the gelatin wasn’t fully dissolved, or it wasn’t evenly incorporated into the mixture. Ensure the gelatin is completely liquid and pour it in slowly while gently mixing to distribute it throughout the entire filling base. Also, double-check your chilling time – sometimes it just needs a bit longer.
Is the cake layer mandatory?
No, the cake layer is entirely optional. The filling and crust are fantastic on their own! Omitting the cake layer essentially makes this a decadent no-bake cream tart or cheesecake. If you’re a fan of no-bake creamy desserts, you might also want to check out our No-Bake Cookie Butter Dessert or Mini Cheesecakes.
How far in advance can I make this cake?
You can prepare the entire cake (including decoration) up to 1-2 days in advance. Keep it covered loosely in the refrigerator. The crust might soften slightly over time, but the filling will remain perfectly set.
Can I use different types of cookies for the crust or topping?
Yes! While graham crackers are traditional, vanilla wafers, chocolate cookies (like Oreos, with the filling removed), or shortbread cookies make excellent alternatives for both the crust and the extra crumb topping. Just process them into fine crumbs.
What’s the best way to slice this cake?
For clean slices that show off the layers, use a sharp knife. Dip the knife into a tall glass of hot water before each cut, then wipe it dry with a paper towel. This helps the warm, clean blade glide through the set filling and crust without dragging.
Enjoy Your Homemade Caramel Crumb Cream Cake!
There you have it – the secret to a stunning, perfectly set Caramel Crumb Cream Cake that will have everyone asking for seconds (and maybe begging for your secret!). This dessert is truly a showstopper, combining rich caramel, tangy cream cheese, crunchy crumbs, and a smooth, firm texture that holds its shape beautifully. It’s worth every moment of chilling time!
Give this recipe a try for your next special occasion, or just because you deserve a truly spectacular dessert. Don’t forget to come back and leave a comment below to let me know how yours turned out! Happy baking (and chilling!)
Caramel Crumb Cream Cake

Ingredients
- For the Crust and Topping:
- 2 cups graham cracker crumbs
- 1/2 cup melted unsalted butter
- 1/4 cup granulated sugar
- 1 cup extra graham cracker crumbs or crushed cookies for topping
- For the Filling:
- 16 ounces cream cheese softened
- 1/2 cup powdered sugar
- 1 teaspoon vanilla extract
- 2 cups heavy cream cold
- 2 teaspoons unflavored gelatin powder
- 1/4 cup hot water
- For the Cake Layer:
- One thin round cake layer (store-bought or homemade) cut to fit your pan (optional, but looks present in image)
- For the Topping and Drip:
- 1 and 1/2 cups prepared caramel sauce
- 1 cup heavy cream for whipped cream
- 1/4 cup powdered sugar for whipped cream
Directions
- Make the Crust: In a bowl, combine 2 cups graham cracker crumbs, 1/2 cup melted butter, and 1/4 cup granulated sugar. Press mixture firmly into the bottom of a 9-inch springform pan. Chill in the refrigerator while preparing the filling.
- Prepare Gelatin: In a small bowl, sprinkle gelatin powder over 1/4 cup hot water. Stir immediately until gelatin is completely dissolved and no granules remain. Set aside to cool slightly, but do not let it set. This is key to the filling setting firmly.
- Make Filling Base: In a large bowl, beat softened cream cheese, 1/2 cup powdered sugar, and 1 teaspoon vanilla extract until smooth and creamy.
- Whip Cream: In a separate bowl, beat cold heavy cream until stiff peaks form. Be careful not to overbeat.
- Combine Filling: Gently fold the whipped cream into the cream cheese mixture until just combined. Do not overmix.
- Incorporate Gelatin: Slowly pour the slightly cooled, dissolved gelatin into the cream cheese and whipped cream mixture while gently folding or whisking until thoroughly incorporated. Work quickly but gently to ensure it is evenly distributed. This step ensures your filling sets properly and isn’t runny.
- Assemble Cake: Pour about half of the filling mixture over the chilled crust in the springform pan. If using, place the thin cake layer on top of the filling. Pour the remaining filling mixture over the cake layer.
- Chill: Cover the pan loosely and refrigerate for at least 4-6 hours, or preferably overnight, until the filling is completely set and firm to the touch. Proper chilling time is essential for the gelatin to work.
- Decorate: Once the cake is set, carefully remove the springform ring. Gently warm the caramel sauce if needed so it drizzles easily. Pour caramel over the top edge of the cake, allowing it to drip down the sides. Pour some caramel onto the top surface as well.
- Make Whipped Cream Topping: In a clean bowl, beat 1 cup heavy cream with 1/4 cup powdered sugar until stiff peaks form.
- Finish Cake: Pipe or dollop the whipped cream around the top edge of the cake. Sprinkle the extra graham cracker crumbs or crushed cookies over the top of the cake and on the whipped cream dollops.
- Serve: Keep cake refrigerated until ready to serve.