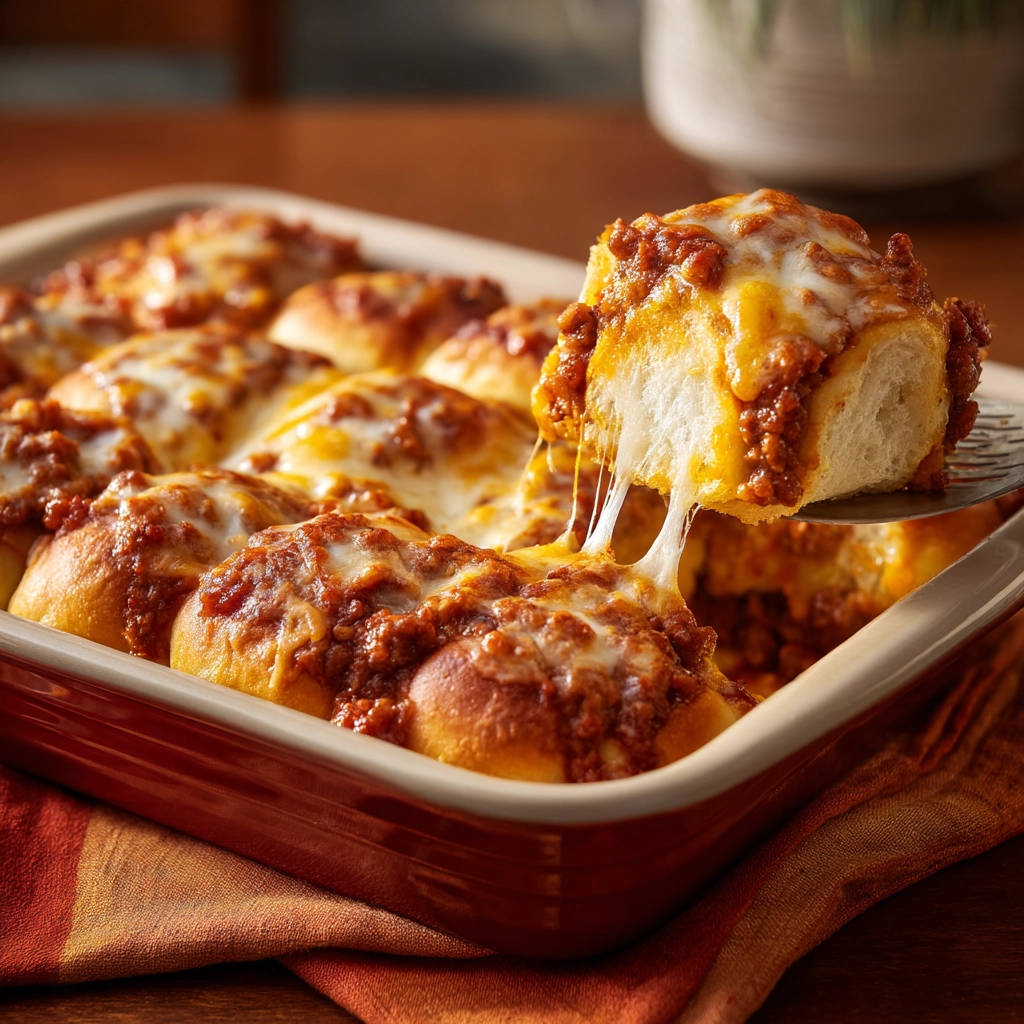
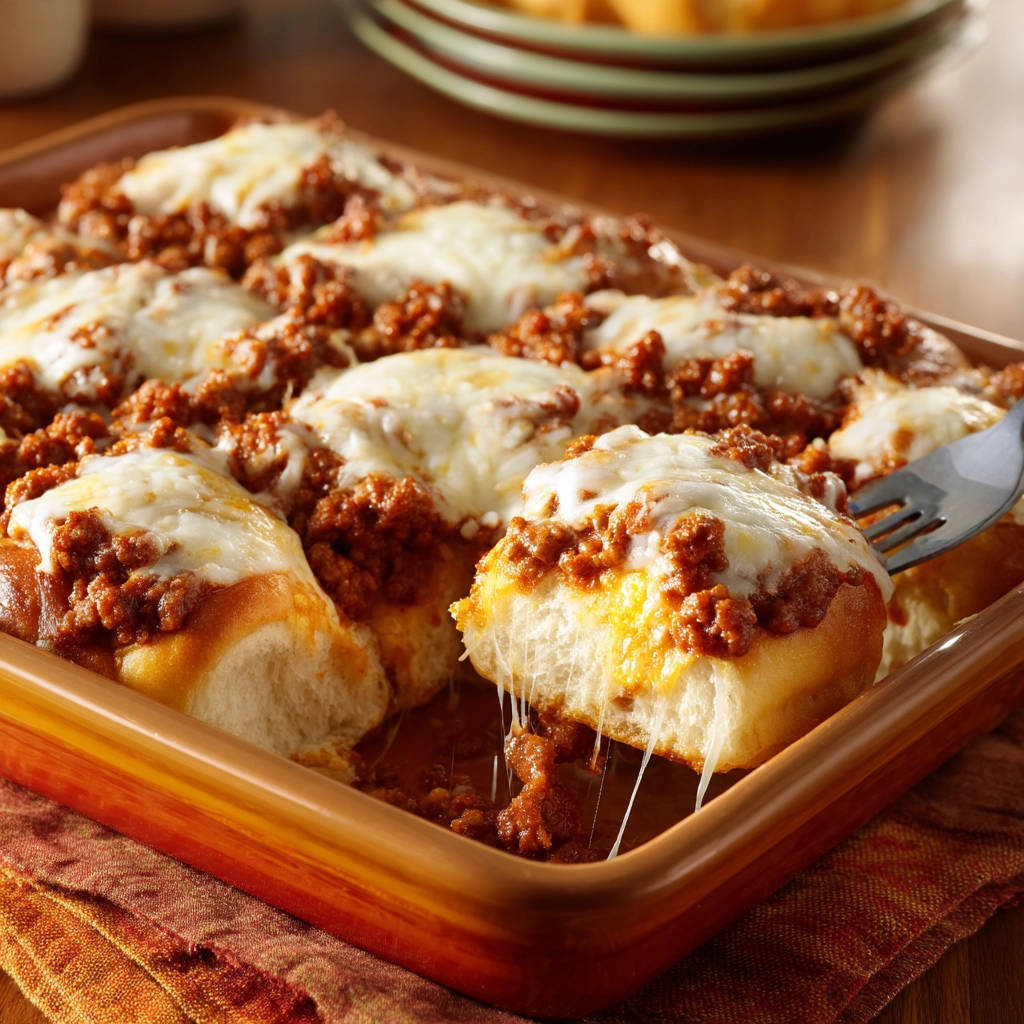
Oh, the heartbreak! You pull a beautiful, bubbly pan of savory rolls from the oven, filled with delicious meat and cheese, only to discover… a soggy bottom. It’s a common kitchen woe that can really put a damper on an otherwise perfect meal. We’ve all been there, right? That disappointing moment when the bread base, meant to be a cozy vessel for flavor, turns into a sad, wet mess.
But what if I told you there’s a simple trick to banish the soggy bottom blues forever when making Cheesy Baked Meat Rolls? It changed my baking game completely, and I’m so excited to share it with you. This recipe is not only incredibly easy and packed with comforting flavor, but it guarantees you’ll get perfectly textured rolls every single time.
Get ready for a crowd-pleasing dish that’s perfect for dinner, parties, or game day. Let’s dive into how to make these glorious, non-soggy, cheesy beef rolls!
Why You’ll Absolutely Love These Cheesy Baked Meat Rolls
Beyond the triumphant avoidance of the dreaded soggy bottom, there are so many reasons why these cheesy baked meat rolls will become a staple in your recipe collection:
- Foolproof Technique: The secret is simple and makes a huge difference in the final texture.
- Ultimate Comfort Food: Warm bread, hearty meat sauce, and melted cheese? It’s pure cozy deliciousness.
- Quick to Assemble: Once the meat mixture is prepped, assembly is lightning fast.
- Family Favorite: Kids and adults alike devour these. They’re perfect for busy weeknights.
- Versatile: Easily adaptable with different cheeses or even types of ground meat.
They take all the things you love about a meat sauce and a bread roll and combine them into one incredible, easy-to-eat package. Trust me, this method is a game-changer!
Gathering Your Ingredients for the Perfect Cheesy Baked Meat Rolls
One of the best things about these savory meat rolls is that they require mostly pantry staples. You likely have many of these items on hand already, making this a fantastic spur-of-the-moment meal idea. The magic comes from combining simple components to build layers of rich, comforting flavor.
Here’s what you’ll need, along with a little bit about why each ingredient plays a crucial role:
- Ground Beef: We start with one pound of ground beef. I typically use 80/20 or 85/15 for a good balance of flavor and texture, but you can certainly opt for leaner ground beef if you prefer. Just be sure to drain off any excess grease after browning.
- Small Onion & Garlic: These are the foundational aromatics that build depth in our meat sauce. A small chopped onion cooked until softened, followed by fragrant minced garlic, creates a sweet and savory base for the tomatoes and meat.
- Crushed Tomatoes & Tomato Paste: A 15-ounce can of crushed tomatoes provides the bulk of our sauce, bringing that essential tomato tang and moisture. The addition of 1/4 cup of tomato paste is absolutely key here. Tomato paste is concentrated tomato flavor, but more importantly for our mission, it’s a thickening powerhouse! It helps achieve the necessary consistency to prevent the rolls from becoming waterlogged.
- Dried Italian Seasoning, Salt, and Black Pepper: This classic blend of herbs like oregano, basil, thyme, and rosemary adds that familiar, comforting Italian-inspired taste that pairs perfectly with beef and tomato. Salt and pepper, of course, are essential for bringing out all those flavors and seasoning the mixture properly.
- Dinner Rolls: You’ll need a 12-count package of dinner rolls. Soft rolls work best as they soak up just a little bit of that thickened sauce without falling apart. Whether you use pull-apart rolls or individual ones, the method works the same.
- Shredded Mozzarella or Italian Blend Cheese: Two cups of shredded cheese are piled high for that glorious, bubbly, melted topping. Mozzarella gives you that classic cheese pull, while an Italian blend (usually containing mozzarella, provolone, parmesan, and romano) adds extra layers of savory flavor. Use what you love, and don’t be shy with it!
Gathering everything before you start cooking makes the process smoother and more enjoyable. Think of these ingredients as the building blocks for your non-soggy success story!
Crafting Your Cheesy Baked Meat Rolls: Step-by-Step Perfection
Ready to turn these simple ingredients into magic? Follow these steps carefully, paying special attention to that crucial thickening stage, and you’ll be rewarded with the most delightful cheesy baked meat rolls.
- Prepare Your Baking Zone: Start by preheating your oven to 375 degrees F (190 degrees C). This ensures the oven is at the correct temperature when the rolls go in, which is important for achieving that golden, bubbly finish without over-saturating the bread base. Grab a 9×13 inch baking dish and set it aside; you won’t need to grease it.
- Brown the Beefy Base: Heat a large skillet over medium heat. Add your pound of ground meat and brown it, breaking it up with a spoon as it cooks. You want it nicely browned, not just grey. Once cooked through, drain off any excess grease. Removing the fat is important for both texture and flavor, preventing the final dish from being greasy.
- Build Flavor with Aromatics: Add the chopped small onion to the skillet with the browned meat. Cook, stirring occasionally, for about 5 minutes until the onion becomes soft and translucent. This softens its bite and brings out its natural sweetness. Next, add the minced garlic and cook for just 1 minute more. Garlic cooks quickly and can burn easily, so watch it closely until you smell its wonderful fragrance.
- Introduce the Tomatoes and Seasoning: Stir in the 15-ounce can of crushed tomatoes, the 1/4 cup of tomato paste, and the tablespoon of dried Italian seasoning. Add salt and black pepper to taste. Stir everything together until well combined. Bring this mixture to a gentle simmer.
- The Secret to No Soggy Bottoms: THICKEN THAT SAUCE! This is the absolute most critical step. Once the sauce is simmering, reduce the heat to low and let it simmer, uncovered, for at least 15-20 minutes. You MUST stir occasionally to prevent sticking. The goal here is to significantly thicken the meat mixture and evaporate excess liquid. What you’re looking for is a thick, almost paste-like consistency – not a watery sauce. Think of it as concentrating the flavor and reducing the potential for the bread to soak up too much moisture. Once thickened, remove the skillet from the heat and let the mixture cool slightly while you prepare the rolls.
- Arrange the Rolls: Place the 12 dinner rolls in a single layer in your 9×13 inch baking dish. If you’re using pull-apart rolls, you can keep them connected; the meat mixture will hold them together nicely. If they are individual rolls, arrange them close together so they fill the dish snugly.
- Spoon on the Thickened Meat Mixture: Now, take that beautifully thickened meat mixture and spoon it evenly over the tops of the rolls. Make sure you’re getting plenty of the meat and thickened sauce, not just liquid (there shouldn’t be much liquid left if you simmered properly!). Use the back of the spoon or a spatula to gently spread it across the rolls. If your rolls have natural slices or gaps, you can gently push some of the mixture into those spots for maximum flavor distribution.
- Generously Cheese It Up: Sprinkle the shredded cheese generously over the entire top of the meat mixture and rolls. Cover every nook and cranny! This cheese layer creates a protective barrier and, of course, provides that irresistible bubbly, gooey topping we all crave.
- Bake to Golden Perfection: Place the baking dish in your preheated oven. Bake for 15-20 minutes. You’ll know they’re ready when the rolls are golden brown around the edges and the cheese is completely melted, bubbly, and perhaps even slightly browned in spots. The relatively quick bake time helps heat everything through and melts the cheese without giving the rolls too much time to absorb excessive moisture.
- Rest Before Serving: Once out of the oven, let the cheesy baked meat rolls cool for just a few minutes before serving. This brief rest allows the sauce to settle further and prevents you from burning your mouth. Then, grab a roll (or two!) and enjoy your non-soggy success!
Following these steps, especially the simmering stage, is the key to achieving the perfect texture and flavor balance in your cheesy baked meat rolls.
Tips for Perfect Cheesy Baked Meat Rolls Every Time
Making these savory meat rolls is straightforward, but a few extra tips can elevate your results and make the process even smoother:
- Don’t Rush the Simmer: Seriously, I cannot stress this enough! The 15-20 minutes of simmering the meat sauce is the secret ingredient to avoiding that soggy bottom. Taste the sauce after simmering – the flavors will be concentrated and delicious.
- Meat Alternatives: While the recipe calls for ground beef, you can easily substitute it with ground turkey or even ground chicken. Just ensure you cook it through and drain any fat. You might need to add a little oil if using very lean meat.
- Cheese, Please: Mozzarella and Italian blend are great, but feel free to experiment! A sharp cheddar, Monterey Jack, or a spicy pepper jack could add interesting twists to your cheesy baked meat rolls.
- Add Veggies: Want to sneak in some extra nutrition? Finely chopped bell peppers, mushrooms, or even grated zucchini (make sure to squeeze out excess moisture) can be added with the onion and garlic.
- Herb Power: Feel free to amp up the herbs! A sprinkle of fresh parsley or basil over the top after baking adds freshness and color.
- Make Ahead: You can make the meat sauce up to 2-3 days in advance and store it in an airtight container in the refrigerator. When ready to bake, arrange the rolls, spoon on the cooled meat mixture, add cheese, and bake as directed, possibly adding a few extra minutes to account for the cold filling.
- Freezing: The cooked meat mixture can be frozen for up to 3 months. Thaw in the refrigerator overnight before using. I don’t recommend freezing the assembled, unbaked rolls, as the bread texture can suffer.
- Roll Choice: Any soft dinner roll will work, but those slightly denser rolls tend to hold up particularly well against the thickened sauce.
What to Serve With Your Cheesy Baked Meat Rolls
These hearty cheesy baked meat rolls can definitely stand on their own, but they pair wonderfully with a variety of simple side dishes to make a complete meal. A fresh, crisp green salad with a light vinaigrette is always a great choice to balance the richness.
Looking for something more substantial? Our recipe for Golden Roasted Potatoes would be a fantastic match, offering a crispy counterpoint to the soft rolls. Or, if you’re craving more cheesy goodness, a small side of our Extra Cheesy Mac and Cheese could turn this into an ultimate comfort food feast.
Simple steamed vegetables like broccoli or green beans also make for a quick and healthy side that complements the savory meat rolls without overpowering them.
Your Cheesy Baked Meat Rolls Questions Answered (FAQ)
Got questions? I’ve got answers! Here are some common inquiries about making these delicious cheesy baked meat rolls:
Can I use different types of ground meat?
Absolutely! While ground beef is classic and provides a rich flavor, you can easily substitute it with ground turkey or chicken for a lighter option. Ensure it’s cooked through and drained well. The cook time for the sauce may need a slight adjustment depending on how much moisture the different meat releases, but the key is still to simmer it down to a thick consistency.
Is the simmering step really that important?
Yes, yes, a thousand times YES! The simmering step is the single most important factor in preventing soggy bottoms. Reducing the liquid in the meat sauce ensures that the bread rolls don’t get waterlogged during baking. If your sauce is too thin, you will end up with soggy rolls, even with the short bake time. Don’t skip or shorten this step!
Can I add vegetables to the meat mixture?
Definitely! Finely diced vegetables like bell peppers, mushrooms, or even carrots can be added with the onion and garlic in step 3. They will add extra flavor and nutrition. Just make sure they are cooked until softened before adding the tomatoes. If adding something like zucchini, be sure to drain or squeeze out any excess moisture before adding it to the pan.
What kind of dinner rolls work best?
Soft, slightly dense dinner rolls or slider buns work wonderfully. Avoid anything overly crusty or airy, as they might not hold up as well to the topping. Standard white or whole wheat dinner rolls from the bakery or grocery store are perfect.
Can I assemble these ahead of time?
You can make the meat mixture entirely ahead of time and store it in the fridge. However, I recommend assembling the rolls and baking them just before serving for the very best texture, especially the non-soggy bottom. If you need to prep slightly ahead, you could arrange the rolls in the dish up to an hour or two before adding the cooled meat mixture and cheese and baking.
How do I reheat leftovers?
Leftovers can be reheated gently in the microwave, though the bread might lose some of its firm texture. For best results, reheat them in a toaster oven or regular oven at a lower temperature (around 300-325°F or 150-160°C) until heated through and the cheese is bubbly again. This helps revive the texture of the roll.
Enjoy Your Homemade Cheesy Baked Meat Rolls!
There you have it – the secret weapon against soggy bottoms and a recipe for incredibly satisfying cheesy baked meat rolls. They’re the perfect blend of hearty, cheesy, and comforting, all wrapped up in a soft, perfectly baked roll.
Give this recipe a try the next time you’re craving something warm and savory. I bet they’ll disappear fast! If you make them, be sure to leave a comment below and let me know what you think. Happy baking!
Cheesy Baked Meat Rolls

Ingredients
- 1 pound ground beef
- 1 small onion chopped
- 2 cloves garlic minced
- 15 ounce can crushed tomatoes
- 1/4 cup tomato paste
- 1 tablespoon dried Italian seasoning
- Salt and black pepper to taste
- 12 count package dinner rolls
- 2 cups shredded mozzarella cheese or Italian blend
Directions
- Preheat oven to 375 degrees F (190 degrees C).
- Brown ground meat in a large skillet over medium heat. Drain excess grease.
- Add chopped onion to the skillet and cook until softened, about 5 minutes. Add minced garlic and cook for 1 minute more until fragrant.
- Stir in crushed tomatoes, tomato paste, Italian seasoning, salt, and pepper. Bring to a simmer.
- This is key to avoiding the soggy bottom: Reduce heat to low and let the sauce simmer, uncovered, for at least 15-20 minutes, stirring occasionally, until it is significantly thickened and most excess liquid has evaporated. You want a thick, almost paste-like consistency for the meat mixture, not a watery sauce. Let cool slightly.
- Arrange the dinner rolls in a single layer in a 9×13 inch baking dish. If using pull-apart rolls, keep them connected. If using individual rolls, place them close together.
- Spoon the thickened meat mixture evenly over the tops of the rolls, making sure to distribute the meat and not just the liquid. Gently push some mixture into any natural gaps or slices in the rolls if desired.
- Sprinkle the shredded cheese generously over the top of the meat mixture and rolls.
- Bake for 15-20 minutes, or until the rolls are golden brown and the cheese is melted and bubbly.
- Let cool for a few minutes before serving. The slightly thickened sauce and quick bake time prevent the bottom from getting soggy while the cheese melts and everything heats through beautifully.