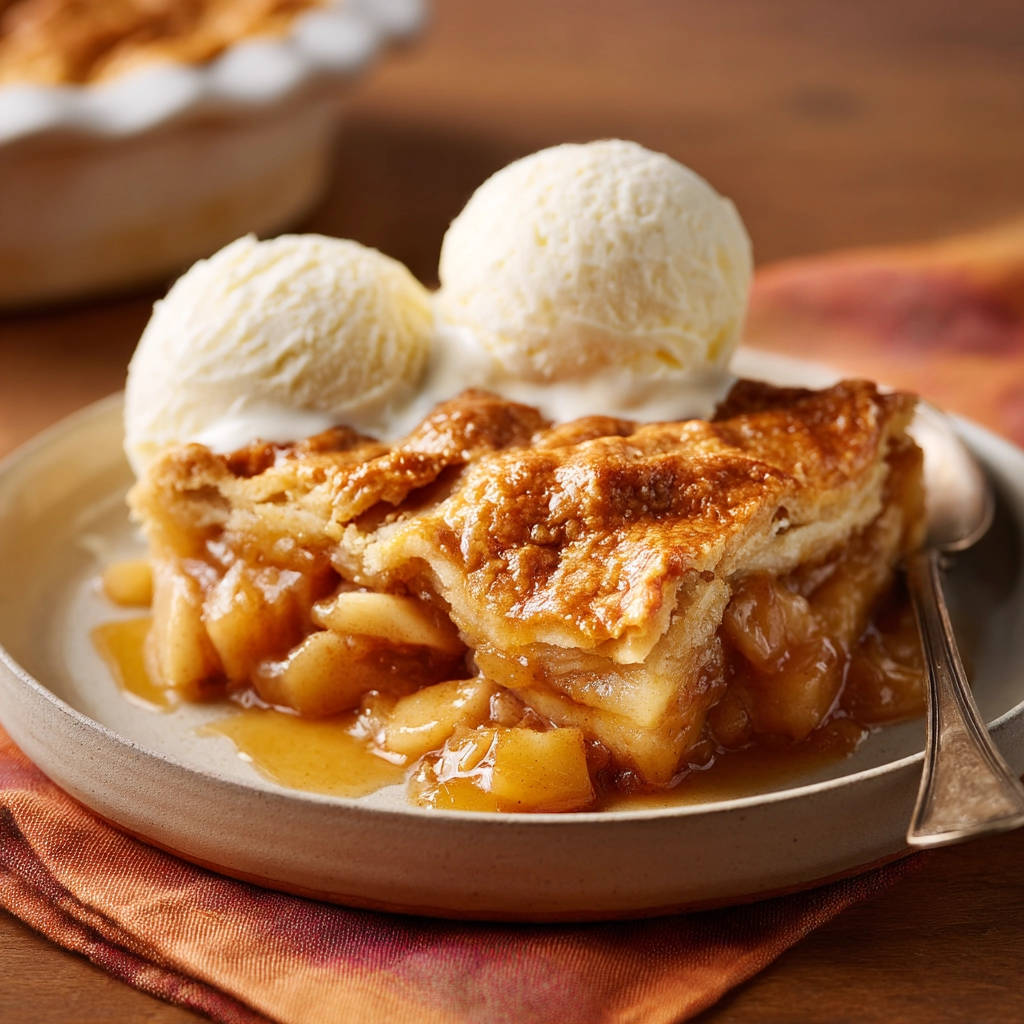
Oh, apple pie. Just saying the words conjures up images of cozy kitchens, crisp autumn days, and the sweet smell of cinnamon filling the air. A slice of warm, comforting Classic Apple Pie is pure happiness on a plate, isn’t it? It’s a dessert that feels like coming home.
However, let’s be honest. We’ve all been there. You pull a gorgeous, golden pie out of the oven, feeling like a baking superstar. You slice into it, anticipating that perfect forkful, only to discover… a soggy, uncooked bottom crust. Deflated much? I know I have been! That dreaded “soggy bottom” can ruin an otherwise perfect pie experience.
Years ago, I struggled with this too. My apple pies tasted great, but the bottom crust was always a gamble. Then, I learned a simple but powerful trick. A little adjustment in technique that changed everything. It’s not complicated, and it guarantees a beautifully crisp, golden bottom crust every single time. This is the secret to taking your homemade Classic Apple Pie Recipe from good to absolutely showstopping.
Ready to say goodbye to soggy bottoms forever and bake the apple pie of your dreams? Let’s dive in!
Why You’ll Fall in Love with This Apple Pie Recipe
This isn’t just another apple pie recipe; it’s a roadmap to apple pie success, particularly focusing on that elusive perfectly baked bottom crust. Here’s why this method will become your go-to:
- Guaranteed Crisp Bottom Crust: The star of the show! Our secret technique ensures a flaky, golden base that stands up to the juicy apple filling.
- Classic, Comforting Flavor: We use a perfect blend of apples and spices for that timeless, nostalgic taste everyone adores.
- Perfectly Set Filling: No runny mess here! We give the pie ample time to cool, allowing the filling to thicken beautifully.
- Crowd-Pleaser: Seriously, who doesn’t love a slice of warm apple pie? It’s the ultimate dessert for holidays, gatherings, or just a simple Sunday treat.
- Made with Love: Baking homemade pie feels like a special act of care. Sharing it with loved ones is even better!
Mastering this Classic Apple Pie recipe will give you confidence in the kitchen and earn you rave reviews.
Gathering Your Ingredients for Your Perfect Apple Pie
Creating a truly memorable apple pie starts with selecting the right components. While the list might look familiar, understanding the role each ingredient plays is key to achieving that perfect balance of flavor and texture.
Here’s what you’ll need, with a few notes to help you choose wisely:
- Double Pie Crust Recipe (for a 9-inch pie): You can use your favorite homemade recipe or a good quality store-bought crust. The trick we’re focusing on works with either! If you’re tackling pastry from scratch, ensure it’s well-chilled.
- 6-8 cups thinly sliced apples (about 2 pounds): The heart of the pie! A mix of apple varieties works best for complexity. Consider using a combination of sweet and tart apples like Granny Smith, Honeycrisp, Fuji, or Braeburn. Slicing them thinly (about 1/4 inch thick) ensures they cook evenly and compact nicely into the pie shell.
- 1/2 cup Granulated Sugar: Provides sweetness and helps create that bubbly, syrupy filling.
- 1/4 cup Packed Brown Sugar: Adds a deeper, richer sweetness with hints of caramel and molasses, complementing the apples beautifully. Using packed brown sugar is important for accurate measurement and moisture.
- 1/4 cup All-Purpose Flour or Cornstarch: This is your thickening agent. Either works, but cornstarch tends to create a clearer, glossy filling, while flour results in a slightly cloudier, more traditional texture. It helps absorb excess moisture from the apples and prevents a watery filling.
- 1 teaspoon Ground Cinnamon: The quintessential apple pie spice! Choose fresh, fragrant cinnamon for the best flavor.
- 1/4 teaspoon Ground Nutmeg: A pinch of nutmeg adds warmth and depth, pairing perfectly with the cinnamon. Freshly grated nutmeg offers the most intense flavor if you have it.
- 1 tablespoon Lemon Juice (optional, but recommended): A splash of lemon juice isn’t just about tartness; it brightens the apple flavor and helps prevent the apples from browning as you slice them. It’s a small addition that makes a big difference.
- 2 tablespoons Unsalted Butter, cut into small pieces: Dotting the top of the filling with butter adds richness and helps create little pockets of deliciousness within the cooked apples.
- 1 large egg, beaten (for egg wash): This creates a beautiful, golden-brown, slightly glossy finish on the top crust.
- 1 tablespoon Coarse Sugar (for topping): Sprinkling coarse sugar (like turbinado or sanding sugar) on top adds a lovely sparkle and a delightful crunchy texture to the crust.
- Vanilla Ice Cream (optional, for serving): The classic accompaniment! Serving warm pie with cold melting ice cream is pure bliss.
Having all your ingredients prepped and ready makes the baking process smooth and enjoyable. For those who love baking from scratch, mastering pie crust can be a rewarding step, much like perfecting easy fluffy biscuits or a crusty artisan loaf.
Baking Your Perfect Apple Pie: Step-by-Step
Now for the fun part – assembling and baking this masterpiece! Follow these steps closely, paying special attention to the key techniques that prevent that dreaded soggy bottom.
- Prepare for Success (and Crispiness!): The very first step is crucial. Preheat your oven to a hot 425 degrees F (220 degrees C). While it’s heating up, place a baking sheet on the lowest rack. This isn’t just any baking sheet; getting it hot before the pie goes in is THE secret weapon against soggy bottoms. The preheated sheet conducts heat directly to the bottom crust from the moment it enters the oven, helping it set quickly.
- Whip Up the Delicious Filling: In a spacious mixing bowl, gather your thinly sliced apples. Add the granulated sugar, brown sugar, your chosen thickener (flour or cornstarch), cinnamon, nutmeg, and the optional but highly recommended lemon juice. Use a large spoon or spatula to gently toss everything together until the apple slices are evenly coated in the sweet, spiced mixture. Avoid being too rough, as you don’t want to break up the apple slices.
- Lay the Foundation: Take one half of your double pie crust dough. On a lightly floured surface, roll it out into a circle large enough to fit your 9-inch pie plate with some overhang. Carefully transfer the rolled dough to the pie plate. Gently ease it into the bottom and up the sides, ensuring it’s snug. Use kitchen shears or a knife to trim away excess dough, leaving about a 1-inch border hanging over the edge of the plate.
- Fill ‘Er Up: Pour the prepared apple filling evenly into the bottom pie crust. The apples might mound slightly in the center, which is perfectly fine – they’ll soften and settle as they bake. Now, take those small pieces of unsalted butter and dot them randomly over the top of the apple filling. These will melt and distribute richness throughout the pie.
- Cap It Off: Roll out the second half of your pie crust dough, just like you did for the bottom crust. Carefully place this rolled-out dough directly over the apple filling. Trim the edges of this top crust, again leaving about a 1-inch overhang. Now, it’s time to seal the deal! Crimp the edges of the top and bottom crusts together all the way around the pie to create a neat, sealed edge. This prevents the filling from bubbling out. Before it goes in the oven, use a sharp knife to cut several vents (slits or shapes) in the top crust. These allow steam to escape during baking, preventing the crust from puffing up or cracking excessively.
- Add Shine and Sparkle: In a small bowl, whisk the large egg until it’s lightly beaten. Use a pastry brush to gently brush this egg wash over the entire top surface of the pie crust. This gives it a beautiful golden sheen as it bakes. Finally, sprinkle the coarse sugar evenly over the egg wash for added sparkle and a touch of sweet crunch.
- The Moment of Truth (and Crispiness!): This is where the magic happens. Carefully, and I mean carefully, transfer the assembled pie onto the already preheated baking sheet that’s been waiting on the lowest rack in your hot oven. Placing the pie directly on that hot surface is the key step that ensures your bottom crust bakes through properly and doesn’t turn soggy.
- Initial High Heat Blast: Bake the pie at the initial high temperature of 425 degrees F (220 degrees C) for the first 15 minutes. This high heat helps to quickly set the bottom crust and start the glorious process of the crust browning.
- Lower and Slow Cook: After the initial 15 minutes, reduce the oven temperature to 375 degrees F (190 degrees C). Continue baking for another 35-45 minutes. During this stage, the crust will continue to brown, and the apple filling will become tender and bubbly. Keep an eye on the top crust – if it starts to get too dark before the filling is done, you can loosely tent the pie with a piece of aluminum foil to shield it. You’ll know it’s ready when the crust is a beautiful golden brown and you see juices bubbling up through the vents.
- The Essential Cooling Period: I know it’s tempting, but this step is non-negotiable! Carefully remove the baked pie from the oven and place it on a wire rack to cool completely for at least 2-3 hours. This lengthy cooling time is crucial. It allows the hot, liquid apple filling to set up and thicken as it cools. Skipping this step is the main reason fillings can be runny when you cut into the pie. Patience is a virtue here!
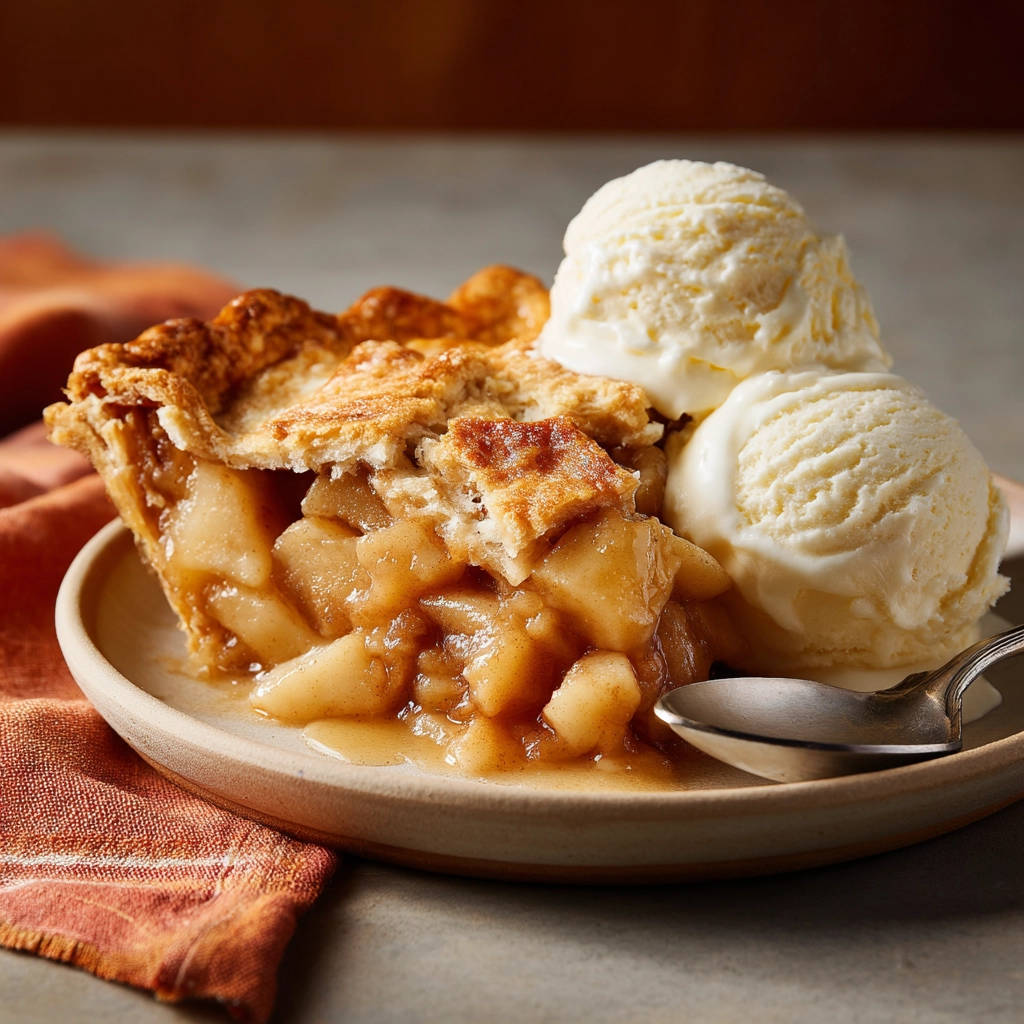
- Serve and Savor: Once the pie is properly cooled and the filling is set, you are ready to slice and serve! Enjoy it warm for the ultimate comfort experience. A scoop of vanilla ice cream is the perfect accompaniment, melting slightly into the warm, spiced apples. Pure heaven!
Following these steps, especially the hot baking sheet method, will ensure you achieve apple pie perfection with a gloriously crisp bottom crust.
Tips for Apple Pie Perfection Every Time
Even with a great recipe, a few extra tips can elevate your pie-baking game and troubleshoot common issues. Here are some pointers for your Classic Apple Pie:
- Choose the Right Apples: As mentioned earlier, a mix of apples is best. Granny Smith provides necessary tartness and holds its shape, while Honeycrisp, Fuji, or Gala add sweetness and soften nicely. Avoid apples that turn to mush, like Red Delicious.
- Don’t Skimp on Cooling Time: I know, I know, waiting is hard! But that 2-3 hour cooling period is non-negotiable for a well-set filling. If you cut too soon, the filling will spill out.
- Handle Dough Gently: If you’re making your own crust, avoid overworking the dough. This develops the gluten too much and results in a tough crust instead of flaky layers. Keep your dough cold! Chilling helps keep the fat solid, which melts during baking to create those flaky pockets.
- Prevent Edge Burn: If the crimped edges of your crust start browning too quickly during baking, you can use pie crust shields or loosely wrap the edges in strips of aluminum foil.
- Adjust Sweetness: Taste your apples! If they are very tart, you might add a tablespoon or two more sugar (granulated or brown) to the filling mixture.
- Flour vs. Cornstarch: If you prefer a really clear, glossy filling, use cornstarch. For a slightly cloudier, more traditional filling, use all-purpose flour. Both work equally well as thickeners.
These little details can make a big difference in the final outcome of your pie.
What to Serve With Your Classic Apple Pie
A warm slice of apple pie is delightful on its own, but there are classic pairings that make it even more special.
Of course, the absolute perfect partner is a scoop of good quality vanilla ice cream. The contrast between the warm, soft pie and the cold, creamy ice cream is simply unbeatable. Whipped cream is another lovely option, adding lightness and richness.
For those who love desserts, this classic dessert is wonderful on its own, but for an extra treat, serve it warm with a scoop of vanilla ice cream. If you’re a dessert lover, you might also enjoy our classic cherry cheesecake or mini cheesecakes. While typically a dessert, a slice of apple pie can be a wonderful sweet ending to a comforting meal, perhaps following a hearty beef stew or some tender creamy cheesy potatoes.
Your Classic Apple Pie Questions Answered (FAQ)
Got questions about baking the perfect apple pie? Here are some answers to common queries:
Can I use store-bought pie crust?
Absolutely! This recipe works beautifully with store-bought crusts. Just make sure you get a package that contains two crusts (a double pie crust) for a standard 9-inch pie. The key soggy-bottom trick still applies regardless of whether the crust is homemade or store-bought.
What are the best types of apples for apple pie?
The best pies use a mix! A combination of sweet apples (like Honeycrisp, Fuji, Gala) and tart apples (like Granny Smith, Mutsu) provides the best balance of flavor and texture. The tart apples help cut through the sweetness, while the sweet apples soften nicely. Using only one type can result in a pie that is too sweet, too tart, or too mushy.
Why is my apple pie filling runny?
The most common reasons for a runny filling are not using enough thickener (flour or cornstarch), slicing the apples too thickly (they release more juice and don’t cook down as much), or, most importantly, not allowing the pie to cool for long enough. That 2-3 hour cooling time lets the starches in the thickener work their magic and set the filling properly.
Can I make apple pie ahead of time?
Yes, you can! You can assemble the entire pie (steps 1-6), cover it tightly with plastic wrap, and refrigerate it for up to 24 hours before baking. You might need to add a few extra minutes to the baking time if baking from cold. You can also slice and mix the apple filling ingredients a few hours ahead of time and keep them covered in the fridge, adding the butter just before assembling.
How do I store leftover apple pie?
Store cooled apple pie loosely covered with plastic wrap or foil at room temperature for up to 2 days. For longer storage, refrigerate it for up to 4 days. You can gently rewarm individual slices in the oven or microwave.
Can I add other spices?
Certainly! While cinnamon and nutmeg are classic, you can add a pinch of ground allspice, ginger, or cardamom for extra warmth and complexity. Just don’t overpower the lovely apple flavor.
Enjoy Your Homemade Classic Apple Pie!
There’s truly nothing quite like the satisfaction of baking a beautiful, delicious pie from scratch, especially when you know that bottom crust is going to be perfectly crisp. This Classic Apple Pie recipe, with its simple trick for preventing sogginess, is designed to give you confidence and incredible results.
Baking should be a joy, and the reward of a slice of this warm, spiced apple pie makes every step worth it. I can’t wait for you to try it!
Give this recipe a try and let me know how it turns out in the comments below! Did the hot baking sheet trick work for you? What are your favorite apples to use? Happy baking!
Classic Apple Pie

Ingredients
- 1 recipe double pie crust (for a 9-inch pie)
- 6-8 cups thinly sliced apples (about 2 pounds)
- 1/2 cup granulated sugar
- 1/4 cup packed brown sugar
- 1/4 cup all-purpose flour or cornstarch
- 1 teaspoon ground cinnamon
- 1/4 teaspoon ground nutmeg
- 1 tablespoon lemon juice (optional, but recommended)
- 2 tablespoons unsalted butter, cut into small pieces
- 1 large egg, beaten (for egg wash)
- 1 tablespoon coarse sugar (for topping)
- Vanilla ice cream (optional, for serving)
Directions
- Preheat your oven to 425 degrees F (220 degrees C). This high initial heat is key to setting the bottom crust quickly and preventing sogginess. While the oven preheats, place a baking sheet on the lowest rack in the oven. Heating the baking sheet before placing the pie on it helps conduct heat directly to the bottom crust.
- In a large bowl, combine the sliced apples, granulated sugar, brown sugar, flour or cornstarch, cinnamon, nutmeg, and lemon juice (if using). Toss gently to coat the apples evenly.
- Roll out half of the pie crust dough and carefully place it in a 9-inch pie plate. Trim any excess dough, leaving about a 1-inch overhang.
- Pour the apple filling into the pie crust. Dot the top of the filling with the small pieces of butter.
- Roll out the second half of the pie crust dough. Place it over the apple filling. Trim the edges, leaving about a 1-inch overhang, and crimp the top and bottom crusts together to seal. Cut several vents in the top crust using a knife to allow steam to escape during baking.
- Brush the top crust with the beaten egg wash and sprinkle with coarse sugar for a beautiful golden finish and added crunch.
- Carefully place the assembled pie onto the preheated baking sheet in the oven. This is the simple but crucial step that helps ensure a crispy bottom crust.
- Bake for 15 minutes at 425 degrees F (220 degrees C).
- Reduce the oven temperature to 375 degrees F (190 degrees C) and continue baking for another 35-45 minutes, or until the crust is golden brown and the filling is bubbly. If the crust starts to brown too quickly, you can loosely tent the pie with aluminum foil.
- Remove the pie from the oven and let it cool on a wire rack for at least 2-3 hours before slicing. This allows the filling to set properly, preventing it from being too runny.
- Serve warm with a scoop of vanilla ice cream, if desired. Enjoy your perfect, non-soggy pie!