
Oh, cheesy bread. Just the thought brings a smile, doesn’t it? Warm, gooey cheese melting over soft, fragrant dough… it’s the ultimate comfort food side dish or snack. But let’s be honest, we’ve all been there. You follow a recipe, the bread looks beautiful, you take a bite, and… sigh… it’s heavy. Dense. Like a brick.
There’s nothing quite as disappointing as dense cheesy bread. It lacks that craveable, airy texture that makes the bakery versions so irresistible. I struggled with this for the longest time, trying recipe after recipe, each promising lightness but delivering density.
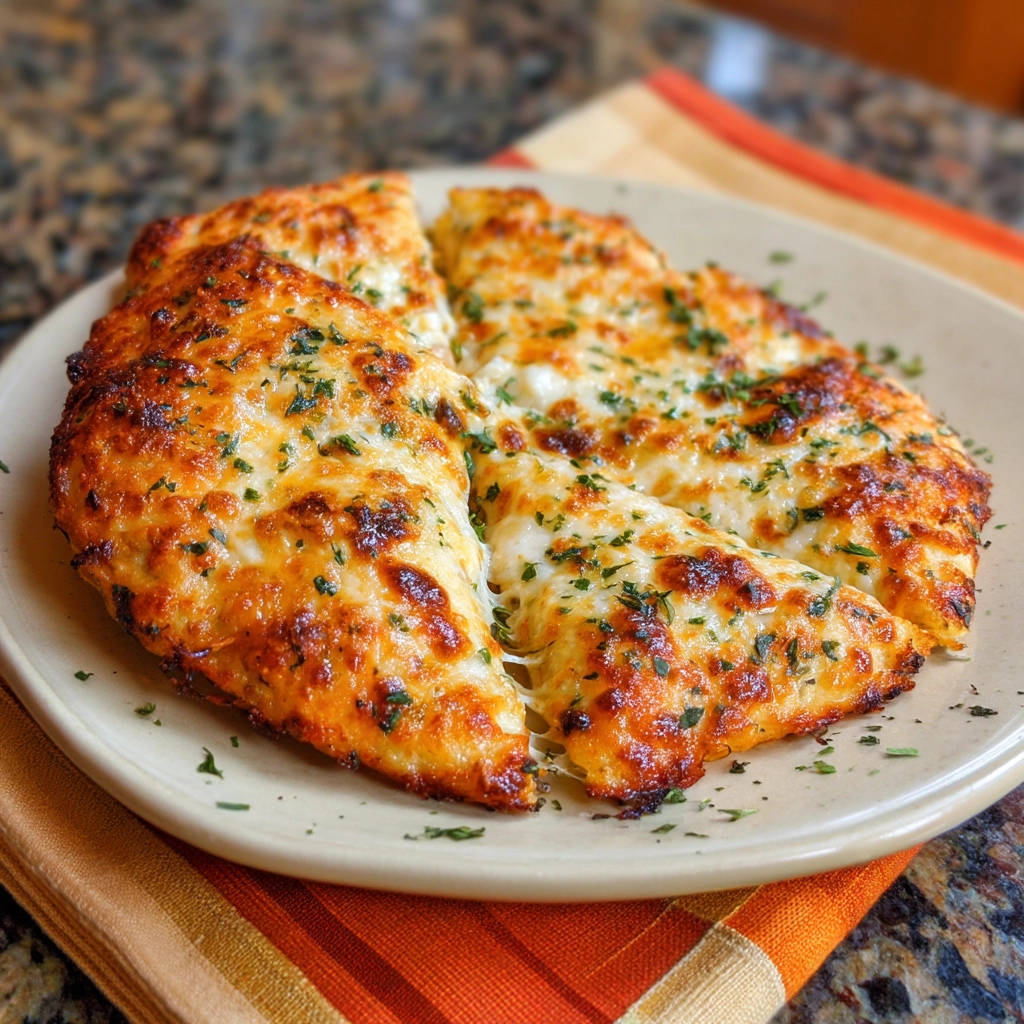
But fear not, fellow bread lovers! After much experimentation and many (delicious) trials, I stumbled upon a simple technique that completely changed the game for me. This Easy Cheesy Herb Bread recipe results in a loaf that is consistently light, fluffy, and absolutely melts in your mouth. It’s packed with garlicky, herby flavor and, of course, plenty of cheese. Prepare yourself for cheesy bread perfection!
Why This Easy Cheesy Herb Bread is the Best
So, what makes this particular cheesy herb bread stand out from the dense crowd? It all comes down to understanding how yeast works and giving your dough the love and time it deserves. Forget those quick-rise methods that promise speed but sacrifice texture.
- The Secret to Airiness: The key isn’t a fancy ingredient; it’s patient proofing! Allowing the dough ample time for a slow, full rise in a warm environment is crucial. This gives the yeast time to create those essential air pockets throughout the dough, resulting in a light crumb.
- Loads of Flavor: We’re not just slapping cheese on top. A delicious mixture of minced garlic, olive oil, and fresh herbs is drizzled over the dimpled dough before baking, infusing every bite with savory goodness.
- Perfect Cheese Pull: A generous blend of shredded mozzarella and grated parmesan creates the ideal cheesy topping – bubbly, golden, and wonderfully stringy.
- Beginner-Friendly: While it requires patience, the actual steps are straightforward and easy to follow, even if you’re new to working with yeast dough.
Essential Ingredients for Your Cheesy Herb Bread
Making fantastic cheesy bread starts with gathering quality ingredients. Each component plays a vital role in achieving that perfect light texture and irresistible flavor. Let’s look at what you’ll need:
For the dough base, we start with warm water. The temperature is critical here – between 105-115°F (40-46°C) is ideal. Too cold, and the yeast won’t activate; too hot, and you’ll kill it. A little granulated sugar gives the yeast a boost to get started, and active dry yeast is our leavening agent, working its magic to make the bread rise.
All-purpose flour forms the structure of the bread. We’ll need a good amount, plus a little extra for dusting your work surface. Salt is essential not just for flavor, but it also helps control the yeast activity and strengthens the gluten structure. A portion of olive oil is kneaded into the dough, contributing to its tenderness and overall richness.
For the flavor-packed topping, you’ll need about 4 cloves of garlic, finely minced. Combining this with olive oil creates a fragrant infusion that soaks into the dimpled dough. Fresh herbs are non-negotiable for that authentic herb bread taste. Think about using a mix like thyme, oregano, or parsley – whatever fresh herbs you love! And if you like a little warmth, a pinch of red pepper flakes adds a subtle kick that complements the cheese beautifully.
And finally, the cheese! A glorious combination of shredded mozzarella cheese (hello, melty pull!) and grated parmesan cheese (for that sharp, salty depth) is key. Don’t be shy with the cheese – this is cheesy herb bread, after all!
Here’s the full list to make sure you have everything ready:
- 2 cups warm water (105-115°F / 40-46°C)
- 1 tablespoon granulated sugar
- 2 1/4 teaspoons active dry yeast (one packet)
- 5 cups all purpose flour, plus more for dusting
- 2 teaspoons salt
- 1/4 cup olive oil, plus about 2 tablespoons more for the topping and extra for the pan and bowl
- 4 cloves garlic, minced
- 2 cups shredded mozzarella cheese
- 1/2 cup grated parmesan cheese
- 2 tablespoons chopped fresh herbs (such as thyme, oregano, parsley)
- Optional: Pinch of red pepper flakes
Crafting Your Cheesy Herb Bread: Step-by-Step for Lightness
Ready to transform simple ingredients into a bakery-worthy loaf? Follow these steps closely, paying special attention to the rising times. Patience is your secret weapon here!
Activate Your Yeast: Begin by combining the warm water, granulated sugar, and the active dry yeast in a large mixing bowl. Give it a gentle stir. The warm water and sugar are food for the yeast, waking it up. Let this mixture sit undisturbed for 5 to 10 minutes. You’ll know your yeast is happy and active when a foamy layer appears on the surface. If it doesn’t foam, your water might not have been the right temperature, or your yeast may be old. Time to start over with fresh yeast!
Combine Wet Ingredients: Once your yeast is actively bubbling, stir the salt and the initial 1/4 cup of olive oil into the mixture. These additions help develop the flavor and texture of the dough.
Mix the Dough: Gradually add the all-purpose flour, one cup at a time, mixing with a sturdy spoon or a spatula. Continue mixing until all the flour is incorporated and a shaggy, somewhat messy dough ball forms. It doesn’t need to be smooth at this stage, just combined.
Knead to Develop Gluten: Turn the shaggy dough out onto a surface that you’ve lightly dusted with flour. Now, it’s time to knead. Gently fold the dough over itself and push it away with the heels of your hands, then rotate and repeat. Knead for 6 to 8 minutes. This process is vital for developing the gluten network in the dough, which is what gives the bread structure and allows it to trap the gases created by the yeast, resulting in a light and airy texture. The dough should become smooth and elastic, though it may still feel slightly sticky.
The Crucial First Rise (Bulk Fermentation): Lightly oil a clean, large bowl. Place the kneaded dough into the bowl, turning it over once to ensure the top is also lightly coated in oil. This prevents it from drying out. Cover the bowl tightly with plastic wrap or a clean kitchen towel. Now, find a warm place for your dough to rest and rise. This is where the magic happens! Allow the dough to rise until it has visibly doubled in size. This usually takes 1 to 1.5 hours, but the exact timing can vary depending on the temperature of your room. A warmer environment will speed things up, while a cooler one will slow them down. The key is the volume increase – don’t rush it! This slow, full first rise (or bulk fermentation) is the simple technique mentioned earlier that prevents your bread from being dense. It builds structure and flavor.
Prepare Toppings: While your dough is happily rising, take this time to get your toppings ready. Mince the garlic cloves and put them in a small bowl. Add about 2 tablespoons of olive oil to the garlic. Stir in your chopped fresh herbs. If you’re using red pepper flakes, add them now too. Set this flavorful oil mixture aside. In a separate bowl, combine the shredded mozzarella cheese and the grated parmesan cheese, mixing them together.
Prep the Pan & Deflate the Dough: Once the dough has doubled in size, it’s time for the next step. Generously oil a 9×13 inch baking pan. Don’t be shy with the oil here; it helps prevent sticking and contributes to a lovely crust. Gently “punch down” the dough in the bowl. This doesn’t mean actually punching it hard! Just gently press down on it to deflate it slightly and release some of the built-up gases. This redistribution of gases helps with the bread’s final texture.
Shape the Bread: Transfer the dough from the bowl to the prepared baking pan. Gently press and stretch the dough with your hands to fit the bottom of the pan. If the dough is being stubborn and springs back a lot, it means the gluten is still tight. Just let it rest in the pan for 5-10 minutes, allowing the gluten to relax, then continue pressing it into shape. Repeat this brief resting period if needed until the dough covers the bottom of the pan.
Dimple and Drizzle: Using your fingertips, gently but firmly dimple the top of the dough all over. Create little indentations across the surface. These dimples are important because they prevent large air bubbles from forming and also create little pockets for the garlic-herb oil to pool in, ensuring maximum flavor in every bite. Drizzle the prepared garlic-herb oil mixture evenly over the dimpled dough, making sure some gets into all those lovely crevices.
Add the Cheese: Generously sprinkle the combined mozzarella and parmesan cheeses evenly over the entire surface of the dough, covering the garlic-herb oil.
Second Rise (Proofing) & Preheat: Now, cover the pan loosely with plastic wrap or a kitchen towel and let the dough rise in the pan for a second time. This final rise is shorter, usually 20-30 minutes. While it’s rising, preheat your oven to 400°F (200°C). This ensures the oven is hot and ready for baking, contributing to a good rise and crust.
Bake Until Golden: Once the dough has had its second rise and the oven is preheated, place the pan in the oven. Bake for 20 to 25 minutes. Keep an eye on it during the last few minutes. You’re looking for a beautiful golden brown crust and cheese that is bubbly, melted, and slightly browned in spots. The aroma filling your kitchen will be incredible!
Cool and Serve: Remove the cheesy bread from the oven. It’s tempting to dive in immediately, but letting it cool slightly in the pan for a few minutes allows it to set up properly. This makes slicing easier and prevents you from burning your mouth! Slice into squares or strips and serve warm.
Tips for Success and Delicious Variations
Getting perfect cheesy bread is easy once you know the key, but here are a few extra tips and ideas to make it even better:
- Check Your Yeast: Don’t skip the step of proofing your yeast in warm water and sugar. If it doesn’t get foamy, buy new yeast. This saves you the disappointment of a flat loaf later.
- Room Temperature Matters: Dough rises best in a warm, draft-free spot. If your kitchen is cool, you can turn your oven on for a minute or two, then turn it off and let the bowl rise inside the warm oven (make sure it’s off!).
- Don’t Over-Knead: While kneading develops gluten, over-kneading can make the dough tough. Knead until it’s smooth and elastic, but still soft and maybe a little tacky.
- Herb Swap: Feel free to change up the fresh herbs based on what you have or prefer. Rosemary, chives, basil, or a blend would all be lovely. Dried herbs can be used in a pinch, but reduce the amount by half as they are more potent, and they won’t release their full flavor as effectively in the oil drizzle as fresh herbs do.
- Cheese Combinations: Experiment with different cheese blends! Provolone, Monterey Jack, or even a little smoked gouda could add exciting twists. Just make sure you still have a good amount of melty cheese like mozzarella. For another cheesy favorite, you might enjoy making cheesy garlic bombs!
- Add Some Spice: Increase the red pepper flakes for more heat, or even swirl in a little hot sauce or chili oil with the herb mixture.
- Make Ahead: You can prepare the dough up to the dimpling stage, cover the pan tightly, and refrigerate for up to 24 hours. Let it sit at room temperature for about 30-45 minutes before dimpling, adding toppings, and doing the final rise and bake.
What to Serve with Cheesy Herb Bread
This cheesy herb bread is incredibly versatile! It’s perfect on its own as a snack, but it truly shines when paired with other dishes. It’s a natural partner for Italian-inspired meals, but its simple savory flavors complement many cuisines.
It’s absolutely divine served alongside a hearty soup or stew. Imagine dipping a warm piece into a comforting bowl of classic beef and barley soup or a rich hearty beef stew. The soft bread soaks up the savory broth beautifully.
It’s also a fantastic addition to pasta dinners. Serve it with a classic like creamy fettuccine alfredo with crispy chicken or a simple creamy tomato pasta. The cheesy, garlicky bread provides a wonderful textural and flavor contrast to the pasta.
Don’t forget about salads! A slice of this bread is the perfect accompaniment to a fresh green salad or a vibrant elevated avocado salad, turning a lighter meal into something more substantial and satisfying.
Easy Cheesy Herb Bread FAQs
Let’s tackle some common questions you might have while making this delicious bread.
Why is my cheesy bread dense?
The most common culprit for dense bread is not allowing the dough enough time to rise fully, especially during the first rise (bulk fermentation). Yeast needs time to produce carbon dioxide gas, which creates the air pockets. Rushing the process means less gas, and a heavier loaf. Ensure your yeast is active and your rising environment is warm and consistent.
Can I use dried herbs instead of fresh?
Yes, you can, but the flavor won’t be quite as vibrant or fresh. If using dried herbs, use about half the amount called for with fresh herbs (so about 1 tablespoon dried). Mix them into the garlic and oil mixture as directed.
What’s the best way to store leftover cheesy bread?
Leftover cheesy bread is best stored at room temperature in an airtight container or wrapped tightly in plastic wrap for 1-2 days. For longer storage, wrap cooled bread well and store in the freezer for up to 1-2 months.
How do I reheat cheesy bread?
Reheating in a toaster oven or conventional oven at around 350°F (175°C) for 5-10 minutes is the best way to revive the crispy edges and melted cheese. You can also reheat in a microwave, but the texture won’t be quite as good.
Can I add other toppings?
Absolutely! This recipe is a great base for variations. Consider adding finely diced onions, sautéed mushrooms (like in our creamy potatoes and mushrooms side dish), sun-dried tomatoes, or even a sprinkle of everything bagel seasoning before adding the cheese.
My dough isn’t rising, what did I do wrong?
This is usually due to inactive yeast or the water temperature being too hot or too cold. Ensure your water is between 105-115°F (40-46°C) and that your yeast gets foamy when proofed with sugar in the water. Also, make sure your rising environment isn’t too cold.
Bake, Share, and Enjoy!
There you have it! The simple secret to achieving perfectly light and airy Easy Cheesy Herb Bread every single time. No more dense disappointments, just pillowy soft bread loaded with garlic, herbs, and bubbly cheese.
This recipe is perfect for sharing (though you might not want to!). It’s wonderful for game nights, family dinners, or just a cozy afternoon snack. Give it a try, be patient with that first rise, and prepare to be amazed by the results.
I’d love to hear how yours turns out! Did you try a different herb combination? How did you serve it? Leave a comment below and let me know!
Easy Cheesy Herb Bread

Ingredients
- 2 cups warm water (105-115F)
- 1 tablespoon granulated sugar
- 2 1/4 teaspoons active dry yeast (one packet)
- 5 cups all purpose flour, plus more for dusting
- 2 teaspoons salt
- 1/4 cup olive oil, plus more for pan and topping
- 4 cloves garlic, minced
- 2 cups shredded mozzarella cheese
- 1/2 cup grated parmesan cheese
- 2 tablespoons chopped fresh herbs (like thyme, oregano, parsley)
- Optional: Pinch of red pepper flakes
Directions
- In a large bowl, combine the warm water, sugar, and yeast. Let stand for 5-10 minutes until foamy. This confirms your yeast is active.
- Stir in the salt and 1/4 cup olive oil. Gradually add the flour, mixing with a spoon or spatula until a shaggy dough forms.
- Turn the dough out onto a lightly floured surface and knead for 6-8 minutes until it’s smooth and elastic. This develops the gluten structure needed for a good rise. The dough should be slightly sticky.
- Lightly oil a clean large bowl. Place the dough in the bowl, turning to coat. Cover the bowl tightly with plastic wrap or a clean kitchen towel.
- This is the key step for a tender, non-dense bread: Let the dough rise in a warm place until it has doubled in size. This usually takes 1 to 1.5 hours, but the exact time depends on the temperature of your room. Do not rush this process. A slow, full rise allows the yeast to create the necessary air pockets, ensuring a light texture.
- While the dough is rising, mince the garlic and combine it in a small bowl with about 2 tablespoons of olive oil. Stir in the chopped herbs and optional red pepper flakes. Set aside. Combine the shredded mozzarella and grated parmesan in a separate bowl.
- Once the dough has doubled, generously oil a 9×13 inch baking pan. Gently punch down the dough (just enough to deflate it slightly, don’t knead it hard).
- Transfer the dough to the prepared pan. Gently press and stretch the dough to fit the bottom of the pan. If it springs back, let it rest for 5-10 minutes, then continue pressing.
- Dimple the top of the dough all over with your fingertips. Drizzle the garlic-herb oil mixture evenly over the dough, getting into the dimples.
- Sprinkle the mixed cheeses generously over the top.
- Let the dough rise again in the pan for another 20-30 minutes while you preheat your oven to 400F (200C).
- Bake for 20-25 minutes, or until the crust is golden brown and the cheese is bubbly and slightly browned in spots.
- Let cool slightly in the pan before slicing and serving. Enjoy your perfectly light and tender cheesy bread!