
There’s a special kind of magic that happens when you bite into a warm, savory burrito filled with tender chicken and that oh-so-satisfying, perfectly melted, gooey cheese. But let’s be honest, achieving that epic cheese pull isn’t always guaranteed, is it? Too often, you end up with cheese that’s stiff, stringy in a bad way, or just… sad.
I used to experience that same disappointment. For the longest time, my homemade chicken burritos were delicious, but the cheese factor was always a gamble. I experimented with different cheeses, different ways of adding them, and varied cooking times. And finally, I cracked the code!
The secret to guaranteed gooey cheese in your chicken burritos is simpler than you might think, and it happens before you even roll them up. This method ensures every single bite is loaded with creamy, melted cheese goodness. Once you try this approach for Cheesy Chicken Burritos, you’ll never look back!
Why You’ll Absolutely Adore These Cheesy Chicken Burritos
Beyond the star attraction – that incredible gooey cheese – there are so many reasons these chicken burritos are about to become a weeknight (or weekend!) favorite:
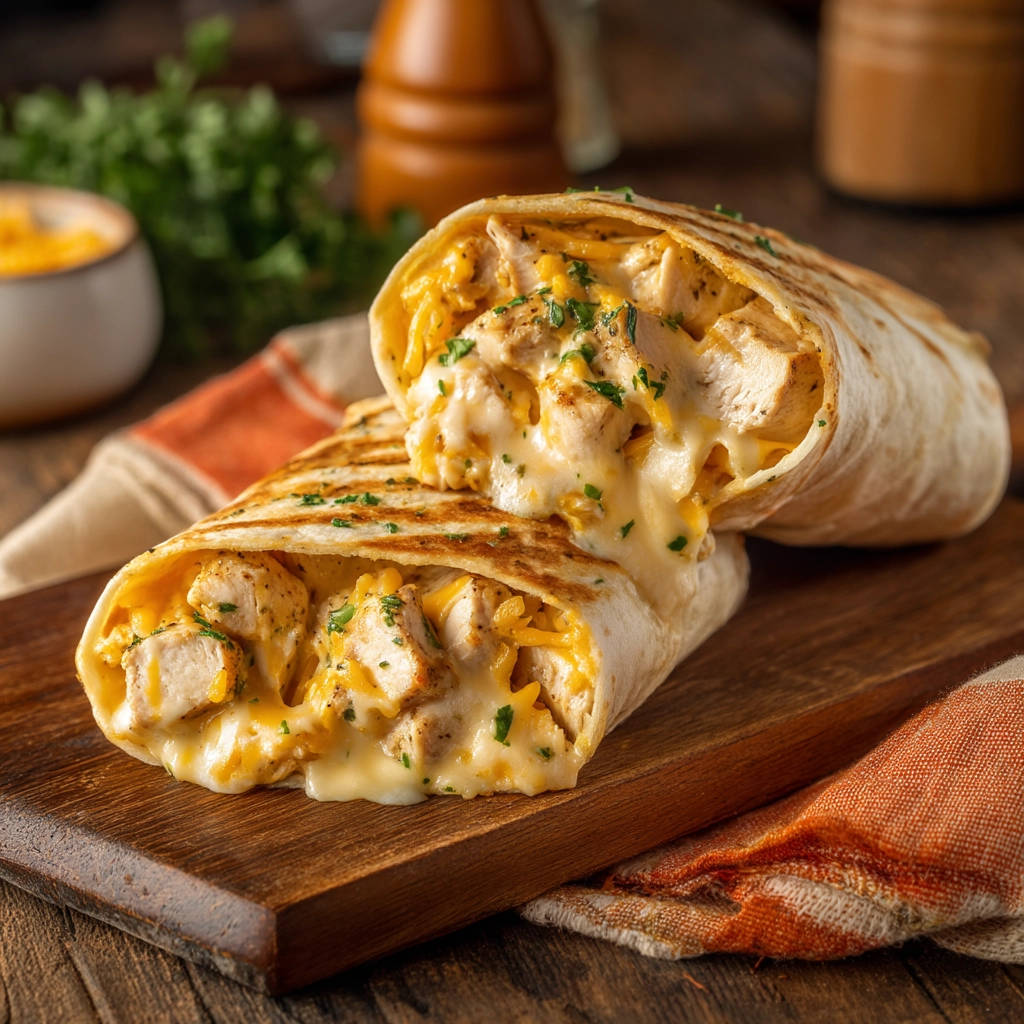
- The Texture Contrast: You get the crispy, golden exterior of the pan-fried tortilla paired with the unbelievably smooth, creamy, and tender filling inside. It’s a match made in heaven.
- Incredible Flavor: The seasoning infuses the chicken, and the cheese melts right into it, creating a rich, satisfying taste that’s wonderfully savory.
- Quick & Easy: If you have cooked chicken ready to go (like leftover roast chicken or rotisserie chicken), these come together in a flash. Even cooking the chicken specifically for this is quick.
- Adaptable: While the gooey cheese is non-negotiable in this recipe, the base filling is perfect for customization. Add rice, beans, corn, or your favorite veggies!
- Crowd-Pleaser: Who doesn’t love a hearty, cheesy burrito? These are perfect for family dinners, casual get-togethers, or even meal prep.
Gathering Your Ingredients for the Ultimate Cheesy Chicken Burritos
Making these incredibly gooey cheesy chicken burritos starts with a few simple ingredients. The magic isn’t in a long, complicated list, but rather how these components come together. The combination of tender chicken, savory seasoning, and, of course, plenty of cheese forms the heart of our delicious filling.
Here’s what you’ll need to create this cheesy perfection:
- Cooked Chicken: You’ll want 2 cups of cooked chicken, diced into bite-sized pieces. This is fantastic for using up leftovers! Rotisserie chicken works beautifully here for speed and tenderness.
- Large Flour Tortillas: Four large flour tortillas are needed to wrap up all that delicious filling. Choose a brand that is soft and pliable to make rolling easier.
- Shredded Cheese Blend: The key to gooeyness often lies in the cheese! We’re using 2 cups of shredded cheddar or Monterey Jack cheese blend. A blend often melts smoother than a single type, and both cheddar and Monterey Jack are excellent melting cheeses that pair wonderfully with chicken and taco seasoning flavors. Make sure you use pre-shredded cheese for convenience, or shred your own if you prefer.
- Butter or Oil: Just 1 tablespoon to heat the chicken and later crisp up the burritos. Butter adds a nice richness, while oil is great for higher heat searing.
- Taco Seasoning: A packet of taco seasoning or 2 tablespoons of a homemade spice blend (featuring chili powder, cumin, paprika, garlic powder, onion powder, salt, and pepper) will provide the essential Tex-Mex flavor profile. Using a blend allows you to control the spice level and saltiness.
- Chicken Broth or Water: You’ll need 1/4 cup. This liquid helps create a little moisture in the chicken mixture, which is essential for incorporating the cheese smoothly later on. Chicken broth adds an extra layer of savory flavor, but water works perfectly fine too.
- Fresh Cilantro: A garnish of chopped fresh cilantro adds a burst of fresh, bright flavor that contrasts beautifully with the rich, cheesy filling. Don’t skip this if you’re a cilantro fan!
That’s it! Simple, accessible ingredients that come together to create something truly special. Having everything prepped and measured before you start cooking makes the process even smoother.
Crafting Your Cheesy Chicken Burritos: Step-by-Step to Gooey Perfection
Ready to unlock the secret to perfectly gooey cheese in your chicken burritos? It’s all about timing and technique. Follow these steps carefully, especially the crucial cheese-melting stage, and you’ll be rewarded with burritos that deliver on that epic cheese pull every time.
-
Heat and Season the Chicken: Start by heating your skillet over medium heat. Add the butter or oil. Once the fat is hot and shimmering, add your diced cooked chicken and the taco seasoning or homemade spice blend. Stir everything together, making sure the chicken pieces are well-coated in the savory spices. You’re not cooking the chicken here, just heating it through and infusing it with flavor. This should only take about 2 to 3 minutes.
-
Introduce the Liquid Base: Pour in the chicken broth or water. Bring the mixture to a gentle simmer. As it heats, use your spoon or spatula to scrape up any browned bits that might be sticking to the bottom of the pan. These bits are packed with flavor! Let the liquid simmer for just about 1 minute. This helps dissolve the spices and creates a slightly saucy base, which is key for our next step.
-
The Gooey Cheese Secret (Pay Attention Here!): This is the moment of truth! Remove the skillet immediately from the heat source. This is crucial because adding cheese to screaming hot liquid can cause it to seize up or turn oily. As soon as it’s off the heat, add all of your shredded cheese to the hot chicken mixture. Stir continuously and vigorously for about 1 to 2 minutes. Keep stirring until you see the cheese transform into a thick, smooth, and gloriously gooey sauce that completely coats every piece of chicken. This technique uses the residual heat of the chicken and the pan to melt the cheese gently, resulting in that perfect, creamy texture inside the burrito. This step is the heart of the recipe!
-
Prepare the Tortillas for Rolling: Warm your large flour tortillas slightly. Cold tortillas can be stiff and prone to tearing when you try to roll them. A quick zap in the microwave for 15-20 seconds (wrapped in a damp paper towel) or a few seconds per side in a dry skillet is all it takes to make them pliable and easy to handle. This prevents frustration during the wrapping stage.
-
Fill ‘Em Up: Lay one warmed tortilla flat on a clean surface. Spoon about one-fourth of your cheesy chicken mixture onto the center of the tortilla. Don’t overfill, or they’ll be hard to roll and might burst open.
-
Fold and Roll Tightly: Now, let’s wrap! Fold the sides of the tortilla inwards over the filling first. Then, fold the bottom edge of the tortilla up and over the filling, tucking it in snugly. Roll the burrito tightly from the bottom edge up towards the top, keeping the filling tucked inside as you go. You want a nice, tight cylinder. Repeat this filling and rolling process with the remaining tortillas and cheesy chicken mixture.
-
Crisp Up the Exterior: Heat the same skillet (or a grill pan if you prefer grill marks) over medium heat. If needed, add a little more butter or oil to the pan – just enough to lightly coat the bottom. Once hot, carefully place the rolled burritos into the pan, starting seam-side down. This helps seal the seam shut as it cooks. Cook for 2 to 3 minutes per side, turning gently with tongs, until each side is golden brown and the tortilla looks sealed and slightly crispy. This final heating step warms the entire burrito through and ensures that lovely textural contrast.
-
Garnish and Serve: Transfer the hot, crispy burritos to plates. Sprinkle them generously with freshly chopped cilantro before serving. The vibrant green adds freshness and color.
And there you have it – perfectly Cheesy Chicken Burritos with guaranteed gooey cheese inside! The entire process is straightforward, focusing on that one key step to achieve cheesy success.
Tips for Perfect Cheesy Chicken Burritos Every Time
While the recipe steps are designed for success, a few extra tips can elevate your cheesy chicken burritos even further:
- Chicken Prep is Key: Using already cooked and diced chicken is a huge time saver. Rotisserie chicken is an excellent choice, but leftover baked or poached chicken works just as well. Just ensure it’s diced fairly small for even distribution in the filling.
- Cheese Quality Matters: While pre-shredded cheese is convenient, block cheese that you shred yourself often contains fewer anti-caking agents and can result in a slightly smoother melt. Experiment to see what you prefer!
- Don’t Skip the Liquid: That small amount of chicken broth or water is crucial. It helps dissolve the spices and creates a little moisture base for the cheese to melt into smoothly off the heat. Without it, the cheese might not coat the chicken as well.
- The Pan Sear Finish: Searing the burritos in the skillet isn’t just about getting a crispy shell; it helps seal the burrito and ensures the filling is heated through and the cheese inside is nice and hot and molten just before serving. Make sure your pan is hot enough to get a nice golden brown color.
- Spice Level: Adjust the taco seasoning amount to your preference. If using a homemade blend, you can tweak the chili powder and cumin for more or less heat.
- Make Ahead: You can prepare the cheesy chicken filling up to 2-3 days in advance and store it in an airtight container in the refrigerator. When ready to assemble, gently reheat the filling before adding it to the tortillas and proceeding with steps 4-8.
What to Serve With Your Cheesy Chicken Burritos
These gooey cheesy chicken burritos are hearty enough to be a meal on their own, but they pair wonderfully with a variety of sides to create a complete and satisfying spread. Think classic Tex-Mex accompaniments:
- Rice: A side of fluffy rice is always a great companion. You could go with simple steamed rice or elevate it with perfect Mexican rice for extra flavor.
- Beans: Refried beans or simple black beans are fantastic additions to the plate.
- Corn: Sweet corn provides a lovely contrast. Consider cheesy creamed corn for another layer of creamy, cheesy goodness.
- Salad: A simple green salad or a fresh, crunchy coleslaw can lighten things up.
- Toppings: Don’t forget the toppings! Sour cream, salsa, guacamole, shredded lettuce, diced tomatoes, or extra chopped cilantro are all excellent choices to add freshness and tang. Our perfect pico de gallo would be a vibrant addition.
- Chips and Dip: A basket of tortilla chips with your favorite salsa or a creamy jalapeno dip makes for a great appetizer or side.
Mix and match your favorites to create the perfect burrito plate!
Your Cheesy Chicken Burritos Questions Answered (FAQ)
Here are some common questions people ask when making cheesy chicken burritos:
Can I use raw chicken instead of cooked?
The recipe is written for cooked chicken for speed and to ensure the chicken is heated and coated evenly with the cheese sauce at the right time. If you start with raw chicken, you would need to cook it fully first, likely by dicing and sautéing it in the skillet before adding the seasoning and liquid. This would add to the overall cooking time.
What’s the best cheese for the gooey effect?
As mentioned in the ingredients, a blend of cheddar and Monterey Jack is excellent due to their melting properties. Other good melting cheeses like Pepper Jack (for a bit of spice), colby, or even a mild provolone can work, but the cheddar/Monterey Jack blend is a classic for this type of burrito and consistently delivers on the gooey texture.
Can I bake these burritos instead of pan-frying?
Yes, you absolutely can! To bake, preheat your oven to around 375°F (190°C). Place the rolled burritos seam-side down on a baking sheet. You can brush them lightly with oil or melted butter if you like, for color. Bake for 15-20 minutes, or until golden brown and heated through. Pan-frying gives a crisper, more immediate result, but baking is great if you’re making a larger batch.
How do I store and reheat leftovers?
Leftover cheesy chicken burritos can be wrapped individually in plastic wrap or foil and stored in an airtight container in the refrigerator for 2-3 days. To reheat, you can microwave them (though this might make the tortilla soft) or, for a better texture, reheat them in a skillet over medium heat, turning occasionally, until hot and crispy again. You can also reheat them in a toaster oven or conventional oven until warmed through.
Why didn’t my cheese get gooey?
The most common reason for cheese not getting gooey is adding it while the skillet is still too hot on the heat source. Removing the skillet from the heat before stirring in the cheese is the crucial step. This allows the residual heat to melt the cheese gently into a smooth sauce rather than causing it to separate or become rubbery or oily. Also, ensure you are using a good melting cheese blend.
Can I add other fillings like rice or beans?
Absolutely! This chicken and cheese base is wonderfully versatile. You can easily add cooked rice (like our restaurant-style fried rice, minus the soy sauce for a Tex-Mex spin, or the perfect Mexican rice mentioned earlier), black beans, corn, or sautéed peppers and onions to the chicken mixture before adding the cheese. Just be mindful not to overstuff the tortillas.
Enjoy Your Homemade Cheesy Chicken Burritos!
Say goodbye to sad, stiff cheese and hello to the best cheesy chicken burritos you’ve ever made at home! This recipe proves that with one simple technique adjustment, you can achieve truly epic, gooey results that will have everyone asking for your secret.
Whether it’s a quick weeknight dinner, a fun weekend meal, or packed for lunch, these burritos deliver on flavor, texture, and that all-important cheese factor. Give this recipe a try and experience the magic for yourself!
Did you make these gooey cheesy chicken burritos? What are your favorite toppings? Let us know in the comments below! We love hearing from you.
Cheesy Chicken Burritos

Ingredients
- 2 cups cooked chicken diced
- 4 large flour tortillas
- 2 cups shredded cheddar or Monterey Jack cheese blend
- 1 tablespoon butter or oil
- 1 packet taco seasoning or 2 tablespoons homemade spice blend (chili powder, cumin, paprika, garlic powder, onion powder, salt, pepper)
- 1/4 cup chicken broth or water
- Fresh cilantro chopped for garnish
Directions
- Heat butter or oil in a skillet over medium heat. Add the diced cooked chicken and seasoning blend. Stir to coat the chicken and heat through, about 2 3 minutes.
- Pour in the chicken broth or water and bring the mixture to a gentle simmer, scraping up any browned bits from the bottom of the pan. Cook for 1 minute.
- Remove the skillet from the heat. IMMEDIATELY add the shredded cheese to the hot chicken mixture. Stir continuously for about 1 2 minutes until the cheese is completely melted and coats the chicken in a thick, gooey sauce. This is the key step to get that perfect cheese melting into the filling!
- Warm the tortillas slightly if needed to make them pliable (microwave for 15 20 seconds or warm in a dry skillet for a few seconds per side).
- Lay a tortilla flat and spoon about 1/4 of the cheesy chicken mixture onto the center.
- Fold the sides of the tortilla inwards over the filling, then fold the bottom edge up and over the filling. Roll the burrito tightly from the bottom up to the top, tucking the filling in as you go. Repeat with remaining tortillas and filling.
- Heat the same skillet or a grill pan over medium heat (add a little more butter or oil if needed). Place the rolled burritos seam-side down in the hot pan. Cook for 2 3 minutes per side, turning gently, until golden brown and the tortilla is sealed. This final heating ensures the cheese inside is perfectly melted and everything is hot.
- Garnish with fresh cilantro before serving.