Ah, the humble oatmeal cookie. There’s something inherently comforting and nostalgic about biting into one. But let’s be honest, finding that perfectly chewy texture can feel like chasing a culinary unicorn, right?
Too often, you bake a batch of oatmeal cookies only for them to turn into dry, crumbly pucks that crumble upon touch. I’ve been there! For years, my oatmeal cookies swung wildly between just okay and outright disappointing.
After much trial and error, tweaking ingredients, and perfecting techniques, I finally cracked the code. This recipe for Chewy Oatmeal Cranberry Cookies is my absolute favorite. It guarantees a soft, yielding center, slightly crisp edges, and that signature chewy texture that makes these cookies utterly irresistible. Forget the hard biscuity versions; get ready for oatmeal cranberry cookie bliss.
Why These Chewy Oatmeal Cranberry Cookies Are a Must-Bake
Beyond their incredible, guaranteed chewy texture, these oatmeal cranberry cookies offer so much to love. They’re a delightful combination of sweet, tart, and nutty, perfect for any time of year.
- Unbeatable Texture: Seriously, the chewiness is next level. No dry cookies here!
- Classic Flavor Pairing: The sweet oats and tart cranberries are a match made in cookie heaven.
- Quick to Mix: The dough comes together in minutes with simple pantry staples.
- Adaptable: Easily customize with or without nuts, or swap out mix-ins.
- Perfect for Sharing: These disappear fast at parties, potlucks, or just a quiet afternoon snack.
Whether you’re baking for a holiday cookie swap or just need a sweet treat to get through the week, these chewy oatmeal cranberry cookies are about to become your new go-to recipe.
Understanding the Delicious Ingredients
Creating that coveted chewy texture starts with the right blend of ingredients and understanding how they interact. While the full list is below, let’s talk about some of the key players that contribute to these cookies’ incredible texture and flavor.
The foundation of many great cookies is butter, and here we use melted unsalted butter. Melting the butter instead of creaming it helps create a denser, chewier cookie by limiting the amount of air incorporated into the dough. Unsalted butter gives you control over the final saltiness, so you can ensure the perfect balance.
Sugar plays a crucial role in both sweetness and texture. This recipe uses a combination of granulated sugar for structure and a hint of crispness around the edges, and packed light brown sugar. The brown sugar is absolutely key for chewiness; its molasses content adds significantly more moisture than white sugar and creates a softer, more pliable cookie dough that resists drying out during baking. Always make sure your brown sugar is fresh and packed firmly into the measuring cup!
Two large eggs bind everything together, adding richness and moisture. Using large eggs ensures the right balance of fat and liquid for a tender crumb and helps with the cookie’s structure. A teaspoon of vanilla extract is a classic flavor enhancer that brings a warm, aromatic depth that complements the other ingredients beautifully.
For the dry ingredients, we carefully measure out all-purpose flour, baking soda, salt, and ground cinnamon. The flour provides the main structure for the cookie. Baking soda acts as a leavening agent, helping the cookies spread slightly and contribute to that desirable chewy edge, while also aiding in browning. Salt is essential for balancing the sweetness and enhancing all the other flavors. A touch of cinnamon adds a cozy spice that feels just right with oats and cranberries.
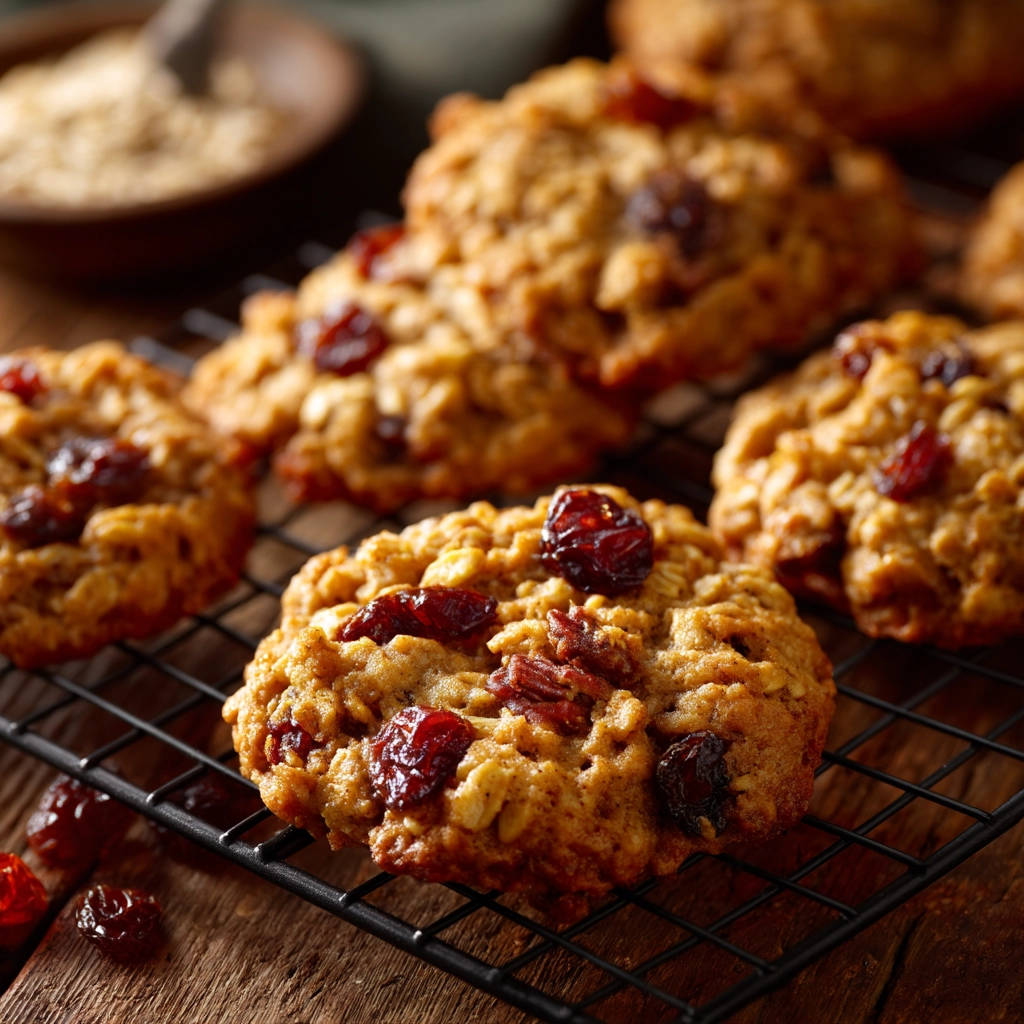
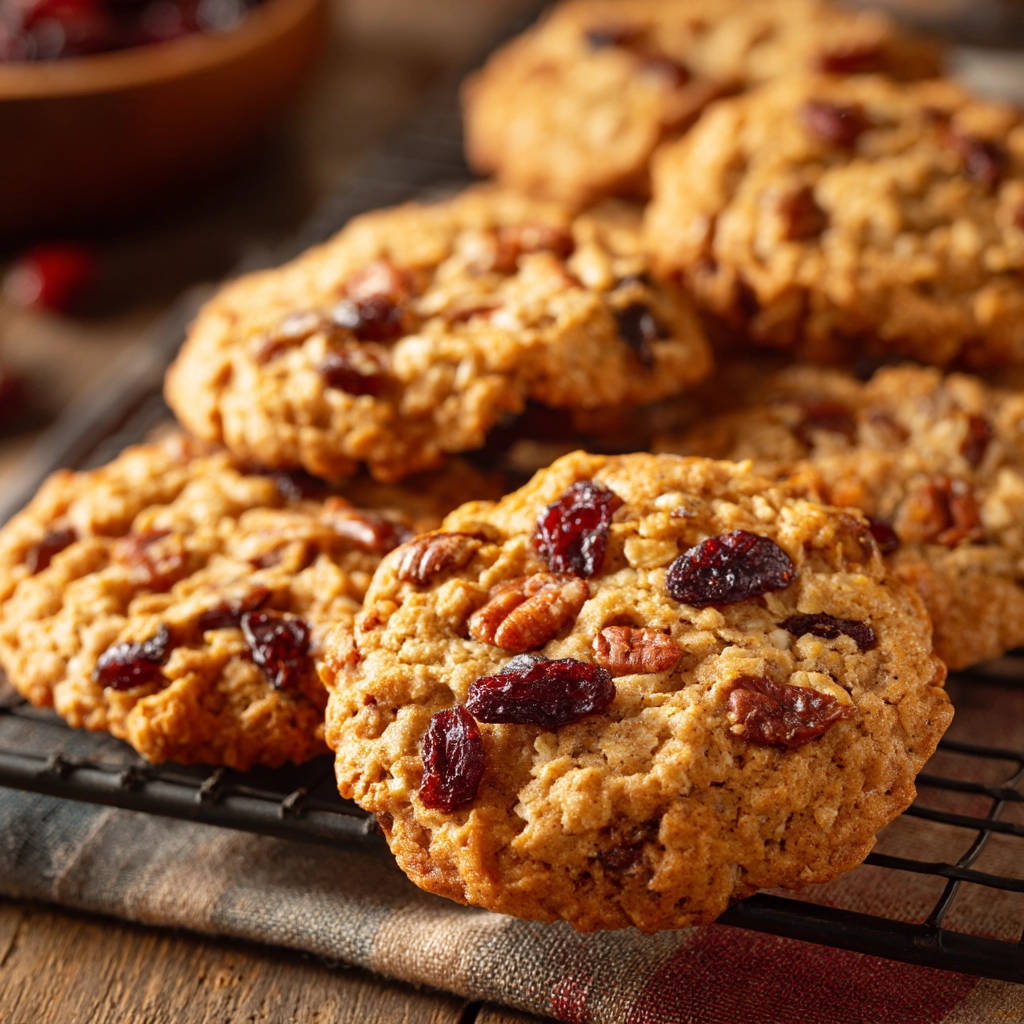
And of course, you can’t have oatmeal cookies without the oats! We specifically call for 3 cups of rolled oats, also widely known as old-fashioned oats. These thicker, flatter oat flakes retain their shape and texture much better during baking compared to quick or instant oats. They are fundamental to getting that classic, substantial, and satisfying chewiness that defines a great oatmeal cookie. Using instant oats will result in a very different, often mushier, texture.
Finally, we add the delightful mix-ins: 1 cup of dried cranberries and an optional 1 cup of chopped nuts (pecans or walnuts are traditional favorites). The dried cranberries provide wonderful bursts of tartness that cut through the cookie’s sweetness and offer another layer of chewiness. Chopped pecans or walnuts add a lovely crunch and an earthy, nutty flavor that complements the oats and fruit. Feel free to omit the nuts if you have allergies or simply prefer a nut-free cookie, or try substituting with white chocolate chips for a different flavor profile.
Here is the full list of ingredients you’ll need:
- 1 cup unsalted butter, melted
- 3/4 cup granulated sugar
- 3/4 cup packed light brown sugar
- 2 large eggs
- 1 teaspoon vanilla extract
- 1 1/2 cups all purpose flour
- 1 teaspoon baking soda
- 1/2 teaspoon salt
- 1/4 teaspoon ground cinnamon
- 3 cups rolled oats (old fashioned)
- 1 cup dried cranberries
- 1 cup chopped nuts (pecans or walnuts), optional
Crafting Your Perfect Batch: Step-by-Step Guide
Ready to bake some magic? Follow these steps carefully to achieve that ultimate chewy cookie perfection. Each step has a purpose, and paying attention to the details will make all the difference!
- Prep Your Baking Zone: Start by getting your oven ready. Preheat it accurately to 350 degrees F (175 degrees C). While it’s heating, prepare your baking sheets. Line them with parchment paper – this prevents sticking and makes cleanup incredibly easy. It also helps with achieving uniform baking and promotes that desirable chewy texture.
- Whisk the Wet Base: In a large mixing bowl, pour in your melted unsalted butter. Add the granulated sugar and the packed light brown sugar. Whisk these together thoroughly until you have a smooth, glossy, and well-combined mixture. Make sure the sugars are fully incorporated into the warm butter; this ensures even sweetness and contributes to the cookie’s structure.
- Integrate the Eggs and Vanilla: Add the large eggs to the sugar-butter mixture, one at a time. Beat each egg in until it is fully incorporated before adding the next. This step helps emulsify the mixture and adds necessary moisture. Once the eggs are blended, stir in the vanilla extract. Mix just until everything is combined; avoid over-beating at this stage.
- Prepare the Dry Blend: In a separate, medium-sized bowl, whisk together your all-purpose flour, baking soda, salt, and ground cinnamon. Use a whisk to thoroughly combine these ingredients. Whisking serves to evenly distribute the leavening agent (baking soda) and spices throughout the dry mix, which is important for consistent rise and flavor in every cookie.
- Gently Combine Wet and Dry: Gradually add the whisked dry ingredients to the wet ingredients in the large bowl. Use a spoon or a rubber spatula to mix the ingredients together until the dry ingredients are just combined with the wet. This is a critical stage: it is crucial not to overmix. Overmixing develops the gluten in the flour too much, which can result in tough, cakey cookies instead of the soft, chewy ones we’re aiming for. Stop mixing as soon as you no longer see visible streaks of dry flour.
- Fold in the Flavor Enhancers: Now it’s time for the delicious add-ins! Stir in the rolled oats, the dried cranberries, and the chopped nuts (if you are using them). Use a spoon or spatula and mix gently until they are evenly distributed throughout the dough. You want every cookie to have a good mix of all the wonderful textures and flavors!
- The Essential Chill Step: This is arguably the single most important step for achieving that guaranteed chewy texture and preventing your cookies from spreading excessively in the oven, which can lead to thin, crispy results. Cover the bowl of dough tightly with plastic wrap and chill it in the refrigerator for at least 30 minutes. If you have the time, chilling for a longer period (up to 24-48 hours) can dramatically improve the flavor and texture even more, as the dry ingredients fully hydrate and the flavors meld. Do not skip or rush this crucial chilling step – it allows the fats to solidify, controls spread, and deepens flavor.
- Portioning the Dough: Once the dough is sufficiently chilled and firm, drop rounded tablespoons of dough onto your prepared baking sheets. Leave about 2 inches of space between each mound of dough to give them a little room to spread out evenly. Using a cookie scoop is a great way to ensure that your cookies are uniform in size, which promotes even baking across the batch.
- Baking for Chewiness (Watch the Edges!): Place the baking sheets in the preheated oven and bake for 10 to 12 minutes. You absolutely must keep a close eye on them during the final minutes of baking time. The visual cue you are looking for is the edges turning a light golden brown, but the centers should still look slightly soft and perhaps a little shiny or underbaked. This appearance is the key to chewiness! Pulling them out at this stage ensures that they will finish cooking and set up on the hot baking sheet without becoming dry or hard in the center.
- Cooling Patience is a Virtue: Resist the strong urge to immediately transfer the hot, soft cookies off the baking sheet. Let them cool undisturbed on the baking sheets for 5 to 10 minutes. During this time, the residual heat from the pan will continue to cook the centers gently and allow the cookies to set their structure without drying out the delicate middle. After they’ve rested and firmed up slightly on the sheets, you can carefully transfer them to a wire rack using a spatula to cool completely.
Following these detailed steps will lead you straight to a batch of the best chewy oatmeal cranberry cookies you’ve ever made. The process is simple, but these little techniques make all the difference.
Expert Tips for Guaranteed Chewy Results
Want to ensure your cookies are consistently chewy and delicious every single time you bake them? Here are a few extra tips from my kitchen that will help you nail that perfect texture:
- Prioritize the Chill Time: I know waiting is tough when warm cookies are on your mind, but chilling the dough is absolutely non-negotiable for achieving that wonderful chewiness and preventing excessive spread. The minimum is 30 minutes, but don’t hesitate to chill longer if you have the time – it truly makes a difference!
- Measure Ingredients Accurately: Especially your flour and oats. For flour, spoon it lightly into your measuring cup and level it off with a straight edge; never scoop directly from the bag as this compacts it and you’ll add too much, resulting in dry cookies. For oats, scoop and level as usual. Precision with measurements, especially for dry ingredients and sugars, is key in baking.
- Get to Know Your Oven’s True Temperature: Oven temperatures can vary significantly from the dial setting. Using an inexpensive oven thermometer can help you ensure that your oven is accurately preheated to 350°F (175°C). Baking at the correct temperature is vital for consistent results and preventing over or under-baking.
- Trust the “Underbaked” Look: It feels counterintuitive, but pulling the cookies from the oven when the edges are just set and the centers still look soft is the secret to chewiness. They will continue to cook and firm up as they cool on the hot pan. Overbaking even by a minute or two is the fastest way to lose that soft, chewy center and end up with a hard cookie.
- Experiment with Mix-ins: While cranberries are wonderfully tart and festive, feel free to customize! Chocolate chips (dark, milk, or white varieties) are a classic addition and pair beautifully with oats. Raisins are another traditional choice for oatmeal cookies. You could also try other dried fruits like chopped apricots or cherries, or different nuts like almonds or macadamia nuts. You could even add a sprinkle of flaky sea salt on top of the dough balls before baking for a delightful sweet and salty contrast. If you enjoy experimenting with cookie bars, you might find inspiration in my recipe for Simple Sugar Cookie Bars, which are also very adaptable!
Serving Suggestions & Storage
These chewy oatmeal cranberry cookies are fantastic on their own, whether enjoyed warm right off the cooling rack or completely cooled. But here are a few ideas to make enjoying them even more special:
- The Timeless Classic: There’s just no beating a warm, freshly baked cookie paired with a tall glass of cold milk. It’s simple comfort food at its finest.
- Elevate Your Break: These cookies are the perfect companion for your morning coffee or an afternoon tea break. For a lovely spread, consider serving them alongside other delightful baked goods like my Easy Homemade Cinnamon Rolls or even Cranberry Orange Scones to offer a variety of textures and flavors.
- Homemade Ice Cream Sandwich: For a truly decadent dessert, take two cooled cookies and sandwich a scoop of your favorite ice cream in between. Vanilla, cinnamon, or even a complementary fruit flavor like raspberry would be divine.
- Thoughtful Gift: Baked goods make some of the most cherished gifts. Package up a batch of these cookies in a nice tin or box for friends, family, or neighbors.
To keep your baked cookies tasting their best and maintain that signature chewiness, store them in an airtight container at room temperature. They should stay wonderfully soft and chewy for up to 3-4 days. If they happen to lose a little bit of their softness over time, you can quickly revive them by popping one in the microwave for just 5-10 seconds.
Unbaked cookie dough can also be stored! Keep it well-wrapped in plastic wrap in the refrigerator for up to 3-4 days. For longer storage, you can portion out the dough balls, place them on a parchment-lined baking sheet, freeze until solid, then transfer to a freezer-safe bag or container. Frozen dough can be stored for up to 3 months. To bake from frozen, simply place the frozen dough balls on a prepared baking sheet and bake for a few extra minutes compared to the recipe time (start checking around 12-14 minutes), until the edges are golden and the centers look just slightly soft.
Your Chewy Oatmeal Cranberry Cookie Questions Answered (FAQ)
Got questions that came up while reading the recipe or during baking? Here are some common queries I receive about making perfect oatmeal cranberry cookies:
Can I use quick oats instead of rolled oats?
While you can make a cookie with quick oats, I strongly recommend sticking to old-fashioned rolled oats for this specific recipe if you want that characteristic chewy texture. Quick oats are more finely processed and absorb liquid much faster, which often results in a cookie with a softer, more crumbly interior rather than a distinct chew. Rolled oats maintain their structure better during baking and are key to achieving the desired result here.
Why did my cookies spread too much and become flat and crispy?
Excessive spread is a common issue and is usually due to the butter being too warm, the dough not being chilled sufficiently, or sometimes a combination of both. Ensure your melted butter has cooled slightly before mixing in the sugars (it shouldn’t be hot). Most importantly, do not skip the dough chilling step! The refrigerator time allows the fats to solidify, which helps the cookies hold their shape and spread less rapidly in the hot oven. Warm dough starts spreading the moment it hits the baking sheet.
Can I add chocolate chips?
Absolutely! Chocolate chips are a fantastic and very popular addition or substitution for the dried cranberries. You can use a mix of cranberries and chocolate chips, or replace the cranberries entirely with chocolate chips (stick to about 1 cup total of mix-ins for balance). If you’re a big fan of classic chocolate chip cookies and their texture, you might also really enjoy my recipe for Golden Edge Chocolate Chip Cookies!
How long should I chill the dough for the best chewiness?
The recipe specifies a minimum of 30 minutes in the refrigerator, which is enough to get a good chewy result. However, chilling longer, even up to 24 or 48 hours, is fantastic if you have the time. Extended chilling allows the dry ingredients (especially the oats and flour) to fully hydrate and the flavors to meld, resulting in a richer taste and an even better, more consistent chewy texture. If you’re in a rush, even 15-20 minutes in the freezer can help firm up the dough quickly.
What’s the best way to ensure they stay soft and chewy after baking?
The two most important factors are controlled during the baking process itself: first, do not overbake – always pull them when the edges are just set and the centers look slightly soft. Second, allow them to cool on the hot baking sheet for the specified 5-10 minutes before moving them. This gentle, residual cooking finishes the centers without drying them out. Once completely cooled, store the cookies in a truly airtight container. Keeping them away from air is key to maintaining their moisture and chewiness over several days.
Bake a Batch of Happiness Today!
There you have it! My tried-and-true recipe for perfectly chewy oatmeal cranberry cookies. This recipe has brought so much joy (and deliciousness!) to my kitchen, and I know it will bring plenty to yours too.
The combination of warm spices, sweet oats, tart cranberries, and that absolutely irresistible chewy texture is simply divine. They’re perfect for holiday baking, everyday snacking, packing into lunchboxes, or sharing a moment of sweetness with loved ones.
Give this recipe a try and experience the guaranteed chewiness for yourself! I’d love to hear how they turn out for you. Leave a comment below with your experience or any fun variations you decided to try. Happy baking!
Classic Oatmeal Cranberry Cookies

Ingredients
- 1 cup unsalted butter, melted
- 3/4 cup granulated sugar
- 3/4 cup packed light brown sugar
- 2 large eggs
- 1 teaspoon vanilla extract
- 1 1/2 cups all purpose flour
- 1 teaspoon baking soda
- 1/2 teaspoon salt
- 1/4 teaspoon ground cinnamon
- 3 cups rolled oats (old fashioned)
- 1 cup dried cranberries
- 1 cup chopped nuts (pecans or walnuts), optional
Directions
- Preheat oven to 350 degrees F (175 degrees C). Line baking sheets with parchment paper.
- In a large bowl, whisk together the melted butter, granulated sugar, and brown sugar until well combined.
- Beat in the eggs one at a time, then stir in the vanilla extract.
- In a separate medium bowl, whisk together the flour, baking soda, salt, and cinnamon.
- Gradually add the dry ingredients to the wet ingredients, mixing until just combined. Do not overmix.
- Stir in the rolled oats, dried cranberries, and chopped nuts (if using) until evenly distributed.
- Cover the bowl and chill the dough in the refrigerator for at least 30 minutes. This is a key step for achieving that chewy texture and preventing excessive spread.
- Drop rounded tablespoons of dough onto the prepared baking sheets, leaving about 2 inches between cookies.
- Bake for 10 to 12 minutes, or until the edges are lightly golden brown but the centers still look slightly soft. Do not overbake! Pulling them out when they look slightly underdone is crucial for chewiness.
- Let the cookies cool on the baking sheets for 5 to 10 minutes before transferring them to a wire rack to cool completely. The residual heat will finish cooking them to perfection.