Okay, let’s talk quesadillas. Specifically, beef and cheese quesadillas. On the surface, they seem incredibly simple, right? Meat, cheese, tortilla, cook. What could go wrong?
If you’ve ever ended up with a sad, pale, rubbery tortilla that just won’t crisp, or worse, a burnt tortilla before the cheese inside has even thought about melting, you know the struggle is real. I’ve been there more times than I’d like to admit!
For years, I fiddled with heat levels, different pans, varying amounts of filling. It felt like a culinary enigma wrapped in a tortilla. But after much trial and error, I finally discovered one simple trick that guarantees that glorious golden brown exterior and perfectly melted, gooey cheese interior every single time. No more quesadilla despair!
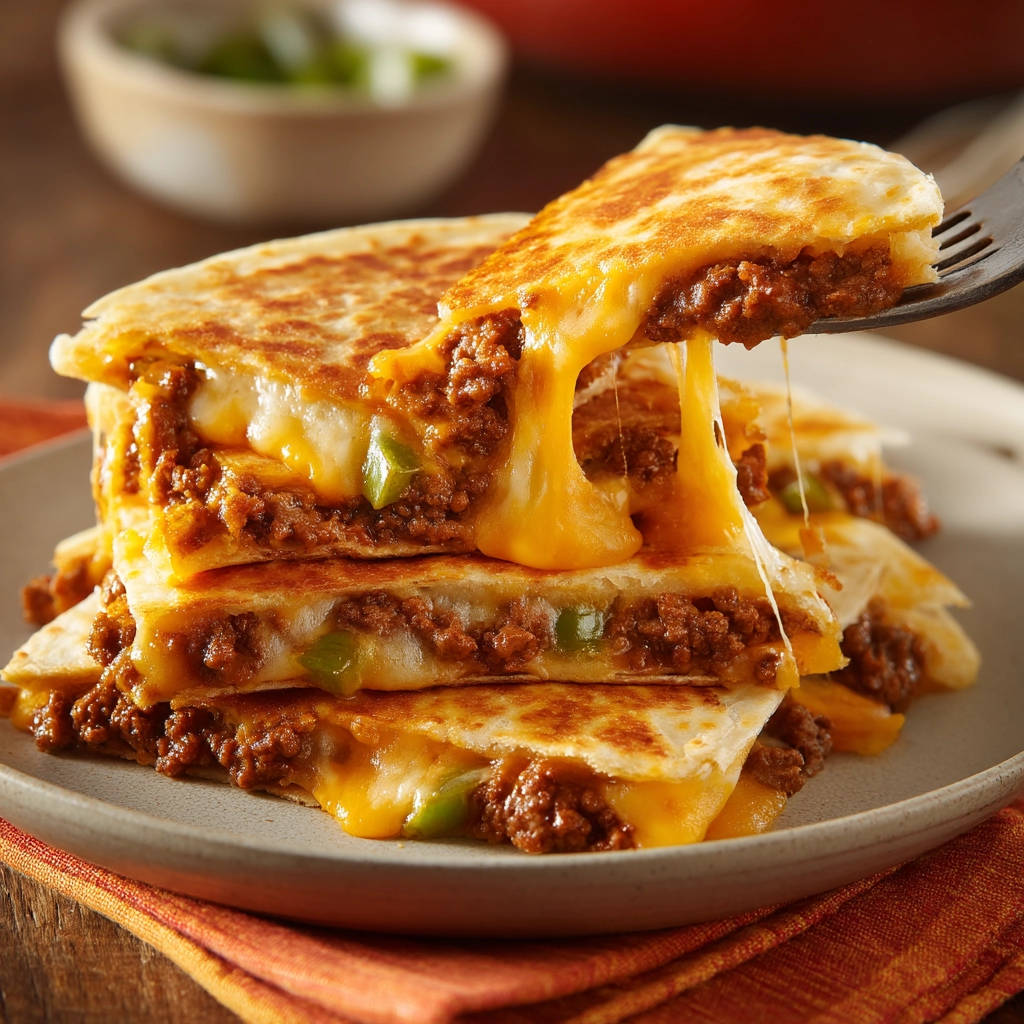
This recipe for beef and cheese quesadillas isn’t just another way to make them; it’s the way to achieve quesadilla perfection. It’s hearty, cheesy, packed with flavor, and thanks to my little secret, boasts an irresistible crispy, golden shell. Ready to unlock the secret to the ultimate quesadilla?
Why You’ll Love This Beef and Cheese Quesadilla Recipe
Beyond just being delicious (which, let’s be honest, is reason enough), these beef and cheese quesadillas tick a lot of boxes for a perfect weeknight meal or snack:
- Consistently Golden and Crispy: My secret trick, which I’ll share in the instructions, takes the guesswork out of achieving that desirable golden-brown exterior.
- Incredible Flavor Combo: Seasoned ground beef, melty cheese, and tender bell pepper create a classic, satisfying filling.
- Quick and Easy: If you have cooked beef on hand, these come together in minutes. Even if you start from raw beef, it’s still a surprisingly fast recipe.
- Kid-Friendly Favorite: What’s not to love about cheesy, beefy goodness wrapped in a warm tortilla?
- Perfect for Leftovers: This is an excellent way to repurpose leftover taco meat or other seasoned ground beef.
- Versatile: While we focus on beef and cheese, the technique works for countless fillings!
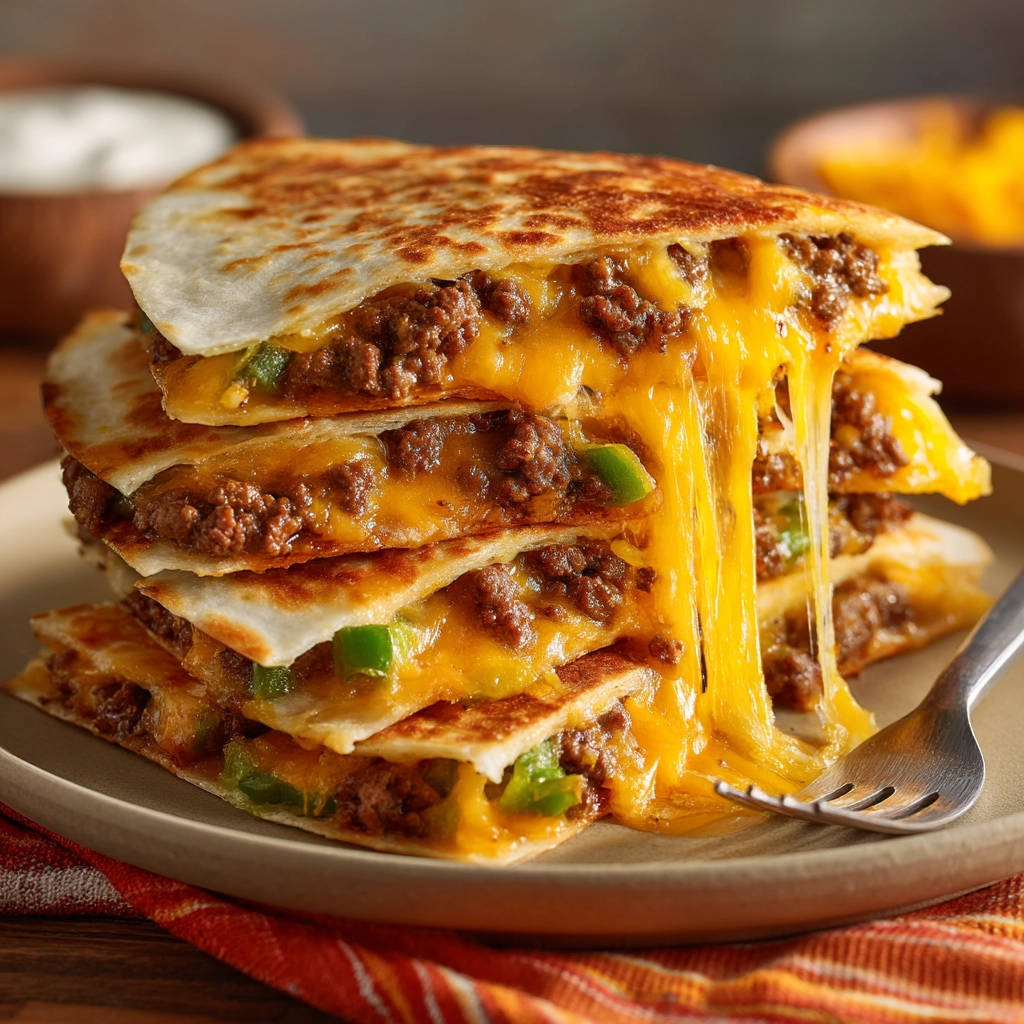
These aren’t just any cheesy beef tortillas; they are guaranteed golden deliciousness that will have everyone asking for more.
Gathering Your Ingredients for Golden Beef and Cheese Quesadillas
To create these amazing beef and cheese quesadillas, you’ll need a few simple, readily available ingredients. The beauty of this recipe lies in the combination of textures and flavors – the savory beef, the creamy melted cheese, the slight crunch of the pepper, all wrapped in that perfectly cooked tortilla.
Here’s what you’ll need to gather from your pantry and fridge. The quantities listed here are for a batch of 8 quesadillas, perfect for feeding a hungry family or having some delicious leftovers.
- Cooked and Seasoned Ground Beef: You’ll need 1 pound. This is the hearty base of our filling. Using pre-cooked beef makes this recipe lightning fast, but don’t worry, I’ll cover how to start from scratch. The key is making sure it’s well-seasoned. Think taco seasoning, salt, pepper, maybe a pinch of cumin or chili powder to really amp up the flavor profile that pairs so well with the cheese and tortilla.
- Shredded Cheese: About 2 cups. A good quality shredded cheddar or a Mexican blend is ideal here. Cheddar offers classic sharpness, while a Mexican blend often includes Monterey Jack, Asadero, or Queso Quesadilla, providing fantastic meltiness. Pre-shredded works, but shredding it yourself often results in smoother melting because it lacks the anti-caking agents found in some pre-shredded bags.
- Chopped Green Bell Pepper: Half a cup. Bell pepper adds a lovely bit of freshness, a subtle crunch, and a mild sweetness that cuts through the richness of the beef and cheese. You can finely dice it so it softens quickly in the pan.
- Medium Flour Tortillas: Eight medium-sized tortillas are the perfect canvas. Flour tortillas are flexible and crisp up beautifully. Medium size is great for handling and folding into half-moons.
- Butter or Oil for Cooking: Approximately 2 tablespoons total, though you’ll add it a bit at a time. This is absolutely crucial for achieving that golden, crispy exterior. Butter adds fantastic flavor, while oil (like vegetable or canola) offers a neutral taste and high heat tolerance. Using enough fat is part of my key trick!
Having all your ingredients prepped and ready before you start cooking makes the assembly process incredibly smooth. Make sure your beef is cooked, your cheese is shredded, and your pepper is chopped!
Crafting Your Golden Beef and Cheese Quesadillas: Step-by-Step
Now for the fun part – bringing it all together! Follow these steps carefully, paying special attention to the cooking process, and you’ll be rewarded with perfectly golden, incredibly cheesy beef quesadillas.
Prepare the Beef Filling: If your pound of ground beef isn’t already cooked and seasoned, start by browning it in a large skillet over medium heat. Break up the meat as it cooks. Once it’s no longer pink, carefully drain off any excess grease. This is important because too much fat in the filling can make your quesadillas greasy and prevent crisping. Season the cooked beef generously with your favorite taco seasoning blend, or simply use salt and pepper to taste. A standard packet of taco seasoning works perfectly for this amount of beef and gives it that familiar, delicious flavor. Once seasoned, stir in the half cup of chopped green bell pepper. Let this mixture cook together for just another 2-3 minutes. You want the bell pepper to soften slightly but still retain a little bite. Give everything a good stir to ensure the pepper is distributed evenly throughout the beef.
Assemble the Quesadilla Filling: Take one medium flour tortilla and lay it flat on a clean surface, like a cutting board. Visualize dividing the tortilla in half. On just one half, sprinkle about a quarter cup of your shredded cheese blend. The cheese acts as a delicious glue, helping to hold the filling together and adhering the tortilla halves. Next, take about a quarter cup of the warm beef and pepper filling and spoon it evenly over the cheese on the same half of the tortilla. Finally, sprinkle another quarter cup of shredded cheese directly on top of the beef filling. Layering the cheese on the bottom and top of the filling helps ensure maximum meltiness and keeps everything contained once cooked.
Fold and Press: Carefully take the empty half of the tortilla and fold it directly over the filling, creating a neat half-moon shape. Gently press down on the folded tortilla with your hand or a spatula. This helps to slightly flatten the quesadilla, distributing the filling evenly and sealing the edges somewhat before cooking. Don’t press too hard and squeeze the filling out, just a gentle flattening is perfect.
Heat the Pan – This is the Key Step!: This is where the magic happens for achieving that golden color and perfect texture. You need a large, flat skillet or griddle. Place it over medium heat. Patience is key here; don’t rush the heating process by cranking up the heat too high. Medium heat allows the tortilla to crisp and turn golden at the same rate that the cheese melts inside. Once the pan feels hot (you can test by flicking a tiny drop of water into it; it should sizzle immediately), add about a teaspoon of butter or oil. Swirl the pan to ensure the fat coats the cooking surface evenly. You need enough fat to facilitate browning, but not so much that the quesadilla is swimming in it. Make sure the pan is evenly heated across its surface before you add the quesadilla.
Cook the First Side: Carefully lift one or two assembled quesadillas and place them gently into the hot skillet. Be mindful not to overcrowd the pan. If you try to cook too many at once, the temperature will drop, and they will steam instead of crisping. Cook in batches if necessary. Let the quesadillas cook undisturbed for about 3-4 minutes on this first side. This is crucial! Resist the urge to peek or flip too early. You’re looking for the bottom tortilla to turn a beautiful golden brown and become slightly crisp. You might even start to see little bits of melted cheese just beginning to ooze out from the edges – that’s a good sign the cheese inside is melting.
Flip and Cook the Second Side: Once the first side is perfectly golden, gently slide a spatula underneath the quesadilla, ensuring you get the whole thing, and carefully flip it over. Cook the second side for another 3-4 minutes. Again, let it cook until it matches the color and crispness of the first side. By now, the cheese inside should be completely melted and wonderfully gooey, and the filling will be hot throughout.
Rest and Serve: When both sides are golden brown and the cheese is bubbling and melted, remove the quesadilla from the skillet. Place it on a cutting board. Allow it to rest for just a minute before cutting. This brief resting period helps the cheese set slightly, making it easier to cut without all the filling oozing out immediately. Use a sharp knife or a pizza cutter to slice the half-moon shape into 2 or 3 wedges. Repeat the cooking process with the remaining assembled quesadillas, adding another teaspoon of butter or oil to the pan for each new batch to maintain that golden crispness. Serve your beef and cheese quesadillas hot, with your favorite toppings or dips!
Following these steps, especially the focus on medium heat and sufficient fat in the pan, is truly the secret weapon against pale, floppy quesadillas. Get ready for golden, cheesy success!
Tips for Perfect Golden Quesadillas Every Time
While the step-by-step guide covers the core process, here are a few extra tips and variations to help you truly master the art of the golden quesadilla:
- Mastering the Heat: As mentioned, medium heat is your best friend. If the pan is smoking hot, the tortilla will burn before the cheese melts. If it’s too low, the tortilla will just warm up and remain soft or become rubbery. A good indicator is when the fat sizzles gently but doesn’t smoke excessively.
- Don’t Skimp on the Fat (But Don’t Drown It): That teaspoon of butter or oil per batch is key. It helps conduct heat evenly to the tortilla surface, promoting browning and crisping. If the pan looks dry after cooking a batch, add a little more before the next one.
- Tortilla Choice Matters: Medium flour tortillas are ideal for this recipe as they are pliable for folding and crisp up nicely. Thinner tortillas might crisp faster but can tear easily, while thicker ones might take longer to cook through.
- Cheese Blend Flexibility: While cheddar and Mexican blend are classic, feel free to experiment! Pepper Jack adds a little heat, Monterey Jack is super melty, and a combination of cheeses can add complexity. Just make sure it’s a cheese that melts well.
- Vary the Veggies: Don’t stop at green bell pepper! Finely diced onion, sautéed mushrooms (similar to our savory mushroom tart), or even some corn can be added to the beef filling for extra flavor and texture. Just make sure any added veggies are cooked and any excess moisture is removed.
- Spice it Up: Want some heat? Add a pinch of cayenne pepper to the beef seasoning, include some finely diced jalapeño with the bell pepper, or serve with a spicy salsa.
- Handling the Flip: A wide, sturdy spatula is helpful for flipping. Be confident but gentle to keep the filling intact.
- Cooking in Batches: This is essential for achieving crispy results. Overcrowding cools the pan and leads to steaming. Cook one or two at a time, depending on the size of your skillet.
- Rest is Best: Letting the quesadilla rest for a minute before cutting prevents the cheese from completely running out. It slightly firms up the melted cheese, keeping the filling where it belongs.
These small adjustments and techniques can make a big difference in the final outcome, ensuring your beef and cheese quesadillas are always a golden, crispy success story.
What to Serve With Your Cheesy Beef Quesadillas
These beef and cheese quesadillas are hearty enough to stand on their own, but they truly shine when paired with a few complementary sides or dipping sauces. Here are some ideas to complete your meal:
- Salsa and Guacamole: Classic companions for a reason! A fresh pico de gallo or chunky guacamole adds brightness and freshness.
- Sour Cream or Greek Yogurt: A dollop of cool sour cream or plain Greek yogurt balances the richness of the cheese and beef.
- Shredded Lettuce and Diced Tomatoes: For a bit of freshness and crunch, offer shredded lettuce and diced tomatoes on the side.
- Refried Beans and Rice: Make it a full Tex-Mex feast with a side of creamy refried beans and fluffy rice, perhaps even our perfect Mexican rice.
- Cheese Dip: If you’re a true cheese lover, serving your quesadillas with a warm smooth melty cheese dip takes the indulgence to the next level.
- Roasted Vegetables: For a healthier twist, serve alongside some simply roasted vegetables like corn, bell peppers, or even our crispy baked zucchini fries.
- Corn Salad: A simple corn salad with lime juice, cilantro, and a touch of red onion is a refreshing side.
Mix and match these suggestions to create the perfect plate of golden beef and cheese quesadillas for any occasion!
Your Golden Quesadilla Questions Answered (FAQ)
Got questions about making the perfect beef and cheese quesadillas? Here are some answers to common queries:
Can I use pre-cooked ground beef from the store?
Absolutely! Using pre-cooked ground beef is a fantastic shortcut that makes this recipe incredibly fast. Just ensure it’s heated through and seasoned well before adding the bell pepper and cheese. If it’s not seasoned, brown it quickly and then add your taco seasoning, salt, and pepper as directed in step 1.
What’s the best kind of cheese for quesadillas?
You want a cheese that melts well and has good flavor. Shredded cheddar, Monterey Jack, Asadero, or a pre-shredded “Mexican blend” are all excellent choices. Using a combination often provides the best balance of flavor and meltiness. Avoid cheeses like fresh mozzarella or pre-cubed cheeses that don’t melt into that classic gooey texture.
How do I prevent the tortilla from getting soggy?
Several factors help prevent a soggy tortilla: 1) Drain excess fat from the cooked ground beef filling. 2) Don’t overstuff the quesadilla – too much filling can create steam. 3) Most importantly, ensure your pan is at medium heat and you are using enough butter or oil to create a barrier and promote crisping, as detailed in step 4 and 5. Avoid overcrowding the pan, as this also leads to steaming.
What is the secret to getting the tortilla golden brown?
The key secret, as highlighted in the recipe, is using medium heat and sufficient butter or oil in the skillet. Medium heat allows the tortilla to cook gradually and evenly without burning, giving it time to crisp and develop that beautiful golden color while the cheese inside melts. Don’t rush it; let it cook for the full 3-4 minutes per side.
Can I make the filling ahead of time?
Yes, the beef and bell pepper filling can be cooked ahead of time and stored in an airtight container in the refrigerator for up to 3-4 days. Reheat the filling gently before assembling the quesadillas. This is a great meal prep strategy!
How do I reheat leftover quesadillas?
The best way to reheat leftover beef and cheese quesadillas to maintain their crispness is in a dry skillet over medium-low heat. Cook for a few minutes on each side until heated through and the tortilla is crispy again. You can also reheat them in a toaster oven or air fryer. Microwaving is the least recommended method, as it will likely make the tortilla soft and rubbery.
Can I add other ingredients to the filling?
Absolutely! This is a very adaptable recipe. Cooked onions, corn, black beans, diced tomatoes (make sure to drain them well!), or even a pinch of chili flakes for heat are all great additions to the beef and bell pepper filling. Just ensure any additions are cooked and not overly wet.
Enjoy Your Homemade Golden Beef and Cheese Quesadillas!
Making perfect beef and cheese quesadillas doesn’t have to be a struggle. By focusing on the simple yet crucial technique of cooking on medium heat with sufficient fat, you can achieve that coveted golden, crispy tortilla and wonderfully melted, gooey cheese every time. These hearty quesadillas are perfect for a quick lunch, a fun dinner, or even a satisfying snack.
Give this recipe a try and see the golden difference for yourself! I’d love to hear how they turn out for you. Leave a comment below and let me know your favorite way to serve them!
Beef and Cheese Quesadillas

Ingredients
- 1 pound cooked and seasoned ground beef
- 2 cups shredded cheddar or Mexican blend cheese
- 1/2 cup chopped green bell pepper
- 8 medium flour tortillas
- 2 tablespoons butter or oil for cooking
Directions
- If not already cooked, brown the ground beef in a skillet, drain any excess fat, season with your favorite taco seasoning, salt, and pepper, then stir in the chopped green bell pepper and cook for another 2-3 minutes until slightly softened.
- Lay out a tortilla flat. Sprinkle half of the tortilla with about 1/4 cup of shredded cheese. Spoon about 1/4 cup of the beef and pepper filling over the cheese on the same half. Sprinkle another 1/4 cup of cheese over the filling.
- Fold the empty half of the tortilla over the filling to create a half-moon shape. Gently press down.
- Heat a large skillet or griddle over medium heat. This is the key step! Add about a teaspoon of butter or oil to the hot pan, swirling to coat. Make sure the pan is evenly heated before adding the quesadilla.
- Carefully place one or two quesadillas in the hot skillet (do not overcrowd the pan, cook in batches if necessary). Cook for 3-4 minutes on one side, or until the tortilla is golden brown and slightly crisp, and you can see the cheese starting to melt through the tortilla edges. Resist the urge to flip too early; let the heat work its magic.
- Gently flip the quesadilla using a spatula and cook for another 3-4 minutes on the second side until it is also golden brown and the cheese is completely melted and gooey.
- Remove from the skillet and let it rest on a cutting board for just a minute before cutting into wedges with a knife or pizza cutter. Repeat with the remaining ingredients, adding more butter or oil to the pan as needed for each new batch. Serve hot.