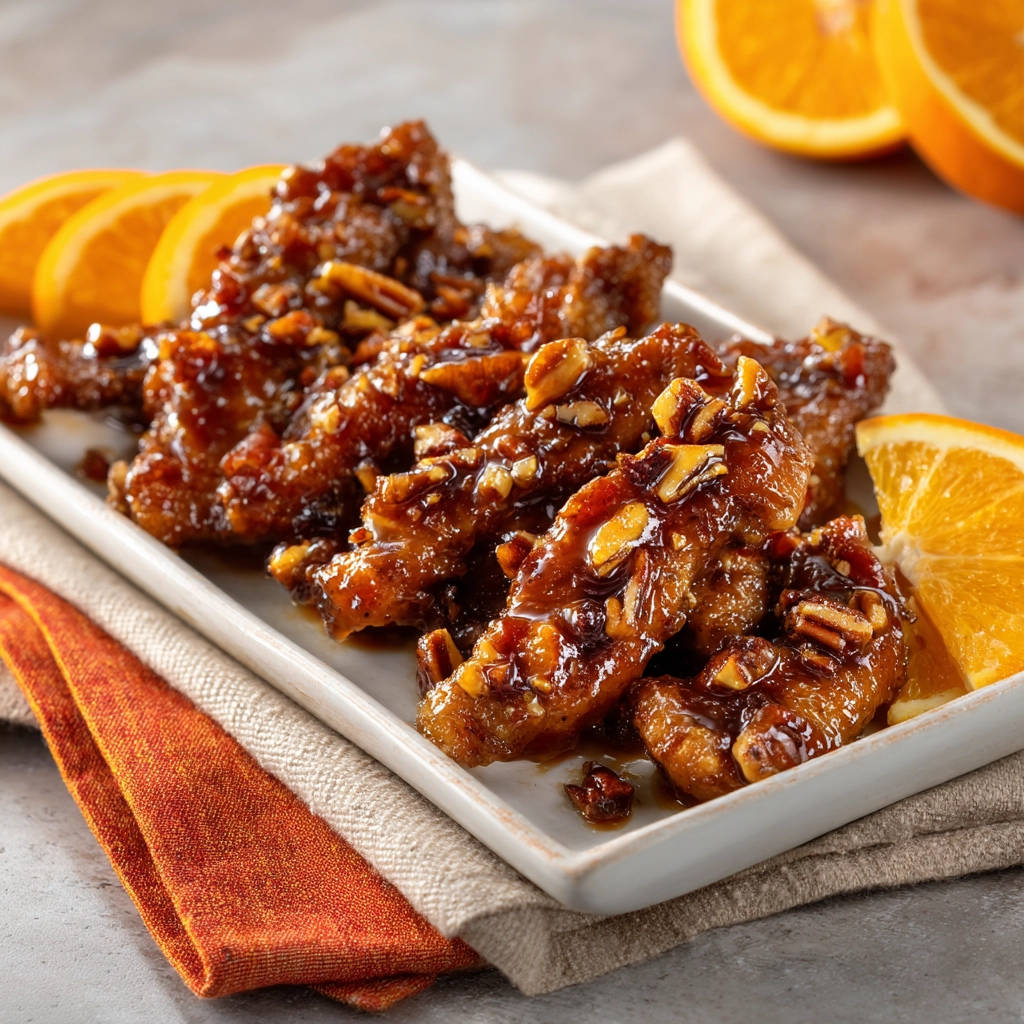
Hello fellow food lovers! If you’ve ever attempted homemade sticky chicken, aiming for that delightful crunch only to watch it vanish the moment it meets that luscious sauce, you are absolutely not alone. For years, I faced the same frustrating dilemma. I craved the perfect balance: wonderfully tender chicken pieces coated in a vibrant, sweet, and tangy glaze, but with that satisfying crisp still intact. After much experimentation, I finally unlocked the secret, and let me tell you, it’s a total game-changer! This recipe for Sweet & Sticky Glazed Chicken delivers on its promise – juicy chicken wrapped in a vibrant sauce with a delightful crispy exterior that holds up.
Why You’ll Absolutely Love This Recipe
This isn’t just another chicken recipe; it’s a solution to a common kitchen problem. Here’s why this Sweet & Sticky Glazed Chicken will become a staple in your meal rotation:
- Guaranteed Crispiness: The unique method ensures your chicken stays wonderfully crunchy, even after being tossed in the glaze. No more soggy disappointment!
- Irresistible Flavor: The glaze is a fantastic mix of sweet, tangy, and savory, with bright citrus notes and a hint of warmth from ginger and garlic.
- Versatile & Family-Friendly: Kids and adults alike devour this dish. It’s perfect for a weeknight meal but impressive enough for company.
- Faster Than Takeout: You can whip up this incredibly delicious meal in less time than it takes for delivery.
Gathering Your Ingredients for Sweet & Sticky Glazed Chicken
Creating this dish requires a balance of pantry staples and fresh aromatics. Each ingredient plays a crucial role, from the base of the crispy coating to the depth and brightness of the sticky glaze. Let’s break down what you’ll need.
For the chicken itself, we’re starting with 1.5 pounds of boneless, skinless chicken. You have the choice between thighs or breasts. Thighs tend to stay a bit juicier during the frying process, while breasts are a lean option. Whichever you choose, cutting them into bite-sized pieces ensures quick cooking and maximum surface area for that craveable coating.
The magic behind the crispy coating comes from a blend of dry ingredients. You’ll need 1/2 cup of cornstarch and 1/4 cup of all-purpose flour. Cornstarch is key here, creating a lighter, crispier crust than flour alone, especially when fried. Salt (1 teaspoon) and black pepper (1/2 teaspoon) season the coating itself, ensuring the chicken is flavorful from the inside out.
For the frying process, you’ll need enough vegetable oil to fill your pan about 1-2 inches deep. The type of oil matters for frying; vegetable oil, canola oil, or peanut oil are good choices because they have high smoke points.
Now, let’s talk about that incredible glaze. The base starts with 1 cup of bright, tangy orange juice. This provides sweetness and acidity. Balancing this is 1/4 cup of soy sauce, which brings the savory, umami depth. Rice vinegar (2 tablespoons) adds another layer of tang and helps cut through the sweetness. To create the signature sticky sweetness, we use 1/2 cup of brown sugar. The molasses in brown sugar adds moisture and a richer caramel note compared to white sugar.
Fresh aromatics elevate the sauce significantly. You’ll need 1 tablespoon of freshly grated ginger and 2 cloves of minced garlic. Using fresh ginger and garlic makes a world of difference in the vibrancy of the glaze.
To thicken the sauce to that perfect glossy, sticky consistency, a cornstarch slurry is essential. This is just 1 teaspoon of cornstarch mixed with 2 tablespoons of water. It’s added at the end to quickly thicken the simmering sauce.
Finally, for garnish and a touch of texture, have 1/4 cup of chopped pecans or walnuts ready. A few fresh orange slices make for a beautiful and fitting presentation.
Here is a quick breakdown of everything:
- 1.5 pounds boneless skinless chicken thighs or breasts, cut into bite-sized pieces
- 1/2 cup cornstarch (for coating)
- 1/4 cup all purpose flour
- 1 teaspoon salt
- 1/2 teaspoon black pepper
- Vegetable oil, for frying (enough to fill pan 1-2 inches deep)
- 1 cup orange juice
- 1/4 cup soy sauce
- 2 tablespoons rice vinegar
- 1/2 cup brown sugar
- 1 tablespoon grated fresh ginger
- 2 cloves garlic, minced
- 1 teaspoon cornstarch (for slurry)
- 2 tablespoons water (for slurry)
- 1/4 cup chopped pecans or walnuts
- Orange slices, for garnish
Crafting Your Sweet & Sticky Glazed Chicken: Step-by-Step
Ready to achieve that perfect, crispy-under-the-glaze texture? Follow these steps closely. The key is in the preparation and timing!
Prepare the Chicken for Maximum Crisp: The very first, non-negotiable step for crispy chicken is removing excess moisture. Pat your cut chicken pieces thoroughly dry with paper towels. Think of it like giving the chicken a little spa treatment to wick away every bit of dampness. This dryness allows the coating to adhere properly and crisp up beautifully in the hot oil.
Coat the Chicken Evenly: Grab a medium bowl and whisk together your dry coating ingredients: the cornstarch, flour, salt, and black pepper. Add your well-dried chicken pieces to this bowl. Toss everything together gently, ensuring every single piece is completely coated in the flour and cornstarch mixture. Pick up the chicken pieces and shake off any excess coating – you want a nice, even layer, not clumps of flour.
Heat the Oil and Fry in Batches: Heat about 1 to 2 inches of vegetable oil in a large skillet or Dutch oven. Get the oil nice and hot; a temperature of 350°F is ideal for frying chicken to golden perfection. If you don’t have a thermometer, you can test the oil by dropping a tiny bit of the flour mixture in – it should immediately sizzle vigorously. Once the oil is hot, carefully add the coated chicken pieces, making sure not to overcrowd the pan. Frying in batches is crucial! Overcrowding lowers the oil temperature, leading to soggy, greasy chicken instead of crispy delights. Fry each batch for about 4 to 6 minutes, flipping them occasionally, until they are a beautiful deep golden brown, cooked through, and feel wonderfully crispy. This initial crispiness is the foundation for maintaining crunch under the glaze.
Drain and Prepare for Glazing: As each batch of chicken finishes frying, remove it from the hot oil using a slotted spoon. Transfer the crispy pieces to a wire rack that’s set over a baking sheet. This allows excess oil to drain away and air to circulate, helping to maintain crispiness while you prepare the glaze. This short resting period is important.
Whip Up the Sticky Glaze: While the chicken rests, turn your attention to the sauce. In a separate saucepan, combine the orange juice, soy sauce, rice vinegar, brown sugar, grated fresh ginger, and minced garlic. Place the saucepan over medium heat and bring the mixture to a gentle simmer, stirring continuously until the brown sugar has completely dissolved into the liquid. Let it bubble gently for a minute or two to allow the flavors to meld.
Thicken the Sauce to Perfection: Now it’s time to thicken the glaze. Give your cornstarch slurry (the 1 teaspoon of cornstarch mixed with 2 tablespoons of water) a quick whisk, as cornstarch settles quickly. Pour the slurry into the simmering sauce, whisking constantly. Continue stirring as the sauce simmers; you’ll notice it start to thicken and become wonderfully glossy within just 1 to 2 minutes. Once it reaches a thick, syrupy consistency that coats the back of a spoon, remove the saucepan from the heat immediately.
Combine Chicken and Glaze (Quickly!): This step is key to preserving that hard-earned crispiness! Just before you’re ready to serve, place all the crispy fried chicken pieces into a large bowl. Pour the warm, thickened glaze directly over the chicken. Using tongs or a large spoon, gently and quickly toss the chicken pieces until each one is evenly coated in the sticky sauce. The goal is to coat them fast and get them plated immediately.
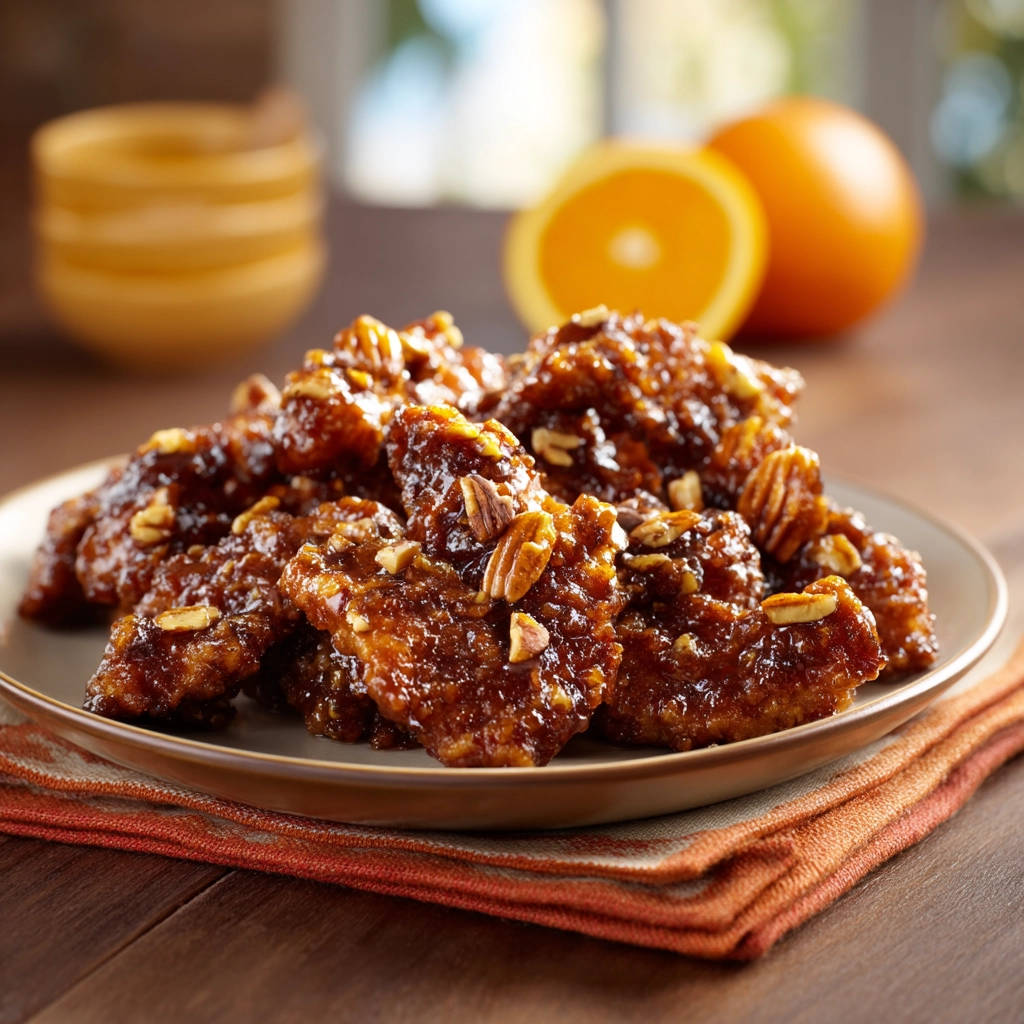
Serve and Enjoy: Transfer the glazed chicken to your serving dish. Sprinkle the chopped pecans or walnuts over the top for added crunch and flavor. Garnish with fresh orange slices for a burst of color and citrus aroma. Serve the Sweet & Sticky Glazed Chicken right away while it’s hot and the texture is at its absolute best. Prepare to be amazed by that perfect crispy texture under the sweet, sticky coating!
Tips for Perfect Sweet & Sticky Glazed Chicken Every Time
Achieving that perfect balance of crispy chicken and sticky glaze is easier when you keep a few things in mind. Here are some pro tips to ensure your success:
- Don’t Skip the Drying Step: Seriously, patting the chicken dry is the most important step for a truly crispy coating. Moisture on the surface equals steam, and steam prevents crisping.
- Maintain Oil Temperature: Use a thermometer if possible (350°F is the sweet spot). If the oil is too cool, the chicken absorbs too much grease; if it’s too hot, the coating burns before the inside cooks.
- Fry in Batches: Resist the urge to crowd the pan. Give those chicken pieces space to fry properly. This keeps the oil temperature stable and ensures even browning and crisping.
- Get the Chicken Extra Crispy: Since you know the glaze will soften the coating slightly, aim for the chicken to be slightly more crispy than you’d think is necessary before tossing it in the sauce.
- Glaze Just Before Serving: Tossing the chicken in the glaze too early will cause the crisp coating to become soggy. Have everything ready, then combine just before plating.
- Flavor Boosts: Want a little heat? Add a pinch of red pepper flakes to the glaze while it simmers. Not a fan of nuts? Skip them or use toasted sesame seeds instead.
- Double the Sauce: If you love extra sauce (and who doesn’t?), feel free to double the glaze ingredients in step 5.
What to Serve With Your Crispy Glazed Chicken
This flavorful chicken pairs beautifully with a variety of side dishes. Steamed rice is a classic choice, soaking up some of that delicious glaze. For a simple yet complementary side, consider serving it alongside some roasted vegetables or perhaps a light salad to balance the richness. If you’re looking for another crispy dish to complete your meal, you might enjoy making crispy chicken bites as an appetizer or a simple side of seasoned rice.
Your Sweet & Sticky Glazed Chicken Questions Answered (FAQ)
Let’s tackle some common questions you might have about making this incredibly satisfying dish.
Can I bake this chicken instead of frying?
While you can bake chicken coated in cornstarch and flour, the texture will not be the same as frying. The deep fry method at a controlled temperature is what creates that intense, durable crispiness needed to withstand the glaze. If you prefer not to fry, baking or air frying will give you crispy results, but the crisp might soften more quickly once coated.
Can I make the glaze ahead of time?
Yes, you can prepare the glaze ahead of time. Store it in an airtight container in the refrigerator for up to 3-4 days. Gently reheat it in a saucepan over medium heat, whisking, just before you’re ready to glaze the chicken.
What’s the best way to reheat leftovers?
Reheating glazed chicken can be tricky if you want to maintain crispiness. The best method is often in an air fryer or oven. Preheat your air fryer to 375°F (190°C) or your oven to 400°F (200°C). Spread the chicken in a single layer (don’t overcrowd!) and heat for 5-10 minutes, or until warmed through and the coating feels crisp again. Microwaving is not recommended as it will make the chicken soggy.
Can I use chicken breast instead of thighs?
Absolutely! The recipe works well with both chicken thighs and breasts. As mentioned, thighs tend to be more forgiving and stay juicier, but chicken breast cut into bite-sized pieces will cook quickly and absorb the flavors beautifully. Just be careful not to overcook breast meat as it can dry out.
Is there a gluten-free option for the coating?
Yes! You can often substitute the all-purpose flour with a gluten-free all-purpose flour blend. Ensure the cornstarch you use is certified gluten-free. The frying method remains the same.
Why do I need a cornstarch slurry for the sauce?
A cornstarch slurry is a simple mixture of cornstarch and cold water used as a thickening agent. When added to a hot liquid, the cornstarch molecules swell, thickening the sauce quickly and creating that characteristic glossy, sticky texture you want in a glazed chicken dish. Adding cornstarch directly to hot liquid without making a slurry first can result in clumps.
Enjoy Your Homemade Sweet & Sticky Glazed Chicken!
Say goodbye to soggy chicken blues! With this recipe, you can confidently create Sweet & Sticky Glazed Chicken at home that boasts perfectly crispy chicken pieces coated in a vibrant, finger-licking good sauce. It’s the ideal weeknight hero or weekend treat. Give it a try, gather your loved ones, and savor every crispy, sticky bite!
Did you make this recipe? How did your chicken turn out? Share your experience in the comments below! We love hearing from you and seeing your delicious creations.
Sweet & Sticky Glazed Chicken

Ingredients
- 1.5 pounds boneless skinless chicken thighs or breasts, cut into bite-sized pieces
- 1/2 cup cornstarch
- 1/4 cup all purpose flour
- 1 teaspoon salt
- 1/2 teaspoon black pepper
- Vegetable oil, for frying
- 1 cup orange juice
- 1/4 cup soy sauce
- 2 tablespoons rice vinegar
- 1/2 cup brown sugar
- 1 tablespoon grated fresh ginger
- 2 cloves garlic, minced
- 1 teaspoon cornstarch mixed with 2 tablespoons water (slurry)
- 1/4 cup chopped pecans or walnuts
- Orange slices, for garnish
Directions
- Pat the chicken pieces thoroughly dry with paper towels. This is crucial for crispiness.
- In a medium bowl, whisk together the cornstarch, flour, salt, and black pepper. Add the dry chicken pieces and toss to coat evenly, shaking off any excess coating.
- Heat 1-2 inches of vegetable oil in a large skillet or Dutch oven over medium high heat until it reaches 350F. Working in batches, carefully add the coated chicken pieces, making sure not to overcrowd the pan. Fry for 4-6 minutes per batch, flipping occasionally, until the chicken is deep golden brown, cooked through, and very crispy.
- Remove the crispy chicken from the oil with a slotted spoon and transfer to a wire rack set over a baking sheet to drain. Making sure the chicken is extra crispy at this stage is the key to it staying crispy after glazing.
- While the chicken drains, prepare the glaze. In a saucepan, combine the orange juice, soy sauce, rice vinegar, brown sugar, ginger, and garlic. Bring the mixture to a simmer over medium heat, stirring until the sugar dissolves.
- Whisk the cornstarch slurry into the simmering sauce. Continue to cook, stirring constantly, until the sauce thickens and becomes glossy, about 1-2 minutes. Remove from heat.
- Just before serving, place the crispy chicken in a large bowl. Pour the warm glaze over the chicken and gently toss until each piece is evenly coated. The goal is to coat quickly and serve immediately to preserve the crispiness.
- Transfer the glazed chicken to a serving plate. Sprinkle with chopped pecans or walnuts and garnish with fresh orange slices. Serve immediately and enjoy that perfect crispy texture under the sticky glaze!