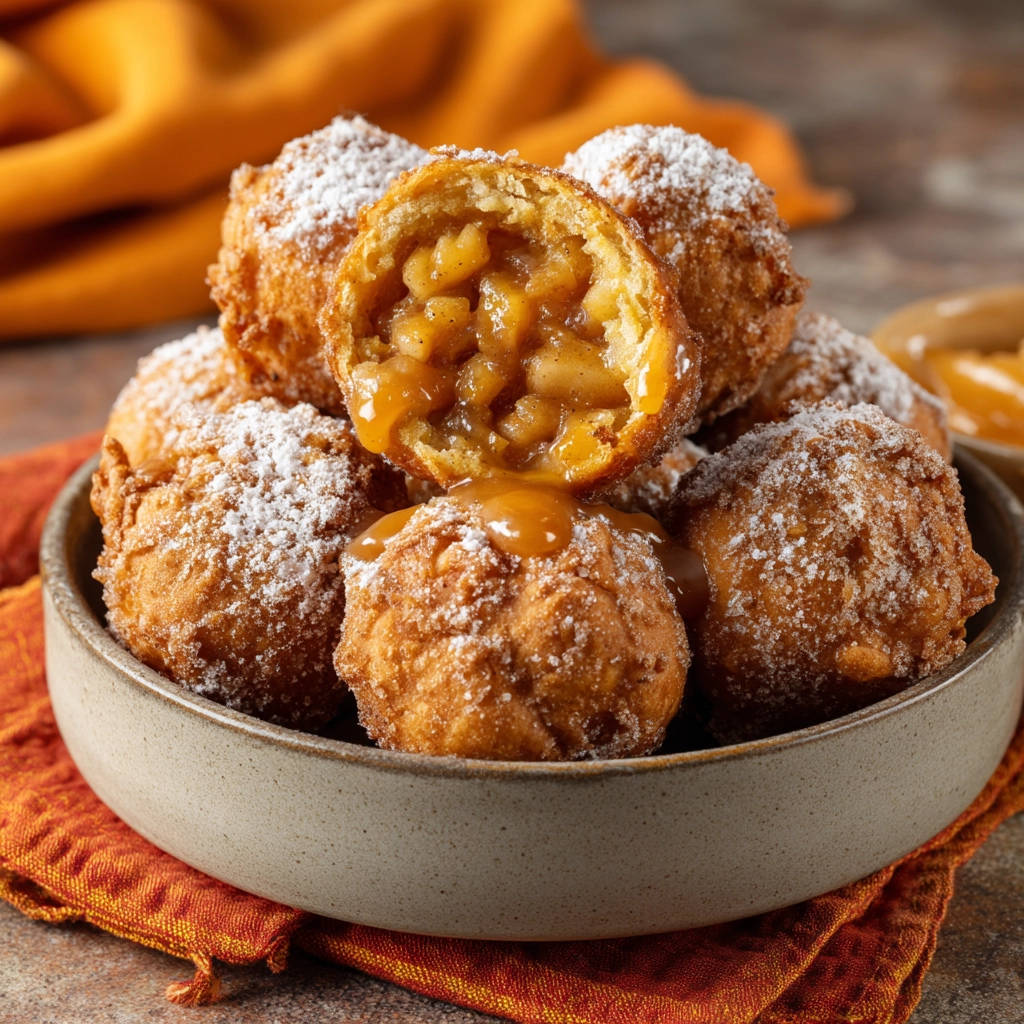
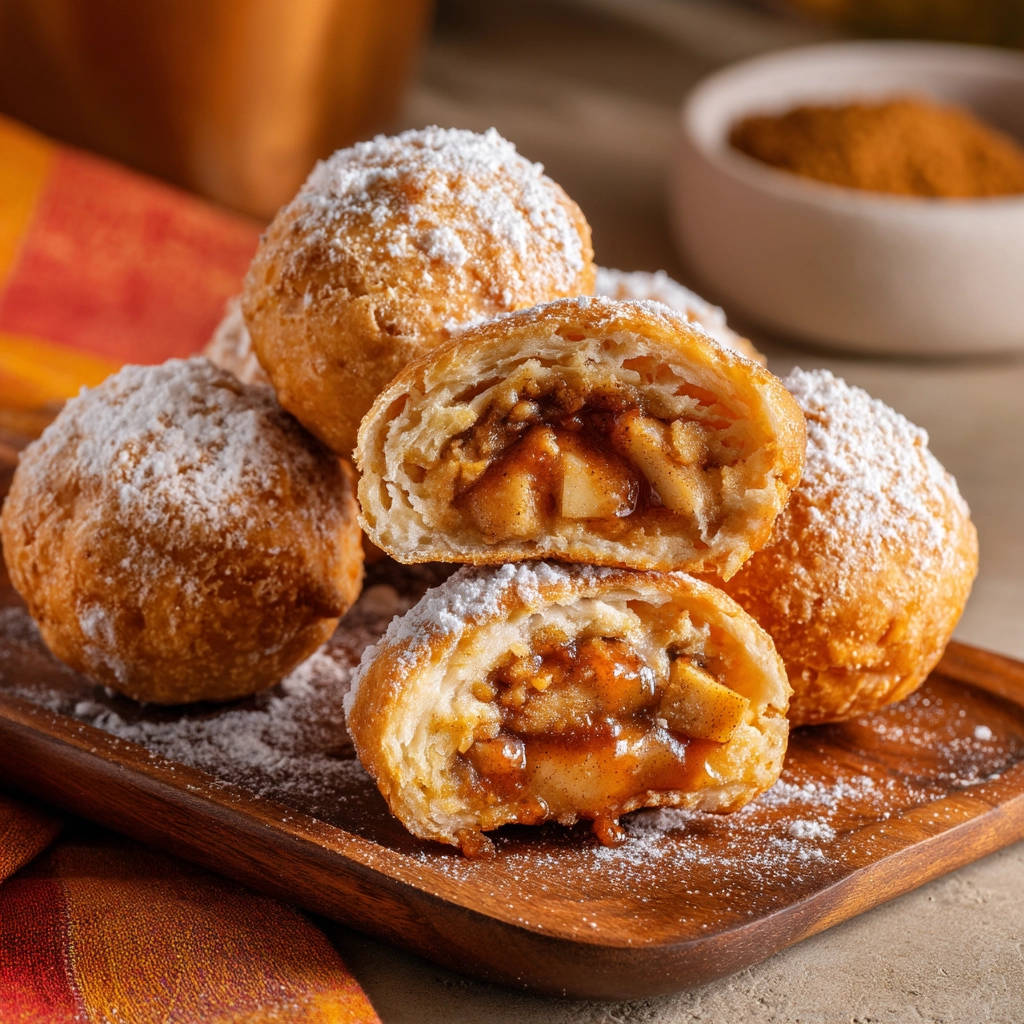
Ah, warm, tender apple fritters! There’s just something incredibly comforting about biting into one. That crispy, golden exterior giving way to a soft, cakey inside studded with sweet, warm apples. Pure bliss, right?
But let’s be honest, making them at home can sometimes feel like a gamble. Have you ever pulled a batch from the fryer, only to find them disappointingly oily and heavy? Or worse, perfectly golden on the outside but still raw and doughy in the middle?
I’ve been there! For the longest time, my attempts at homemade fried apple fritters resulted in varying degrees of greasy disappointment. I tried different batters, different oil levels, different frying times. Nothing seemed to guarantee that elusive combination of crispy, non-greasy, and perfectly cooked-through.
Then, I discovered the secret, and it’s surprisingly simple: it’s all about the oil temperature! Maintaining the correct, steady temperature is the absolute key to ensuring your apple fritters fry up golden brown, crispy, never greasy, and always cooked beautifully inside. Once I nailed this one trick, my fritter game changed forever. And now, I’m going to share my foolproof method with you so you can experience apple fritter perfection every single time.
Why You’ll Fall in Love with This Apple Fritter Recipe
This isn’t just another fritter recipe. This method guarantees results that will make you feel like a pro baker. Here’s why you’ll adore making these:
- Consistently Non-Greasy: The precise temperature control prevents the fritters from absorbing excess oil.
- Perfectly Cooked Apples: The heat is just right to soften and sweeten the diced apples without turning them to mush or leaving them hard.
- Golden & Crispy Exterior: Achieve that beautiful, satisfying crunch with minimal effort.
- Simple, Accessible Ingredients: No fancy ingredients needed, just pantry staples and fresh apples.
- Pure Comfort Food: Nothing beats a warm, homemade fritter dusted with sugar or drizzled with caramel sauce.
Gathering Your Ingredients for Apple Fritter Bliss
Creating these delightful fried apple fritters starts with gathering a few simple items. The magic isn’t in rare ingredients, but in the combination and preparation. We’re building a simple, sturdy batter that coats the apples and puffs up beautifully in the hot oil, along with those essential flavor builders.
You’ll need:
- All-Purpose Flour: The foundation of our batter, providing structure.
- Granulated Sugar: Adds sweetness to the batter, balancing the tartness of the apples.
- Baking Powder: This is our leavening agent, giving the fritters their wonderful fluffy texture inside. Make sure yours isn’t expired!
- Salt: A pinch enhances all the other flavors, both sweet and apple.
- Egg: Acts as a binder, helping hold the batter together and adding richness.
- Milk or Buttermilk: Liquid to bring the batter together. Buttermilk adds a slight tang and tenderness, but regular milk works perfectly fine too.
- Vanilla Extract: Essential for that classic warm, comforting flavor profile that pairs so well with apples and cinnamon.
- Diced Apples: The star of the show! About two medium apples, peeled and diced into roughly ½-inch pieces. Don’t dice them too small, or they’ll disintegrate; too large, and they might not cook through. Sturdier apple varieties like Honeycrisp, Gala, or Granny Smith (if you like a bit of tartness) work best for frying.
- Ground Cinnamon: Apple’s best friend! This spice infuses the apples and the batter with warm, aromatic flavor.
- Brown Sugar (Optional): Combining this with the apples pre-fry enhances their sweetness and adds a lovely depth from the molasses. If your apples are already very sweet, you can omit this.
- Vegetable Oil or Canola Oil: The frying medium. Choose an oil with a high smoke point. You’ll need enough to fill your pot with 2-3 inches of oil.
- Powdered Sugar: For that essential dusting finish right after frying. It melts into a beautiful glaze as the fritters cool slightly.
- Caramel Sauce: Drizzling warm caramel over hot fritters is an indulgent finishing touch that takes them over the top. You can use store-bought or homemade. If you’re feeling ambitious, making your own caramel isn’t as hard as you think!
Crafting Your Fried Apple Fritters: Step-by-Step Perfection
Ready to transform those simple ingredients into golden, delicious fritters? The process is straightforward, but paying attention to a couple of key details, especially that oil temperature, will make all the difference.
-
Prep the Apple Filling: Start by preparing the apples themselves. Peel, core, and dice your apples into uniform pieces. Aim for pieces about ½ inch square. In a small bowl, toss the diced apples with the ground cinnamon and the optional brown sugar. Give it a good stir to ensure the apples are evenly coated. This simple step infuses the apples with warm spice and sweetness before they even hit the batter. Set this bowl aside for a moment.
-
Prepare the Batter Base: Now, let’s build our batter. In a large mixing bowl, whisk together your dry ingredients: the all-purpose flour, granulated sugar, baking powder, and salt. Give them a good whisk to ensure they are well combined and that the leavening is evenly distributed. In a separate, smaller bowl, whisk together the wet ingredients: the egg, milk (or buttermilk), and vanilla extract. Whisking the wet ingredients separately first helps ensure everything is combined before introducing it to the flour.
-
Combine Wet and Dry Ingredients: Pour the wet mixture from the smaller bowl into the large bowl with the dry ingredients. This is where the batter comes together! Stir gently using a spoon or spatula just until the ingredients are combined. Do not overmix! A few lumps in the batter are perfectly normal and actually preferable. Overmixing develops the gluten in the flour, which can result in tough, dense fritters instead of light, fluffy ones. Stop stirring as soon as there’s no dry flour visible.
-
Fold in the Apples: Now, take your prepared, cinnamon-coated diced apples and gently fold them into the batter. Use a spatula or spoon to gently incorporate the apples without stirring vigorously. The batter should be quite thick at this point, substantial enough to coat the apple pieces and hold its shape when you scoop it out for frying. This thick batter is important for keeping the apples suspended and for creating that classic fritter shape.
-
Heat the Oil (The Secret Step!): This is where you unlock the “never greasy, always cooked through” magic! Pour 2 to 3 inches of your chosen frying oil (vegetable or canola) into a deep pot or a sturdy Dutch oven. You need enough depth so the fritters can float and cook evenly. Attach a reliable thermometer to the side of the pot, ensuring the tip is submerged in the oil but not touching the bottom. Heat the oil over medium-high heat until it reaches a steady temperature of 360 degrees F (about 180 degrees Celsius). Maintaining this temperature is absolutely critical. Oil that is too cool will result in greasy, heavy fritters because the batter absorbs oil instead of crisping up. Oil that is too hot will burn the outside before the inside has a chance to cook. Keep a close eye on the thermometer throughout the frying process.
-
Fry the Fritters: Once your oil is consistently at 360°F, it’s time to fry! Carefully drop spoonfuls of the apple fritter batter into the hot oil. A standard tablespoon or a small cookie scoop works well. Don’t overcrowd the pot! Frying too many at once will drastically lower the oil temperature, leading back to that greasy problem. Fry only a few fritters at a time, giving them plenty of space. Let them fry for about 2 to 3 minutes on the first side, or until they are beautifully golden brown underneath. Use a slotted spoon or a spider tool to carefully flip each fritter. Continue frying for another 2 to 3 minutes on the second side, or until they are golden brown all over and look puffed up and cooked through. They should feel relatively light when lifted from the oil.
-
Drain Properly: As you remove the golden fritters from the hot oil, resist the urge to just dump them on a paper towel. The best way to drain excess oil and keep them crispy is to place them on a wire rack set over a paper towel-lined baking sheet. The wire rack allows air to circulate around the entire fritter, preventing the bottoms from getting soggy. Let them drain here for a minute or two.
-
Finish and Serve: The final touch! While the fritters are still warm from the fryer (but after draining), generously dust them with powdered sugar using a sifter or fine-mesh sieve. The warmth helps the sugar adhere. For an extra layer of deliciousness, drizzle warm caramel sauce over the top just before serving. These are definitely best enjoyed immediately, when they are warm and at their peak crispy-tender perfection!
Tips for Achieving Apple Fritter Perfection
Beyond the crucial oil temperature, here are a few extra tips to help you make the absolute best fried apple fritters:
- Choose the Right Apples: As mentioned, use apples that hold their shape when cooked. Beyond Honeycrisp, Gala, and Granny Smith, Fuji and Braeburn are also good choices. Avoid apples that turn mushy quickly like Red Delicious.
- Monitor Oil Temperature Constantly: This is worth repeating! Use a thermometer and adjust your heat as needed throughout the frying process. The temperature will drop when you add the batter, so you might need to slightly increase the heat, then lower it once the temperature stabilizes again. It takes a little practice, but it’s the key.
- Don’t Crowd the Pot: Frying in batches is essential for maintaining oil temperature and ensuring even cooking and browning. Be patient!
- Drain on a Wire Rack: Seriously, don’t skip this. It makes a huge difference in the final texture.
- Test for Doneness: If you’re unsure if a fritter is cooked through, sacrifice one! Break it open. The batter inside should be cooked, like a light cake, and the apples should be tender. If it’s still raw in the middle, your oil might be too hot (cooking the outside too fast) or you need to fry for slightly longer at the correct temp.
- Uniform Apple Size: Dicing your apples into similar-sized pieces helps ensure they cook evenly within the fritter.
Serving Suggestions
While these fried apple fritters are divine straight from the wire rack with a dusting of powdered sugar, here are a few ideas to elevate your serving game:
- Classic Dust & Drizzle: Powdered sugar is a must, and a warm caramel drizzle is highly recommended.
- A Scoop of Ice Cream: Serve warm fritters with a scoop of vanilla bean ice cream. The contrast of warm and cold is heavenly.
- For Breakfast/Brunch: Alongside fluffy waffles or pancakes for an indulgent breakfast spread.
- Other Sauces: Try a drizzle of maple syrup, a warm sweet apple sauce, or even a cream cheese glaze.
Your Fried Apple Fritter Questions Answered (FAQ)
Got questions about making these delightful treats? Here are some common ones:
What type of oil is best for frying apple fritters?
You’ll want to use a neutral-flavored oil with a high smoke point, such as vegetable oil or canola oil. These oils can handle the 360°F temperature needed without breaking down and imparting off-flavors. Peanut oil is also a good option if allergies aren’t a concern.
Can I make the batter ahead of time?
It’s best to make the batter just before frying. The baking powder starts reacting once it’s mixed with the wet ingredients, and letting it sit for too long can result in less airy fritters. The diced apples might also release too much liquid if left sitting in the batter for an extended period.
Can I use frozen apples?
I highly recommend using fresh apples for the best texture and flavor. Frozen apples tend to release a lot of moisture as they thaw, which can make the batter too wet and lead to soggy fritters. If you must use frozen, ensure they are completely thawed and very well-drained, pressing out as much excess liquid as possible, before folding them into the batter.
How do I store leftover apple fritters?
Fried foods are always best eaten fresh. However, you can store cooled fritters in an airtight container at room temperature for a day or two. To reheat and restore some crispiness, it’s best to warm them gently in an oven or toaster oven at around 300°F (150°C) until heated through. Microwaving will make them soft.
Why are my apple fritters greasy?
The most common culprit for greasy fritters is oil that isn’t hot enough. If the oil temperature drops below the optimal range (around 360°F), the batter will soak up the oil instead of forming a crispy crust quickly. Ensure you are using a thermometer and maintaining a consistent temperature.
Why are my apple fritters raw in the middle?
This usually happens if the oil is too hot! The outside gets dark and crispy very quickly, creating a barrier that prevents the heat from penetrating and cooking the inside batter and apples thoroughly. Make sure you’re using a thermometer and keeping the oil at the recommended 360°F. Frying for slightly longer at the correct temperature will ensure they are cooked through.
Enjoy Your Homemade Fried Apple Fritters!
There you have it! The secret to perfectly crispy, never greasy, deliciously cooked fried apple fritters. This recipe is a game-changer and is sure to become a favorite whenever the craving for warm, spiced apple goodness strikes. The smell alone as they fry is enough to gather everyone in the kitchen!
Give this recipe a try and taste the difference that temperature control makes. I promise, it’s worth the small effort of using a thermometer. They are perfect for a weekend treat, a special brunch, or just because. Don’t forget that dusting of powdered sugar and maybe even a drizzle of caramel!
Did you make these perfect apple fritters? I’d love to hear how they turned out! Leave a comment below and let me know your favorite way to enjoy them.
Fried Apple Fritters

Ingredients
- 2 cups all-purpose flour
- 1/3 cup granulated sugar
- 2 teaspoons baking powder
- 1/2 teaspoon salt
- 1 egg
- 3/4 cup milk or buttermilk
- 1 teaspoon vanilla extract
- 2 cups diced apples (about 2 medium)
- 1 teaspoon ground cinnamon
- 1/4 cup brown sugar (optional, for apples)
- Vegetable oil or canola oil for frying
- Powdered sugar for dusting
- Caramel sauce for drizzling
Directions
- Prepare the apple filling: In a small bowl, combine the diced apples, cinnamon, and brown sugar (if using). Set aside.
- Prepare the batter: In a large bowl, whisk together the flour, granulated sugar, baking powder, and salt. In a separate bowl, whisk together the egg, milk or buttermilk, and vanilla extract.
- Combine wet and dry ingredients: Pour the wet ingredients into the dry ingredients and stir gently just until combined. Do not overmix; a few lumps are okay.
- Fold in apples: Gently fold the prepared diced apples into the batter. The batter should be thick enough to coat the apples and hold its shape when dropped.
- Heat the oil: Pour 2 to 3 inches of vegetable or canola oil into a deep pot or Dutch oven. Attach a thermometer to the side of the pot. Heat the oil over medium-high heat until it reaches a steady temperature of 360 degrees F. This is the key step to avoid greasy fritters and ensure they cook through. Maintaining the correct temperature is crucial.
- Fry the fritters: Carefully drop spoonfuls of the apple fritter batter into the hot oil. Fry only a few fritters at a time (do not overcrowd the pot) to maintain the oil temperature. Fry for 2 to 3 minutes per side, or until they are golden brown all over and appear cooked through. Using a slotted spoon, carefully flip them halfway through frying.
- Drain properly: Use a slotted spoon to remove the fried fritters from the oil. Place them on a wire rack set over a paper towel-lined baking sheet to drain any excess oil. Draining on a wire rack helps air circulate and keeps them from getting soggy.
- Finish and serve: While still warm, dust the fritters generously with powdered sugar. Drizzle with caramel sauce before serving. Enjoy immediately!