
Oh, the sheer frustration of baking in beautiful, intricate molds! You spend time mixing your batter, carefully filling each detailed cavity, you smell those wonderful aromas filling your kitchen… only to have your heart sink when you try to unmold them and pieces stick, patterns break, and your perfectly planned treats turn into a crumbled mess. I have been there more times than I care to admit! That stunning honeycomb pattern or adorable little bee motif? Suddenly flattened or left behind in the mold. It’s enough to make you want to swear off decorative baking forever!
But don’t give up just yet! I discovered a simple, yet absolutely foolproof, trick that guarantees your delicate baked goods will release from those intricate molds perfectly every single time. Seriously, every single time. It’s a game-changer! And paired with this delightful, tender honeycomb bites recipe, you’re about to experience the joy of baking little treasures that look just as good as they taste. Get ready to wow yourself and everyone you share them with!
Why You’ll Adore These Honeycomb Bites
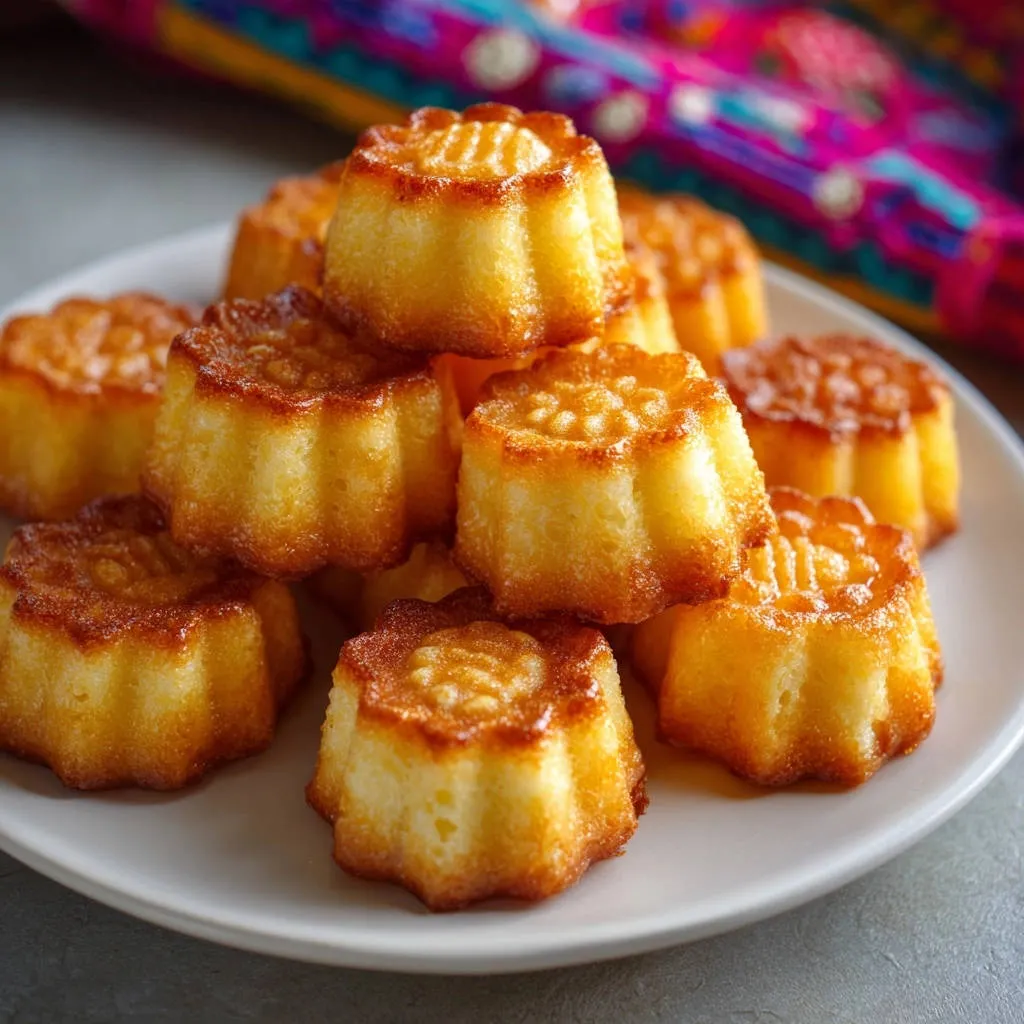
These aren’t just any mini cakes; they’re little bites of sunshine with a delicate sweetness and a tender crumb. Beyond their undeniable charm, here’s why this specific recipe for honeycomb bites will become a staple in your baking repertoire:
- Perfect Release: Thanks to my secret mold preparation method, these bites slide out effortlessly, preserving every intricate detail of your mold. No more broken dreams (or cakes!).
- Delightful Texture: They boast a wonderfully moist and tender crumb, a result of the careful balance of ingredients and mixing techniques.
- Sweet & Subtle Flavor: The gentle hint of honey baked into the batter, coupled with a final drizzle, provides a natural, comforting sweetness that isn’t overwhelming.
- Versatile Treats: Perfect for parties, tea time, lunchboxes, or just a little sweet treat for yourself. Their small size makes them incredibly portable and easy to share.
- Quick Baking Time: Mini molds mean faster baking! You’ll have these little gems ready to enjoy in under 30 minutes from start to finish (plus cooling, of course!).
Gathering Your Ingredients for Perfect Honeycomb Bites
Creating these lovely honeycomb bites requires a few pantry staples, each playing a specific role in achieving that tender texture and sweet, subtle flavor. Think of this collection as the building blocks for your miniature masterpieces. While the list itself is straightforward, understanding what each ingredient contributes is key to baking success!
Let’s talk about the stars of the show:
- All-Purpose Flour: The foundation of our cake batter, providing structure. Using the right amount is important for tenderness, which is why we measure carefully – typically 1 and 1/2 cups.
- Baking Powder: This is our primary leavening agent, giving the honeycomb bites their light lift and helping them rise beautifully in the mold. You’ll need 1 teaspoon to get that perfect crumb.
- Salt: Just a touch, 1/4 teaspoon, enhances all the other flavors and balances the sweetness. Don’t skip it!
- Unsalted Butter: Softened butter is crucial here (1/2 cup). Creaming softened butter with sugar incorporates air, which is another key to a light, fluffy texture. Using unsalted butter gives you control over the saltiness of the final product. If you’re looking for other recipes where softened butter is key to texture, try our popular Simple Sugar Cookie Bars!
- Granulated Sugar: Provides sweetness, contributes to the tender texture by interfering with gluten development, and helps with browning (1 cup).
- Large Eggs: Two large eggs bind the ingredients together and add richness and structure. Ensure they are at room temperature for better emulsification with the butter mixture.
- Vanilla Extract: A teaspoon of pure vanilla extract adds a layer of warmth and complexity that complements the honey flavor beautifully. Vanilla is a staple in so many sweet treats, like our Classic Vanilla Cupcakes!
- Milk: Provides necessary moisture to create a smooth batter and a tender cake (1/2 cup). Whole milk is ideal for richness, but 2% will work too.
- Honey: We use 2 tablespoons of honey in the batter for that unmistakable flavor and a little extra moisture. Plus, you’ll need more honey for drizzling generously over the finished bites! Choose a good quality honey for the best results.
- Softened Butter or Baking Spray with Flour for Molds: This isn’t just for flavor; it’s the magic ingredient for mold release! Using softened butter applied generously, or a dedicated baking spray that contains flour, creates that vital non-stick layer.
- Flour for Dusting Molds: After buttering, a light dusting of flour ensures the butter coating has something for the cake batter to grab onto slightly, while the flour itself forms a barrier against sticking.
Having all your ingredients measured and ready before you start mixing (this is called “mise en place”) will make the baking process much smoother and more enjoyable. It’s a technique that makes all baking feel more effortless, whether you’re making these bites or something larger like a Apple Cinnamon Crumb Cake.
Crafting Your Honeycomb Bites: A Detailed Guide
Now for the fun part – bringing these ingredients together to create delicious, perfectly formed honeycomb bites. This process is straightforward, but paying attention to a few key steps, especially that initial mold preparation, will make all the difference.
Prepare Your Oven and Mold: The Secret Step! Begin by preheating your oven to 350 degrees F (175 degrees C). While the oven heats, focus all your attention on preparing your intricate baking mold. This is the single most crucial step for ensuring your cakes don’t stick! Do not rush this. Using a pastry brush (or even your finger, if you’re careful), generously coat every single crevice, indentation, and detail of each mold cavity with softened butter. You need to get into all the nooks and crannies, especially the fine details of honeycomb or bee patterns. If using baking spray with flour, spray thoroughly, ensuring complete coverage. Once buttered, dust each cavity lightly with all-purpose flour. Gently tap the mold over a sink or trash can to remove any excess flour. This painstaking preparation creates a robust barrier that prevents the delicate cake batter from adhering to the mold, guaranteeing a clean release.
Combine Dry Ingredients: In a medium-sized mixing bowl, whisk together your measured all-purpose flour, baking powder, and salt. Whisking helps to evenly distribute the leavening agent and salt throughout the flour, preventing pockets of leavening and ensuring a consistent rise and flavor in every bite.
Cream Wet Ingredients (Part 1): In a larger mixing bowl, using an electric mixer (stand or hand mixer), cream together the softened unsalted butter and granulated sugar. Beat them on medium speed until the mixture becomes light in color and fluffy in texture. This process incorporates air into the butter and sugar mixture, which is essential for creating a tender cake crumb. Next, add the two large eggs, one at a time, beating well after each addition until fully incorporated. Finally, stir in the vanilla extract.
Combine Wet Ingredients (Part 2): In a small bowl or a liquid measuring cup, whisk together the milk and the 2 tablespoons of honey until they are well combined. This mixture will provide moisture and introduce the lovely honey flavor into the batter.
Combine Wet and Dry: Now, we’ll bring the wet and dry mixtures together carefully. Alternately add a portion of the dry ingredients mixture and a portion of the milk/honey mixture to the butter/sugar mixture, starting and ending with the dry ingredients. Mix on the lowest speed possible, just until the ingredients are combined. Overmixing can develop the gluten in the flour too much, resulting in tough cakes. Stop mixing as soon as you no longer see streaks of dry ingredients.
Fill the Molds: Spoon the batter evenly into your meticulously prepared mold cavities. Fill each one about two-thirds full. This allows room for the cakes to rise during baking without overflowing and obscuring the intricate patterns. An ice cream scoop or two spoons can make this process less messy.
Bake ‘Em Up: Place the filled mold into your preheated 350°F (175°C) oven. Bake for 18-22 minutes. The exact time will depend on the size of your mold cavities and your oven’s calibration. You’ll know they’re ready when the tops are golden brown and a toothpick or small skewer inserted into the center of one of the cakes comes out clean, with no wet batter attached.
Cool Before Unmolding: Once baked, carefully remove the mold from the oven and place it on a wire rack. Let the cakes cool in the mold for 5-10 minutes. This brief cooling period is important; it allows the cakes to firm up slightly within their cavities, making them less fragile and easier to handle during the unmolding process.
The Moment of Truth: Unmolding! After the short cooling period in the mold, place the wire rack directly over the mold. Holding both the mold and the rack together firmly, carefully invert them. Your honeycomb bites should release easily onto the wire rack if the mold was prepared correctly in step 1. If any seem hesitant, a gentle tap on the mold might encourage them. Resist the urge to dig them out with utensils, as this can damage the details!
Finish with Honey Drizzle: Allow the honeycomb bites to cool completely on the wire rack before adding the final touch. Just before serving, generously drizzle additional honey over the tops of the cooled cakes. This adds another layer of honey flavor and a lovely glossy finish that highlights the pattern. If you love honey, you might also enjoy this delicious Honey Cornbread!
Tips for Perfect Honeycomb Bites Every Time
Beyond the mold prep, here are a few extra pointers to ensure your honeycomb bites turn out beautifully and delicious on every bake:
- Ingredient Temperature Matters: Make sure your butter and eggs are at room temperature. This helps them emulsify properly with the sugar, creating a smoother batter and a more tender cake.
- Don’t Overmix: Once you add the dry ingredients and the milk mixture, mix only until just combined. Overmixing develops gluten, which can lead to tough cakes.
- Filling Level: Filling the mold cavities about two-thirds full is ideal. This prevents overflow while ensuring the cakes rise to fill the mold completely for that perfect shape.
- Know Your Oven: Oven temperatures can vary. Using an oven thermometer can help ensure your oven is accurately preheated to 350°F (175°C), leading to consistent baking results.
- Cooling Time is Key: Don’t skip the cooling time in the mold. It helps the cakes set and makes them much easier to unmold cleanly.
- Storage: Store cooled honeycomb bites in an airtight container at room temperature for up to 3-4 days.
- Freezing: Cooled, undrizzled honeycomb bites can be frozen for up to 3 months. Wrap them tightly in plastic wrap, then place them in a freezer-safe bag or container. Thaw at room temperature before drizzling with honey and serving.
Serving Suggestions for Your Honeycomb Bites
These charming honeycomb bites are perfect on their own, especially with that final honey drizzle. However, they also pair wonderfully with a variety of accompaniments:
- With a Warm Beverage: They are absolutely divine served alongside a cup of tea or coffee.
- As a Mini Dessert: Serve them as part of a dessert platter with other small treats like Mini Cheesecakes or fresh berries.
- Elevated Drizzle: Instead of just honey, try a drizzle of melted chocolate, a light lemon glaze, or a dusting of powdered sugar.
- Alongside Fruit: Serve with a simple fruit salad or a dollop of whipped cream and fresh fruit.
Your Honeycomb Bite Questions Answered (FAQ)
Here are some common questions you might have when making these delightful mini cakes:
Can I use a different size or shape mold?
Yes, absolutely! This recipe will work in various intricate baking molds, provided they are roughly similar in volume per cavity. The baking time might need slight adjustment – smaller cavities will bake faster, larger ones might take a bit longer. Always use the toothpick test to check for doneness.
What if I don’t have softened butter?
It’s important for the creaming step. If your butter isn’t softened, you can cut it into small cubes and let it sit at room temperature for about 15-30 minutes, or you can gently warm it in the microwave on 10% power for short bursts (5-10 seconds) until it’s soft but not melted. For the mold preparation, slightly melted butter is fine, but softened is easier to brush into crevices.
Can I make this recipe gluten-free?
While I haven’t tested it specifically, you can likely substitute the all-purpose flour with a good quality gluten-free all-purpose baking blend that contains xanthan gum. Results may vary depending on the blend used, and the texture might be slightly different. You could also explore using alternative flours in other recipes like our Apple Bread if you’re experimenting with gluten-free baking.
What kind of honey is best for honeycomb bites?
Any good quality liquid honey will work beautifully. Lighter, milder honeys like clover or acacia will provide a sweet, subtle flavor, while darker honeys like buckwheat or wildflower will add a richer, more distinct taste. Choose one you enjoy!
My cakes still stuck a little! What went wrong?
The most common reason for sticking is inadequate mold preparation. Make sure you were truly generous with the butter or baking spray and got into every single nook and cranny. Don’t be shy with the flour dusting either, and tap out the excess. It creates that crucial barrier. Also, ensure you waited the 5-10 minutes for the cakes to cool in the mold before attempting to invert.
Can I add other flavors or mix-ins?
For these delicate bites with intricate molds, keeping the batter simple helps ensure a clean release and highlight the mold detail. Adding large mix-ins like chocolate chips or nuts could interfere with the pattern. However, you could gently whisk in a small amount of lemon zest or almond extract along with the vanilla for a subtle flavor variation.
Enjoy Your Homemade Honeycomb Bites!
There you have it! Delicious, tender honeycomb bites that release perfectly from even the most detailed molds, thanks to a simple, effective trick. These little cakes are more than just a treat; they’re a testament to how a little extra care in preparation can lead to stunning results. Whether you’re making them for a special occasion or just to brighten an ordinary day, these honeycomb bites are sure to bring a smile to your face (and anyone you share them with!).
Give this recipe a try and say goodbye to baking mold frustration forever. I can’t wait to hear how yours turn out! Please leave a comment below and let me know your favorite part about baking these foolproof honeycomb bites. Happy baking!
Honeycomb Bites

Ingredients
- 1 and 1/2 cups all-purpose flour
- 1 teaspoon baking powder
- 1/4 teaspoon salt
- 1/2 cup unsalted butter softened
- 1 cup granulated sugar
- 2 large eggs
- 1 teaspoon vanilla extract
- 1/2 cup milk
- 2 tablespoons honey, plus more for drizzling
- Softened butter or baking spray with flour for molds
- Flour for dusting molds
Directions
- Preheat your oven to 350 degrees F (175 degrees C). This first step is the secret to perfectly releasing your cakes: thoroughly prepare your intricate baking mold. Use a pastry brush to generously coat every single crevice and detail of the mold cavities with softened butter or baking spray containing flour. Don’t miss any spots, especially the detailed tops like the honeycomb or bee pattern. Once buttered, dust each cavity lightly with flour, tapping out the excess. This creates a barrier that prevents sticking.
- In a medium bowl, whisk together the flour, baking powder, and salt.
- In a large bowl, cream together the softened butter and sugar until light and fluffy. Beat in the eggs one at a time, then stir in the vanilla extract.
- In a small bowl or measuring cup, whisk together the milk and 2 tablespoons of honey.
- Alternately add the dry ingredients and the milk mixture to the butter mixture, beginning and ending with the dry ingredients. Mix on low speed until just combined. Do not overmix.
- Spoon the batter evenly into the prepared mold cavities, filling them about two-thirds full.
- Bake for 18-22 minutes, or until a toothpick inserted into the center of a cake comes out clean and the tops are golden brown.
- Let the cakes cool in the mold on a wire rack for 5-10 minutes before attempting to unmold them. This brief cooling period helps the cakes firm up slightly.
- Carefully invert the mold onto the wire rack. If properly prepared in step 1, the cakes should release easily. If any resist, gently tap the mold.
- Once completely cooled, drizzle the cakes generously with additional honey just before serving.