Who else has tried making homemade truffles, only to end up with a filling that’s either too soft and sticky to roll, or so crumbly it just falls apart? I finally cracked the code to that perfectly smooth, rich, and firm-yet-creamy peanut butter center you dream of, and these Peanut Butter Truffles are the delightful result.
This recipe isn’t just easy; it’s foolproof, ensuring every batch of these no-bake desserts comes out beautifully. Prepare for an irresistible sweet treat that will have everyone asking for your secret.
The Truffle Texture Secret: No More Crumbly or Sticky Disasters!
The quest for the ideal truffle texture can be frustrating. Many recipes yield centers that are either too gooey to handle or crumble before they even get to the chocolate coating. This recipe tackles those common pitfalls head-on, ensuring a consistently perfect bite every time.
Why This Recipe Guarantees Success Every Time
Our method focuses on precise ingredient ratios and crucial chilling steps. This combination transforms simple ingredients into a pliable, easy-to-handle dough that maintains its integrity.
The gradual addition of powdered sugar and the strategic refrigeration periods are key to building structure. These steps prevent both stickiness and excessive dryness, making your truffle-making experience stress-free.
Beyond Basic: What Sets Our Peanut Butter Truffles Apart?
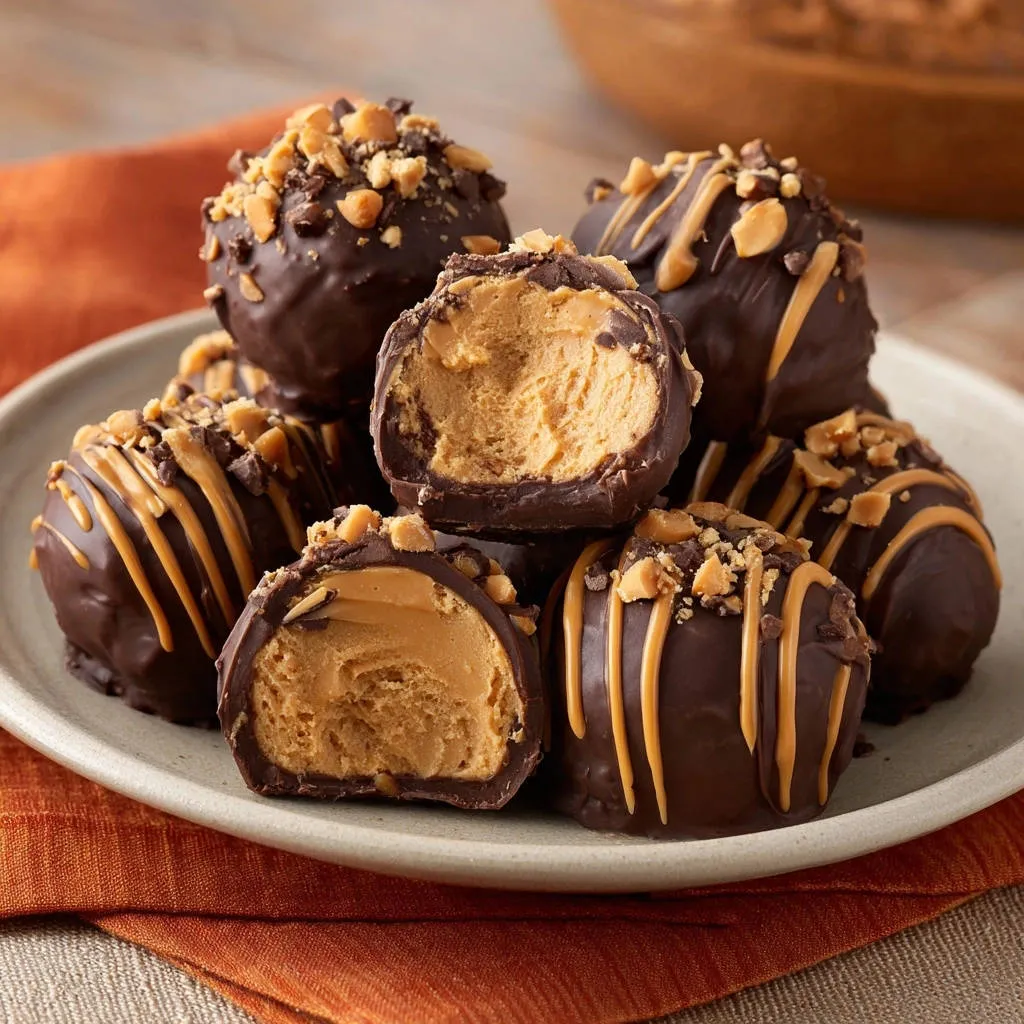
What truly sets these Peanut Butter Truffles apart is their signature firm-yet-creamy interior. We achieve this through a simple, yet powerful, trick: careful texture adjustment and a two-stage chilling process.
This guarantees the truffles hold their shape beautifully for dipping, yet melt in your mouth with an incredibly smooth and rich peanut butter candy flavor. No more frustrating crumbly filling or sticky hands!
Crafting Perfection: The Essential Ingredients for Peanut Butter Truffles
Great truffles start with great ingredients. Here’s what you’ll need and why each element is crucial for achieving that irresistible homemade truffle.
The Heart of the Truffle: Creamy Peanut Butter
For the best classic results and consistent texture, opt for a smooth, processed creamy peanut butter. It provides the essential flavor and helps form a stable base for your filling.
Sweetening the Deal: Sifted Powdered Sugar
Sifting your powdered sugar is a non-negotiable step. It ensures a lump-free, silky smooth filling that is key to the melt-in-your-mouth experience of these sweet treats.
Unsung Heroes: Butter, Vanilla, and Coconut Oil
Softened unsalted butter binds the ingredients, adding richness and a smooth consistency to the filling. Vanilla extract enhances the overall flavor, giving it a warm, inviting aroma.
Coconut oil, though optional, is highly recommended for the chocolate coating. It helps create a smoother, more fluid melted chocolate, resulting in a glossy, professional-looking finish on your homemade truffles.
The Irresistible Coating: Semi-Sweet Chocolate Chips
Semi-sweet chocolate chips offer the perfect balance of sweetness and rich chocolate flavor that beautifully complements the peanut butter. High-quality chocolate makes a noticeable difference in taste and texture.
Finishing Touches: Roasted Peanuts and Drizzles
Chopped roasted peanuts add a delightful crunch and visual appeal. An extra drizzle of melted peanut butter provides an attractive contrast and an extra burst of nutty flavor.
Your Truffle Toolkit: Essential Equipment for Smooth Sailing
Having the right tools makes the process of creating these delicious Peanut Butter Truffles much smoother and more enjoyable.
Mixing and Rolling Made Easy
An electric mixer, either stand or hand-held, will be your best friend for whipping up the creamy peanut butter filling quickly and thoroughly. You’ll also need a large mixing bowl.
A small cookie scoop or a tablespoon measure ensures uniform truffle balls, which is essential for even coating and professional presentation.
For the Perfect Chocolate Dip
A microwave-safe bowl is needed for melting your chocolate coating. A sturdy fork or a specialized dipping tool will help you coat each truffle cleanly and efficiently.
Parchment-lined baking sheets are indispensable for chilling the truffles and preventing them from sticking as the chocolate sets.
From Pantry to Plate: Your Step-by-Step Guide to Irresistible Truffles
Mastering the Peanut Butter Filling
Step 1: The Creamy Base. In a large mixing bowl, combine the softened butter and the first cup of creamy peanut butter. Beat with an electric mixer on medium speed until thoroughly combined and perfectly smooth. This initial thorough mixing ensures a uniform base, crucial for achieving that silky, consistent texture in your Peanut Butter Truffles.
Step 2: Sweetening Gradually. Gradually add the sifted powdered sugar, about a half cup at a time, beating until fully incorporated after each addition. The mixture will become quite thick as the sugar is absorbed. Finally, add the vanilla extract and mix until just combined, infusing a lovely aromatic depth.
Step 3: The Texture Secret Revealed. At this stage, your mixture should resemble a firm dough that holds its shape when pressed together without being overly sticky or crumbly. If it feels too dry, add water or milk, one teaspoon at a time, mixing just until it comes together. If it’s too soft, add another tablespoon or two of sifted powdered sugar. The key is to achieve a pliable consistency; do not overmix, as this can affect the final texture.
Step 4: Crucial Chilling, Phase One. Cover the bowl with plastic wrap and refrigerate the peanut butter mixture for at least 30 minutes. This crucial chilling step firms up the mixture significantly, making it incredibly easy to roll into perfect truffle balls and ensuring that signature creamy, non-crumbly texture.
Shaping Your Truffles to Perfection
Step 5: Roll and Re-Chill. Once chilled, scoop out small portions of the peanut butter mixture, about 1 tablespoon each. Roll them quickly and smoothly into round balls using the palms of your hands. Place the rolled truffles on a parchment-lined baking sheet. Return them to the refrigerator for another 15-20 minutes to firm up even more while you prepare the chocolate coating; this second chill is essential for a clean dip.
The Silky Chocolate Coating
Step 6: Melting the Chocolate. In a microwave-safe bowl, combine the semi-sweet chocolate chips and the optional coconut oil. Microwave on medium power in 30-second intervals, stirring well after each, until the chocolate is smooth and fully melted. Be careful not to overheat the chocolate, as this can cause it to seize or burn.
Dipping, Decorating, and Final Chill
Step 7: The Dipping Process. Using a fork or a specialized dipping tool, carefully dip each thoroughly chilled peanut butter truffle into the melted chocolate, ensuring it’s fully coated. Lift the truffle, gently tapping the fork against the side of the bowl to allow any excess chocolate to drip off, preventing puddles.
Step 8: Instant Decoration. Place the coated truffles back on the parchment-lined baking sheet. Immediately sprinkle with chopped roasted peanuts or drizzle with additional melted peanut butter, if desired, before the chocolate coating has a chance to set. This ensures your toppings adhere beautifully.
Step 9: Set and Store. Refrigerate the finished truffles for at least 30 minutes, or until the chocolate coating is completely set and firm. Once firm, store your delicious Peanut Butter Truffles in an airtight container in the refrigerator for up to two weeks, layered with parchment paper if stacking.
Chef’s Secrets: Elevating Your Peanut Butter Truffles to Artisan Level
Unlock the full potential of your Peanut Butter Truffles with these expert tips, transforming them from simple sweet treats into truly extraordinary confections.
Sift Your Powdered Sugar: This crucial step prevents lumps and ensures a smoother, incredibly creamy filling texture. It’s absolutely critical for that desirable “melt-in-your-mouth” feel that defines a perfect truffle.
Don’t Skip the Chilling: The two chilling phases are non-negotiable for perfectly rollable truffles and a firm, non-crumbly interior. This is the ultimate secret weapon for handling your mixture with ease and ensuring a professional finish.
Perfecting Your Chocolate Dip: Use a deeper, narrower bowl for melting your chocolate. This ensures sufficient depth for full immersion with less chocolate, and helps keep it warm longer. A sturdy fork or a specialized dipping tool works wonders for achieving a clean, even coating.
Temperature Control for Chocolate: If your chocolate coating starts to thicken during dipping, briefly microwave it again for 10-15 seconds, stirring well until it’s fluid. Always avoid overheating, as this can cause the chocolate to seize, become grainy, or look dull.
Creative Topping Ideas: Beyond peanuts, consider a sprinkle of flaky sea salt for a gourmet sweet-salty crunch, crushed pretzels, white chocolate drizzles, or even finely chopped candy pieces for a festive and colorful flair. The possibilities are endless for customizing your homemade truffles!
Truffle Troubleshoot: Common Issues & Quick Fixes
Even seasoned bakers encounter hiccups. Here are solutions to common problems you might face while making your Peanut Butter Truffles.
“My Peanut Butter Filling is Too Sticky or Soft!”
This usually means there isn’t enough powdered sugar, or your softened butter might have been too warm. To fix it, gradually add more sifted powdered sugar, one tablespoon at a time, mixing until the mixture forms a firm, pliable dough.
Always ensure your butter is only softened, not melted, before starting. If the entire mixture feels too warm, an extra chill in the refrigerator can also help firm it up quickly.
“My Filling is Too Crumbly and Won’t Hold Together!”
A crumbly filling indicates the mixture is too dry. The simple solution is to add a very small amount of liquid, such as a teaspoon of water or milk, at a time, mixing gently just until the dough comes together.
Exercise caution not to add too much liquid at once, as it’s easier to add more than to correct an overly wet mixture.
“My Chocolate Coating Isn’t Smooth or Sets Too Fast!”
Overheating chocolate is a common culprit for a grainy or seized coating. Always microwave in short bursts, stirring thoroughly between each, to ensure gentle melting.
Adding a teaspoon of coconut oil (as specified in the recipe) greatly helps create a smoother, more fluid consistency for dipping and contributes to a beautiful, glossy finish. If it’s setting too fast, ensure your truffles are properly chilled but not frozen solid, and work quickly, or remelt your chocolate as needed.
“My Truffles Look Messy or Unevenly Coated!”
For a pristine appearance, ensure your peanut butter balls are well-chilled and perfectly smooth before dipping. Use a fork and gently tap off excess chocolate after dipping to prevent drips and puddles.
A swift, confident dip and lift motion will yield the best results. For a truly professional look, consider investing in a specialized dipping tool, which helps prevent marks and ensures an impeccably even chocolate coating.
Unleash Your Inner Chocolatier: Creative Truffle Variations
Once you’ve mastered the classic, don’t hesitate to get creative! These Peanut Butter Truffles are a fantastic canvas for flavor experimentation.
Different Chocolate Delights
Experiment with dark chocolate for a richer, more intense flavor that cuts through the sweetness, or choose white chocolate for a sweeter, creamier coating that visually pops. You can also drizzle contrasting chocolate types over the set truffles for an elegant, two-toned finish.
Nutty Alternatives & Flavor Add-Ins
While classic peanut butter is undeniably king, feel free to try almond butter or cashew butter for a different, nuanced flavor profile. A pinch of cinnamon or a tiny splash of almond extract (in addition to the vanilla) can also add a delightful complexity to the filling, making each bite an adventure.
For another delightful truffle experience, you might enjoy making these delicious raspberry chocolate coconut truffles, offering a beautiful contrast in flavor and texture.
Dietary Adaptations (Gluten-Free, Dairy-Free Hints)
For a dairy-free version of these beloved sweet treats, simply use a plant-based butter alternative and ensure your chosen chocolate chips are certified dairy-free. This recipe is naturally gluten-free, using powdered sugar instead of flour, so no adjustments are typically needed there!
Mastering Make-Ahead: Storing and Enjoying Your Peanut Butter Truffles
These homemade truffles are perfect for making ahead, whether for a special occasion or simply to have a delicious snack on hand.
Optimal Storage for Freshness
Store your finished Peanut Butter Truffles in an airtight container in the refrigerator for up to two weeks. To prevent them from sticking together, layer them between sheets of parchment paper, ensuring each truffle maintains its perfect shape.
Can You Freeze Peanut Butter Truffles?
Absolutely! These no-bake desserts freeze beautifully for up to 2-3 months without losing their quality. To freeze, place them in a single layer on a parchment-lined baking sheet until solid, then transfer them to a freezer-safe airtight container or bag. Simply thaw them in the refrigerator before serving for a perfectly fresh taste.
Planning Ahead: Make-Ahead Tips
The peanut butter filling can be made a day or two in advance and stored, covered, in the refrigerator. This allows you to break up the truffle-making process, making it even more manageable and less time-consuming for busy schedules or large gatherings.
Beyond the Plate: Creative Ways to Serve Your Homemade Truffles
These versatile peanut butter candy creations are perfect for any occasion, from casual snacking to elegant entertaining.
Elegant Dessert Platter Pairings
Arrange your truffles elegantly with fresh berries, a scattering of lightly toasted nuts, or alongside small espresso cups for a sophisticated after-dinner treat. They pair wonderfully with a robust coffee, a rich hot chocolate, or even a dessert wine for an elevated experience.
Gifting Ideas & Holiday Treats
Homemade Peanut Butter Truffles make a thoughtful and truly delicious gift for any occasion. Package them beautifully in small decorative boxes, lined with festive tissue paper, for birthdays, holidays, or as a charming host or hostess gift. They show you care!
Kid-Friendly Fun with Truffles
Involve younger helpers in the fun! Let them participate in rolling the truffle balls (after the chilling!) or sprinkling on the various toppings. These sweet treats are a fantastic and easy win for school events, bake sales, or simply as a special homemade snack that everyone will adore.
Your Peanut Butter Truffle Questions Answered!
What’s the best type of peanut butter to use for these truffles?
For the classic creamy texture and consistently reliable results, we highly recommend using a smooth, processed creamy peanut butter, such as Jif or Skippy. While natural peanut butter can be used, its oil separation may require more careful adjustments to the powdered sugar or liquid to achieve the correct firm-yet-pliable dough consistency.
Is coconut oil essential for the chocolate coating?
While optional, coconut oil is highly recommended for the chocolate coating. It helps to thin the melted chocolate slightly, making it much smoother for dipping and giving the finished coating a beautiful, professional, glossy finish. If you don’t have it, you can omit it, but the chocolate may be a bit thicker and slightly less shiny.
How long do homemade Peanut Butter Truffles last?
When stored in an airtight container in the refrigerator, these delicious truffles will remain fresh and absolutely delicious for up to two weeks. If you choose to freeze them, they can impressively last for 2-3 months, making them a fantastic make-ahead dessert option.
Can I make these truffles without an electric mixer?
Yes, you can definitely make these without an electric mixer! While an electric mixer makes the initial mixing process quicker and ensures a very smooth base, you can certainly use a sturdy spoon and a lot of elbow grease. Just be prepared for a bit of a workout, especially when incorporating all the powdered sugar into the creamy peanut butter base.
If you love easy, no-bake peanut butter desserts, you might also enjoy these amazing no-bake peanut butter bars that never fall apart, another fantastic treat requiring minimal equipment.
Ready to Delight? Share Your Peanut Butter Truffles Creation!
With this foolproof recipe, you’re now equipped to create Peanut Butter Truffles that will impress everyone who tastes them. Say goodbye to crumbly disappointments and hello to perfectly smooth, rich, and utterly irresistible bites that are sure to become a cherished sweet treat in your repertoire.
Don’t be shy – whip up a batch, share your masterpieces with friends and family, and bask in the compliments! We’d absolutely love to see your creations; tag us on social media with #PerfectPeanutButterTruffles and show off your chocolate coating artistry.
Peanut Butter Truffles
Course: DessertCuisine: American CuisineDifficulty: easy4
about 36 truffles50
minutes120
minutesAmerican Cuisine
Ingredients
1 cup creamy peanut butter
1/2 cup unsalted butter, softened
2 cups powdered sugar, sifted
1 teaspoon vanilla extract
12 ounces semi-sweet chocolate chips
1 teaspoon coconut oil (optional, for smoother melting chocolate)
1/4 cup chopped roasted peanuts (for topping)
2 tablespoons creamy peanut butter (for drizzle, if desired)
Directions
- For the perfect creamy filling: In a large mixing bowl, combine the softened butter and 1 cup of creamy peanut butter. Beat with an electric mixer on medium speed until thoroughly combined and perfectly smooth. This initial thorough mixing ensures a uniform base.
- Gradually add the sifted powdered sugar, a half cup at a time, beating until fully incorporated after each addition. The mixture will become thick. Add the vanilla extract and mix until just combined.
- The texture secret: At this stage, your mixture should resemble a firm dough that holds its shape when pressed together without being overly sticky or crumbly. If it feels too dry, add water or milk, one teaspoon at a time, mixing just until it comes together. If it’s too soft, add another tablespoon or two of sifted powdered sugar. Do not overmix.
- Cover the bowl with plastic wrap and refrigerate the peanut butter mixture for at least 30 minutes. This crucial chilling step firms up the mixture, making it easy to roll and ensuring that signature creamy, non-crumbly texture.
- Once chilled, scoop out small portions (about 1 tablespoon each) and roll them into smooth, round balls. Place the rolled truffles on a parchment-lined baking sheet. Return them to the refrigerator for another 15-20 minutes to firm up even more while you prepare the chocolate coating.
- For the chocolate coating: In a microwave-safe bowl, combine the semi-sweet chocolate chips and coconut oil (if using). Microwave on medium power in 30-second intervals, stirring well after each, until the chocolate is smooth and fully melted. Be careful not to overheat.
- Using a fork or a dipping tool, dip each thoroughly chilled peanut butter truffle into the melted chocolate, ensuring it’s fully coated. Lift the truffle, gently tapping the fork against the side of the bowl to allow any excess chocolate to drip off.
- Place the coated truffles back on the parchment-lined baking sheet. Immediately sprinkle with chopped roasted peanuts or drizzle with additional melted peanut butter (if desired) before the chocolate sets.
- Refrigerate the truffles for at least 30 minutes, or until the chocolate coating is completely set. Store in an airtight container in the refrigerator for up to two weeks.
Notes
- Ensure thorough chilling for best rolling and texture. Adjust filling consistency with small amounts of liquid or powdered sugar if needed.