
Warming Mat for Food Extra Large 32"x15", Electric Silicone Food Warmer Trays for Chafing Dishes & Buffet,Portable Countertop Food Warmers for Parties, 7-Level Temp 8-Hour Timer, Blue
$49.99 (as of November 3, 2025 15:13 GMT +00:00 - More infoProduct prices and availability are accurate as of the date/time indicated and are subject to change. Any price and availability information displayed on [relevant Amazon Site(s), as applicable] at the time of purchase will apply to the purchase of this product.)
Knobēz: Decorative Knob Covers - Red Peppermint - 12pk - Stretch Over Hardware Decorations, Holiday-Winter-Christmas, Kitchen-Bathroom-Dressers-Home
$24.99 (as of November 3, 2025 15:13 GMT +00:00 - More infoProduct prices and availability are accurate as of the date/time indicated and are subject to change. Any price and availability information displayed on [relevant Amazon Site(s), as applicable] at the time of purchase will apply to the purchase of this product.)
Handlez by Knobēz: Large Peppermint Stick - 10pk - Stretch Over Hardware Decorations, Holiday-Winter-Christmas, Kitchen-Bathroom-Dressers-Home
$24.99 (as of November 3, 2025 15:13 GMT +00:00 - More infoProduct prices and availability are accurate as of the date/time indicated and are subject to change. Any price and availability information displayed on [relevant Amazon Site(s), as applicable] at the time of purchase will apply to the purchase of this product.)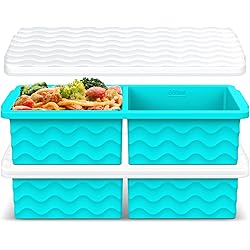
Aopigavi Silicone Freezer Tray with Lid – 2-Cup Soup Freezer Container Molds, Large Ice Cube Trays for Freezing Soup, Sauce & Broth, Meal Prep & Food Storage – Oven & Dishwasher Safe, 2-Pack
$17.99 (as of November 3, 2025 15:13 GMT +00:00 - More infoProduct prices and availability are accurate as of the date/time indicated and are subject to change. Any price and availability information displayed on [relevant Amazon Site(s), as applicable] at the time of purchase will apply to the purchase of this product.)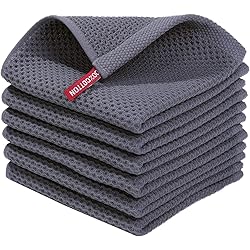
Homaxy 100% Cotton Waffle Weave Kitchen Dish Cloths, Ultra Soft Absorbent Quick Drying Dish Towels, 12 x 12 Inches, 6-Pack, Dark Grey
$8.99 (as of November 3, 2025 15:13 GMT +00:00 - More infoProduct prices and availability are accurate as of the date/time indicated and are subject to change. Any price and availability information displayed on [relevant Amazon Site(s), as applicable] at the time of purchase will apply to the purchase of this product.)We’ve all been there: a chicken breast that promises a quick meal but delivers dry disappointment.
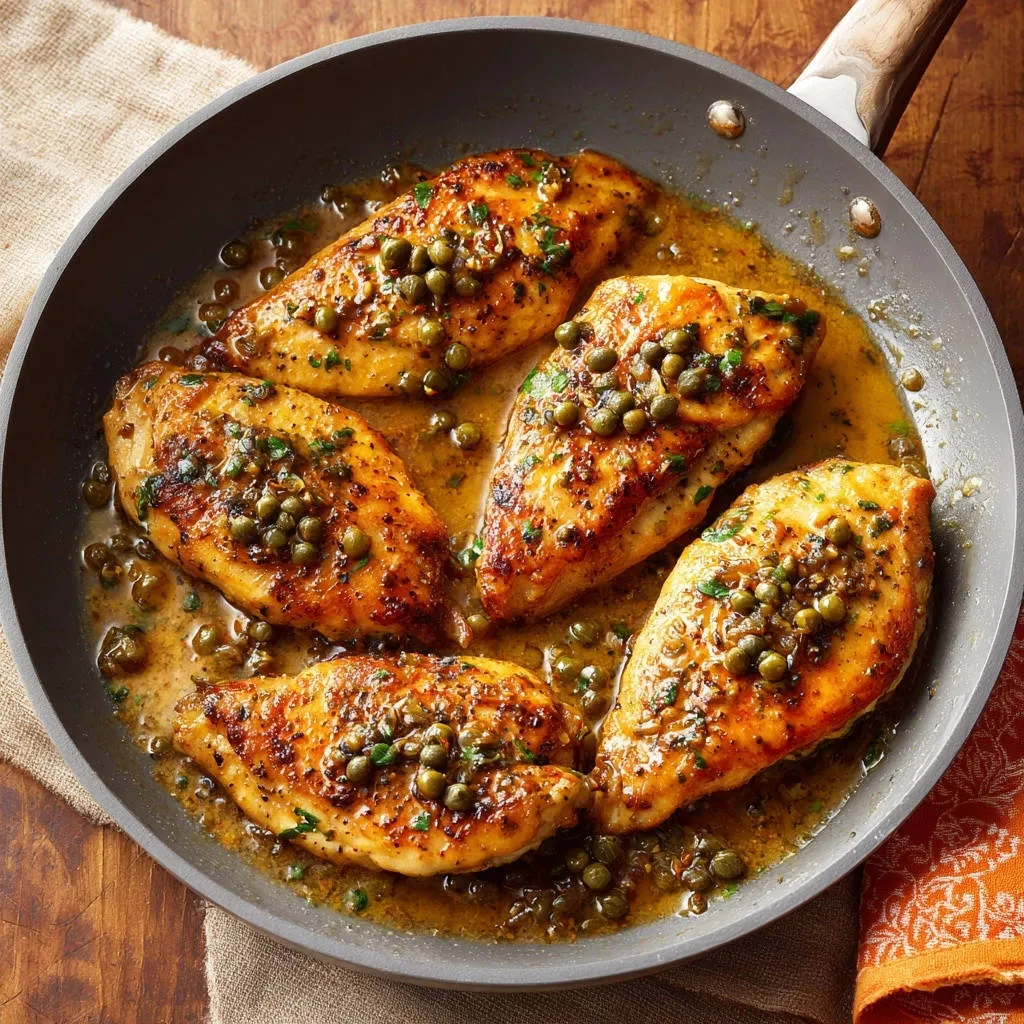
But I’m here to share the secret to a Skillet Lemon Caper Chicken that is unfailingly juicy, incredibly tender, and bursting with vibrant flavor, making it a true weeknight triumph.
Get ready to transform your chicken dinner experience with simple techniques that guarantee perfection.
Why This Skillet Lemon Caper Chicken Will Be Your New Weeknight Hero
The Secret to Never-Dry Chicken, Guaranteed!
This recipe meticulously addresses the common challenge of dry chicken through specific, easy-to-follow techniques.
Pounding the chicken to an even thickness, strategic searing, and a crucial resting period all work in harmony to lock in moisture.
You’ll enjoy consistently tender and juicy results, transforming your confidence in cooking chicken breasts.
Effortless Elegance for Any Night of the Week
Despite its gourmet taste, this Skillet Lemon Caper Chicken is surprisingly simple and quick to prepare.
It comes together in under 30 minutes, making it an ideal choice for busy weeknights when you crave something special without the fuss.
This dish offers restaurant-quality flavor with minimal effort, elevating your home dining experience effortlessly.
That Irresistible Lemon Caper Sauce: A Flavor Powerhouse
The star of this dish is undoubtedly its bright, tangy, and savory lemon caper sauce, which coats every piece of chicken beautifully.
A perfect balance of fresh lemon juice, briny capers, and aromatic parsley creates a vibrant flavor profile that truly awakens the palate.
This luscious sauce transforms simple chicken into an unforgettable meal, soaking into every tender bite.
Gear Up: What You’ll Need for Skillet Lemon Caper Chicken Success
A Reliable Skillet: Your Workhorse
A good quality non-stick or cast-iron skillet is essential for achieving an even, golden-brown sear on your chicken.
It also facilitates excellent deglazing, ensuring your sauce develops maximum flavor from the pan’s fond.
Meat Mallet (or a Heavy Alternative)
This tool is crucial for uniformly pounding chicken breasts to an even 1/2-inch thickness.
Even thickness guarantees that your chicken cooks through simultaneously, preventing dry edges and undercooked centers.
Basic Measuring Tools
Accurate measuring spoons and cups are key for precise ingredient ratios, especially when crafting the flavorful lemon caper sauce.
These ensure the perfect balance of tang, salt, and richness in every spoonful.
Whisk and Spatula
A whisk helps blend your flour mixture smoothly for dredging, creating an even coating on the chicken.
A heat-resistant spatula is ideal for safely flipping the chicken and scraping up those delicious browned bits from the skillet for the sauce.
Unveiling the Stars: Key Ingredients for This Luscious Chicken Dish
The Chicken Breast: Pounding for Perfection
Boneless, skinless chicken breasts are the ideal canvas for this recipe due to their lean profile and quick cooking time.
Pounding them to a uniform 1/2-inch thickness is a critical step that guarantees consistent tenderness and prevents any part from drying out.
Flour Power: Our Secret to a Golden Crust
All-purpose flour, seasoned with salt and pepper, creates a light, delicate coating on the chicken breasts.
This dredge contributes to a beautiful golden-brown crust during searing and helps to slightly thicken the pan sauce.
The Dynamic Duo: Butter & Olive Oil
Unsalted butter provides rich flavor and aids in achieving that perfect golden hue on the chicken.
Olive oil has a higher smoke point, working synergistically with butter to prevent it from burning, ensuring a clean sear and taste.
The Sauce Symphony: Broth, Lemon, Capers, & Parsley
Low-sodium chicken broth forms the savory base of our exquisite sauce, providing depth without excessive saltiness.
Fresh lemon juice introduces a bright, zesty tang that cuts through the richness and invigorates the palate, balancing the dish beautifully.
Drained capers deliver a distinctive briny, salty, and slightly vinegary pop, adding complexity and a gourmet touch to the sauce.
Fresh chopped parsley provides a vibrant, herbaceous finish, enhancing the visual appeal and adding a fresh counterpoint to the rich flavors.
Your Guided Journey to Skillet Lemon Caper Chicken Perfection
Prep for Even Cooking: The Pounding Principle
Begin by placing each boneless, skinless chicken breast between two sheets of plastic wrap.
Using a meat mallet or the flat side of a heavy pan, gently but firmly pound the chicken to an even 1/2-inch thickness.
This crucial technique ensures uniform cooking, preventing those frustrating dry edges and guaranteeing tender results every time.
Season and Dredge: Building the Flavor Foundation
In a shallow dish, combine the all-purpose flour, salt, and black pepper, mixing them thoroughly.
Take each pounded chicken breast and dredge it lightly in the flour mixture, ensuring an even coating on all sides.
Gently shake off any excess flour; we’re aiming for a delicate, thin layer to promote a golden crust.
The Golden Sear: Locking in Juices
Heat the unsalted butter and olive oil in a large non-stick skillet over medium-high heat until the butter is melted and sizzling slightly.
Carefully add the dredged chicken breasts to the hot skillet, ensuring not to overcrowd the pan; cook in batches if necessary to maintain heat.
Sear for 3 to 4 minutes per side until the chicken is deeply golden brown and cooked through, reaching an internal temperature of 165°F (74°C).
This quick, hot sear on evenly thick chicken is the key to locking in those precious juices and developing incredible flavor.
The Critical Rest: Don’t Skip This!
Once cooked, remove the golden-brown chicken breasts from the skillet and transfer them to a clean plate.
Tent the plate loosely with aluminum foil to keep the chicken warm.
Allowing the chicken to rest for a brief 5-7 minutes is vital, as it permits the juices to redistribute throughout the meat, ensuring maximum moisture and tenderness.
Sauce Alchemy: Deglazing and Simmering
Reduce the heat to medium on the same skillet, retaining any browned bits and remaining fat.
Pour in the low-sodium chicken broth and fresh lemon juice, then immediately use a wooden spoon to scrape up all the flavorful browned bits (the “fond”) from the bottom of the pan.
Bring the mixture to a gentle simmer and cook for 2 to 3 minutes, stirring occasionally, until the sauce slightly thickens and reduces.
Finishing Touches: Capers, Parsley, & Balance
Stir in the drained capers and the fresh chopped parsley into the simmering sauce.
Taste the sauce and adjust the seasoning if needed, adding a pinch more salt, pepper, or a squeeze of lemon to perfect its balance.
The Grand Finale: Serve and Savor
Return the rested, juicy chicken breasts to the skillet, nestling them into the luscious lemon caper sauce.
Spoon the vibrant sauce generously over each piece of chicken.
Serve your Skillet Lemon Caper Chicken immediately, perhaps with your favorite side, and relish every perfectly tender and flavorful bite.
Beyond the Recipe: Expert Tips for Next-Level Skillet Lemon Caper Chicken
Precision Pounding Pays Off
The most crucial step for uniform cooking is consistent chicken thickness. Uneven pounding will lead to dry, overcooked sections while others are still cooking.
Give Your Chicken Room to Breathe (Don’t Overcrowd)
Always cook chicken in batches if your skillet isn’t large enough. Overcrowding drops the pan temperature significantly, causing the chicken to steam instead of sear, preventing that desirable golden crust.
The Magic of Deglazing
Don’t underestimate the power of scraping up the “fond” – the browned bits stuck to the bottom of the pan after searing.
These caramelized morsels are packed with concentrated flavor, adding immense depth and complexity to your lemon caper sauce.
Always Use Fresh Lemon Juice and Parsley
The difference between fresh and bottled lemon juice is night and day; fresh provides a brighter, more authentic tang.
Similarly, fresh parsley offers a vibrant herbaceousness that dried alternatives simply cannot replicate, crucial for the dish’s fresh finish.
Taste and Adjust Your Sauce
Seasoning is personal, and broth/capers can vary in saltiness. Always taste your finished sauce before serving.
Adjust with a pinch more salt, pepper, or a final squeeze of lemon juice until the flavors are perfectly balanced to your liking.
Invest in a Meat Thermometer
A digital instant-read thermometer is your best friend for perfectly cooked chicken.
It ensures your chicken reaches the safe internal temperature of 165°F (74°C) without going a degree over, guaranteeing juiciness every single time.
What to Serve with Your Skillet Lemon Caper Chicken Masterpiece
Creamy Mashed Potatoes or Risotto
The luxurious creaminess of mashed potatoes or a lemon-infused risotto creates a comforting and elegant pairing.
Their texture beautifully contrasts the tender chicken, and they are perfect for soaking up every drop of that irresistible lemon caper sauce.
Fluffy Rice or Quinoa
For a lighter, yet equally satisfying option, fluffy white or brown rice, or even quinoa, works wonderfully.
These grains are excellent absorbents for the vibrant, tangy sauce, ensuring no flavor goes to waste.
Simple Roasted Asparagus or Green Beans
Quickly roasted or steamed asparagus or blanched green beans offer a healthy, crisp, and refreshing counterpoint.
Their natural sweetness and vibrant color beautifully complement the rich flavors of the Skillet Lemon Caper Chicken.
A Light Side Salad
A crisp green salad, perhaps with a simple vinaigrette dressing, provides a refreshing element that cleanses the palate.
It adds a delightful textural contrast and brightens the overall meal experience.
Plan Ahead: Storing and Reheating Your Skillet Lemon Caper Chicken
Can I Make This Ahead?
While this Skillet Lemon Caper Chicken is best enjoyed fresh, you can certainly prep ingredients in advance.
Pound and season the chicken, chop your parsley, and measure out broth and lemon juice the day before to streamline cooking on a busy weeknight.
Storing Leftovers Safely
Allow any leftover chicken and sauce to cool completely before transferring them to an airtight container.
Properly stored, your delicious leftovers will keep fresh in the refrigerator for up to 3-4 days.
Reheating for Best Results
To maintain juiciness, gently reheat the chicken and sauce in a skillet over low-medium heat on the stovetop until warmed through.
Alternatively, use a microwave on a lower power setting, heating in short bursts, to prevent the chicken from drying out.
Help! My Skillet Lemon Caper Chicken Isn’t Perfect (and How to Fix It!)
Why is My Chicken Dry?
Dry chicken often stems from overcooking, so ensure you cook to exactly 165°F (74°C) with a thermometer.
Skipping the pounding step or the crucial resting period can also lead to tough, dry results. Always pound to an even thickness and allow the chicken to rest.
My Sauce Isn’t Thickening Enough
Ensure you’ve scraped up all the flavorful fond from the bottom of the pan, as this contributes to the sauce’s body.
Allow the sauce to simmer a bit longer, letting it reduce naturally. For a slightly thicker sauce, you can whisk in a tiny pinch of cornstarch mixed with cold water, but it’s usually unnecessary.
My Chicken Isn’t Getting Golden Brown
The skillet needs to be sufficiently hot before adding the chicken; test with a drop of water that sizzles immediately.
Avoid overcrowding the pan, as this lowers the temperature and steams the chicken instead of searing it. Cook in batches if needed for that beautiful golden crust.
Burning Questions? We’ve Got Your Skillet Lemon Caper Chicken FAQs Covered
Can I Use Chicken Thighs Instead of Breasts?
Yes, chicken thighs are a delicious alternative! They are naturally more forgiving and less prone to drying out.
Adjust cooking times slightly, as thighs may take a bit longer to cook through (to 175°F/80°C), and you might not need to pound them.
What If I Don’t Have Capers?
Capers offer a unique briny, tangy flavor that is hard to replicate precisely.
If you absolutely must omit them, you could add a very small amount of finely chopped green olives or a touch more lemon juice for acidity, but the distinct caper punch will be missed.
Is This Recipe Gluten-Free Friendly?
Absolutely! Simply substitute the all-purpose flour for a good quality gluten-free flour blend.
Ensure your chicken broth is also certified gluten-free, and the rest of the ingredients are naturally free from gluten.
How Can I Make This Dairy-Free?
To make this Skillet Lemon Caper Chicken dairy-free, replace the unsalted butter with an equal amount of your preferred dairy-free butter alternative or simply use more olive oil.
The sauce will retain its incredible flavor profile with these simple substitutions.
Can I Add More Vegetables to the Skillet?
Yes, absolutely! Quick-cooking vegetables like spinach, cherry tomatoes, or sliced mushrooms can be added after the chicken is removed.
Sauté them in the skillet for a few minutes before adding the broth for the sauce, allowing them to soften slightly and absorb the pan’s flavors.
Ready to Impress? Share Your Skillet Lemon Caper Chicken Masterpiece!
You now possess the expert techniques and a truly exceptional recipe for Skillet Lemon Caper Chicken.
This dish is guaranteed to be juicy, tender, and incredibly flavorful, making it a showstopper for any meal.
Go ahead, confidently create this culinary delight, savor every bite, and share your delicious success with those you love!

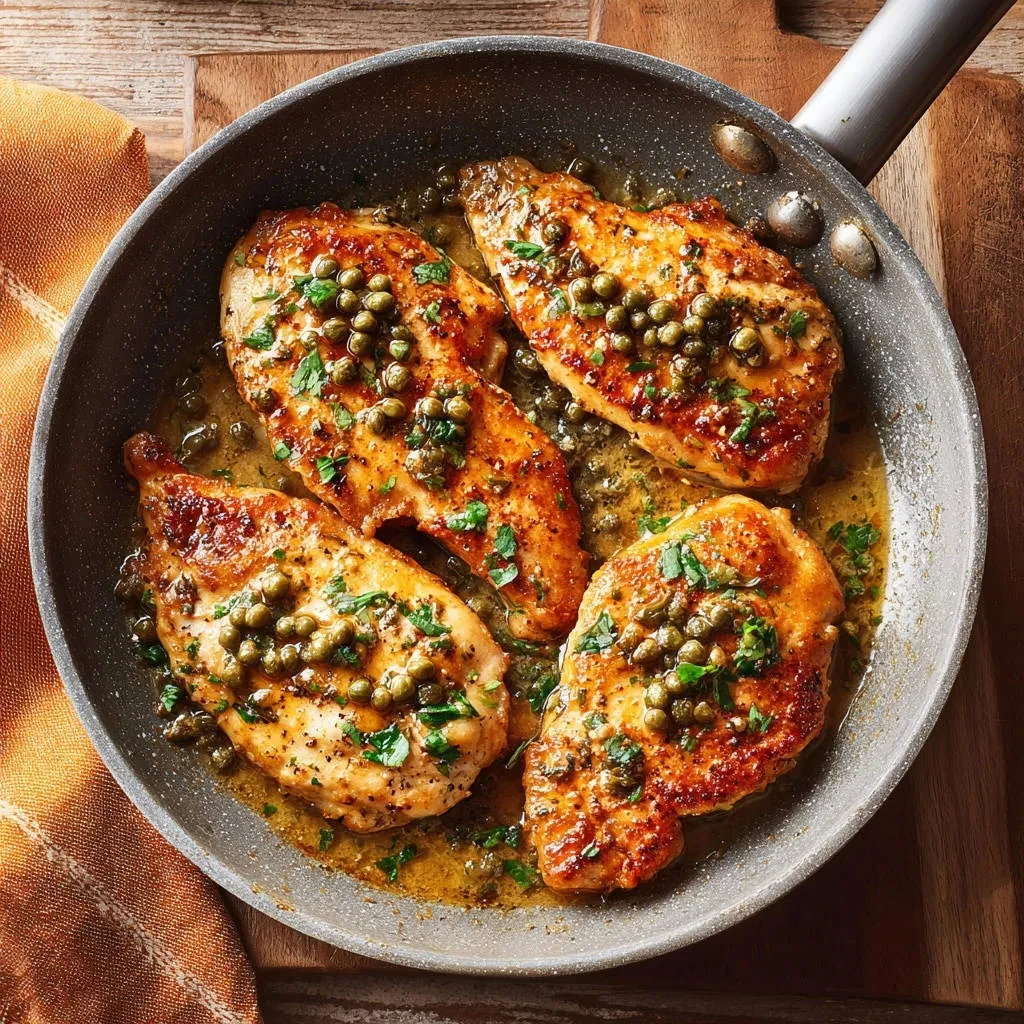
Skillet Lemon Caper Chicken
Course: Main CourseCuisine: International CuisineDifficulty: easy4
servings15
minutes15
minutes30
minutesInternational Cuisine
Ingredients
4 boneless, skinless chicken breasts
2 tablespoons all-purpose flour
1/2 teaspoon salt
1/4 teaspoon black pepper
2 tablespoons unsalted butter
1 tablespoon olive oil
1/2 cup chicken broth (low sodium)
2 tablespoons fresh lemon juice
1 tablespoon capers, drained
2 tablespoons fresh parsley, chopped
Directions
- Prepare Chicken for Even Cooking: Place each chicken breast between two pieces of plastic wrap. Using a meat mallet or a heavy pan, gently pound the chicken breasts to an even 1/2-inch thickness. This step is crucial for ensuring they cook through evenly without drying out.
- Season the Chicken: In a shallow dish, combine the flour, salt, and pepper. Dredge each pounded chicken breast in the flour mixture, shaking off any excess.
- Sear for Golden Perfection: Heat butter and olive oil in a large non-stick skillet over medium-high heat until the butter is melted and sizzling. Add the chicken breasts to the hot skillet, ensuring not to overcrowd the pan (cook in batches if necessary). Cook for 3 to 4 minutes per side, until deeply golden brown and cooked through. The internal temperature should reach 165 degrees Fahrenheit. This quick, hot sear on evenly thick chicken prevents dryness.
- Rest the Chicken: Remove the cooked chicken from the skillet and set aside on a plate, tented loosely with foil. Allowing the chicken to rest briefly helps redistribute the juices, keeping it moist.
- Build the Sauce: Reduce heat to medium. Pour the chicken broth and fresh lemon juice into the same skillet, scraping up any browned bits from the bottom of the pan (these add amazing flavor!). Bring to a simmer and cook for 2 to 3 minutes, or until the sauce slightly thickens.
- Finish the Sauce: Stir in the drained capers and chopped fresh parsley. Taste and adjust seasoning if needed.
- Serve: Return the rested chicken breasts to the skillet, spooning the luscious lemon caper sauce over each piece. Serve immediately and enjoy your perfectly juicy chicken!
Notes
- Pounding chicken to an even 1/2-inch thickness is crucial for even cooking and preventing dryness.
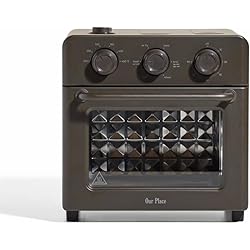
Our Place Wonder Oven | 6-in-1 Air Fryer & Toaster Oven with Steam Infusion | Compact, Countertop Friendly, Fast Preheat, Multifunctional | Air Fry, Toast, Roast, Bake, Reheat & Broil | Char
$185.00 (as of November 3, 2025 15:13 GMT +00:00 - More infoProduct prices and availability are accurate as of the date/time indicated and are subject to change. Any price and availability information displayed on [relevant Amazon Site(s), as applicable] at the time of purchase will apply to the purchase of this product.)
Knobēz: Decorative Knob Covers - Red Peppermint - 12pk - Stretch Over Hardware Decorations, Holiday-Winter-Christmas, Kitchen-Bathroom-Dressers-Home
$24.99 (as of November 3, 2025 15:13 GMT +00:00 - More infoProduct prices and availability are accurate as of the date/time indicated and are subject to change. Any price and availability information displayed on [relevant Amazon Site(s), as applicable] at the time of purchase will apply to the purchase of this product.)
Professional 0.5 Sec Instant Read Meat Thermometer Digital, NIST Certified ±0.5℉ Accuracy, Auto Rotate Large LCD Display, 100% Waterproof Cooking Thermometer for Grill BBQ Smoker Oven Candy, Red
$16.99 (as of November 3, 2025 15:13 GMT +00:00 - More infoProduct prices and availability are accurate as of the date/time indicated and are subject to change. Any price and availability information displayed on [relevant Amazon Site(s), as applicable] at the time of purchase will apply to the purchase of this product.)
LovePads Clear Table Cover Protector 36 x 60 Inch, 1.5mm Thick Plastic Table Cover, Table Protector for Dining Room Table, Waterproof Vinyl Tablecloth Table Pad Mat for Kitchen, Dresser, Writing Desk
$28.49 (as of November 3, 2025 15:13 GMT +00:00 - More infoProduct prices and availability are accurate as of the date/time indicated and are subject to change. Any price and availability information displayed on [relevant Amazon Site(s), as applicable] at the time of purchase will apply to the purchase of this product.)