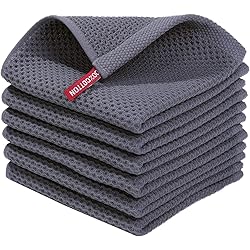
Homaxy 100% Cotton Waffle Weave Kitchen Dish Cloths, Ultra Soft Absorbent Quick Drying Dish Towels, 12 x 12 Inches, 6-Pack, Dark Grey
$8.99 (as of November 3, 2025 15:13 GMT +00:00 - More infoProduct prices and availability are accurate as of the date/time indicated and are subject to change. Any price and availability information displayed on [relevant Amazon Site(s), as applicable] at the time of purchase will apply to the purchase of this product.)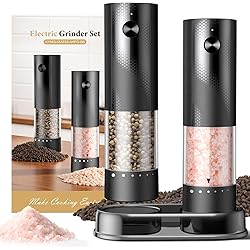
Electric Salt and Pepper Grinder Set - Rechargeable Automatic Salt and Pepper Shakers, Kitchen Appliances with External Adjustable Coarseness, Larger Hopper for Cooking, Home Gifts(2 Pack,Black/Black)
$22.99 (as of November 3, 2025 15:13 GMT +00:00 - More infoProduct prices and availability are accurate as of the date/time indicated and are subject to change. Any price and availability information displayed on [relevant Amazon Site(s), as applicable] at the time of purchase will apply to the purchase of this product.)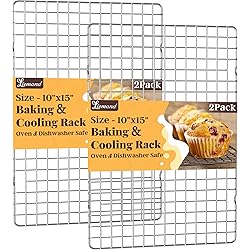
Cooling Racks for Cooking and Baking - 2 PCS 10" x 15" Grid Wire Baking Rack for Oven Cooking, Baking, Grilling, Roasting - Dishwasher Safe Bacon Rack - Fits Jelly Roll Cookie Sheet Pan
$6.99 (as of November 3, 2025 15:13 GMT +00:00 - More infoProduct prices and availability are accurate as of the date/time indicated and are subject to change. Any price and availability information displayed on [relevant Amazon Site(s), as applicable] at the time of purchase will apply to the purchase of this product.)
Simple Modern Halloween 40 oz Trek Tumbler with Handle and Straw Lid | Cup Holder Friendly Insulated Stainless Steel Travel Mug | Autumn Maple
$44.99 (as of November 3, 2025 15:13 GMT +00:00 - More infoProduct prices and availability are accurate as of the date/time indicated and are subject to change. Any price and availability information displayed on [relevant Amazon Site(s), as applicable] at the time of purchase will apply to the purchase of this product.)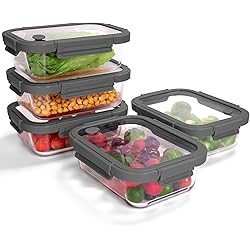
BOROHOUSE 5-Pack Borosilicate Glass Containers with Tempered Lids, 35.2oz/4.4 Cup Airtight Meal Prep Set, Microwave/Freezer Safe (Gray)
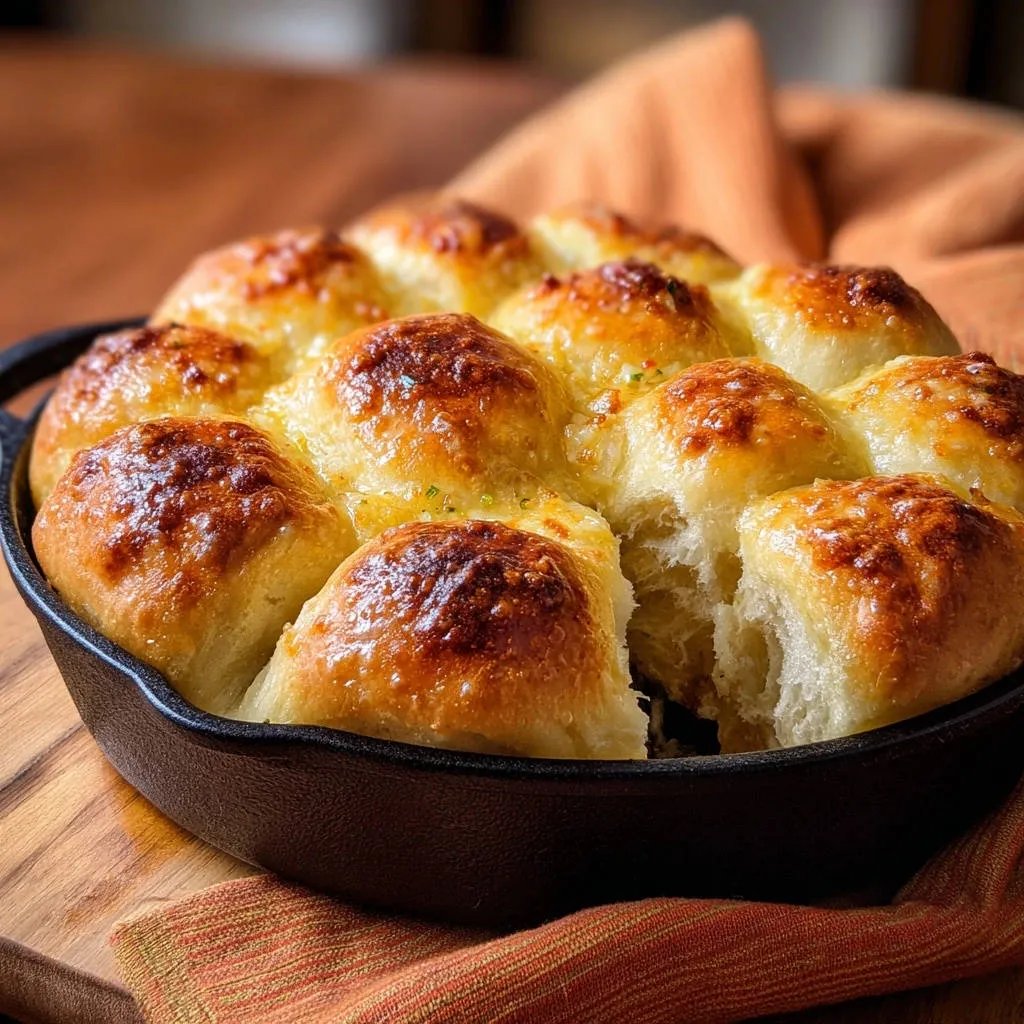
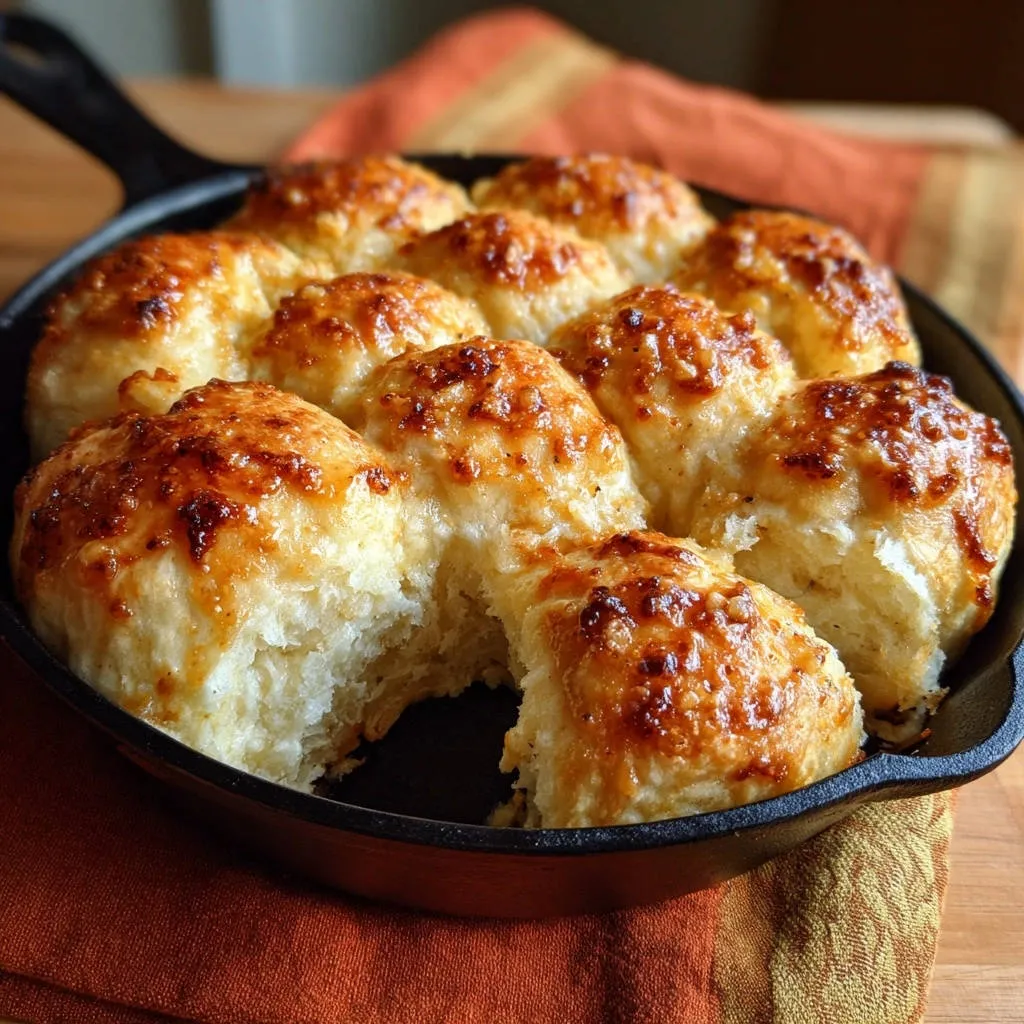
$45.99 (as of November 3, 2025 15:13 GMT +00:00 - More infoProduct prices and availability are accurate as of the date/time indicated and are subject to change. Any price and availability information displayed on [relevant Amazon Site(s), as applicable] at the time of purchase will apply to the purchase of this product.)For years, I dreamt of baking those impossibly light, fluffy rolls you see at bakeries, but always ended up with something dense and unsatisfying. It felt like a mystery until I finally cracked the code, transforming my kitchen into a haven of perfectly risen Skillet Garlic Pull-Apart Rolls. This recipe isn’t just about ingredients; it’s about simple techniques that guarantee an airy, melt-in-your-mouth texture every single time, making it truly special.
Beyond Basic: What Makes Our Skillet Garlic Pull-Apart Rolls So Special?
These aren’t just any dinner rolls. This recipe for Skillet Garlic Pull-Apart Rolls promises a baking experience that builds confidence and delivers irresistible results. Each element is carefully chosen and explained to ensure your success.
The “Never Dense” Secret: Achieving Airy Perfection
The core promise of this recipe is its consistently light and fluffy outcome. We focus on specific techniques that prevent the common pitfall of dense rolls, ensuring an airy crumb every time.
Simple Tricks, Extraordinary Results: Your Path to Baking Confidence
Even if you’re new to yeast baking, this guide simplifies the process. It offers clear instructions and practical insights that guarantee success, building your confidence with each perfectly baked roll.
Irresistible Flavor: A Garlic Butter Dream
The crowning glory of these rolls is the rich, aromatic garlic and fresh parsley butter topping. This savory finish elevates a simple roll into a truly unforgettable culinary delight, making every bite a burst of flavor.
A Crowd-Pleaser for Any Occasion
These Skillet Garlic Pull-Apart Rolls are universally loved, perfect for everything from a casual family dinner to a festive holiday spread. Their delicious pull-apart nature makes them a fun and communal dish for any gathering.
The Essential Building Blocks: Ingredients for Flawless Rolls
Understanding the role of each ingredient is key to mastering these fluffy rolls. Quality matters, and knowing the “why” behind each addition empowers you as a baker.
Active Dry Yeast: The Rise and Shine Starter
Active dry yeast is the leavening agent responsible for the rolls’ beautiful rise. Ensuring your yeast is fresh and properly activated is the very first step to success.
The proofing step, where it foams up in warm milk, confirms its vitality and readiness to work its magic.
Flour Fundamentals: The Right Type and How Much
We use standard all-purpose flour, which provides the necessary gluten structure. The key is to add flour gradually and avoid over-flouring.
Too much flour leads to dense, dry rolls, so err on the side of a slightly sticky dough during mixing.
Dairy Delights: Milk and Butter for Richness
Warm milk activates the yeast and contributes to a tender crumb. Its fat content also adds richness to the dough.
Unsalted butter adds incredible flavor, tenderness, and a rich mouthfeel to the rolls. It’s used both within the dough and generously for the garlic butter topping.
The Aromatic Duo: Garlic and Fresh Parsley
Freshly minced garlic provides a pungent, savory aroma that is central to these garlic rolls. Using fresh ensures the most vibrant flavor.
Fresh parsley adds a bright, herbaceous note and a beautiful pop of color to the garlic butter. It complements the garlic perfectly.
Sweet & Salty Balance: Sugar and Salt’s Subtle Impact
Granulated sugar feeds the yeast, helping it activate and promoting a lovely golden-brown crust. It’s not primarily for sweetness in this savory context.
Salt is crucial for balancing the flavors in the dough and controlling yeast activity. It enhances the overall taste profile significantly.
Equipping Your Kitchen: Essential Tools for Skillet Garlic Pull-Apart Rolls
Having the right tools makes the baking process smoother and more enjoyable. These essentials ensure you can easily create beautiful Skillet Garlic Pull-Apart Rolls.
Mixing & Kneading Gear
A large mixing bowl is essential for combining ingredients and allowing the dough to rise comfortably. A sturdy, clean surface is also needed for effective kneading.
Proofing Perfectors
Plastic wrap or a clean kitchen towel will be used to cover the dough during its rises. This prevents the dough from drying out and creates a warm, humid environment optimal for rising.
The Star of the Show: Your 9-Inch Skillet
A 9-inch cast iron skillet is ideal for baking these pull-apart rolls. Cast iron retains and distributes heat exceptionally well, resulting in a beautifully golden crust and even cooking.
If you don’t have cast iron, any similar oven-safe baking dish will work, such as a ceramic pie plate or a round cake pan.
Measuring & Prep Essentials
Accurate measuring cups and spoons are critical for consistent results in baking. A sharp knife and a cutting board are needed for mincing garlic and chopping fresh parsley.
Your Path to Skillet Garlic Pull-Apart Rolls Perfection: A Detailed Guide
- Activate the Yeast:
In a large bowl, combine the warm milk (around 105-115°F), yeast, and sugar.
Allow this mixture to sit for 5-10 minutes until it becomes foamy. This crucial step confirms your yeast is alive and ready to provide a beautiful rise.
- Incorporate Wet Ingredients:
Stir the salt, egg, and 1/4 cup of melted butter into the foamy yeast mixture until everything is thoroughly combined.
Ensure these ingredients are fully integrated to distribute flavor and moisture evenly throughout the dough.
- Begin Adding Flour:
Gradually add 3 cups of all-purpose flour to the wet mixture, mixing until a shaggy, cohesive dough starts to form.
Assess the dough’s consistency; if it remains excessively sticky, add more flour one tablespoon at a time, being careful not to overdo it.
- The Art of Kneading: Building Gluten for Airiness:
Turn the dough out onto a lightly floured surface and knead vigorously for 8-10 minutes.
The goal is to achieve a dough that is smooth, elastic, and springs back when gently poked. This thorough kneading is the secret to developing the gluten structure essential for a light, airy texture that won’t be dense.
- First Rise: Flavor and Structure Development:
Lightly grease a clean bowl with oil, then place the kneaded dough inside, turning once to coat.
Cover the bowl with plastic wrap and let it rise in a warm place for 1 to 1 1/2 hours, or until it has visibly doubled in size. This initial rise is fundamental for developing both the rich flavor and robust structure of your rolls.
- Shape the Rolls:
Once the dough has fully risen, gently punch it down to release the trapped air.
Divide the dough into 12 equal pieces, then roll each piece into a smooth, uniform ball, ensuring even baking.
- Prepare the Skillet:
Lightly grease a 9-inch cast iron skillet or any other suitable oven-safe baking dish.
Arrange the shaped dough balls evenly within the prepared skillet, leaving a small space between each for expansion during the second rise.
- Second Rise: Ensuring Ultimate Lightness:
Loosely cover the skillet with plastic wrap or a clean kitchen towel.
Allow the rolls to rise again in a warm place for an additional 30-45 minutes, or until they appear noticeably puffy. This crucial second rise ensures a truly light texture, preventing any density in the final product.
- Preheat Oven & Prepare Garlic Butter:
Preheat your oven to 375°F (190°C).
In a small bowl, melt the remaining 2 tablespoons of butter and stir in the minced garlic and chopped fresh parsley. This fragrant mixture will be used for brushing.
- Bake to Golden Perfection:
Bake the rolls for 18-22 minutes, or until their tops are beautifully golden brown and they are cooked through.
For an extra boost of flavor and deeper browning, you can brush the tops with a little of the garlic butter mixture halfway through the baking process.
- Finishing Touch: Garlic Butter Shower:
Immediately upon removing the rolls from the oven, generously brush the remaining garlic butter mixture over the warm tops.
Serve these delectable Skillet Garlic Pull-Apart Rolls hot and enjoy pulling them apart!
Mastering the Dough: Secrets to an Irresistibly Light Texture
Achieving truly light and fluffy Skillet Garlic Pull-Apart Rolls isn’t by chance; it’s a result of understanding and executing specific techniques in dough development.
The Power of Thorough Kneading
Kneading the dough for a full 8-10 minutes is non-negotiable for an airy texture. This process develops the gluten strands, which create a strong yet elastic network that traps the gasses produced by the yeast.
Properly kneaded dough will be smooth, supple, and spring back when gently pressed, indicating excellent gluten development.
Perfecting the Double Rise
Both the first and second rises are crucial. The first rise develops flavor and initial structure, allowing the yeast to fully activate.
The second rise, after shaping, contributes to the final airy lightness, ensuring each individual roll is puffy and tender. Rushing either rise can lead to denser results.
Temperature Matters: A Warm Environment is Key
Yeast thrives in warmth. Using warm milk (105-115°F) for activation is vital, as too-cold water slows yeast, and too-hot water can kill it.
Allowing the dough to rise in a consistently warm, draft-free spot encourages robust yeast activity, leading to a successful and airy rise.
Chef’s Secrets: Elevate Your Skillet Garlic Pull-Apart Rolls Game
Don’t Over-Flour Your Dough: Resist the urge to add too much flour during mixing and kneading, as this is the primary cause of dense rolls. A slightly sticky dough is often ideal and will become less sticky with sufficient kneading.
Confirm Yeast Activity: Always ensure your yeast mixture becomes foamy after sitting. If it doesn’t, your yeast might be expired or the water temperature was off, and your rolls won’t rise properly. Start fresh if this happens.
Enhance Garlic Aroma: For an even deeper garlic flavor, you can gently warm the minced garlic in a tiny bit of butter over low heat for 1-2 minutes before mixing it into the full garlic butter topping. This mellows the raw garlic taste and amplifies its aroma.
Achieving Golden Brown Perfection: Keep a close eye on your rolls during the last few minutes of baking. If they’re browning too quickly on top, loosely tent them with aluminum foil to prevent over-browning while the insides finish cooking.
Fresh Herbs Make a Difference: While dried parsley can be substituted (use about 1 teaspoon), fresh parsley in the garlic butter topping provides superior flavor, a brighter appearance, and a more vibrant aroma.
Solving Common Dough Dilemmas: Troubleshooting Your Rolls
My rolls turned out dense and heavy.
This is most commonly caused by adding too much flour, leading to a stiff dough that can’t rise properly. It can also result from under-kneading, which prevents gluten development, or insufficient rising time.
Ensure your dough remains slightly tacky during kneading and give it ample time for both rises in a warm spot.
My dough isn’t rising at all!
Inactive yeast is usually the culprit here. Your yeast might be expired, or the milk temperature was either too hot (killing the yeast) or too cold (inhibiting its activity).
Always proof your yeast first, and ensure your milk is within the 105-115°F range. A too-cold rising environment can also slow or stop the rise.
The rolls are dry and crumbly.
Dry and crumbly rolls are often a sign of over-baking. Keep an eye on the oven and remove them as soon as they are golden brown and cooked through.
Excessive flour added during mixing or kneading can also contribute to a dry final product, as there isn’t enough moisture for a tender crumb.
My garlic butter topping soaked in too quickly.
The rolls should be warm, but not scorching hot, when brushed. If they’re piping hot, the butter might melt and soak in immediately. Also, ensure you brush generously and quickly upon removal from the oven.
A good, even coating ensures the flavor stays on the surface for maximum impact.
Serving Suggestions & Perfect Pairings
These Skillet Garlic Pull-Apart Rolls are incredibly versatile, fitting seamlessly into various meals and occasions. Their savory garlic flavor makes them a welcome addition to almost any spread.
The Ultimate Dinner Companion
Pair these fluffy yeast rolls with rich pasta dishes, such as a hearty lasagna or a creamy fettuccine alfredo. They are also fantastic alongside roasted chicken, juicy steaks, or comforting stews, perfect for soaking up delicious sauces.
Breakfast & Brunch Delight
Don’t limit these to dinner! Skillet Garlic Pull-Apart Rolls make a delightful addition to a savory breakfast or brunch. Serve them alongside scrambled eggs, crispy bacon, or a flavorful breakfast casserole for a truly satisfying meal.
A Standalone Snack
Warm from the oven, these Skillet Garlic Pull-Apart Rolls are utterly delicious all on their own. They can also be a wonderful light lunch alongside a simple green salad with a vinaigrette, offering a delightful and satisfying bite.
Savvy Storage & Make-Ahead Solutions
With a little planning, you can enjoy these Skillet Garlic Pull-Apart Rolls freshly baked or prepare components in advance to simplify your baking day.
Keeping Fresh: Storage Tips
Store leftover rolls in an airtight container at room temperature for up to 2-3 days. This helps maintain their soft texture and prevents them from drying out.
For longer storage, freeze cooled rolls in a freezer-safe bag for up to 1 month. Thaw at room temperature before reheating.
Reheating for Fresh-Baked Taste
To enjoy that fresh-baked warmth, reheat rolls in an oven preheated to 300°F (150°C) for about 5-10 minutes, or until warmed through. You can also quickly warm them in the microwave for 15-30 seconds, though this may alter the texture slightly.
Prep Ahead: Dough Management for Busy Bakers
You can prepare the dough up to the end of the first rise. After the dough has doubled, gently punch it down, place it back in the greased bowl, cover tightly with plastic wrap, and refrigerate for up to 24 hours.
When ready to bake, remove the dough from the refrigerator, let it come to room temperature for about 30-60 minutes, then proceed with shaping and the second rise as directed in the recipe.
Your Skillet Garlic Pull-Apart Rolls Questions Answered
Can I use instant yeast instead of active dry yeast?
Yes, you can use instant yeast. The primary difference is that instant yeast doesn’t require proofing. You can typically mix it directly with the dry ingredients, then add the warm milk and wet ingredients.
Follow the same quantities unless your instant yeast packaging specifies otherwise.
What if I don’t have a cast iron skillet?
No problem! A 9-inch ceramic pie plate, an oven-safe glass dish, or even a square 8×8-inch baking pan will work beautifully.
Just ensure whatever dish you use is oven-safe and lightly greased to prevent sticking.
Can I add cheese to these rolls?
Absolutely! For a cheesy garlic roll variation, you can sprinkle about 1/2 cup of grated Parmesan or mozzarella cheese over the dough balls before the second rise.
Alternatively, mix it into the garlic butter topping for a cheesy crust, or brush it on during the last few minutes of baking.
How can I make these rolls sweeter for a dessert option?
This particular recipe is designed for savory Skillet Garlic Pull-Apart Rolls. To make a sweeter version, you would need to significantly increase the sugar in the dough (to about 1/4 to 1/2 cup), omit the garlic and parsley, and potentially add cinnamon or a sweet glaze.
It would essentially become a different recipe, but the pull-apart dough base is a great starting point for sweet rolls too!
Your Next Culinary Triumph Awaits!
There’s immense satisfaction in baking a batch of truly exceptional rolls, and these Skillet Garlic Pull-Apart Rolls promise just that. With their irresistible fluffy texture and robust garlic flavor, they are guaranteed to impress.
Don’t hesitate to try this recipe; you’ll love the confidence it brings to your baking journey. I encourage you to make these Skillet Garlic Pull-Apart Rolls your own and savor every delicious, pull-apart moment!
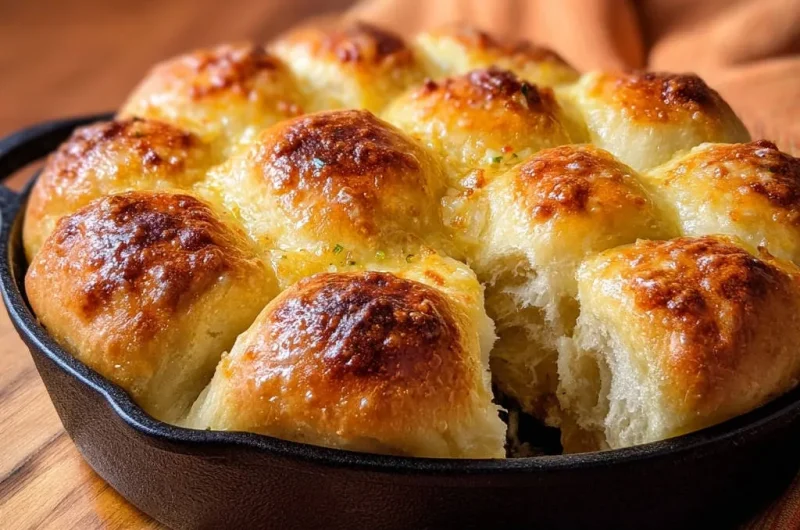
Skillet Garlic Pull-Apart Rolls
Course: BreadCuisine: American CuisineDifficulty: easy4
12 rolls40
minutes20
minutes180
minutesAmerican Cuisine
Ingredients
1 cup warm milk (around 105-115°F)
2 1/4 teaspoons active dry yeast (one packet)
2 tablespoons granulated sugar
1 teaspoon salt
1 large egg
1/4 cup unsalted butter, melted, plus 2 tablespoons for topping
3 to 3 1/2 cups all-purpose flour
3 cloves garlic, minced
2 tablespoons fresh parsley, chopped
Directions
- In a large bowl, combine the warm milk, yeast, and sugar. Let it sit for 5-10 minutes until foamy. This confirms your yeast is active and ready to work!
- Stir in the salt, egg, and 1/4 cup of melted butter until well combined.
- Gradually add 3 cups of flour, mixing until a shaggy dough forms. Add more flour, a tablespoon at a time, if the dough is too sticky, but be careful not to add too much.
- Turn the dough out onto a lightly floured surface and knead for 8-10 minutes. The key here is to keep kneading until the dough is smooth, elastic, and bounces back when lightly poked. This thorough kneading develops the gluten essential for a light, airy texture that won’t be dense.
- Lightly grease a clean bowl with oil. Place the dough in the bowl, turning once to coat. Cover with plastic wrap and let it rise in a warm place for 1 to 1 1/2 hours, or until doubled in size. This first rise is crucial for developing flavor and structure.
- Once risen, gently punch down the dough to release the air. Divide the dough into 12 equal pieces. Roll each piece into a smooth ball.
- Grease a 9-inch cast iron skillet (or other oven-safe baking dish). Arrange the dough balls in the skillet.
- Cover the skillet loosely with plastic wrap or a clean kitchen towel and let the rolls rise again in a warm place for another 30-45 minutes, or until noticeably puffy. This second rise ensures a truly light texture without being dense.
- Preheat your oven to 375°F (190°C).
- In a small bowl, melt the remaining 2 tablespoons of butter. Stir in the minced garlic and chopped parsley.
- Bake the rolls for 18-22 minutes, or until golden brown on top and cooked through. Halfway through baking, you can brush the tops with a little of the garlic butter mixture to enhance flavor and browning.
- Once out of the oven, immediately brush the remaining garlic butter generously over the warm rolls. Serve hot and pull apart!
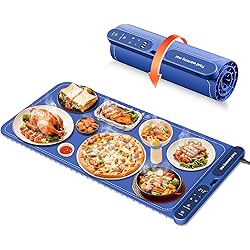
Warming Mat for Food Extra Large 32"x15", Electric Silicone Food Warmer Trays for Chafing Dishes & Buffet,Portable Countertop Food Warmers for Parties, 7-Level Temp 8-Hour Timer, Blue
$49.99 (as of November 3, 2025 15:13 GMT +00:00 - More infoProduct prices and availability are accurate as of the date/time indicated and are subject to change. Any price and availability information displayed on [relevant Amazon Site(s), as applicable] at the time of purchase will apply to the purchase of this product.)
BOROHOUSE 5-Pack Borosilicate Glass Containers with Tempered Lids, 35.2oz/4.4 Cup Airtight Meal Prep Set, Microwave/Freezer Safe (Gray)
$45.99 (as of November 3, 2025 15:13 GMT +00:00 - More infoProduct prices and availability are accurate as of the date/time indicated and are subject to change. Any price and availability information displayed on [relevant Amazon Site(s), as applicable] at the time of purchase will apply to the purchase of this product.)
Amazon Basics Organic Cotton Waffle Kitchen Dish Towels - Ultra Absorbent, Quick Drying, Lint-Free, 15 x 25 inches, 6-Pack (4 Navy Strip/Checker, 1 White, 1 Solid Navy)
$15.19 (as of November 3, 2025 15:13 GMT +00:00 - More infoProduct prices and availability are accurate as of the date/time indicated and are subject to change. Any price and availability information displayed on [relevant Amazon Site(s), as applicable] at the time of purchase will apply to the purchase of this product.)
F-Caw-F Funny Chicken Humor F-Caw-F Quote Rooster Meme Stainless Steel Insulated Tumbler
$18.69 (as of November 3, 2025 15:13 GMT +00:00 - More infoProduct prices and availability are accurate as of the date/time indicated and are subject to change. Any price and availability information displayed on [relevant Amazon Site(s), as applicable] at the time of purchase will apply to the purchase of this product.)