Oh, glazed pearl onions. They sound simple, right? Sweet, tender, and coated in a luscious, glossy glaze that just screams elegance. But if you’ve ever tried to make them at home and ended up with a pan of sadly bitter, sticky, or watery onions instead of that deep, rich, clinging perfection, you are absolutely not alone. For the longest time, this classic side dish felt like my culinary nemesis. I’d rush the process, crank up the heat, and inevitably get that disappointing burnt sugar bitterness or a thin, sad sauce that slid right off the onions.
But after countless batches and a lot of experimenting, I finally cracked the code. The secret isn’t a fancy ingredient or a complex technique; it’s all about patience and understanding a couple of key moments in the cooking process. This recipe will guide you through creating glazed pearl onions that are wonderfully tender inside, beautifully caramelized outside, and coated in a rich, sweet-savory glaze that will have everyone asking for the recipe. Forget the bitter burn; get ready for glazed onion glory!
Why You’ll Fall in Love with This Glazed Pearl Onions Recipe
Beyond just tasting incredible, there are so many reasons these glazed pearl onions deserve a spot on your table, especially during special meals or holidays, but honestly, they’re easy enough for any night you want a touch of something special.
- The Perfect Texture: These onions become melt-in-your-mouth tender, a wonderful contrast to the slight caramel chewiness of the glaze.
- Rich, Complex Flavor: It’s not just sweet! You get the natural sweetness of the onions, the depth from the browned yellow onion base, the caramelized sugar notes, and a tangy counterpoint from the balsamic vinegar.
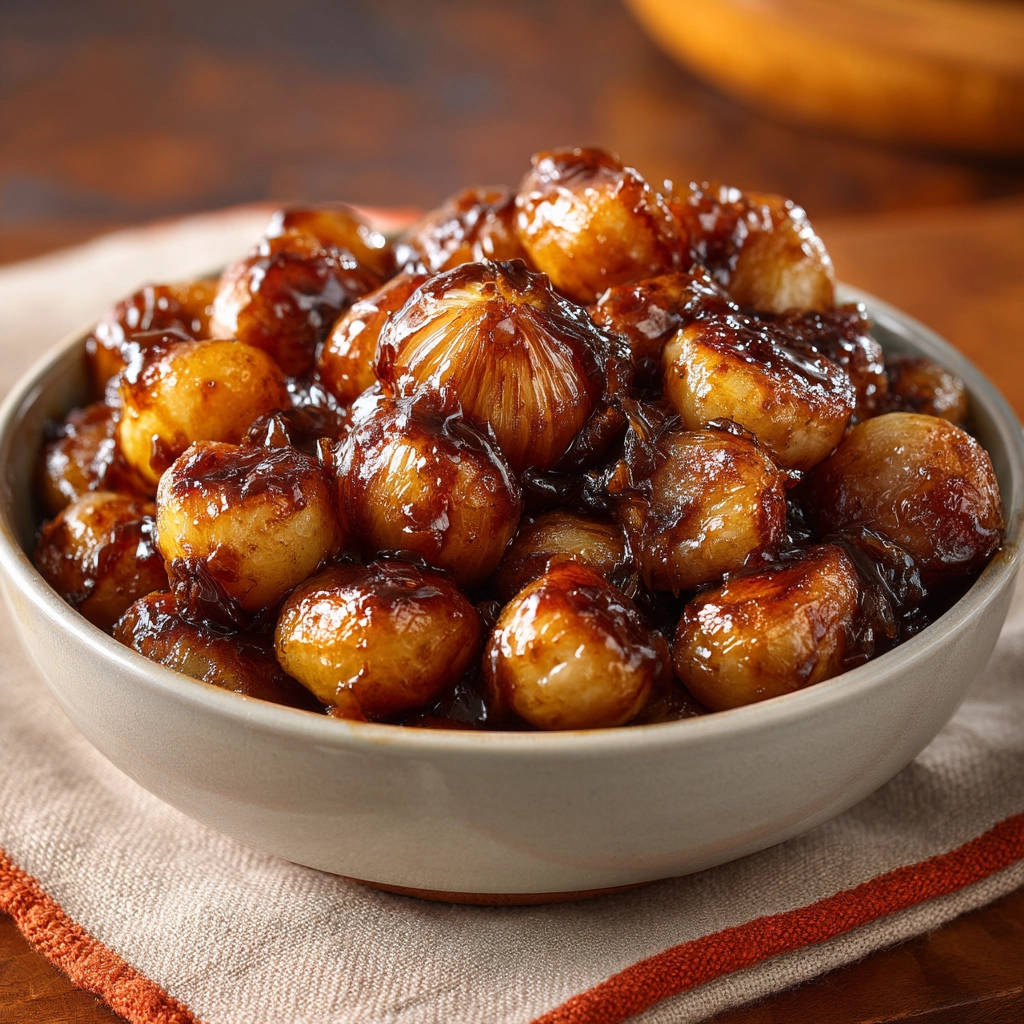
- That Beautiful Glaze: Achieving a glossy, clinging glaze is the hallmark of this dish, and this method ensures you get it every time without burning the sugar.
- Versatile Side Dish: While often associated with holiday roasts, these onions pair beautifully with so many main courses, from simple chicken dishes to hearty beef stews.
- Impressive Yet Simple: They look incredibly elegant and sophisticated, but the actual cooking process is straightforward once you know the key steps (which I’ll walk you through!).
Seriously, once you master this method, these glazed pearl onions will become a staple side in your cooking repertoire. They elevate any meal they accompany!
Gathering Your Ingredients for Perfect Glazed Pearl Onions
Creating that signature rich glaze and tender onion texture starts with selecting the right components. While the list is relatively short, each ingredient plays a vital role in building those deep, complex flavors and achieving the perfect consistency for your glazed pearl onions.
Here’s what you’ll need:
- Pearl Onions: You’ll want 2 pounds of these lovely little bulbs, already peeled if you can find them! Peeling pearl onions can be a bit tedious, though there are tricks (like blanching briefly) if you’re starting with unpeeled. These are the stars, offering that delightful bite-sized tenderness once cooked down.
- Yellow Onion: A large one, thinly sliced. While the pearl onions are the focus, the yellow onion serves as the essential foundation for our glaze. Cooking it down slowly adds a layer of savory depth and sweetness that complements the smaller onions beautifully. Don’t skip this!
- Unsalted Butter: 3 tablespoons. Butter provides the initial richness for sautéing our onions and contributes to the overall silkiness of the finished glaze. Using unsalted butter gives you control over the final seasoning.
- Brown Sugar: 2 tablespoons. This is where some of that signature sweetness and color come from. Brown sugar, with its molasses content, adds a deeper caramel note than white sugar and helps create that gorgeous, deep hue in the glaze. It’s also key to the careful caramelization step that prevents bitterness.
- Broth: 1 cup. You can use either beef or vegetable broth here, depending on your preference and what you’re serving the onions with. Beef broth will add a richer, more savory undertone, perfect for pairing with meat dishes. Vegetable broth keeps it plant-based and lighter, making it a versatile side for various meals, including vegetarian options. Choose a good quality broth for the best flavor.
- Balsamic Vinegar: 2 tablespoons. This is the secret weapon that cuts through the sweetness and adds a crucial tang and depth. Balsamic vinegar reacts beautifully with the caramelized sugar and broth, creating that balanced, slightly complex sweet-and-sour profile in the glaze. Choose a decent quality balsamic, but it doesn’t need to be an expensive aged one.
- Salt and Black Pepper: 1/2 teaspoon salt and 1/4 teaspoon black pepper. These essential seasonings enhance all the other flavors and bring them into harmony. You’ll season at the end, adjusting to taste.
- Fresh Herbs for Garnish: Fresh thyme or parsley. A sprinkle of fresh herbs at the end adds a burst of color and a final layer of aromatic freshness. Thyme pairs wonderfully with the savory and sweet notes, while parsley offers brightness.
Having all your ingredients prepped and ready to go before you start cooking will make the process much smoother, especially during the steps that require careful watching, like the sugar caramelization.
Crafting Your Glazed Pearl Onions: Step-by-Step for Success
This recipe follows a simple, logical flow, but the key to that perfect, non-bitter glaze lies in paying close attention during the caramelization and reduction phases. Don’t worry, I’ll walk you through it!
Build the Flavor Base with Yellow Onion: Start by melting the 3 tablespoons of unsalted butter in a large skillet or pot over medium heat. Once the butter is melted and perhaps just starting to foam, add your thinly sliced large yellow onion. Cook this, stirring occasionally, for about 8 to 10 minutes. You’re not just softening the onion here; you want it to start taking on some color and sweetness, beginning to brown around the edges. This caramelization of the yellow onion lays a crucial foundation for the final glaze’s depth.
Introduce the Pearl Onions: Add the peeled pearl onions to the skillet with the softened yellow onion. Continue to cook, stirring gently to avoid breaking the pearl onions, for another 5 to 7 minutes. The goal here is to give the pearl onions a little head start and let them also begin to brown slightly on their exteriors. This initial browning contributes to their flavor and helps them hold up during the longer cooking time ahead.
The Critical Sugar Step (No Bitter Burn Here!): This is where many recipes go wrong, leading to bitterness. Sprinkle the 2 tablespoons of brown sugar evenly over the onions in the skillet. Immediately reduce the heat slightly to medium-low. Now, this is key: you must stir constantly for just 2 to 3 minutes. Watch the sugar melt and coat the onions. It will start to caramelize, turning a beautiful amber color. The constant stirring prevents any part of the sugar from sitting still and burning, which is the primary cause of bitter glazed onions. This happens quickly, so stay focused on the pan!
Deglaze and Scrape for Flavor: Once the sugar has melted and lightly caramelized (after that careful 2-3 minutes), it’s time to deglaze. Carefully pour in the 1 cup of beef or vegetable broth and the 2 tablespoons of balsamic vinegar. The liquid will bubble and steam as it hits the hot pan. Use a wooden spoon to scrape the bottom of the skillet vigorously. Those browned bits stuck to the pan? That’s called the fond, and it’s packed with incredible flavor from the caramelized onions and sugar. Loosen all of it into the liquid; it will dissolve and enrich your glaze base.
Simmer and Tenderize: Bring the mixture to a gentle simmer, then immediately reduce the heat to low. Cover the skillet. Let the onions cook gently in this flavorful liquid for 15 to 20 minutes. This low and slow simmering time is essential for ensuring the pearl onions become wonderfully tender all the way through without getting mushy. Test one by piercing it with a fork; it should slide in easily when they’re ready.
Develop the Glaze: Once the pearl onions are tender, uncover the skillet and increase the heat back to medium. Now, you’ll simmer the liquid, stirring occasionally, for another 10 to 15 minutes. This is the reduction phase. The liquid will gradually thicken as it simmers, concentrating the flavors and reducing down into that beautiful, glossy glaze that coats the onions. Stirring helps ensure even reduction and prevents sticking.
Season and Finish: Once the glaze has thickened to your desired consistency (it should cling nicely to the onions), remove the skillet from the heat. Season the glazed onions with the 1/2 teaspoon of salt and 1/4 teaspoon of black pepper. Stir well to distribute the seasoning evenly throughout the onions and glaze. Taste and adjust if needed.
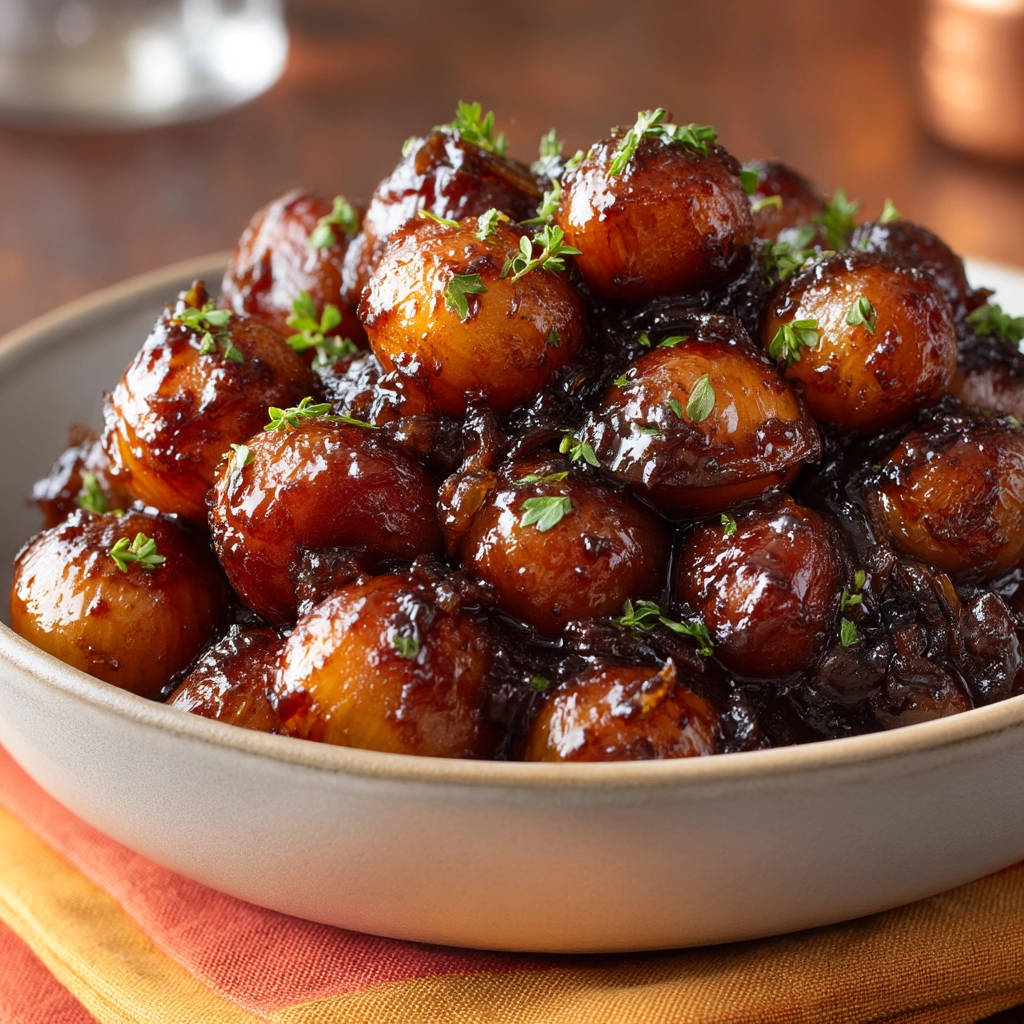
Serve Hot and Garnish: Your glazed pearl onions are ready! Serve them hot, spooning that rich glaze over the top. For a final touch of freshness and visual appeal, garnish with a sprinkle of fresh thyme or chopped fresh parsley.
Following these steps, especially being mindful during that crucial sugar phase and allowing sufficient time for the final glaze reduction, will ensure you achieve perfectly tender, beautifully glazed pearl onions every single time. It’s a technique worth mastering!
Tips for Perfect Glazed Pearl Onions Every Time
Even with the detailed steps above, a few extra tips can make the difference between good glazed pearl onions and absolutely show-stopping ones.
- Peeling Pearl Onions Made Easy: If you’re working with unpeeled pearl onions, the easiest way to peel them is to blanch them first. Bring a pot of water to a boil. Drop the onions in for just 30 seconds, then immediately scoop them out into an ice bath. Once cooled, you can easily snip off the root end and squeeze the onion out of its skin. It’s a game-changer!
- Don’t Rush the Browning: The initial cooking of both the yellow and pearl onions isn’t just about softening; it’s about developing flavor through caramelization. Give them the full time suggested (8-10 minutes for yellow, 5-7 minutes for pearl) over medium heat to build that important base.
- Heat Management is Key for Sugar: The brown sugar step is critical. Medium-low heat and constant stirring are your friends here. If the sugar starts smoking or looks like it’s turning dark brown too quickly, immediately pull the pan off the heat for a few seconds while you continue stirring, then return it to low heat. Better to go a little slow than to burn the sugar.
- Achieving Glaze Consistency: The time it takes for the glaze to thicken (Step 6) can vary depending on your skillet size, the heat level, and how much liquid was left after simmering. Watch for the glaze to coat the back of a spoon and cling to the onions rather than pooling thinly at the bottom of the pan. If it gets too thick, you can stir in a tablespoon or two of extra broth or water. If it’s too thin, continue simmering uncovered for a few more minutes.
- Flavor Boosters: While the recipe is perfect as is, you can add a pinch of dried thyme or a bay leaf during the simmering stage for extra aromatic depth. Just be sure to remove the bay leaf before serving.
- Making Ahead and Reheating: Glazed pearl onions can be made a day ahead. Store them in an airtight container in the refrigerator. To reheat, gently warm them in a small saucepan over low heat, adding a splash of broth or water if the glaze is too thick.
Keeping these points in mind will help you navigate the process confidently and achieve delicious results.
What to Serve With These Delicious Glazed Pearl Onions
These glazed pearl onions are the ultimate versatile side dish. They bring a touch of sweetness and elegance that pairs beautifully with a variety of main courses.
Consider serving them alongside classic roasted meats, like a juicy oven roast or glazed chicken perfection. They are an absolute must-have for holiday dinners, complementing dishes such as a classic pot roast or creamy baked chicken. Beyond roasts, they also work well with pan-seared steak or even vegetarian options like roasted root vegetables. Their sweet and savory glaze provides a lovely counterpoint to richer or more savory main dishes.
Your Glazed Pearl Onions Questions Answered (FAQ)
Got questions about making glazed pearl onions? Here are some common ones:
Can I use frozen pearl onions?
Yes, you can use frozen pearl onions. Thaw them first and drain off any excess liquid before adding them to the skillet. They might not brown as much in the initial stages due to moisture content, but they will still cook down nicely in the glaze.
My glaze is too thin/too thick. How can I fix it?
If the glaze is too thin after the reduction step, simply continue simmering uncovered over medium heat, stirring occasionally, until it thickens to your liking. If it’s too thick, stir in a tablespoon or two of extra broth or water until it reaches the right consistency.
Can I make this recipe vegetarian or vegan?
Yes, absolutely! The recipe already provides the option to use vegetable broth instead of beef broth, which makes it vegetarian. To make it vegan, simply substitute the butter with a plant-based butter alternative or olive oil. The rest of the ingredients are naturally vegan.
Why did my glaze turn bitter?
Bitterness in the glaze is almost always caused by the brown sugar burning during the caramelization step (Step 3). This happens when the heat is too high or the sugar isn’t stirred constantly. Reducing the heat to medium-low and stirring continuously for just those crucial 2-3 minutes prevents the sugar from scorching.
How long will leftovers last?
Leftover glazed pearl onions can be stored in an airtight container in the refrigerator for 3-4 days. Reheat gently on the stovetop or in the microwave.
Enjoy Your Homemade Glazed Pearl Onions!
There you have it – the secret to perfectly glazed pearl onions that are tender, sweet, and free from that dreaded bitter aftertaste. They’re a classic side dish that adds a touch of elegance to any meal, whether it’s a special occasion or just a Tuesday night where you want something a little extra.
Don’t be intimidated by them! With a little patience and attention to the key steps, you’ll be serving up beautiful, glossy glazed pearl onions that are bursting with rich flavor. Give this recipe a try, and let me know what you think in the comments below! Happy cooking!
Glazed Pearl Onions

Ingredients
- 2 pounds pearl onions, peeled
- 1 large yellow onion, thinly sliced
- 3 tablespoons unsalted butter
- 2 tablespoons brown sugar
- 1 cup beef or vegetable broth
- 2 tablespoons balsamic vinegar
- 1/2 teaspoon salt
- 1/4 teaspoon black pepper
- Fresh thyme or parsley for garnish
Directions
- Melt butter in a large skillet or pot over medium heat. Add the thinly sliced yellow onion and cook, stirring occasionally, until softened and beginning to brown, about 8-10 minutes. This starts building a deep flavor base.
- Add the peeled pearl onions to the skillet and cook, stirring gently, for another 5-7 minutes, until they start to brown on the edges.
- Here’s the key to preventing bitter burn while building flavor: Sprinkle the brown sugar over the onions. Reduce the heat slightly to medium-low and cook, stirring constantly, for just 2-3 minutes until the sugar melts and coats the onions, starting to caramelize. Watch this step carefully!
- Deglaze the pan by pouring in the broth and balsamic vinegar. Scrape the bottom of the pan with a wooden spoon to loosen any browned bits; this is where lots of flavor hides.
- Bring the mixture to a simmer, then reduce the heat to low. Cover the skillet and let the onions cook gently for 15-20 minutes, or until the pearl onions are tender when pierced with a fork.
- Uncover the skillet and increase the heat back to medium. Let the sauce simmer, stirring occasionally, for another 10-15 minutes. This is where you create the rich, clinging glaze. The liquid will reduce and thicken beautifully as you stir.
- Season the glazed onions with salt and pepper. Stir well.
- Serve hot, garnished with fresh thyme or parsley.