Oh, my goodness, do I have a treat for you today! If you’ve ever embarked on the delicious journey of making no-bake peanut butter bars only to have them crumble and fall apart when you try to slice into them, you know the specific kind of dessert heartbreak I’m talking about. It’s frustrating when your beautiful creation turns into a crumbly mess.
But guess what? I’ve cracked the code! After much experimentation, I discovered the simple, crucial secrets that guarantee your no-bake peanut butter bars will set up perfectly firm and slice into clean, gorgeous squares every single time. Seriously, these bars hold together like a dream, delivering that irresistible combination of chocolate and peanut butter without the mess. Say hello to your new go-to recipe for amazing no-bake peanut butter bars!
Why These No-Bake Peanut Butter Bars Are an Absolute Must-Make
There are countless reasons to fall head over heels for this recipe. First and foremost, they are no-bake. On a hot day, or when you simply don’t feel like turning on the oven, these are your answer to a decadent treat.
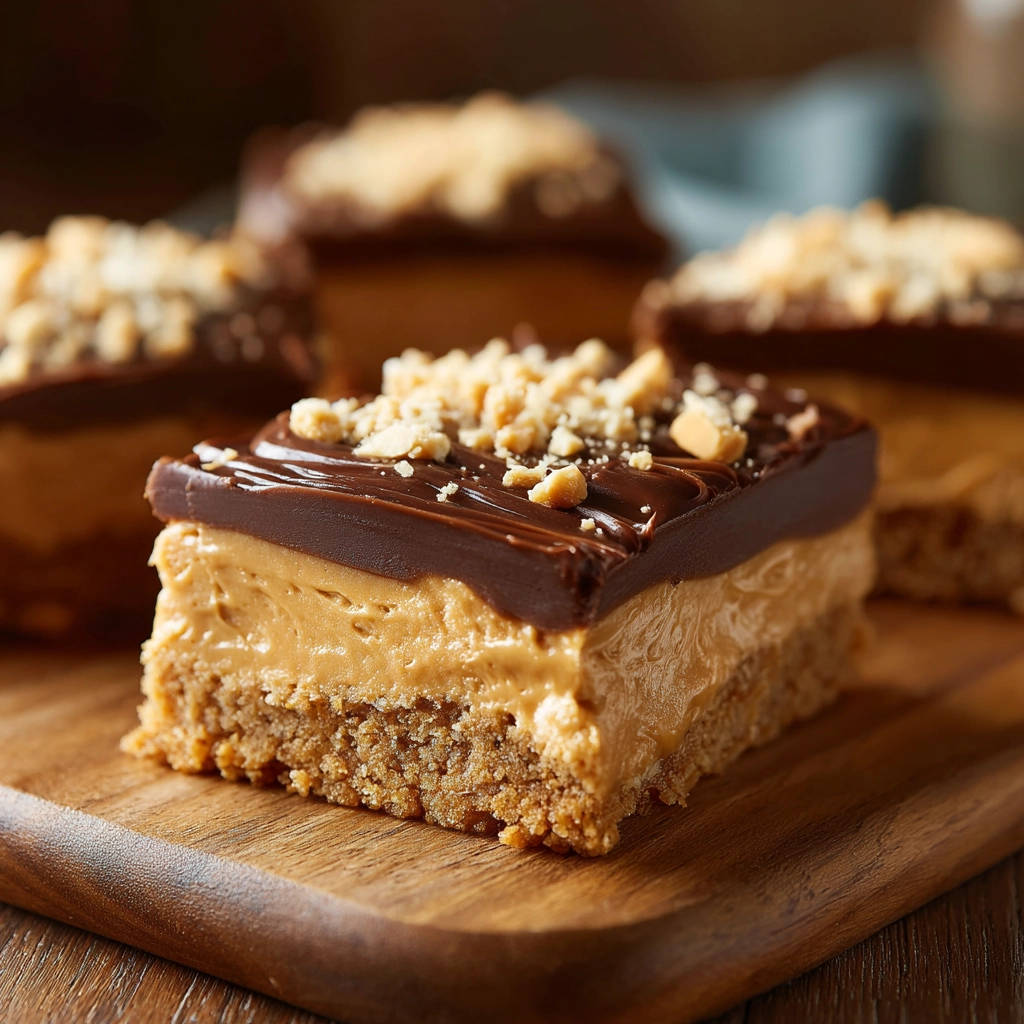
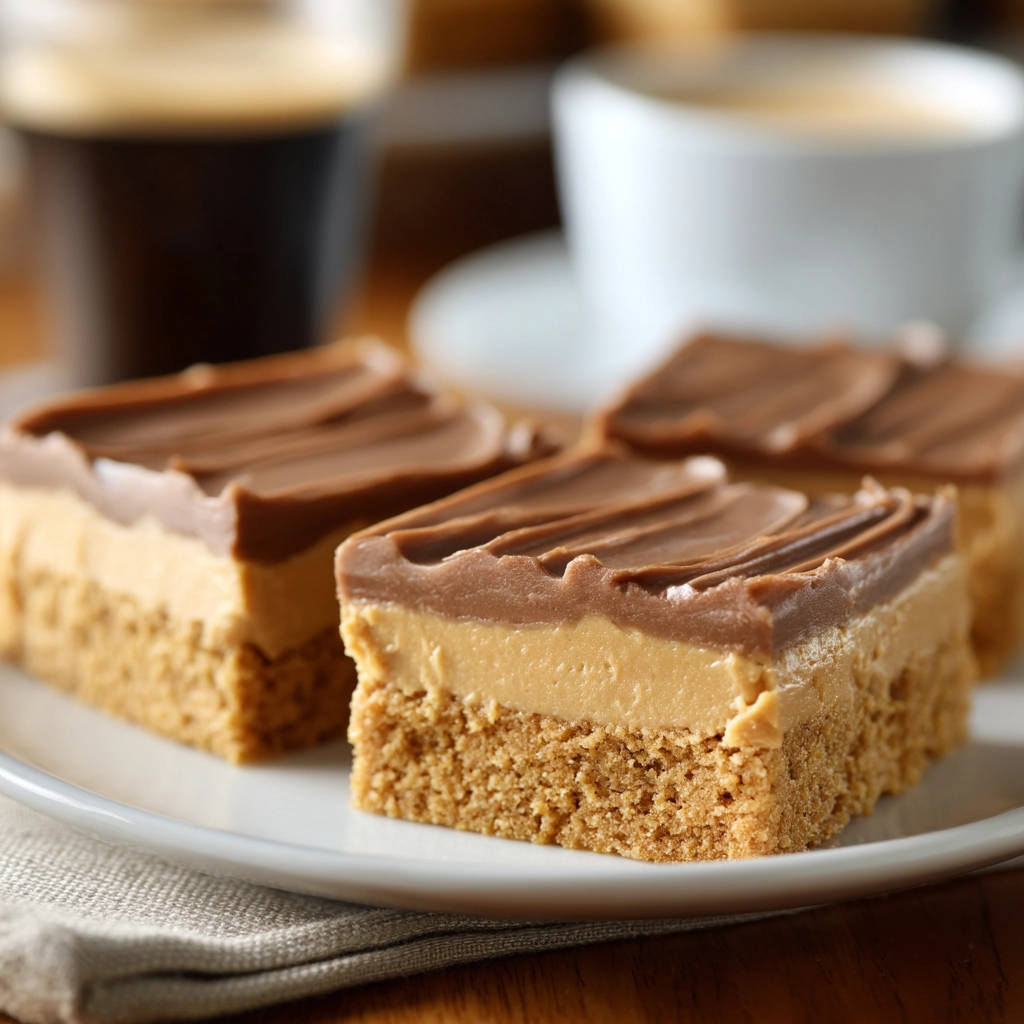
Beyond the convenience, the texture is spot-on. You get a firm, buttery graham cracker crust that provides a satisfying crunch, a thick, creamy peanut butter layer that’s pure comfort, and a smooth chocolate topping with a delightful nutty finish.
But the real magic here? They don’t fall apart! This recipe tackles the most common issue with no-bake bars, leaving you with picture-perfect squares that are easy to share and even easier to devour.
What You’ll Need: Gathering Your Ingredients
Making these incredible no-bake peanut butter bars requires a handful of simple ingredients, most of which you probably already have in your pantry. Success starts with good quality components, so let’s talk about what makes this recipe shine.
For the sturdy, classic base, you’ll need:
- Crushed Graham Cracker Crumbs: We need about 1 and 1/2 cups, which works out to roughly 10 full sheets of graham crackers. You can buy pre-crushed crumbs for convenience, or easily crush whole crackers yourself using a food processor or by placing them in a bag and rolling over them with a rolling pin. A fine crumb consistency works best for a compact base.
- Melted Unsalted Butter: Half a cup of melted butter binds those graham cracker crumbs together to form a solid, pressable crust. Using unsalted butter gives you control over the saltiness of the base.
- Granulated Sugar: Just a quarter cup of white sugar adds a touch of sweetness to the crust, complementing the richness of the other layers.
Now, for the star of the show – the creamy peanut butter layer:
- Creamy Peanut Butter: You’ll need 1 and 1/2 cups. Opt for a standard, processed creamy peanut butter (like Jif or Skippy) rather than natural-style peanut butter. The oils in natural peanut butter can separate and make the filling too soft, preventing it from setting properly and contributing to crumbly bars.
- Softened Unsalted Butter: Half a cup of unsalted butter, softened to room temperature, is crucial here. It creams beautifully with the peanut butter and powdered sugar, creating a smooth, rich filling. Softened butter incorporates air better, leading to a lighter, creamier texture.
- Powdered Sugar: A generous 2 cups of powdered sugar (also known as confectioners’ sugar or icing sugar) provides the necessary sweetness and helps thicken the peanut butter mixture, giving it structure so it sets up firmly. Sift it if it’s lumpy for the smoothest filling.
- Vanilla Extract: A teaspoon of vanilla extract adds a warm, aromatic depth that enhances the flavors of the peanut butter and chocolate.
- Milk: Just a quarter cup of milk helps achieve the perfect consistency for the peanut butter layer – smooth and spreadable, but still thick enough to hold its shape. Any type of milk (dairy or non-dairy) will work here.
And finally, the luscious chocolate topping:
- Semi-Sweet Chocolate Chips: 1 cup of semi-sweet chocolate chips provides the classic chocolate flavor that pairs so perfectly with peanut butter. You could also use milk chocolate or dark chocolate chips depending on your preference.
- Shortening or Coconut Oil: 1 tablespoon of either shortening or coconut oil is the secret ingredient for a smooth, glossy chocolate topping that cuts cleanly without cracking. It slightly thins the melted chocolate and helps it set up with a less brittle texture.
- Chopped Peanuts: A quarter cup of chopped peanuts sprinkled on top adds a lovely crunch and reinforces the peanut butter theme. Feel free to omit these or substitute with other toppings like sprinkles or flaky sea salt.
How to Make Them: Step-by-Step Guide to Perfect No-Bake Peanut Butter Bars
Ready to make some magic? Let’s walk through each step. Don’t rush the chilling times – that’s where the “never fall apart” magic truly happens!
- Prep Your Pan: Start by preparing an 8×8 inch baking pan. The easiest way to ensure your bars lift out beautifully is to line the pan with parchment paper. Leave enough overhang on two opposite sides so you can use them as handles later. This step prevents the bars from sticking and makes slicing so much simpler.
- Craft the Crust: In a medium bowl, combine your graham cracker crumbs, the half cup of melted butter, and the quarter cup of granulated sugar. Stir this mixture together until the crumbs are evenly moistened by the butter. Transfer this mixture into your prepared 8×8 inch pan. Now, the important part: press it down firmly and evenly into the bottom of the pan. Use the bottom of a glass or a flat measuring cup to really compact the crust. This dense crust is key to a stable bar. Once pressed, place the pan in the refrigerator to chill while you move on to the next step. This brief chill helps the butter solidify, setting the crust.
- Whip Up the Peanut Butter Layer: Grab a large bowl. Add the half cup of softened butter and the 1 and 1/2 cups of creamy peanut butter. Beat these together until they are smooth and well combined. An electric mixer makes this quick work, but you can absolutely do it by hand with a sturdy whisk or spoon. Gradually add the 2 cups of powdered sugar to the mixture, mixing until it’s fully incorporated and the mixture is thick and creamy. Don’t just dump it all in – adding it gradually helps prevent a cloud of sugar and ensures it mixes in smoothly. Finally, stir in the teaspoon of vanilla extract and the quarter cup of milk. Mix until the peanut butter mixture is perfectly smooth and spreadable, but still quite thick. You don’t want it runny.
- Layer and Chill (The First Crucial Chill): Carefully spread the peanut butter mixture evenly over the chilled graham cracker crust in the pan. Use an offset spatula or the back of a spoon to get a nice, smooth, even layer right to the edges. Return the pan back to the refrigerator. This chill is vital! Let it firm up for at least 1 hour. This allows the peanut butter layer to set significantly before the warm chocolate topping is added, preventing the layers from bleeding together and ensuring you get clean lines when you eventually cut the bars.
- Melt the Chocolate Topping: In a microwave-safe bowl, combine the 1 cup of semi-sweet chocolate chips and the 1 tablespoon of shortening or coconut oil. Microwave on medium power in 30-second intervals. Stir the mixture after each interval, even if it doesn’t look melted at first. The residual heat will continue to melt the chocolate. Keep microwaving and stirring until the chocolate is completely smooth and melted with no lumps remaining. The shortening or coconut oil helps create a smooth, pourable consistency and a chocolate layer that sets up firm but not brittle.
- Add the Chocolate and Toppings: Once the peanut butter layer has chilled for at least an hour and is firm, pour the melted chocolate evenly over it. Quickly spread the melted chocolate to cover the entire peanut butter layer, going right to the edges. Work relatively fast here, as the cold peanut butter layer will start to set the chocolate. Immediately after spreading the chocolate, sprinkle the chopped peanuts (or your chosen topping) over the wet chocolate layer. This ensures they stick firmly as the chocolate sets.
- Chill Again (The Second Crucial Chill) & The Ultimate Cutting Secret: Return the pan to the refrigerator for at least 2-3 hours, or preferably longer, like overnight. The longer it chills, the firmer the layers will become, especially the chocolate. For the absolute cleanest cuts – the big secret to preventing your bars from falling apart! – place the chilled pan in the freezer for about 15-20 minutes just before you plan to cut them. This short blast of cold hardens all the layers evenly, making them easier to slice through cleanly.
- Slice and Store: Lift the chilled (or slightly frozen) bars out of the pan using the parchment paper overhang. If they were in the freezer, let them sit at room temperature for just a few minutes to make cutting slightly easier, but don’t let them get too soft. Use a sharp knife to slice the bars into squares. For the neatest cuts, wipe the knife clean with a warm, damp cloth or paper towel between each slice. This prevents chocolate and peanut butter residue from dragging and messing up the edges. Store your amazing no-bake peanut butter bars in an airtight container in the refrigerator.
Secrets to No-Fail No-Bake Peanut Butter Bars
Mastering these bars is all about patience and a couple of key techniques. Here are the insider tips to ensure yours are perfect every time:
- Chill, Chill, Chill: I can’t stress this enough! Allowing ample time for each layer to chill and firm up in the refrigerator is critical. Don’t shortcut the 1-hour chill for the peanut butter layer or the 2-3 hour chill for the final bars.
- The Freezer Trick is Gold: That short 15-20 minute stint in the freezer right before cutting? That’s the game-changer for clean, sharp edges. It hardens the chocolate just enough so it doesn’t shatter and allows the knife to slice through cleanly.
- Compact the Crust: Really lean into pressing that graham cracker crust down. The denser the crust, the less likely it is to crumble when you lift and cut the bars.
- Use the Right Peanut Butter: Stick to creamy, processed peanut butter. Natural peanut butters behave differently when mixed with butter and sugar and can result in a softer, less stable filling.
- Sharp, Clean Knife: Wiping your knife clean (and warming it slightly with warm water, drying it well) between each cut makes a huge difference in getting those clean, defined squares instead of messy ones.
Customizing Your Peanut Butter Bars
While the classic combination is divine, these bars are also wonderfully versatile. Here are a few ideas to switch things up:
- Different Toppings: Instead of or in addition to chopped peanuts, try mini chocolate chips, sprinkles, flaky sea salt (a fantastic contrast to the sweetness!), chopped peanut butter cups, or even a drizzle of white chocolate.
- Add Some Crunch: Stir about 1/2 cup of crispy rice cereal into the peanut butter layer before spreading for a fun, textured twist. It creates a filling similar to a classic candy bar!
- Spice It Up (Mildly): A tiny pinch of cayenne pepper added to the melted chocolate can give a subtle, intriguing warmth.
- Make Them Mini: Instead of one large pan, you could press the crust into mini muffin liners placed in muffin tins for individual bites. Adjust chilling times as needed.
These bars store beautifully in an airtight container in the refrigerator for up to a week, though they rarely last that long in my house! You can also freeze the uncut slab or individual bars, wrapped tightly, for up to 2-3 months. Thaw in the refrigerator before serving.
Your No-Bake Peanut Butter Bar Questions Answered (FAQ)
Got questions? I’ve got answers! Here are some common inquiries about making perfect no-bake peanut butter bars.
Can I use crunchy peanut butter instead of creamy?
While you can use crunchy peanut butter, be aware that the texture of the peanut butter layer will be different. It won’t be as smooth, obviously, but the bigger potential issue is that the pieces of peanuts might make it slightly less cohesive and potentially more prone to crumbling than a smooth filling when cut. For the most reliable, never-fall-apart bars, creamy is recommended.
My chocolate topping hardened too quickly. What happened?
This usually happens if the peanut butter layer underneath was intensely cold, or if you took too long to spread the chocolate. Ensure the peanut butter layer is chilled (refrigerator cold, not frozen solid yet) and work quickly once the chocolate is poured. Melting the chocolate gently in short intervals and stirring in the shortening or coconut oil helps keep it fluid longer. If it hardens prematurely, you can gently warm it again very briefly in the microwave to make it spreadable, but avoid overheating.
Can I make these bars gluten-free?
Yes, you absolutely can! Substitute the graham cracker crumbs with gluten-free graham cracker crumbs or use crushed gluten-free cookies (like plain shortbread or vanilla wafers) mixed with the melted butter and sugar for the base.
How long do these need to chill before they are ready to eat?
You need at least 1 hour of chilling for the peanut butter layer after it’s spread over the crust, and then a minimum of 2-3 hours for the entire bar after the chocolate is added. For the easiest and cleanest cutting, adding that extra 15-20 minutes in the freezer right before slicing is highly recommended.
Why is the shortening or coconut oil necessary in the chocolate? Can I skip it?
The shortening or coconut oil helps the chocolate melt smoothly and, more importantly, set with a texture that is firm yet cuts cleanly without shattering or cracking excessively. It also gives the chocolate a nice glossy finish. While you can technically skip it, you risk a chocolate topping that is brittle and breaks apart when you try to slice the bars, which defeats the “never falls apart” goal! I highly recommend using it.
How should I store these bars?
Always store these amazing no-bake peanut butter bars in an airtight container in the refrigerator. This keeps the layers firm and prevents them from getting too soft. They are best enjoyed chilled.
Ready to Make Amazing No-Bake Peanut Butter Bars?
There you have it! The ultimate guide to making no-bake peanut butter bars that are not only incredibly delicious but also beautifully structured. No more crumbs, no more disappointment – just perfect, shareable squares of peanut butter and chocolate bliss.
Give this recipe a try, follow the chilling and cutting tips closely, and prepare to be amazed. I promise they’ll become a favorite in your house, just like they are in mine. If you make them, be sure to leave a comment below and let me know how they turned out!
Amazing No-Bake Peanut Butter Bars

Ingredients
- 1 and 1/2 cups crushed graham cracker crumbs (about 10 full graham crackers)
- 1/2 cup melted unsalted butter
- 1/4 cup granulated sugar
- 1 and 1/2 cups creamy peanut butter
- 1/2 cup unsalted butter, softened
- 2 cups powdered sugar
- 1 teaspoon vanilla extract
- 1/4 cup milk
- 1 cup semi-sweet chocolate chips
- 1 tablespoon shortening or coconut oil
- 1/4 cup chopped peanuts, for topping
Directions
- Line an 8×8 inch baking pan with parchment paper, leaving an overhang on the sides to make lifting easy.
- In a medium bowl, combine the graham cracker crumbs, melted butter, and granulated sugar. Press the mixture firmly and evenly into the bottom of the prepared pan. Use the bottom of a glass or a flat measuring cup to really compact it well. Place the pan in the refrigerator to chill while you prepare the peanut butter layer.
- In a large bowl, beat together the softened butter and creamy peanut butter until smooth. Gradually add the powdered sugar, mixing until well combined and creamy. Stir in the vanilla extract and milk until the mixture is smooth and spreadable but still thick.
- Spread the peanut butter mixture evenly over the chilled crust in the pan. Return the pan to the refrigerator for at least 1 hour to allow the peanut butter layer to firm up significantly. This is a key step to prevent the layers from mixing and to ensure clean cuts later.
- In a microwave-safe bowl, melt the chocolate chips with the shortening or coconut oil in 30-second intervals, stirring after each, until smooth and completely melted.
- Pour the melted chocolate over the chilled peanut butter layer, spreading it evenly to the edges. Sprinkle the chopped peanuts over the chocolate before it sets.
- Return the pan to the refrigerator for at least 2-3 hours, or preferably longer, until the chocolate layer is completely set and the entire bar is firm. For the cleanest cuts (the secret to them not falling apart!), chill the bars in the freezer for about 15-20 minutes before cutting.
- Lift the bars out of the pan using the parchment overhang. Let sit at room temperature for a few minutes if frozen, then use a sharp knife wiped clean between cuts to slice the bars into squares. Store in an airtight container in the refrigerator.