Have you ever had that moment? You pull a batch of cookies from the oven, the aroma is heavenly, but then you bite in, and instead of that dreamy, soft center you were hoping for, you get… hardness? A uniform crunch that just isn’t what you envisioned? I’ve been there! For years, I chased that elusive soft middle, trying every trick in the book.
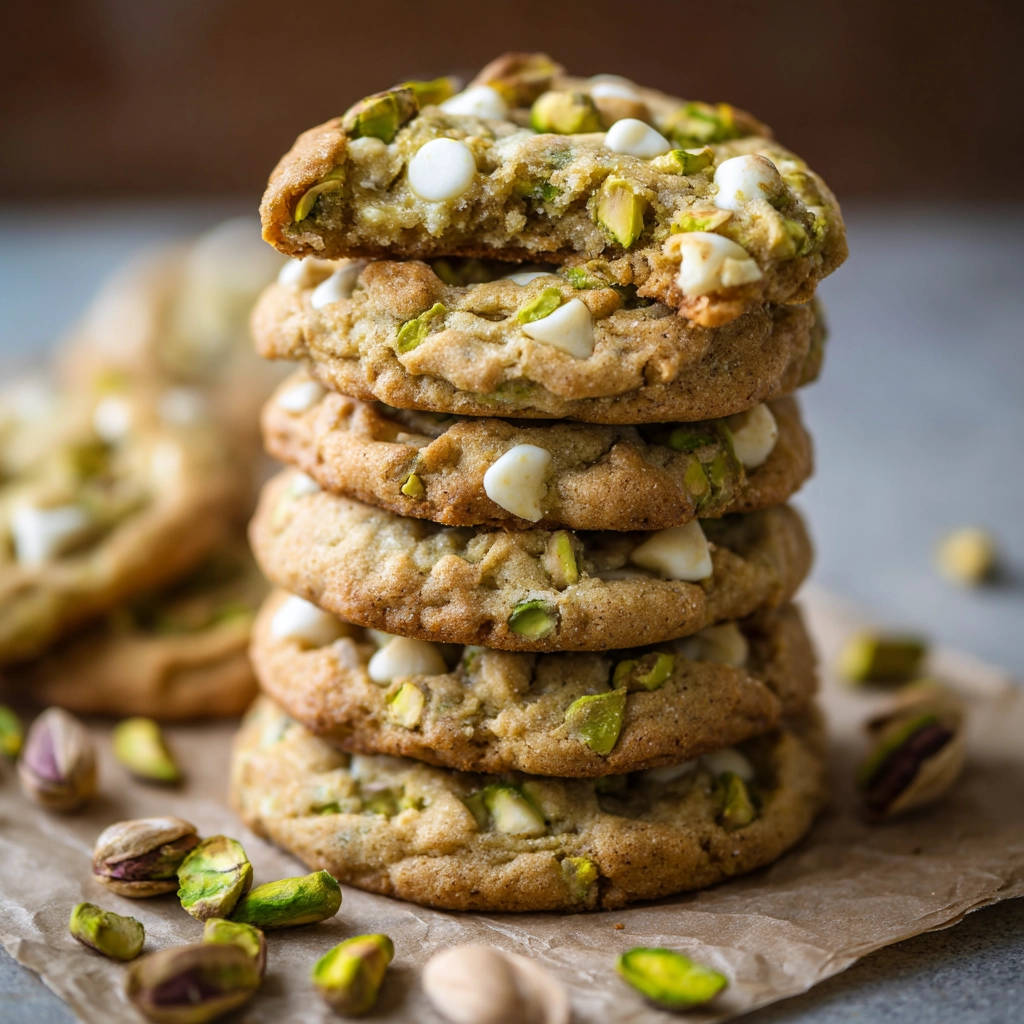
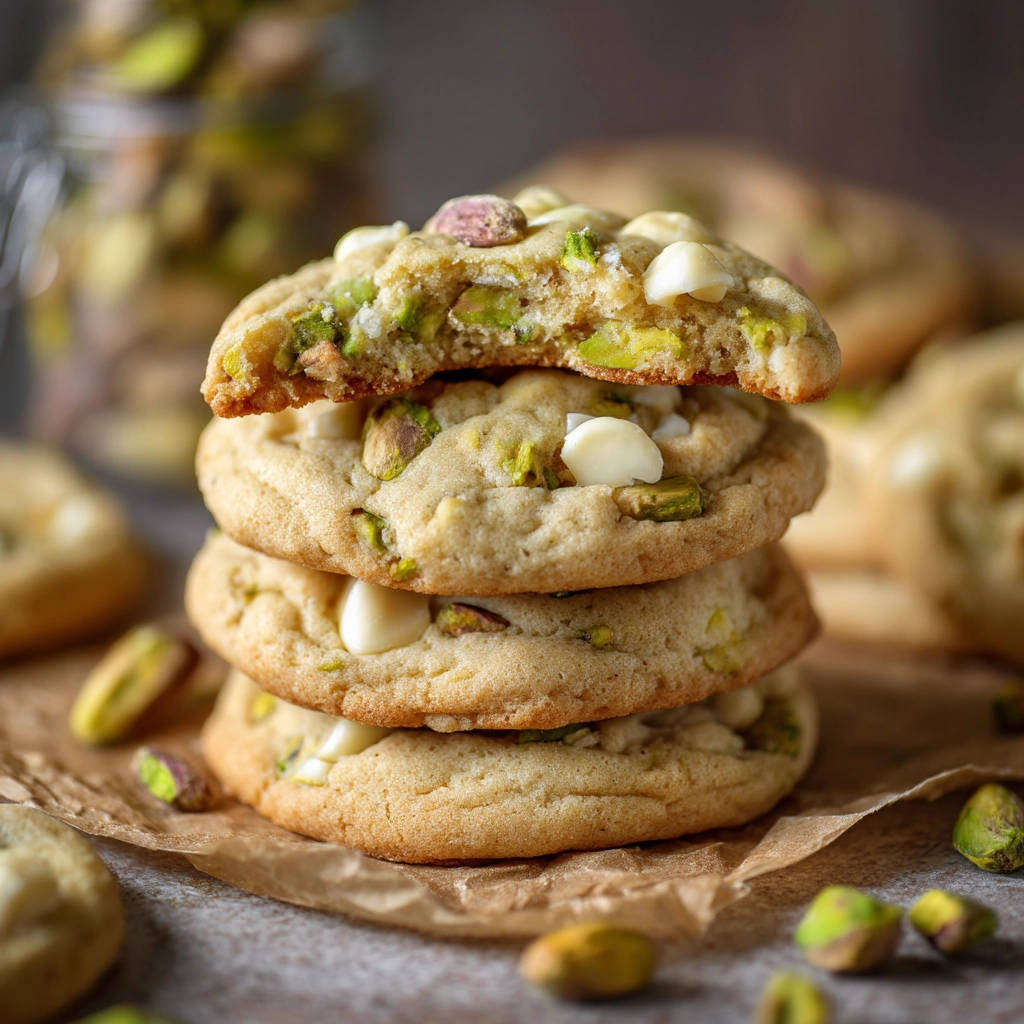
But guess what? I finally cracked the code! And I’m so excited to share it with you today with these Amazing Soft Pistachio White Chocolate Cookies. These aren’t just any cookies; they are little discs of pure joy, packed with creamy white chocolate and crunchy pistachios, and they boast a reliably soft, slightly gooey center every single time. The secret is surprisingly simple, and once you know it, your cookie-baking world will change forever!
Why You’ll Absolutely Adore These Cookies
Beyond just the guaranteed soft centers (which, let’s be honest, is reason enough!), these Pistachio White Chocolate Cookies bring so much to the table. The combination of salty pistachios and sweet, creamy white chocolate is simply divine. It’s a flavor pairing that feels both classic and just a little bit special.
- Perfect Texture: The magical method ensures a delightful contrast between the slightly chewy edges and the irresistibly soft middle.
- Irresistible Flavor Combo: The nutty, slightly salty punch of pistachios is the perfect counterpoint to smooth, sweet white chocolate.
- Visually Stunning: Those pops of green from the pistachios make these cookies look as good as they taste. They’re perfect for sharing!
- Impressive Yet Easy: While the results are bakery-quality, the steps are straightforward and totally achievable for home bakers of all levels.
Whether you’re baking for a special occasion, a holiday cookie swap, or just because you need a little treat, these cookies are guaranteed to be a hit. They disappear quickly around my house!
Gathering Your Ingredients for Blissful Bites
Creating the perfect cookie starts with understanding the role each ingredient plays. For these Pistachio White Chocolate Cookies, we rely on a standard lineup of pantry staples, but the quality and preparation of each component are key to achieving that dreamy texture and rich flavor.
Let’s walk through what you’ll need and why it matters:
- Unsalted Butter, Softened: We start with a full cup of softened unsalted butter. Softened butter is crucial because it creams properly with the sugars, creating tiny air pockets that contribute to the cookie’s structure and tenderness. Using unsalted butter gives you control over the saltiness, ensuring the balance with the sweet white chocolate and nuts is just right. Make sure it’s soft enough that you can easily dent it with your finger, but not so soft that it’s greasy or melted.
- Granulated Sugar: A half cup of white granulated sugar provides sweetness and helps with the spread and crisping of the cookie edges. It works in tandem with the brown sugar to create that ideal texture profile – firm edge, soft center.
- Packed Light Brown Sugar: This is where a lot of that wonderful chewiness and moisture comes from! We use a generous 1 and 1/4 cups of packed light brown sugar. The molasses in brown sugar adds moisture, a deeper caramel-like flavor, and contributes significantly to that sought-after soft texture in the middle of the cookie. Make sure you pack it firmly into the measuring cup for accuracy.
- Large Eggs: Two large eggs act as a binder, holding the dough together and adding richness. They also contribute to the structure and help create a tender crumb. Using large eggs is standard for most baking recipes for consistency.
- Vanilla Extract: Just a teaspoon of vanilla extract enhances all the other flavors, adding a warm, classic bakery note that complements both the white chocolate and the pistachios beautifully. Use good quality pure vanilla extract for the best flavor payoff.
- All-Purpose Flour: The structure of our cookie dough comes from 2 and 1/2 cups of all-purpose flour. It’s important to measure your flour correctly – spoon it lightly into the measuring cup and level it off with a straight edge. Too much flour can lead to dry, cakey cookies.
- Baking Soda: This is our primary leavening agent, giving the cookies a bit of lift and contributing to their spread, which is important for achieving that balance of chewy edges and soft centers. One teaspoon is just the right amount.
- Salt: A half teaspoon of salt balances the sweetness and enhances the overall flavor profile. Don’t skip the salt! It brings out the best in the white chocolate and provides a nice contrast to the nutty pistachios.
- White Chocolate Chips: For pockets of creamy sweetness, we add 1 and 1/2 cups of white chocolate chips. Choose a good quality white chocolate that you enjoy eating plain, as its flavor will shine through. Chips hold their shape better during baking, giving you distinct melty pools within the cookie.
- Chopped Pistachios: The star nut! One cup of chopped pistachios adds fantastic crunch, a beautiful green color, and that unique, slightly sweet and earthy flavor. I prefer using lightly salted pistachios, as the saltiness really plays well with the sweet white chocolate, but unsalted work too – just ensure you have enough salt in the dough itself. Chop them into roughly pea-sized pieces.
Having all your ingredients measured and ready before you start mixing is called “mise en place” in the culinary world, and it makes the whole baking process smoother and more enjoyable. Plus, it prevents those frantic searches for an ingredient mid-mix!
Crafting Your Dream Cookies: Step-by-Step with Insider Tips
Alright, gathering the ingredients is the first step, but the real magic happens in the mixing and baking process. This recipe includes a crucial technique that makes all the difference in achieving those guaranteed soft centers. Follow these steps carefully, and you’ll be rewarded with cookie perfection!
- Combine Your Dry Ingredients: Start by whisking together the foundation of your cookie dough. In a medium-sized bowl, measure out your all-purpose flour, baking soda, and salt. Give them a good whisk for about 30 seconds. This step isn’t just about mixing; it evenly distributes the leavening and salt throughout the flour, which is essential for a consistent rise and flavor in every bite. Set this bowl aside for a moment.
- Creaming Butter and Sugars: Now, grab a large bowl – preferably the bowl of your stand mixer if you have one, or a large mixing bowl if you’re using a hand mixer. Add the softened unsalted butter, granulated sugar, and packed light brown sugar. Using an electric mixer (either stand or hand-held), beat these together on medium speed. You’re looking for a transformation here: the mixture should become significantly lighter in color and texture, fluffy and airy. This typically takes 2-3 minutes. This creaming process incorporates air, which helps the cookies rise and spread nicely.
- Incorporating Wet Ingredients: With the mixer still on medium-low, add the large eggs one at a time, beating well after each addition until fully incorporated. Scrape down the sides of the bowl if needed to ensure everything is mixing evenly. Once the eggs are in, stir in the vanilla extract. Mix just until the vanilla is distributed. The mixture might look a little curdled at this point, but don’t worry, that’s normal and will resolve in the next step.
- Adding the Dry to the Wet: Now, it’s time to bring the dry ingredients into the party. With your mixer on the lowest speed, gradually add the flour mixture to the wet ingredients. Mix just until the dry ingredients are barely combined and no streaks of dry flour remain. This stage is critical – overmixing cookie dough develops too much gluten, which can result in tough, hard cookies instead of soft ones. Stop mixing as soon as you see everything come together.
- Folding in the Goodies: Remove the bowl from the mixer (or turn it off) and use a spatula to fold in the white chocolate chips and chopped pistachios. Gently mix until the chips and nuts are evenly distributed throughout the dough. You want pockets of flavor in every cookie! Avoid using the electric mixer for this step, as it can break up the nuts and overwork the dough.
- The Game-Changing Chill: THIS is the secret step for those guaranteed soft centers! Cover the bowl containing your dough tightly with plastic wrap. Make sure the plastic wrap is pressed down onto the surface of the dough to prevent it from drying out. Place the covered dough in the refrigerator for at least 1 hour. You can chill it for up to 3 days, which makes this dough perfect for making ahead! Chilling solidifies the butter in the dough. When the cold dough hits the hot oven, the butter takes longer to melt and spread, allowing the edges to set while the center remains softer and chewier. It makes a huge difference in texture.
- Prep for Baking: When you’re ready to bake, preheat your oven to 375 degrees F (190 degrees C). While the oven heats up, line your baking sheets with parchment paper. Parchment paper prevents sticking and makes cleanup a breeze. Do NOT use silicone mats if you are aiming for minimal spread and soft centers; parchment paper is key here.
- Scoop and Space: Remove the chilled dough from the refrigerator. Scoop rounded tablespoons of dough and place them onto the prepared baking sheets. Leave enough space between the cookies (about 2 inches) as they will spread slightly. Uniformly sized scoops will help ensure consistent baking time for the whole batch. You can use a cookie scoop for this to make it easier.
- Bake to Soft Perfection: Place the baking sheet in the preheated oven and bake for 9 to 11 minutes. The exact time will vary slightly depending on your oven and the size of your cookies. Keep a close eye on them! You want the edges to be set and lightly golden, but here’s the crucial part: the centers should still look slightly soft or even a little underdone. This is NOT a sign they aren’t ready; it’s the indicator that they will have that beautiful, moist, soft interior once cooled. Pull them out when they look just shy of being fully baked.
- Cooling is Crucial: This step is just as important as the chilling! Once out of the oven, leave the cookies on the hot baking sheets for 5 to 10 minutes. This allows them to continue cooking slightly from the residual heat and finish setting up without overbaking. After this crucial resting period, carefully transfer the cookies to a wire rack using a spatula to cool completely. Letting them cool on the rack ensures air circulation, preventing them from becoming soggy on the bottom.
Following these steps, especially the chilling and the strategic underbaking, will consistently deliver those incredibly soft and chewy Pistachio White Chocolate Cookies you’ve been dreaming of.
Pro Tips for Your Pistachio White Chocolate Cookie Success
While the recipe is designed for success, a few extra tips can elevate your cookie game even further. These little nuances can make the difference between good cookies and truly spectacular ones!
- Don’t Skip the Chill Time: Seriously, this is non-negotiable if you want soft centers. The longer the dough chills (up to 3 days!), the deeper the flavor can develop, and the less the cookies will spread during baking, leading to a thicker, softer center.
- Use Room Temperature Eggs: Eggs incorporate more evenly into the butter and sugar mixture when they are at room temperature. This helps create a smoother dough base. Forgot to take them out? Place them in a bowl of warm water for 5-10 minutes.
- Measure Flour Correctly: Spoon and level! Scooping flour directly from the bag can compact it, resulting in too much flour and dry cookies.
- Quality Ingredients Matter: Using good quality butter, white chocolate, and fresh pistachios really makes a difference in the final flavor.
- Even Scoops for Even Baking: Using a cookie scoop ensures all your cookies are the same size, meaning they’ll bake in the same amount of time. This avoids having some cookies perfectly done while others are over or underbaked on the same sheet.
- Know Your Oven: Ovens can vary significantly in temperature. If you find your cookies are consistently baking differently than expected, consider using an oven thermometer to check your oven’s true temperature.
- Don’t Overbake: This is the second most critical tip for soft centers! Err on the side of slightly underbaked. The cookies will continue to set up as they cool on the hot baking sheet.
Serving Suggestions & Perfect Pairings
These cookies are absolutely delightful on their own, straight off the cooling rack (after their resting period, of course!). But they’re also fantastic with a variety of simple accompaniments.
Enjoy them with a tall glass of cold milk, a hot cup of tea, or your favorite coffee. They’d also be wonderful alongside a scoop of vanilla ice cream for a simple dessert. If you’re putting together a dessert platter, they pair beautifully with other classic treats like easy homemade cinnamon rolls or slices of classic banana bread.
Your Pistachio White Chocolate Cookie Questions Answered (FAQ)
Got questions about making these delightful cookies? Here are some common ones I hear:
Can I use salted pistachios instead of unsalted?
Absolutely! Many people prefer the flavor of salted pistachios in cookies as the salt really enhances the sweetness of the white chocolate. If you use salted pistachios, you can reduce the amount of salt added to the dough by half, or omit it entirely, depending on your preference for saltiness. I often use lightly salted pistachios and keep the salt in the dough as written because I love that sweet and salty contrast!
How long do I really need to chill the dough? What happens if I skip it?
You need to chill the dough for at least 1 hour. If you skip the chilling step, your cookies will likely spread out too much while baking, resulting in thinner, crispier cookies with less of that desired soft, chewy center. Chilling the dough is vital for controlling spread and achieving the correct texture.
My cookies spread too much! What went wrong?
Several things could cause excessive spreading: the butter might have been too soft (almost melted) when creaming, you might have overmixed the dough after adding the flour, or you didn’t chill the dough for long enough. Ensure your butter is just softened, mix until just combined, and don’t skimp on the chilling time!
Can I substitute other nuts for pistachios?
Certainly! While pistachios offer a unique flavor and color, you could substitute other chopped nuts like walnuts, pecans, or macadamia nuts. The baking time might remain similar, but the flavor profile will obviously change. You could also swap the white chocolate chips for semi-sweet or dark chocolate chips if you prefer a different chocolate pairing, creating a whole new delicious cookie!
How should I store these cookies?
Once completely cooled, store the cookies in an airtight container at room temperature for up to 3-4 days. If you want to keep them fresh longer, you can freeze the baked cookies in a freezer-safe container or bag for up to 3 months. Thaw them at room temperature. You can also freeze the raw dough balls. Scoop the dough balls onto a baking sheet, freeze until solid, then transfer to a freezer bag. Bake from frozen, adding 1-3 minutes to the baking time.
How can I make the centers even softer?
The key is pulling them out when they look slightly underdone in the center. If they look fully set and golden all the way across when you take them out, they will likely be crispy once cooled. Trust your instincts and the visual cue of the slightly pale, soft center.
Enjoy Your Homemade Goodness!
There’s something incredibly satisfying about baking a batch of cookies, especially when they turn out exactly how you hoped. These Amazing Soft Pistachio White Chocolate Cookies are more than just a recipe; they’re a ticket to that moment of warm, gooey, nutty, chocolatey bliss. Whether you’re making them for yourself, your family, or to share, the joy they bring is undeniable.
Give this recipe a try and discover the simple secret to soft centers yourself. I can’t wait to hear how much you love them!
Did you make these cookies? Let me know in the comments below how they turned out! What’s your favorite secret baking trick?
Pistachio White Chocolate Cookies

Ingredients
- 1 cup unsalted butter, softened
- 1/2 cup granulated sugar
- 1 and 1/4 cups packed light brown sugar
- 2 large eggs
- 1 teaspoon vanilla extract
- 2 and 1/2 cups all-purpose flour
- 1 teaspoon baking soda
- 1/2 teaspoon salt
- 1 and 1/2 cups white chocolate chips
- 1 cup chopped pistachios
Directions
- In a medium bowl, whisk together the flour, baking soda, and salt. Set aside.
- In a large bowl, cream the softened butter, granulated sugar, and brown sugar with an electric mixer until light and fluffy.
- Beat in the eggs one at a time, then stir in the vanilla extract.
- Gradually add the dry ingredients to the wet ingredients, mixing on low speed just until combined. Do not overmix.
- Fold in the white chocolate chips and chopped pistachios until evenly distributed.
- This is the secret step for soft centers: Cover the dough tightly and refrigerate for at least 1 hour, or up to 3 days. Chilling solidifies the fat, leading to less spread and a chewier, softer interior.
- Preheat your oven to 375 degrees F (190 degrees C). Line baking sheets with parchment paper.
- Scoop rounded tablespoons of dough onto the prepared baking sheets, leaving space between cookies.
- Bake for 9 to 11 minutes, or until the edges are set and lightly golden, but the centers still look slightly soft or underdone. This crucial slightly underbaked stage is what locks in that moist, soft texture.
- Let the cookies cool on the baking sheets for 5 to 10 minutes before carefully transferring them to a wire rack to cool completely.