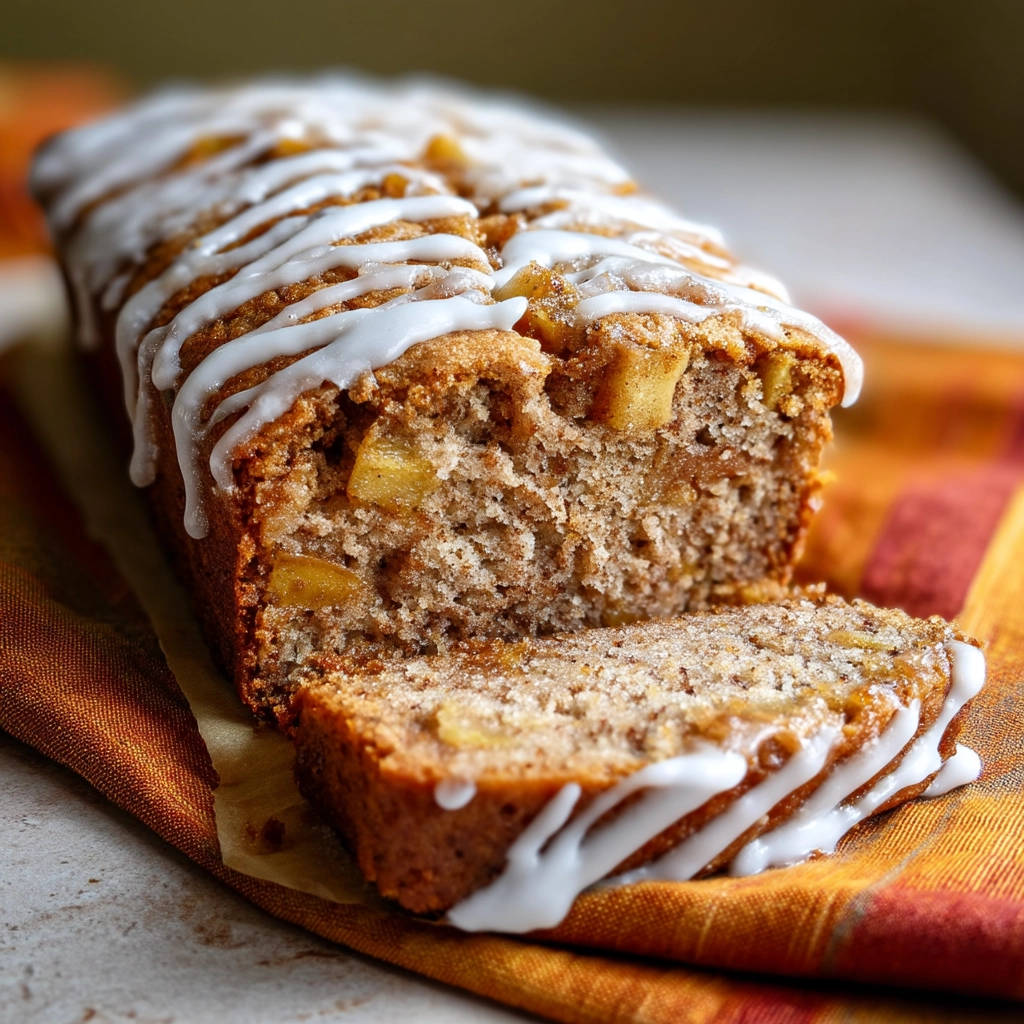
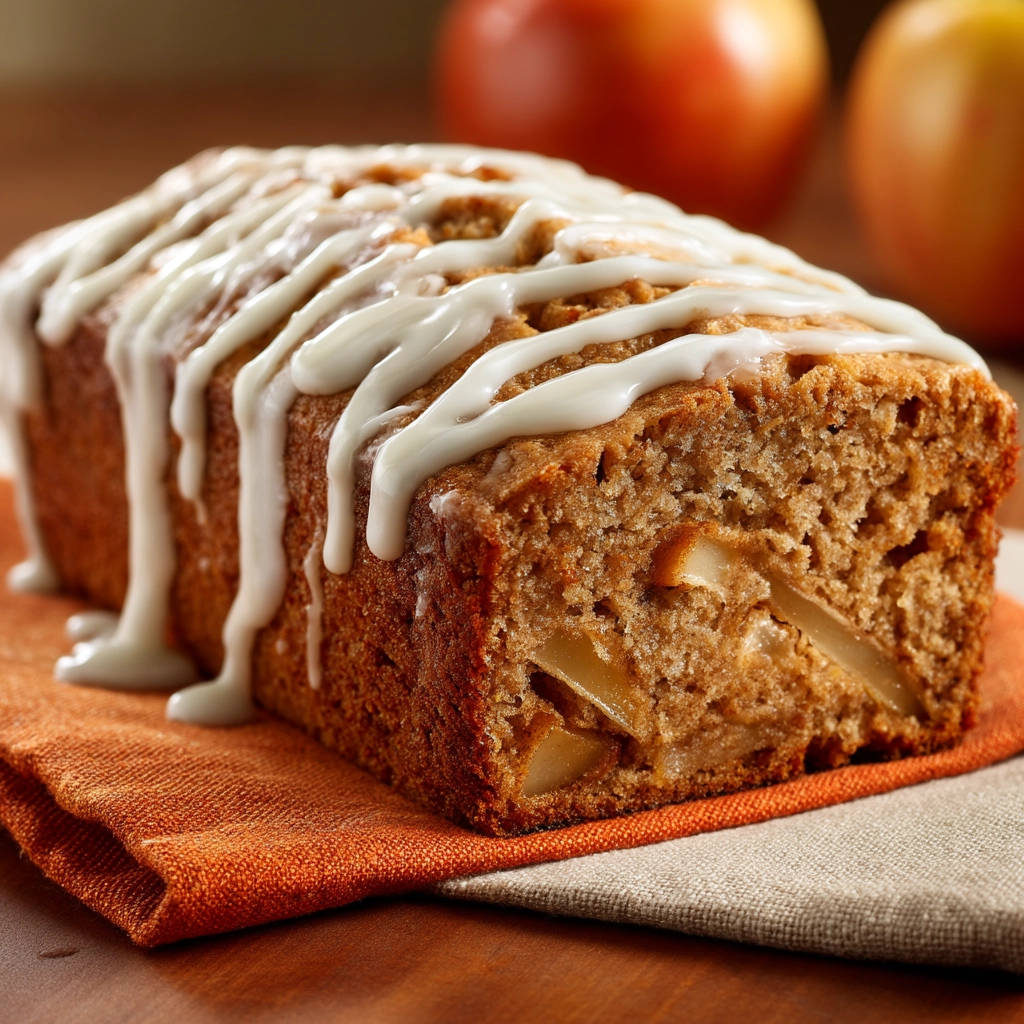
Is there anything more comforting than the smell of freshly baked apple bread wafting through your home? I adore quick breads, but there’s nothing more disappointing than biting into a dry, crumbly loaf. I’ve been there, and I know the frustration. After countless attempts, I’ve finally cracked the code for apple bread that is consistently moist, tender, and bursting with apple cinnamon flavor. This isn’t just any apple bread recipe; it’s the apple bread recipe you’ll make again and again, guaranteed to banish dry loaves forever!
Why You’ll Love This Apple Bread
This apple bread is more than just a tasty treat; it’s a guaranteed crowd-pleaser that’s surprisingly simple to make. Here’s why you’ll fall in love with it:
- Incredibly Moist: Say goodbye to dry, crumbly bread! The secret ingredient and technique ensure a perfectly moist texture every time.
- Bursting with Flavor: The combination of cinnamon, nutmeg, and fresh apples creates a warm and comforting flavor profile.
- Easy to Make: This is a quick bread, meaning no yeast or kneading required! It’s perfect for beginner bakers.
- Perfect for Any Occasion: Enjoy it for breakfast, brunch, dessert, or a simple afternoon snack.
- Freezes Beautifully: Make a loaf (or two!) ahead of time and freeze for later.
Gathering Your Ingredients for Apple Bread
Before we dive into the baking process, let’s talk about the ingredients. The quality of your ingredients plays a vital role in the final outcome of your apple bread. We’re aiming for a symphony of flavors here, with the warm spice notes complementing the fresh, tartness of the apples. I often find that the combination of brown sugar and granulated sugar really brings out a robust taste.
Here’s a breakdown of what you’ll need, along with some tips to ensure baking success:
- 2 cups all-purpose flour: The foundation of our bread. Ensure it’s fresh for the best rise. For those looking for a gluten-free option, consider using a gluten-free all-purpose blend, but be aware that you may need to adjust the liquid content.
- 1 teaspoon baking soda: This is our leavening agent, helping the bread rise and become light and airy. Make sure yours is not expired!
- 1/2 teaspoon salt: Salt enhances the flavors of all the other ingredients and balances the sweetness.
- 1 teaspoon ground cinnamon & 1/4 teaspoon ground nutmeg: These spices add warmth and depth to the bread. Freshly ground spices will always provide the most intense flavor.
- 1 cup granulated sugar: For sweetness and structure.
- 1/2 cup vegetable oil: This is our key to keeping the bread incredibly moist. I prefer vegetable oil for its neutral flavor, but you could also use melted coconut oil or even unsweetened applesauce (for a healthier option).
- 2 large eggs: Eggs bind the ingredients together and contribute to the bread’s structure.
- 1/2 cup milk: Adds moisture and helps to create a tender crumb. You can use dairy or non-dairy milk.
- 1 teaspoon vanilla extract: Enhances the overall flavor profile. Use pure vanilla extract for the best results.
- 2 cups peeled, cored, and finely diced apples (about 2 medium): The star of the show! I prefer using a mix of sweet and tart apples, such as Honeycrisp and Granny Smith, for the best flavor balance. Ensure they are finely diced so they distribute evenly throughout the batter. For a different twist, consider using our recipe for chocolate covered apple dessert cups.
For the glaze:
- 1 cup powdered sugar: For a sweet and smooth glaze.
- 2 tablespoons milk: To create the perfect drizzling consistency.
Crafting Your Apple Bread: Step-by-Step
Now, let’s get baking! This recipe is straightforward, but following these step-by-step instructions will ensure a perfectly moist and delicious apple bread every single time. The key is gentle mixing and not overbaking!
- Preheat and Prep: Start by preheating your oven to 350 degrees F (175 degrees C). While the oven heats, grease and flour a 9×5 inch loaf pan. This will prevent the bread from sticking and ensure easy removal. I like to use baking spray with flour for a guaranteed non-stick surface.
- Combine Dry Ingredients: In a large bowl, whisk together the flour, baking soda, salt, cinnamon, and nutmeg. Whisking ensures that the baking soda and spices are evenly distributed throughout the flour, which is crucial for a consistent rise and flavor.
- Mix Wet Ingredients: In a separate medium bowl, whisk together the sugar, vegetable oil, eggs, milk, and vanilla extract until well combined. Whisking vigorously at this stage helps to emulsify the oil and eggs, creating a smooth and even batter.
- Combine Wet and Dry: Pour the wet ingredients into the dry ingredients and stir with a spatula or wooden spoon until just combined. This is the most important step! Do not overmix; a few lumps are okay. Overmixing develops gluten, which can lead to a tough or dry loaf. Think of it like gently folding the ingredients together rather than aggressively stirring.
- Fold in the Apples: Gently fold in the diced apples until they are evenly distributed throughout the batter. Again, be gentle to avoid overmixing.
- Pour and Bake: Pour the batter into the prepared loaf pan and spread evenly. Bake for 50 to 65 minutes, or until a toothpick inserted into the center comes out clean. I always start checking around 50 minutes, as ovens can vary. If the top starts to brown too quickly, you can loosely tent the pan with foil to prevent burning.
- Cooling is Key: Let the loaf cool in the pan for 10 minutes before transferring it to a wire rack to cool completely. This prevents the bread from sticking to the pan and allows it to set properly.
- Make the Glaze: While the loaf cools, make the glaze. In a small bowl, whisk together the powdered sugar and milk until smooth. Add a little more milk if needed to reach desired drizzling consistency.
- Glaze and Enjoy: Drizzle the glaze over the cooled loaf. Let the glaze set before slicing. Now, slice, serve, and enjoy your perfectly moist apple bread!
Tips for Perfect Apple Bread Every Time
Want to take your apple bread to the next level? Here are a few extra tips to ensure baking success:
- Don’t Overmix: I can’t stress this enough! Overmixing is the enemy of moist bread.
- Use Fresh Apples: Fresh, crisp apples will provide the best flavor and texture.
- Measure Accurately: Use measuring cups and spoons designed for baking. Spoon the flour into the measuring cup and level it off with a knife.
- Check for Doneness: A toothpick inserted into the center should come out clean or with a few moist crumbs attached.
- Add Nuts: For added texture and flavor, try adding 1/2 cup of chopped walnuts or pecans to the batter.
- Spice it Up: Experiment with other spices, such as cardamom or ginger.
- Storage: Store the cooled bread in an airtight container at room temperature for up to 3 days or in the refrigerator for up to a week. You can also freeze the bread for up to 2 months. If you are looking to bake something similar that can be stored for a long time, try our easy caramel nut dessert jars recipe.
What to Serve With Apple Bread
Apple bread is delicious on its own, but it’s even better when paired with the right accompaniments. Here are a few serving suggestions:
Your Apple Bread Questions Answered (FAQ)
Can I use a different type of apple?
Absolutely! Feel free to experiment with different apple varieties to find your favorite flavor combination. Honeycrisp, Granny Smith, Fuji, and Gala apples all work well in this recipe. A mix of sweet and tart apples provides the best flavor balance.
Can I make this recipe gluten-free?
Yes, you can substitute the all-purpose flour with a gluten-free all-purpose blend. However, be aware that you may need to adjust the liquid content, as gluten-free flours can absorb more moisture. Look for a blend that contains xanthan gum for the best results.
How do I prevent the top of the bread from burning?
If the top of the bread starts to brown too quickly, you can loosely tent the pan with foil during the last 15-20 minutes of baking.
Can I freeze apple bread?
Yes, apple bread freezes beautifully! Let the bread cool completely, then wrap it tightly in plastic wrap and foil. Freeze for up to 2 months. Thaw overnight in the refrigerator before serving.
Why did my apple bread turn out dry?
The most common cause of dry apple bread is overmixing the batter or overbaking the loaf. Be sure to mix the wet and dry ingredients until just combined, and check for doneness starting around 50 minutes. Using the correct amount of oil is essential as well!
Enjoy Your Homemade Apple Bread!
There you have it – the secret to perfectly moist and delicious apple bread! This recipe is a guaranteed crowd-pleaser that’s perfect for any occasion. So, gather your ingredients, preheat your oven, and get ready to enjoy the comforting aroma and incredible taste of homemade apple bread. Don’t forget to leave a comment below and let me know how yours turned out! Share this recipe with your friends and family and spread the joy of baking! If you want another taste of something delicious, try our decadent chocolate topped cream cake recipe.