There’s nothing quite like a warm, fresh donut hole, but the path to perfectly light, fluffy, and never-greasy results can often feel elusive. After countless batches, I’ve cracked the code on how to achieve that coveted bakery-quality texture right in your own kitchen. These Blueberry Custard Donut Holes are the culmination of that journey, promising an irresistible bite without the common pitfalls.
Why These Blueberry Custard Donut Holes Will Be Your New Favorite
Many homemade donut recipes can leave you with a heavy, oily, or dense result. This recipe specifically addresses those frustrations, ensuring your donut holes emerge wonderfully light, impeccably fluffy, and surprisingly non-greasy.
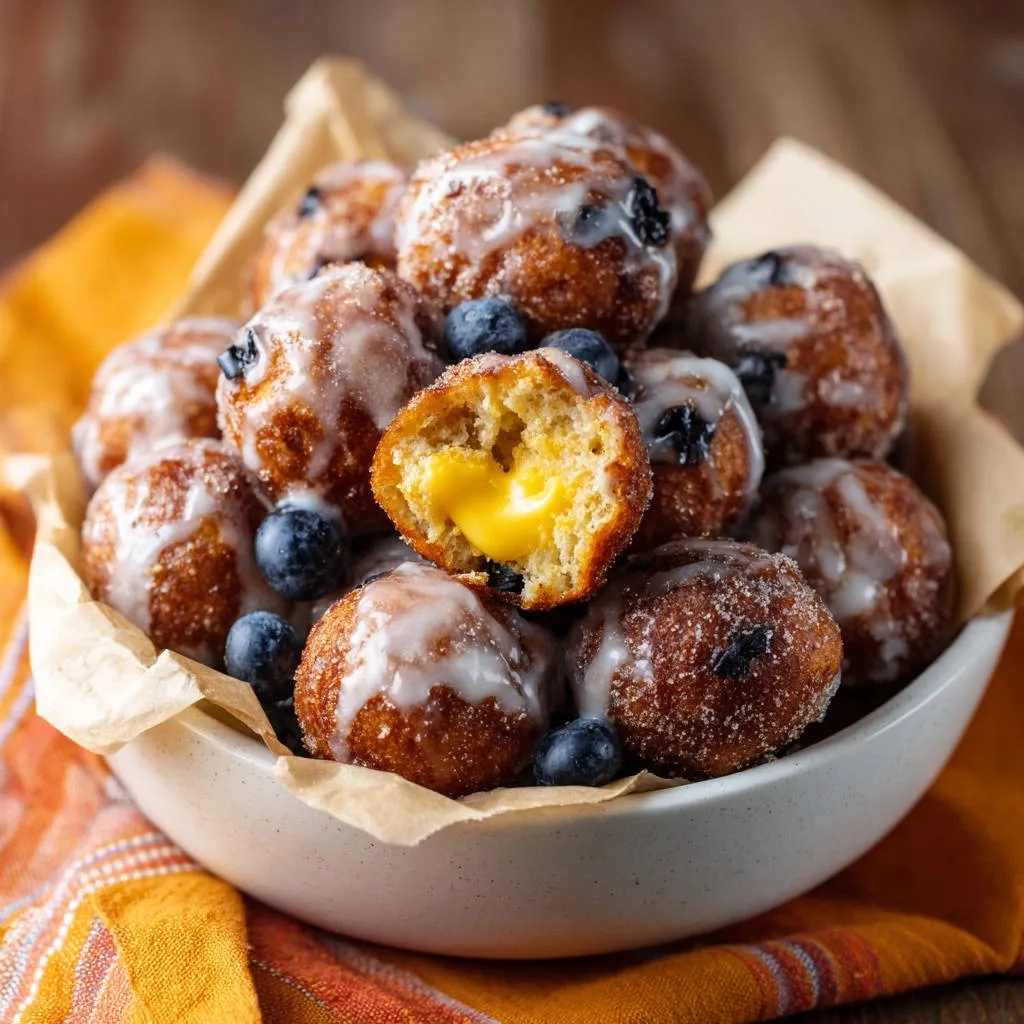
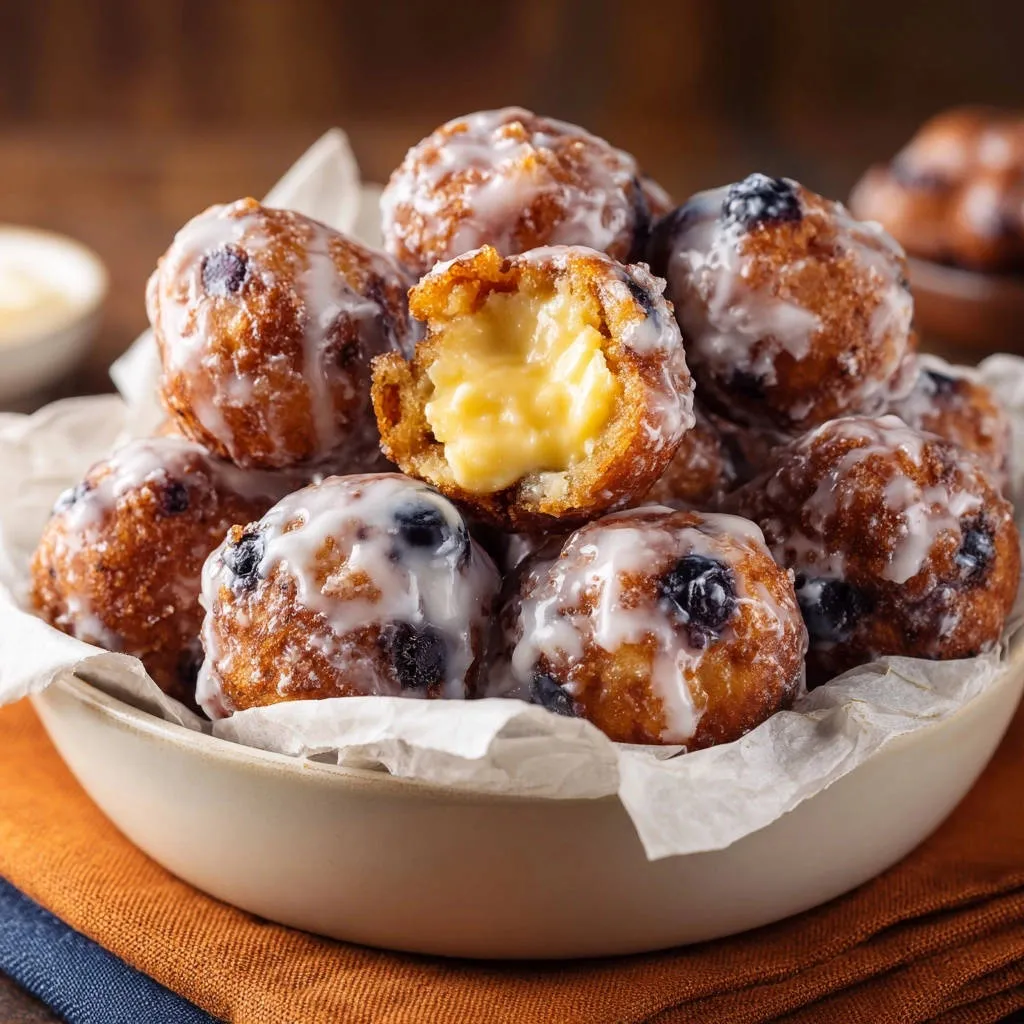
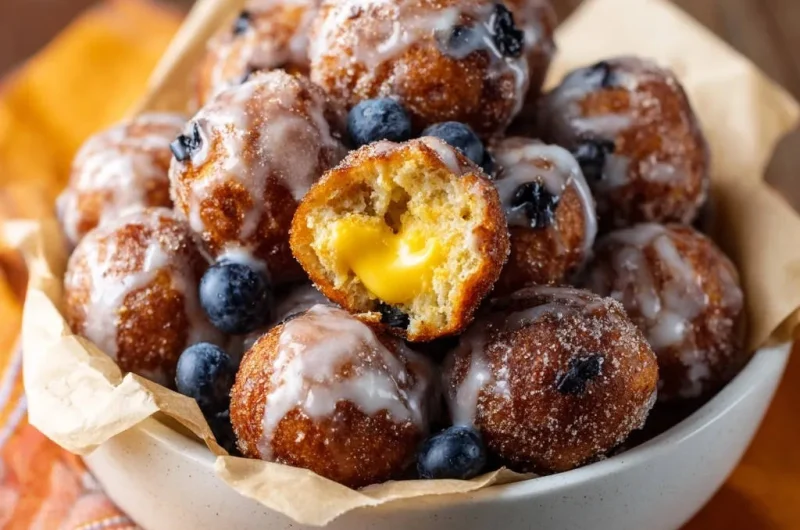
The magic truly happens with the combination of a tender, airy donut dough, a rich, creamy vanilla custard, and the delightful pop of fresh blueberries in every bite. It’s a symphony of textures and flavors that elevates the humble donut hole into a gourmet treat.
Beyond the taste, there’s immense satisfaction in crafting these beautiful pastries yourself. Imagine the joy of sharing these warm, perfectly golden creations with family and friends – a truly impressive feat that tastes as good as it looks.
Essential Tools for Your Donut Hole Journey
Stand Mixer or Large Mixing Bowl: Crucial for efficient dough kneading, ensuring a smooth and elastic texture.
Deep-Fry Thermometer: Absolutely essential for precise oil temperature control, the secret to non-greasy donut holes.
Heavy-Bottomed Pot or Dutch Oven: Provides even heat distribution for consistent frying.
2-inch Round Cookie Cutter: For uniformly shaped donut holes, though a glass rim can also work.
Wire Rack & Paper Towels: For draining excess oil post-frying, preventing greasiness.
Whisk & Medium Saucepan: For preparing the smooth, lump-free custard filling.
Crafting the Perfect Bite: Key Ingredients Unpacked
For the Light & Fluffy Donut Dough
Warm Milk & Active Dry Yeast: The foundation for a light dough, ensuring proper yeast activation for optimal rise and an airy structure.
Granulated Sugar: Feeds the yeast, promoting its activity, and adds subtle sweetness to the dough itself.
Egg & Melted Butter: Contribute essential richness, moisture, and a tender crumb, ensuring the donut holes are never dry or tough.
All-Purpose Flour & Salt: Provide the necessary structure for the dough and balance the overall flavors, enhancing sweetness.
Fresh Blueberries: Offer delightful bursts of natural sweetness and a welcome tart contrast, creating a complex flavor profile within the donut holes.
Creating the Silky Blueberry Custard Filling
Milk & Granulated Sugar: Form the creamy base and primary sweetness of the luscious custard.
Egg Yolks: Provide incredible richness, a beautiful golden color, and contribute significantly to the custard’s smooth, luxurious texture.
Cornstarch: The essential thickening agent, ensuring a perfectly set yet still creamy and spreadable custard that holds its shape.
Vanilla Extract & Pinch of Salt: Enhance the overall flavor profile, adding warmth, depth, and brightening the sweetness of the custard.
Finishing Touches: Frying & Sweet Coating
Vegetable Oil for Deep Frying: The crucial medium for cooking; its precise temperature management is paramount for a beautifully golden and non-greasy result.
Granulated Sugar for Tossing: Adds a simple, classic, and perfectly sweet coating to the warm donut holes, offering a delightful textural contrast.
Powdered Sugar & Milk for Glaze (Optional): For those who prefer a traditional, thin, and glossy finish that melts delicately on the tongue.
Your Path to Perfect Blueberry Custard Donut Holes: A Detailed Guide
Step 1: Activating the Yeast and Forming the Dough. Begin by proofing your yeast. In a large bowl or stand mixer, combine the warm milk and 1 teaspoon of granulated sugar. Sprinkle the active dry yeast over top and let it sit for 5-10 minutes, until a foamy layer appears on the surface. This confirms your yeast is vibrant and ready to create a beautifully light dough.
Once the yeast is active, add the remaining 1/4 cup granulated sugar, room temperature egg, cooled melted butter, and salt to the mixture. Mix these wet ingredients well. Gradually add the 3 cups of all-purpose flour, mixing until a soft, shaggy dough forms.
Step 2: Kneading and the First Rise. Transfer the dough to a lightly floured surface or continue in your stand mixer with a dough hook. Knead the dough for 5-7 minutes until it transforms into a smooth, elastic ball. Proper kneading develops the gluten, which is absolutely essential for achieving that desirable fluffy, chewy donut hole texture.
Lightly oil a clean bowl, place the dough inside, and turn it once to coat. Cover the bowl tightly with plastic wrap and let the dough rise in a warm, draft-free place for 1 to 1.5 hours, or until it has visibly doubled in size. This initial rise builds significant volume and flavor.
Step 3: Crafting the Creamy Custard Filling. While your donut dough is on its first rise, prepare the luscious custard. In a medium saucepan, whisk together the 1.5 cups milk, 0.5 cup granulated sugar, 3 large egg yolks, 0.25 cup cornstarch, 1 teaspoon vanilla extract, and a pinch of salt until thoroughly combined and smooth.
Place the saucepan over medium heat, whisking constantly. Continue whisking as the mixture thickens significantly and comes to a gentle boil. Reduce the heat to low and cook for just 1 more minute, stirring continuously to prevent scorching. Immediately remove the custard from the heat, transfer it to a clean bowl, and cover it with plastic wrap directly pressed onto the surface of the custard. This critical step prevents a skin from forming. Chill the custard completely in the refrigerator; it must be cold and firm before assembly.
Step 4: Assembling Your Donut Hole Creations. Once the dough has doubled, gently punch it down to release the air. On a lightly floured surface, roll out the dough to an even 1/4-inch thickness. Using a 2-inch round cookie cutter or the rim of a small glass, cut out as many dough circles as possible.
For each Blueberry Custard Donut Hole, place a small spoonful of your well-chilled custard filling in the center of one dough circle, along with a few fresh blueberries. Take another dough circle and place it directly on top of the filled one. Crucially, pinch the edges of the two dough circles together firmly and completely to seal the filling inside, forming a perfect, plump ball. This tight seal is vital to prevent any delicious filling from leaking out during frying. Repeat with the remaining dough and filling.
Step 5: The Crucial Second Rise: Preparing for Fluffiness. Carefully arrange your assembled donut holes on a baking sheet lined with parchment paper, ensuring there is ample space between each one to allow for expansion. Loosely cover the baking sheet with plastic wrap and let the donut holes rise for another 20-30 minutes, or until they look noticeably puffy and lighter. This second proofing is absolutely vital for achieving that desired light, airy, and fluffy texture in your finished donut holes. Do not rush or skip this step!
Step 6: The “Non-Greasy” Frying Technique. In a large, heavy-bottomed pot or Dutch oven, pour enough vegetable oil to reach a depth of about 3 inches. Heat the oil over medium heat until it reaches precisely 350°F (175°C). Use a candy or deep-fry thermometer to monitor this temperature meticulously. This exact temperature is THE absolute key to preventing greasy donut holes. If the oil is too cold, the dough will absorb too much oil, resulting in a heavy, oily texture; if it’s too hot, the outside will burn before the inside cooks through. Carefully lower 4-5 donut holes into the hot oil at a time, being careful not to overcrowd the pot, which would lower the oil temperature. Fry for 2-3 minutes per side, or until they are a beautiful golden brown and cooked through. Keep a close eye on the oil temperature, adjusting the heat as needed to maintain that perfect 350°F.
Step 7: Draining and Coating for Perfection. As soon as the donut holes are golden brown and cooked through, use a slotted spoon to carefully remove them from the hot oil. Immediately transfer them to a wire rack that has been set over a layer of paper towels. This crucial step allows any excess oil to drain away efficiently, further preventing greasiness and ensuring a light finish.
While the donut holes are still warm (this is important for adherence), gently roll them in granulated sugar to coat them evenly. If you prefer a glaze, whisk together powdered sugar and milk until smooth, then drizzle it over the cooled donut holes. Serve immediately and savor your perfectly light, fluffy, and never greasy Blueberry Custard Donut Holes!
Elevate Your Bake: Expert Tips for Irresistible Donut Holes
Precision with Oil Temperature: Your deep-fry thermometer is your best friend here. Consistently maintaining 350°F (175°C) is the single most important factor in preventing oily donut holes. Fluctuations lead to absorption. Adjust heat as needed throughout the frying process.
Don’t Overcrowd the Pot: Frying too many donut holes at once will drastically drop the oil temperature, leading to undercooked, greasy results. Work in small, manageable batches to ensure consistent cooking and perfect texture.
The Power of the Second Rise: While the first rise is important, the second proofing (after assembly) is absolutely crucial for a truly light and airy texture. Do not rush this step; patience here pays off in fluffiness.
Seal the Filling Firmly: When pinching the edges of your donut holes, ensure they are securely sealed with no gaps. This prevents the delicious custard and blueberries from leaking out into the hot oil during frying, keeping your treats intact and beautiful.
Chill Custard Completely: A well-chilled and firm custard filling is significantly easier to work with when assembling the donut holes. It also prevents the dough from becoming soggy during the brief time it’s exposed.
Draining is Key: Always transfer fried donut holes immediately to a wire rack set over paper towels. This setup allows air to circulate around them and ensures any remaining surface oil drips away, further preventing greasiness.
Your Blueberry Custard Donut Holes FAQs
Can I make these donut holes ahead of time?
While best enjoyed fresh, you can prepare the donut dough and custard the day before. Store the dough, covered, in the refrigerator overnight; it will have a slower rise. Ensure the custard is tightly covered with plastic wrap pressed directly onto its surface and chilled. Assemble and fry your Blueberry Custard Donut Holes just before serving for optimal freshness and texture.
How do I store leftover donut holes?
Store any leftover blueberry custard donut holes in an airtight container at room temperature for up to 1-2 days, or in the refrigerator for up to 3 days. To restore some warmth and softness, you can gently reheat them in a microwave for a few seconds or in a low oven.
What if my donut holes are dense or oily?
If your donut holes are dense, it’s likely due to insufficient rising time or potentially over-kneading the dough, which can make them tough. For oiliness, the most common culprit is incorrect oil temperature during frying – ensure it stays precisely at 350°F (175°C) and always avoid overcrowding the pot. For more insights on achieving perfect fried dough, consider these easy fried dough bites that share similar principles.
Can I use frozen blueberries for the filling?
Yes, you can absolutely use frozen blueberries! However, it’s important not to thaw them beforehand. Toss the frozen blueberries lightly in about a teaspoon of all-purpose flour before adding them to the donut holes. This small trick helps absorb any excess moisture they might release and prevents them from sinking to the bottom during cooking, ensuring even distribution.
Are there alternative fillings for these donut holes?
Absolutely! This recipe provides a fantastic, versatile donut base. You could easily experiment with other fillings such as a vibrant lemon curd, a simple yet decadent chocolate ganache, or your favorite fruit jam. For a classic taste, you can omit both the custard and blueberries entirely for plain sugared or glazed donut holes. If you enjoy fruit-filled pastries, you might also love our recipe for sweet berry hand pies.
Enjoying Your Homemade Blueberry Custard Donut Holes
These homemade Blueberry Custard Donut Holes are truly a versatile and delightful treat. They are absolutely exquisite served warm, fresh from the fryer, simply dusted with a generous coating of granulated sugar, or elegantly drizzled with a light glaze. They make an unforgettable addition to a leisurely weekend brunch, serve as a charming dessert for family gatherings, or provide a perfect pick-me-up alongside your morning coffee or afternoon tea.
Consider arranging them artfully on a beautiful platter for an impressive presentation that will surely delight your guests. Their unique blend of tender dough, creamy filling, and burst of fresh fruit makes them a standout, demonstrating your culinary prowess.
Ready to Impress? Share Your Blueberry Custard Donut Holes Masterpiece!
You now possess the comprehensive guide to creating perfectly light, fluffy, and never greasy Blueberry Custard Donut Holes right in your own kitchen. This recipe promises not only consistently delicious results but also the immense satisfaction of mastering a truly special homemade treat that rivals any bakery.
We encourage you to embark on this delightful baking adventure. Don’t forget to share your culinary creations with us! Tag your photos on social media or leave a comment below to let us know how your donut holes turned out. Your success stories and baking triumphs inspire us all!
Blueberry Custard Donut Holes
Course: DessertCuisine: American CuisineDifficulty: easy4
24-30 donut holes1
hour30
minutesAmerican Cuisine
Ingredients
For the Donut Dough:
1 cup warm milk (about 105-115°F)
2 and 1/4 teaspoons active dry yeast (one standard packet)
1/4 cup granulated sugar, plus 1 teaspoon
1 large egg, at room temperature
1/4 cup unsalted butter, melted and cooled
3 cups all-purpose flour, plus more for dusting
1/2 teaspoon salt
1/2 cup fresh blueberries
For the Custard Filling:
1 and 1/2 cups milk
1/2 cup granulated sugar
3 large egg yolks
1/4 cup cornstarch
1 teaspoon vanilla extract
Pinch of salt
For Frying and Coating:
6-8 cups vegetable oil, for deep frying
1/2 cup granulated sugar, for tossing
For Glaze (optional):
1 cup powdered sugar
2-3 tablespoons milk
Directions
- Prepare the Donut Dough: In a large bowl or stand mixer, combine the warm milk and 1 teaspoon of granulated sugar. Sprinkle the yeast over top and let sit for 5-10 minutes, until foamy.
- Add the remaining 1/4 cup granulated sugar, egg, melted butter, and salt to the yeast mixture. Mix well. Gradually add the flour, mixing until a soft dough forms.
- Knead the dough for 5-7 minutes until it’s smooth and elastic. Place the dough in a lightly oiled bowl, cover with plastic wrap, and let rise in a warm place for 1 to 1 and a half hours, or until doubled in size.
- Prepare the Custard Filling: While the dough rises, whisk together the milk, granulated sugar, egg yolks, cornstarch, vanilla extract, and pinch of salt in a medium saucepan.
- Cook over medium heat, whisking constantly, until the mixture thickens and comes to a boil. Reduce heat to low and cook for 1 more minute, stirring. Remove from heat, transfer to a bowl, cover with plastic wrap directly on the surface to prevent a skin from forming, and chill completely in the refrigerator.
- Assemble the Donut Holes: Gently punch down the risen dough. On a lightly floured surface, roll out the dough to about 1/4-inch thickness.
- Using a 2-inch round cookie cutter or glass, cut out circles. For each donut hole, place a small spoonful of chilled custard in the center of one circle, and a few blueberries. Top with another dough circle and pinch the edges firmly to seal the filling inside, forming a ball. Repeat with remaining dough and filling.
- Place the assembled donut holes on a baking sheet lined with parchment paper, leaving space between each. Cover loosely with plastic wrap and let rise for another 20-30 minutes, or until slightly puffy. This second rise is crucial for a light, fluffy texture.
- Fry the Donut Holes (The Non-Greasy Secret!): In a large heavy-bottomed pot or Dutch oven, pour enough vegetable oil to reach a depth of about 3 inches. Heat the oil over medium heat until it reaches 350°F (175°C). Use a candy or deep-fry thermometer to monitor the temperature precisely. This exact temperature is the absolute key to preventing greasy donut holes. If the oil is too cold, the dough will absorb too much oil; if it’s too hot, the outside will burn before the inside cooks through.
- Carefully lower 4-5 donut holes into the hot oil at a time, being careful not to overcrowd the pot, which would lower the oil temperature. Fry for 2-3 minutes per side, or until golden brown and cooked through. Keep a close eye on the oil temperature, adjusting the heat as needed to maintain 350°F.
- Using a slotted spoon, carefully remove the cooked donut holes and immediately transfer them to a wire rack set over paper towels. This allows excess oil to drain away, preventing greasiness.
- Coat the Donut Holes: While still warm, roll the donut holes in granulated sugar. If making a glaze, whisk together powdered sugar and milk until smooth, then drizzle over the cooled donut holes. Serve immediately and enjoy your perfectly light, fluffy, and never greasy treats!
Notes
- Maintaining precise oil temperature (350°F) is crucial for preventing greasy donut holes. Chilling the custard completely is essential for easy assembly.