Have you ever spent hours looking forward to a comforting plate of braised beef with gravy, only to end up with dry, tough meat? It’s one of the most frustrating kitchen fails! Trust me, I’ve been there. For years, I wrestled with roasts that promised melt-in-your-mouth tenderness but delivered disappointment. Discovering a simple, foundational approach completely changed my braising game. This method for braised beef with gravy consistently produces fork-tender results bathed in a rich, savory sauce. Get ready to banish tough beef from your kitchen forever!
Reasons This Braised Beef with Gravy is a Keeper
This isn’t just another braised beef recipe. This is the one that delivers on its promise of incredible texture and deep flavor every single time. Here’s why this recipe will become your go-to:
- Guaranteed Tenderness: By using the right cut and cooking it low and slow, you activate the magic that transforms tough connective tissue into silky gelatin.
- Rich, Built-In Gravy: The braising liquid becomes the base for a luscious, flavorful gravy that clings perfectly to the tender meat.
- Simple Ingredients, Incredible Results: You don’t need a long list of fancy ingredients to achieve restaurant-quality comfort food at home.
- Perfect for Make-Ahead: Braised dishes often taste even better the next day, making this ideal for entertaining or easy weeknight meals.
Gathering Your Ingredients for Tender Braised Beef
Creating this deeply satisfying dish starts with selecting the right components. Each ingredient plays a role in building the layers of flavor and achieving that signature tender texture that makes braised beef with gravy so beloved.
Our star ingredient is, of course, the beef. We opt for beef chuck roast, a cut known for having abundant connective tissue. While this makes it tough for quick cooking, it’s precisely what makes it perfect for braising. Over low, slow heat, this tissue breaks down into gelatin, rendering the meat incredibly tender and moist. Cutting it into 2-inch pieces ensures even browning and cooking.
We start the flavor base by searing the beef in good quality olive oil. This initial browning step is non-negotiable – it creates complex flavors through the Maillard reaction, adding depth to the final gravy. Aromatics like a large sliced onion and earthy mushrooms contribute sweetness and umami, building a savory foundation. Two cloves of minced garlic add a pungent punch that complements the rich beef.
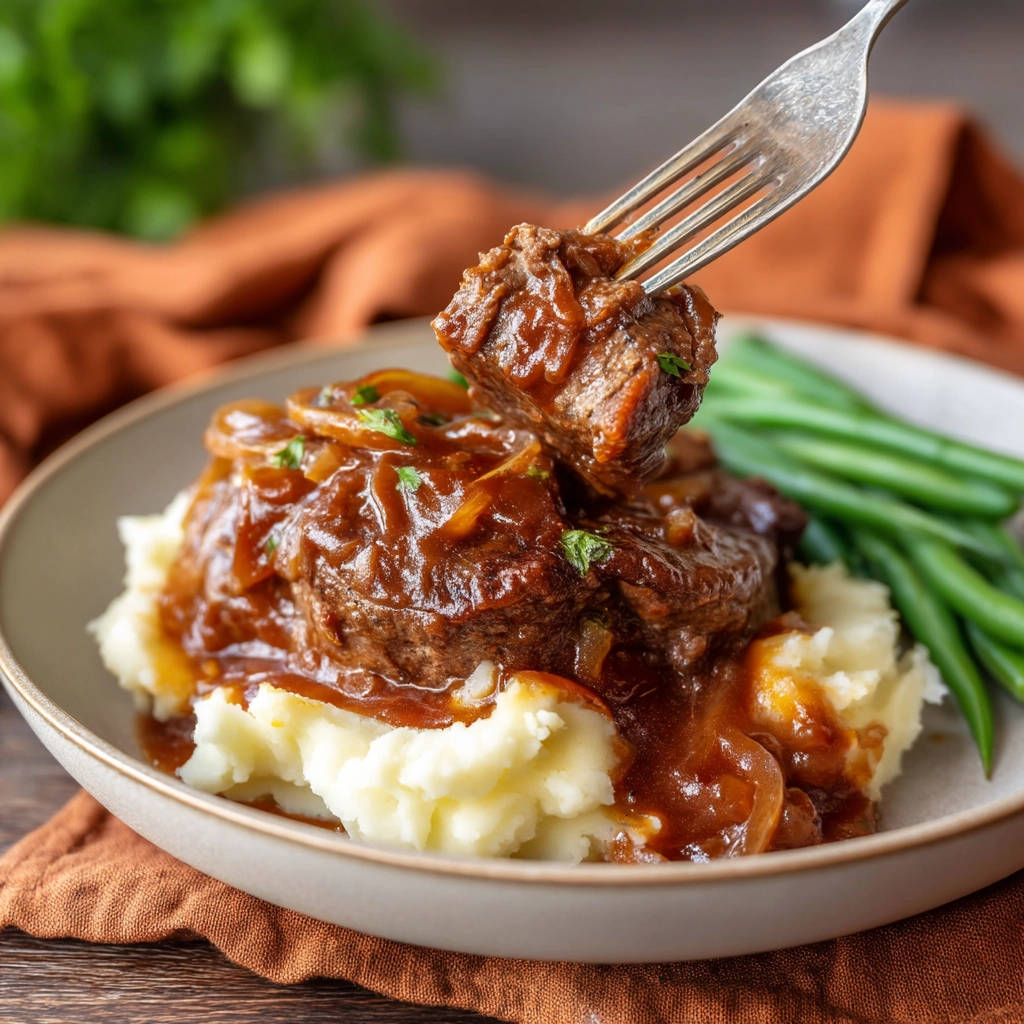
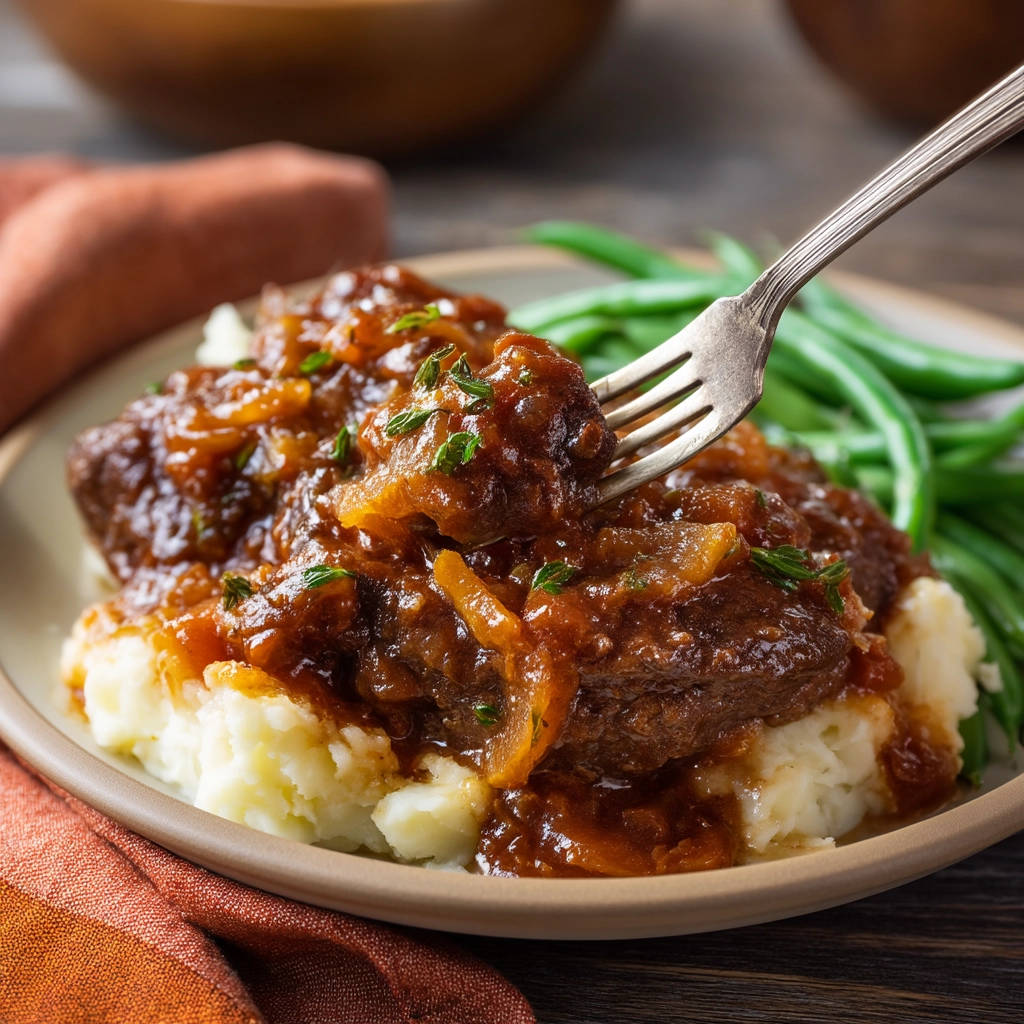
The braising liquid is primarily beef broth. Using beef broth reinforces the beefy flavor profile and provides the necessary moisture for the long cooking process. For that perfect, pourable gravy consistency, a touch of flour or cornstarch is whisked into a slurry and stirred into the reduced cooking liquid at the end. Simple salt and black pepper are essential for seasoning at every stage, enhancing all the other flavors. Finally, a sprinkle of fresh chopped parsley adds a burst of color and fresh, herbaceous brightness just before serving. And don’t forget the classic pairings: warm mashed potatoes and tender cooked green beans, which are listed as serving suggestions but essential to the experience!
Here’s a quick list of what you’ll need:
- 2 pounds beef chuck roast, cut into 2-inch pieces
- 1 tablespoon olive oil
- 1 large onion, sliced
- 8 ounces mushrooms, sliced
- 2 cloves garlic, minced
- 4 cups beef broth
- 1 tablespoon flour or cornstarch (for thickening)
- Salt and black pepper to taste
- Fresh parsley, chopped, for garnish
- Mashed potatoes, for serving
- Cooked green beans, for serving
Crafting Your Braised Beef with Gravy: Step-by-Step for Tenderness
Ready to create magic in your kitchen? This process is straightforward, focusing on key techniques that guarantee success. Let’s walk through it together, step by step.
- Prep the Beef for Maximum Sear: Begin by ensuring your beef pieces are as dry as possible. Thoroughly pat each piece with paper towels. Excess moisture will steam the beef instead of searing it, preventing that crucial browned crust. Once dry, season the meat generously on all sides with salt and freshly cracked black pepper. Don’t be shy with the seasoning; a good amount is needed to flavor the meat throughout the long cook time.
- Heat Your Pot Properly: Place a large, heavy pot or Dutch oven over medium-high heat on your stovetop. Add the olive oil and let it heat until it shimmers slightly. A heavy pot retains heat well, which is ideal for achieving a deep sear and for the long, slow braising.
- Achieving the Golden Sear: Carefully add the seasoned beef pieces to the hot oil. It’s absolutely essential to add them in a single layer, avoiding overcrowding the pot. If you add too much beef at once, the temperature will drop, and the meat will steam instead of developing that beautiful brown crust we’re after. Sear the beef on all sides until it’s deeply browned – aim for about 5-7 minutes total. This step is the foundation of the dish’s flavor, creating rich caramelized notes. Once browned, remove all the beef from the pot and set it aside temporarily.
- Building the Aromatic Base: Reduce the heat in the pot to medium. Add your sliced onions and mushrooms. Cook these vegetables, stirring occasionally, until they have softened and taken on some color, which should take about 8-10 minutes. They will pick up some of the delicious browned bits left behind by the beef, adding even more flavor. Once the vegetables are softened, stir in the minced garlic and cook for just one more minute until you can smell its wonderful aroma. Be careful not to burn the garlic at this stage.
- Deglazing and Adding Liquid: Pour the beef broth into the pot with the cooked vegetables. Use a wooden spoon or spatula to scrape up any browned bits stuck to the bottom of the pot. These bits are pure flavor gold, and incorporating them into the liquid is vital for a rich gravy. Bring the broth to a gentle simmer.
- Reuniting Beef and Liquid: Return the seared beef pieces to the pot. The liquid should almost cover the beef. If it looks a bit low, add a splash more beef broth or even water until the meat is mostly submerged. This ensures the beef stays moist and tender as it braises. Cover the pot tightly with a lid. A tight-fitting lid is crucial to prevent the liquid from evaporating during the long cooking time.
- The Magic of Low and Slow Cooking: This is where the transformation happens! You have two options: transfer the covered pot to a preheated oven set to 325°F (160°C), or keep it on the stovetop, reducing the heat to very low and maintaining a bare, gentle simmer. The low, consistent heat over 2 1/2 to 3 hours, or even longer, is key. This extended period at a low temperature slowly breaks down the tough connective tissues in the chuck roast, resulting in incredibly tender beef that easily pulls apart with just a fork. Check on the pot occasionally, ensuring there’s still enough liquid to keep the beef submerged.
- Finishing the Gravy: Once the beef is fall-apart tender, carefully remove the meat from the pot and set it aside. Now, you can focus on the delicious liquid left behind. Bring the liquid in the pot to a simmer. In a small separate bowl, whisk together the flour or cornstarch (whichever you prefer) with 2 tablespoons of cold water until you have a smooth slurry. Slowly pour this slurry into the simmering liquid in the pot while continuously whisking. Continue to cook and stir until the sauce thickens to your desired consistency – it should coat the back of a spoon. Taste the gravy and add more salt and pepper if needed. Finally, gently return the tender braised beef pieces to the thickened sauce, allowing them to warm through and soak up the glorious gravy.
- Serving Your Masterpiece: Your patient efforts have paid off! Serve generous portions of the tender braised beef draped in the rich gravy over warm, creamy mashed potatoes. Garnish with a sprinkle of fresh chopped parsley for a touch of color and freshness. A side of cooked green beans makes for a classic, complete meal.
Tips for Perfect Braised Beef Every Time
Achieving that perfect, never-tough braised beef with gravy is easy once you know a few simple tricks. Here are my favorite tips to ensure your success:
- Choose the Right Cut: While this recipe specifies chuck roast, other cuts with good connective tissue, like beef brisket or even short ribs, can also be used for braising. They all benefit from the low and slow cooking method.
- Don’t Rush the Sear: That deep brown crust isn’t just for looks; it’s flavor! Take the time to properly sear the beef on all sides without crowding the pan. Work in batches if necessary.
- Ensure a Tight Lid: A tight-fitting lid keeps moisture locked in, which is essential for tenderizing the beef during the long braise. If your lid isn’t perfectly tight, you can place a layer of aluminum foil over the pot opening before putting the lid on.
- Check Liquid Levels: While braising, peek in occasionally, especially during longer cooking times. If the liquid level drops significantly and the beef isn’t mostly submerged, add a little more beef broth or hot water to keep everything moist.
- Adjust Gravy Consistency: If your gravy is too thick after adding the slurry, you can whisk in a little more broth or water until it reaches your desired consistency. If it’s not thick enough, make a second small slurry and whisk it in, simmering for another minute or two.
- Rest the Meat (Optional but Recommended): Some cooks like to let the seared beef rest for 10-15 minutes before returning it to the pot for braising. This can help the juices redistribute, although the long braising process does a lot of that work anyway.
What to Serve With Your Braised Beef with Gravy
This hearty dish pairs beautifully with comforting sides that soak up the rich gravy. Mashed potatoes are a classic for a reason, but don’t stop there! Consider serving it over creamy cheesy potatoes or even simple egg noodles. Alongside, roasted vegetables like perfectly roasted veggies or, as the recipe suggests, simple cooked green beans, provide a nice contrast in texture and flavor. For a lighter option, a fresh green salad would also work well.
Your Braised Beef with Gravy Questions Answered (FAQ)
Let’s tackle some common questions you might have about making this incredibly tender braised beef.
Why is my braised beef still tough?
Tough braised beef is almost always a result of not cooking it long enough or at a high enough temperature. Braising relies on low, slow heat over an extended period (usually 2.5 to 3 hours or more for chuck roast) to break down the tough connective tissues into gelatin. If it’s still tough, simply put the lid back on and keep cooking it low and slow until it’s fork-tender. It might take longer than the recommended time depending on the cut and your oven/stove.
Can I make braised beef ahead of time?
Absolutely! Braised beef with gravy often tastes even better the next day as the flavors meld and deepen. Cook the recipe entirely, let it cool, then store it covered in the refrigerator. To reheat, gently warm it on the stovetop over low heat or in a covered oven-safe dish in a 300°F (150°C) oven until heated through. You may need to add a splash more broth or water if the gravy has thickened too much.
Can I use a different cut of beef?
Yes, you can! Cuts suitable for braising are generally those with a lot of connective tissue. Besides chuck roast, brisket, short ribs, or even some cuts of round or shank can work. Just be aware that cooking times may vary depending on the cut and size.
How do I store leftovers?
Store any leftover braised beef and gravy in an airtight container in the refrigerator for up to 3-4 days. For longer storage, you can freeze it in a freezer-safe container for up to 3 months. Thaw overnight in the refrigerator before reheating.
Can I make this recipe gluten-free?
Yes, easily! Simply substitute the flour or cornstarch used for thickening the gravy with a gluten-free alternative. Cornstarch is naturally gluten-free. Just be sure to check the packaging of your beef broth to ensure it doesn’t contain any hidden gluten ingredients.
Can I add other vegetables?
Absolutely! Carrots, celery, potatoes (added later in the cooking process so they don’t turn to mush), or parsnips are wonderful additions to the pot when you add the onions and mushrooms. They will soften and absorb the delicious braising liquid.
Enjoy Your Homemade Braised Beef with Gravy!
There’s nothing quite like the aroma of savory braised beef filling your kitchen, promising a meal that is both comforting and deeply satisfying. By following these steps and embracing the low-and-slow method, you’ll achieve beef that is incredibly tender, enveloped in a rich, flavorful gravy. Say goodbye to tough, dry roasts and hello to your new favorite way to make braised beef with gravy.
Give this recipe a try and let me know how it turns out! I’d love to hear about your experience in the comments below. Happy cooking!
Braised Beef with Gravy

Ingredients
- 2 pounds beef chuck roast, cut into 2-inch pieces
- 1 tablespoon olive oil
- 1 large onion, sliced
- 8 ounces mushrooms, sliced
- 2 cloves garlic, minced
- 4 cups beef broth
- 1 tablespoon flour or cornstarch (for thickening)
- Salt and black pepper to taste
- Fresh parsley, chopped, for garnish
- Mashed potatoes, for serving
- Cooked green beans, for serving
Directions
- Pat the beef pieces dry thoroughly with paper towels. Season generously with salt and black pepper.
- Heat olive oil in a large heavy pot or Dutch oven over medium-high heat.
- Achieving Tenderness Starts Here: Add the beef in a single layer without crowding the pot. Sear until deeply browned on all sides, about 5-7 minutes total. This step is crucial for flavor and texture development before the long cooking process. Remove beef from the pot and set aside.
- Reduce heat to medium. Add the sliced onion and mushrooms to the pot. Cook, stirring occasionally, until softened and browned, about 8-10 minutes. Add minced garlic and cook for 1 minute more until fragrant.
- Pour in the beef broth, scraping up any browned bits from the bottom of the pot. Bring to a simmer.
- The Key to Melt-in-Your-Mouth Texture: Return the seared beef to the pot. The liquid should mostly cover the beef. If not, add a little more broth or water. Cover the pot tightly with a lid.
- Low and Slow is the Secret: Transfer the covered pot to a preheated oven at 325°F (160°C) or reduce stovetop heat to low and maintain a bare simmer. Cook for 2 1/2 to 3 hours, or until the beef is incredibly tender and easily pulls apart with a fork. The low, slow heat breaks down the connective tissue, ensuring it’s never tough. Check occasionally to ensure there’s enough liquid.
- Remove the beef from the pot. If you want to thicken the sauce, bring the liquid in the pot to a simmer. In a small bowl, whisk together 1 tablespoon flour or cornstarch with 2 tablespoons cold water to make a slurry. Slowly whisk the slurry into the simmering liquid. Cook, stirring, until the sauce has thickened to your desired consistency. Season sauce with additional salt and pepper if needed. Return beef to the thickened sauce.
- Serve the tender braised beef and rich gravy over warm mashed potatoes, garnished with fresh parsley. Serve with a side of cooked green beans.