Most people avoid braising chicken because they can’t stand the texture of the skin. You’ve likely seen it before: a beautiful pot of stew where the chicken skin turns into a gray, rubbery layer that slides right off the meat. It’s a culinary tragedy because you lose all that rendered fat and concentrated flavor. This recipe changes the game by using a shallow-braise philosophy that bridges the gap between a succulent, slow-cooked stew and a high-heat roast.
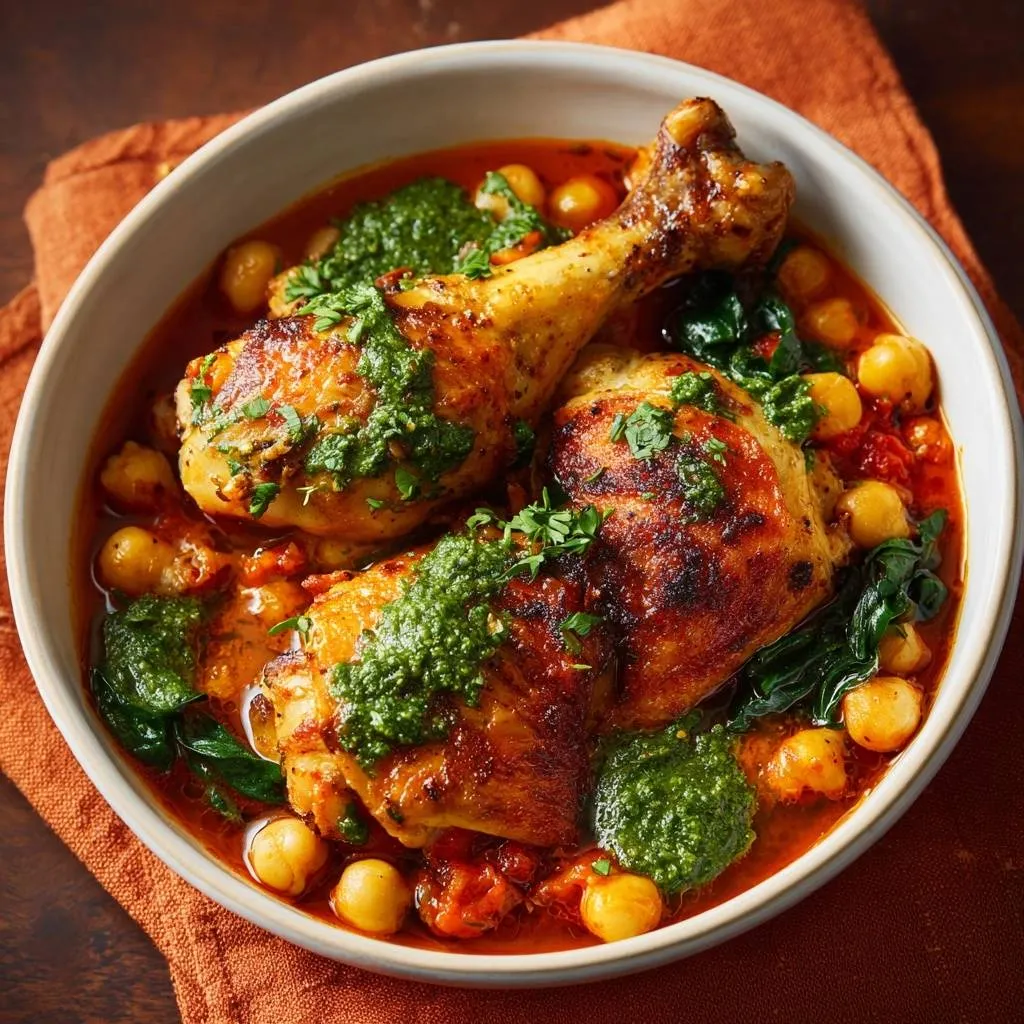
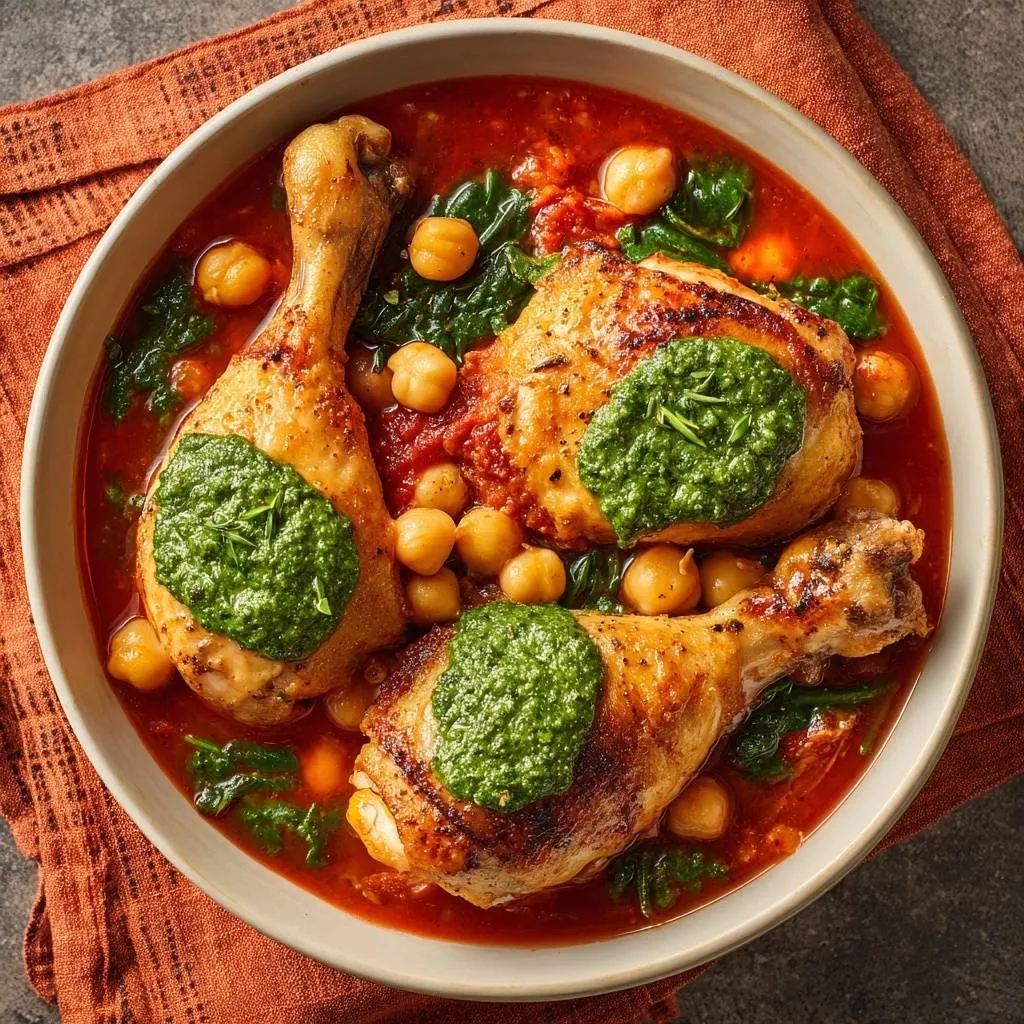
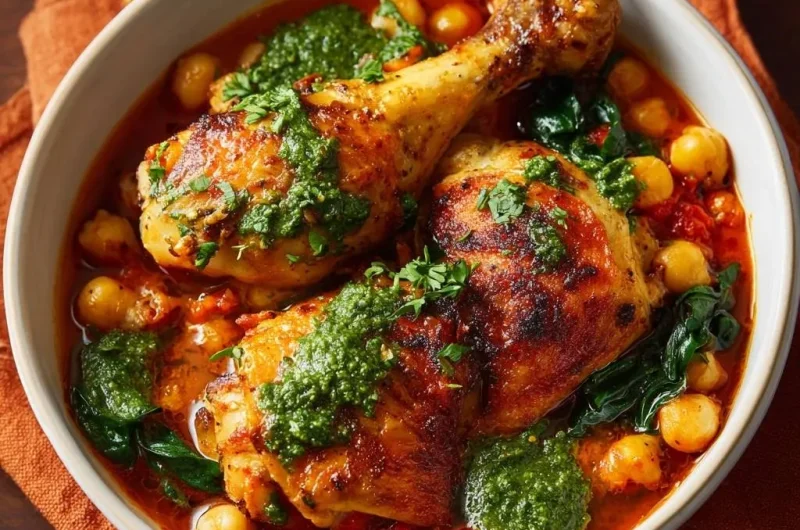
The goal here is a dish that feels like a warm hug but still offers a satisfying crunch. We’re leaning into a Mediterranean profile with fire-roasted tomatoes, earthy chickpeas, and pungent garlic. By the time you’re done, the chicken meat will be falling off the bone, but the skin will remain shatteringly crisp. It’s the ultimate one-pan solution for anyone who demands both comfort and texture in a single bite.
The real secret to this success is the “tide line” technique. You aren’t drowning the chicken in liquid; you’re letting it sit in a shallow bath of aromatics. This allows the bottom of the meat to poach in the juices while the top stays exposed to the dry heat of the pan. If you’ve ever struggled with soggy poultry, this specific method is your new best friend.
The Physics of the Perfect Shallow Braise
Traditional braising usually involves submerging meat entirely in liquid. While this works wonders for tough cuts of beef, it’s a disaster for skin-on poultry. When skin is submerged, the collagen breaks down into a gelatinous mess rather than crisping up. The moisture prevents the temperature from rising above the boiling point, which means the Maillard reaction—that beautiful browning we love—simply cannot happen.
By keeping the skin above the liquid line, we trigger a secondary dehydration process. As the sauce simmers below, the ambient heat from the skillet and the rising steam (which escapes because we don’t use a lid) continues to render the fat out of the skin. This creates a self-basting effect where the skin fries in its own fat while the meat underneath stays protected and moist. It’s a delicate balance of two different cooking environments in one skillet.
Essential Components for Mediterranean Chicken and Chickpeas
Quality ingredients are the backbone of this dish because the flavors are so concentrated. You’ll want to start with bone-in, skin-on chicken thighs. The bone acts as an insulator, preventing the meat from drying out during the 40-minute process, while the skin provides the essential fat for the sauce. Boneless cuts will simply vanish into the sauce and lose their structural integrity.
For the base, fire-roasted tomatoes are a non-negotiable upgrade over standard diced tomatoes. They bring a smoky charred flavor that mimics a wood-fired oven. The chickpeas serve a dual purpose: they provide a creamy, starchy contrast to the acidic tomatoes and act as little sponges that soak up the chicken fat and broth. It’s a protein-packed starch that makes the meal feel incredibly hearty without needing a side of potatoes.
Selecting the Right Poultry Cuts
Thighs and drumsticks are the champions of the braising world. They contain enough connective tissue to stay juicy even after a long simmer. I strongly recommend avoiding chicken breasts for this recipe. Because breasts are so lean, they will become stringy and dry long before the chickpeas have had time to soften and the sauce has thickened.
If you can find air-chilled chicken, grab it. Most commercial chicken is chilled in water baths, which means the meat absorbs excess moisture. When that water hits your hot oil, it creates steam and prevents a proper sear. Air-chilled poultry has a drier skin, which leads to a much faster and more consistent crunch.
Aromatics and the Mediterranean Pantry
Smoked paprika and dried oregano provide the earthy, sun-drenched backbone of this flavor profile. The paprika adds a hint of sweetness and a deep red hue to the sauce, while the oregano brings that classic herbal punch. Make sure your spices are fresh; if that jar of oregano has been in your pantry since the last election, it’s time for a new one.
Fresh garlic and onions are the foundation here. You want to dice the onion finely so it practically melts into the tomato base. This creates a thick, jammy consistency rather than a watery soup. The chicken broth should be low-sodium so you can control the salt levels yourself as the sauce reduces and the flavors intensify.
The Anti-Soggy Skin Pre-Preparation Ritual
Before the chicken even touches the pan, you have to deal with surface moisture. This is the most important step in the entire process. Take a few paper towels and pat the chicken skin until it feels completely dry to the touch. If the skin is wet, it will steam in the oil instead of searing, and you’ll never get that golden crust.
Once dry, season the skin generously with salt. Salt doesn’t just add flavor; it draws out deep-seated moisture from the skin cells through osmosis. This allows the heat of the oil to immediately start rendering the fat. If you have the time, let the salted chicken sit uncovered in the fridge for 30 minutes. It’s a mini dry-brine that guarantees a superior Maillard reaction.
Step-by-Step: Achieving the Golden Sear
Heat your olive oil until it’s shimmering but not smoking. You want a medium-high heat that provides a loud sizzle the moment the chicken hits the pan. Place the chicken skin-side down and then—this is the hard part—don’t touch it. Resist the urge to peek or move it around for at least 6 to 8 minutes.
The chicken will actually “stick” to the pan at first. This is normal. As the skin crisps and the fat renders, the meat will naturally release from the surface. When you can easily lift the chicken with tongs and see a deep, mahogany-gold color, it’s ready to flip. We only sear the bottom for two minutes because we want to keep the interior raw enough to finish cooking in the sauce later.
Building the Tomato and Chickpea Base
After removing the chicken, you’ll see brown bits stuck to the bottom of the skillet. This is “fond,” and it’s pure culinary gold. Sauté your onions directly in the rendered chicken fat, using a wooden spoon to scrape up those bits. This integrates the roasted chicken flavor directly into the vegetable base.
Add your garlic and spices only after the onions are soft. Garlic burns quickly, and burnt garlic will turn your entire sauce bitter. Stir the spices for just 60 seconds until you can smell the paprika and oregano blooming in the fat. Then, pour in the tomatoes and broth. The liquid will deglaze the pan, picking up every last drop of flavor from the sear.
The Shallow Braise: Managing the Liquid Line
Now comes the critical moment of assembly. Carefully nestle the chicken pieces back into the simmering tomato and chickpea mixture. You must ensure the liquid only reaches about halfway up the sides of the chicken. If the sauce covers the skin, all your hard work during the searing phase will be undone in minutes.
Do not put a lid on the pan. I know it’s tempting to cover it to speed things up, but a lid traps steam. That steam will condense on the underside of the lid and drip back onto your crispy chicken skin, turning it soft. By simmering uncovered, the sauce reduces and thickens while the skin stays exposed to the dry air, maintaining its crunch until the very end.
Finishing Touches: Spinach and Pesto Integration
Fresh baby spinach only needs about 90 seconds to wilt. Stir it into the sauce around the chicken pieces during the final moments of cooking. This adds a pop of vibrant green and a fresh, earthy flavor that cuts through the richness of the tomatoes and chicken fat. It also ensures you’re getting a good dose of greens without them turning into mush.
The final flourish is a dollop of basil pesto on each piece of chicken. The residual heat from the meat will gently melt the pesto, releasing the aroma of fresh basil and garlic. This “cold finish” provides a bright, herbaceous contrast to the deep, smoky flavors of the braise. Sprinkle some fresh parsley over the top, and you’re ready to serve.
Troubleshooting Common Braising Obstacles
If you find that your sauce is reducing too quickly and the pan looks dry before the chicken is done, don’t panic. Simply add a splash of chicken broth or water around the edges of the pan. Be careful not to pour it directly over the chicken skin. You want to maintain that “tide line” throughout the entire cooking process.
On the flip side, if your chicken is cooked through but the sauce is still too watery, remove the chicken to a plate and turn the heat to high. Let the sauce boil rapidly for 3 to 5 minutes to thicken it up. Once it reaches a jammy consistency, nestle the chicken back in for a minute to re-warm. This ensures you never have to settle for a thin, flavorless sauce.
Optimal Pairings for Mediterranean Braised Poultry
Since this dish has a rich, acidic tomato base and creamy chickpeas, you want sides that can soak up the sauce or provide a crisp contrast. A thick slice of toasted sourdough is perfect for mopping up the extra tomato juices. The crunch of the bread echoes the crunch of the chicken skin, making for a very satisfying texture profile.
If you want something lighter, a lemon-zested couscous or quinoa works beautifully. The citrus notes in the grain will brighten the heavy flavors of the smoked paprika. A simple arugula salad with a sharp balsamic vinaigrette is also a great choice. The bitterness of the greens and the acidity of the vinegar help cleanse the palate between bites of the rich, savory chicken.
Storage and Reheating Without Losing Texture
Leftovers will stay fresh in an airtight container for up to three days. However, be aware that the skin will naturally soften as it sits in the fridge. To revive this dish, avoid the microwave at all costs. The microwave will turn the chicken rubbery and the skin soggy. It’s the fastest way to ruin a great meal.
Instead, reheat the chicken in an air fryer at 375°F for about 5 minutes. This will re-crisp the skin perfectly while warming the meat. Alternatively, place the chicken on a baking sheet under the broiler for 2-3 minutes while warming the chickpea sauce separately in a small saucepan on the stove. This extra effort ensures your second meal is just as good as the first.
Expert Inquiries Regarding Braised Chicken
Can I use dried chickpeas instead of canned?
Yes, but you cannot add them directly to the pan. Dried chickpeas must be soaked overnight and boiled until tender before they can be used in this braise. Canned chickpeas are preferred here because they are already perfectly cooked and their canning liquid (aquafaba) actually helps thicken the Mediterranean sauce slightly.
Why is my chicken skin still soft after searing?
This usually happens for two reasons: the pan wasn’t hot enough or the skin was too wet. If the oil doesn’t sizzle aggressively when the chicken hits the pan, the fat won’t render properly. Also, ensure you aren’t crowding the pan. If the chicken pieces are touching, they will trap steam between them, which prevents crisping.
Can I substitute the chicken broth with something else?
If you’re out of broth, you can use water mixed with a little extra salt and a squeeze of lemon juice. The acidity of the lemon helps mimic the depth of the broth. Avoid using just plain water if possible, as it can dilute the rich flavors of the fire-roasted tomatoes and spices.
Is a cast iron skillet necessary for this recipe?
While a cast iron skillet is excellent for heat retention and achieving a deep sear, any heavy-bottomed, oven-safe stainless steel skillet will work. The key is the “heavy-bottomed” part. Thin pans have hot spots that can burn the garlic and spices before the chicken has a chance to cook through.
Can I add other vegetables to the braise?
Absolutely. Bell peppers, zucchini, or even artichoke hearts fit the Mediterranean profile perfectly. Just be mindful of water content. Vegetables like zucchini release a lot of liquid, so you may need to simmer the sauce a bit longer to ensure it doesn’t become too watery and submerge your crispy chicken skin.
Braised Mediterranean Chicken and Chickpeas
Course: Main CourseCuisine: MediterraneanDifficulty: easy4
servings15
minutes40
minutes55
Minutes485
kcalMediterranean
Ingredients
4 bone-in, skin-on chicken thighs or drumsticks (or a mix)
1 can (15 oz) chickpeas, drained and rinsed
1 can (14.5 oz) fire-roasted diced tomatoes (for texture and color)
1/2 cup chicken broth (to achieve the correct sauce consistency)
2 cups fresh baby spinach
3 tablespoons olive oil
1 small onion, finely diced
3 cloves garlic, minced
1 teaspoon smoked paprika
1 teaspoon dried oregano
Salt and black pepper to taste
1/4 cup prepared basil pesto (for garnish)
Fresh parsley, chopped
Directions
- Pat the chicken skin completely dry with paper towels. This is the most critical step for preventing soggy skin. Season generously with salt and pepper on both sides.
- Heat olive oil in a large oven-safe skillet over medium-high heat. Place chicken skin-side down. Do not move the chicken for 6 to 8 minutes. This deep sear renders the fat and creates a golden, crispy barrier. Flip and sear the other side for 2 minutes, then remove chicken to a plate.
- In the same pan, sauté the onion in the rendered chicken fat until soft. Add garlic, paprika, and oregano, stirring for 1 minute until fragrant.
- Pour in the diced tomatoes (with their juices), the chicken broth, and the chickpeas. Stir to combine, scraping the bottom of the pan to release the flavorful browned bits. Bring to a gentle simmer.
- Carefully nestle the chicken back into the pan. Crucial Step: Ensure the liquid only reaches halfway up the sides of the chicken. The skin must remain exposed and above the liquid line to maintain its crunch.
- Simmer uncovered over medium-low heat for 20 to 25 minutes. Do not cover the pan, as steam will soften the skin. The chicken is done when it reaches an internal temperature of 165°F.
- During the last 2 minutes of cooking, stir the fresh spinach into the sauce around the chicken until wilted.
- Remove from heat. Top each piece of chicken with a generous dollop of pesto and a sprinkle of fresh parsley. Serve directly from the pan to maintain the skin’s texture.
Notes
- The most critical step is ensuring the liquid only reaches halfway up the chicken pieces. Do not cover the pan during simmering, as trapped steam will ruin the crispy texture of the skin.