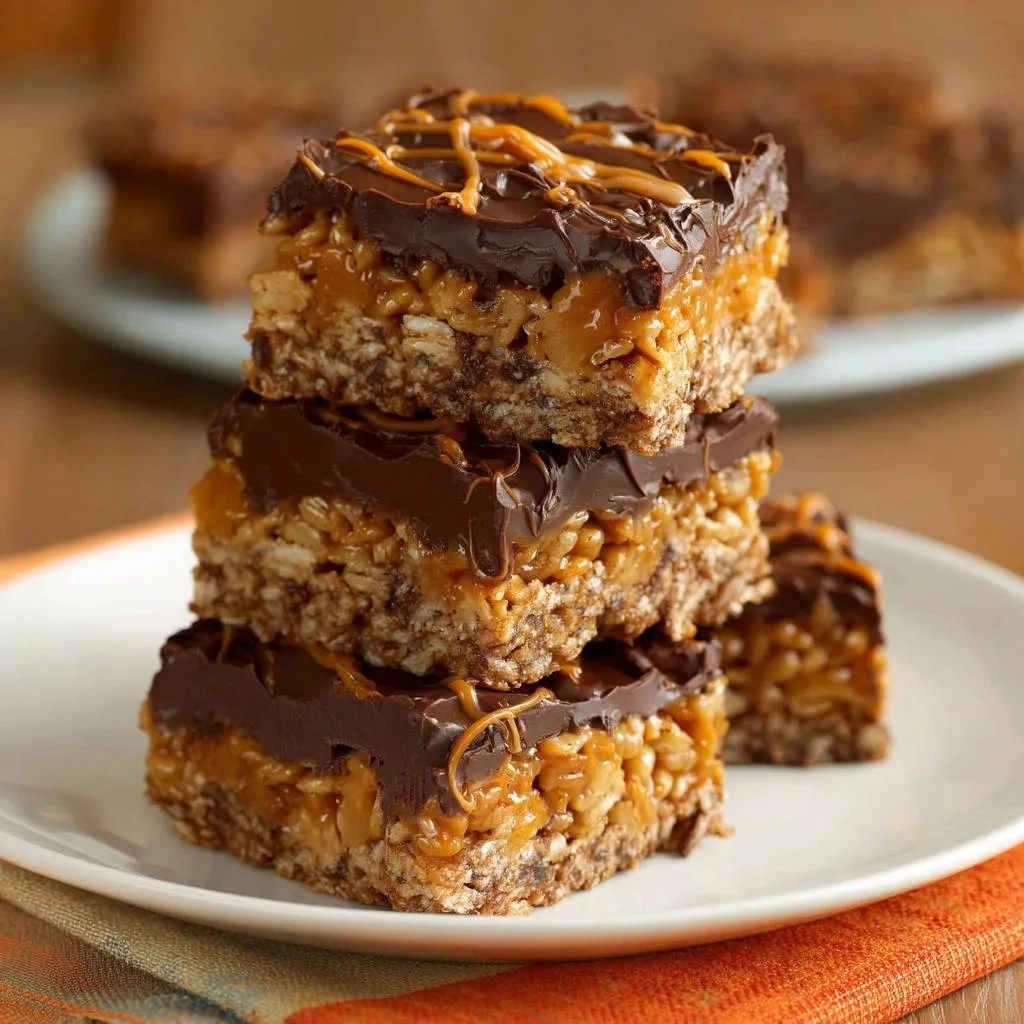
I still remember the frustration of meticulously layering what I thought would be perfect Caramel Chocolate Crispy Bars, only for them to crumble, stick, or smudge into a messy heap when I tried to slice them. It felt like a betrayal after all that effort! But through countless experiments, I unlocked a few simple secrets that guarantee truly bakery-perfect, neatly cut Caramel Chocolate Crispy Bars every single time.
This recipe isn’t just about combining delicious flavors; it’s about smart techniques that ensure stunning, clean squares, making these no-bake bars a showstopper that’s effortlessly impressive and simple to serve.
The Secret to Showstopping Caramel Chocolate Crispy Bars (No More Mess!)
This isn’t just another no-bake dessert recipe; it’s a guide to absolute success. We tackle the common frustrations of sticky, crumbly bars head-on with foolproof methods.
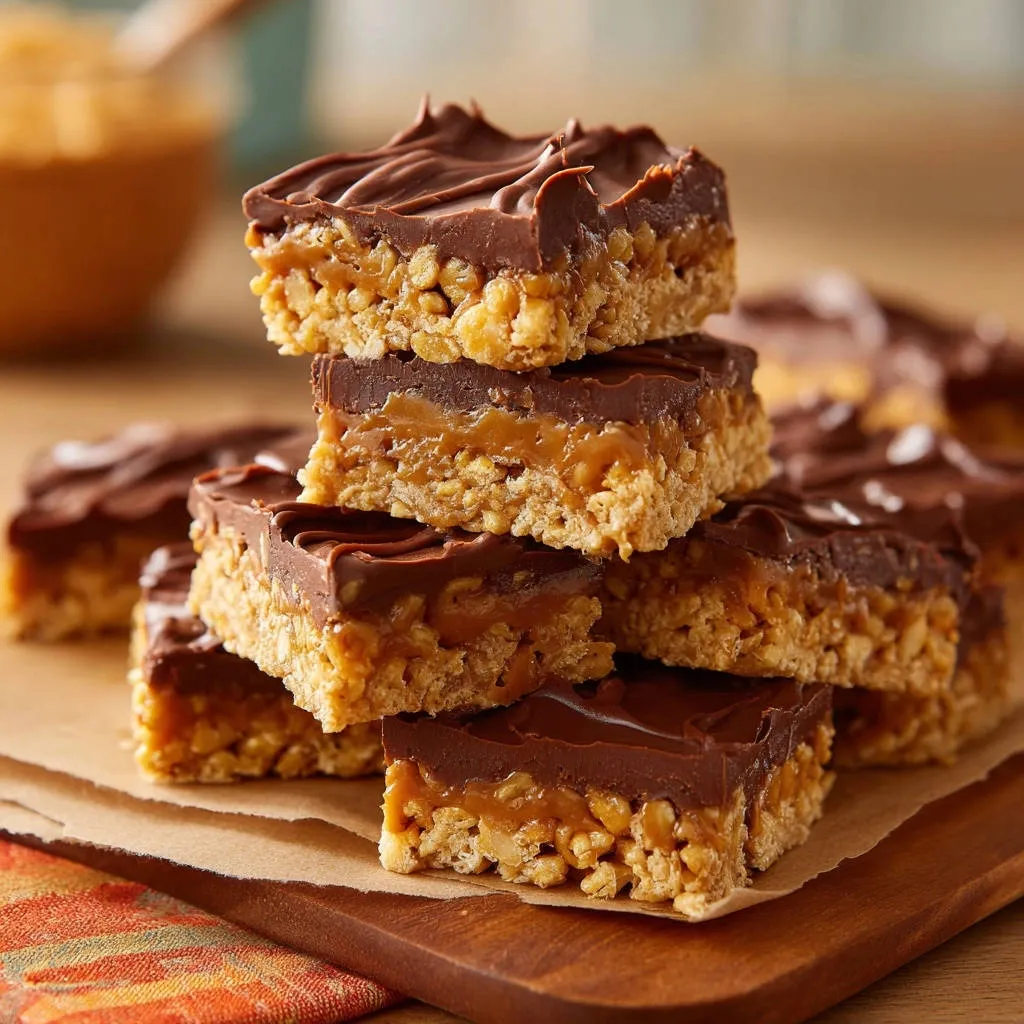
You’ll achieve distinct, beautiful layers that won’t fall apart. The unique combination of steps ensures each bite offers the perfect balance of crispy, chewy, and rich chocolatey goodness, all while looking professional.
Gather Your Indulgent Ingredients for Caramel Chocolate Crispy Bars
Quality ingredients are the foundation of any great dessert. Here’s what you’ll need for these irresistible layered bar recipe:
- 6 cups crispy rice cereal
- 1/4 cup unsalted butter, plus more for greasing
- 1 (10 ounce) bag mini marshmallows
- 1 (11 ounce) bag soft caramel candies, unwrapped
- 2 tablespoons heavy cream, divided
- 1 cup semi-sweet chocolate chips
- 1 teaspoon coconut oil (optional, for smoother chocolate)
The Crispy Foundation: Cereal & Marshmallows
Crispy rice cereal forms the essential crunchy base. Choose a fresh box for maximum crispness, as stale cereal can lead to a less appealing texture.
Mini marshmallows are preferred for their quicker, more even melting. They act as the perfect binder, creating that classic chewy-crispy texture without becoming too hard.
That Silky, Golden Caramel Layer
Soft caramel candies are key here, providing that rich, gooey layer that defines a true chocolate caramel dessert. Avoid hard caramels, as they won’t melt into the desired smooth consistency.
Heavy cream is crucial for transforming the melted caramels into a luxuriously smooth, pourable sauce. It prevents the caramel from becoming overly stiff or sticky, ensuring an even layer.
Rich Chocolate Topping & Optional Coconut Oil
Semi-sweet chocolate chips offer a balanced sweetness that complements the rich caramel. High-quality chips will melt more smoothly and provide a better flavor.
Coconut oil is an optional but highly recommended addition. Just a small amount helps the chocolate melt into a silky, glossy topping that spreads beautifully and sets with a satisfying snap, preventing any dull or streaky finishes.
Beyond the Basics: Essential Pantry Staples
Unsalted butter is used in the crispy base. Using unsalted butter allows you to control the overall saltiness of your bars, ensuring the perfect sweet-salty balance.
Your Kitchen Arsenal for Perfect Caramel Chocolate Crispy Bars
Having the right tools makes all the difference, especially when aiming for those clean, bakery-style treats.
9×13 Inch Baking Pan: A standard size that ensures proper thickness for your layered bars. Always grease it well!
Parchment Paper with Overhang: This is your first secret weapon! It acts as a “sling” to easily lift the entire slab of bars from the pan, making cutting effortless and mess-free.
Large Microwave-Safe Bowls: Essential for melting the butter, marshmallows, caramels, and chocolate efficiently and safely.
Offset Spatula or Back of a Spoon: Ideal for evenly spreading the caramel and chocolate layers right to the edges, creating a polished finish.
Sharp Knife: A good, sharp knife is fundamental for clean cuts. Using one that’s well-maintained will prevent dragging and tearing.
Cutting Board: Provides a stable, clean surface for lifting and slicing your chilled bars with precision.
Step-by-Step Perfection: Crafting Your Caramel Chocolate Crispy Bars
-
Preparing for Success: The Pan & Parchment Sling
Begin by lightly greasing your 9×13 inch baking pan. This initial layer of butter ensures nothing sticks, even with the parchment. Then, line the pan with parchment paper, making sure to leave a generous overhang on all sides; this creates your “parchment sling,” which is a game-changer for effortlessly lifting the entire batch later. Don’t forget to lightly grease the parchment paper itself for extra insurance against sticking.
-
Building the Sturdy Crispy Base
In a large, microwave-safe bowl, melt the 1/4 cup of unsalted butter completely. Add the mini marshmallows and microwave for 1 to 2 minutes, stirring halfway through, until they are fully melted and smooth. Stir in the crispy rice cereal until every piece is thoroughly coated in the marshmallow mixture, creating a cohesive and flavorful base.
-
Pressing Power: Creating a Firm Foundation
Immediately transfer the warm crispy mixture to your prepared pan. To ensure a perfectly flat and stable foundation, use a piece of greased parchment paper or lightly buttered hands to press the mixture down very firmly and evenly into the pan. This tight compaction is absolutely crucial for creating neat layers and preventing your Caramel Chocolate Crispy Bars from crumbling when cut.
-
Melting the Luxurious Caramel Layer
In another microwave-safe bowl, combine the unwrapped soft caramel candies with 1 tablespoon of heavy cream. Microwave in short 30-second intervals, stirring thoroughly after each, until the caramels are completely melted and smooth. This process usually takes about 2 to 3 minutes total; be patient and stir well to avoid scorching.
-
Layering & First Chill for Separation
Carefully pour the silky melted caramel evenly over the pressed crispy rice base. Using an offset spatula or the back of a spoon, gently spread the caramel all the way to the edges of the pan, creating a uniform layer. Place the pan in the refrigerator for at least 30 minutes; this critical chilling step allows the caramel to firm up completely, making it easier to achieve clean separation between layers when slicing.
-
The Smooth Chocolate Grand Finale
In a clean microwave-safe bowl, combine the semi-sweet chocolate chips and the optional coconut oil. Microwave in 30-second intervals, stirring well after each, until the chocolate is fully melted and smooth, typically taking 1 to 1.5 minutes. The coconut oil helps achieve a beautifully glossy and easy-to-spread consistency.
-
Spreading the Decadent Topping
Pour the melted chocolate evenly over the thoroughly chilled caramel layer. Work quickly but carefully to spread it across the entire surface using your offset spatula, ensuring full coverage and a polished top layer for your easy dessert bars.
-
Optional Caramel Drizzle & Swirl
For an extra touch of elegance and flavor, melt a few extra caramel candies with a tiny splash (about 1 teaspoon) of heavy cream until smooth. Drizzle this melted caramel artfully over the still-wet chocolate layer. For a decorative swirl, gently drag a toothpick through the drizzled caramel before it sets.
-
The Ultimate Chill: Setting for Perfect Cuts
Return the pan to the refrigerator for at least 1 to 2 hours, or until the chocolate layer is completely firm and set. This extended chill time is the ultimate secret for achieving those flawless, non-sticky cuts without any smudging or cracking, defining your Caramel Chocolate Crispy Bars as truly bakery-worthy.
-
The Hot Knife Method: Precision Slicing
Once fully chilled and firm, use the parchment paper overhang to gently lift the entire slab of bars out of the pan and onto a clean cutting board. To achieve crisp, precise slices, heat a sharp knife under hot running water, then wipe it completely dry. Slice the bars into your desired squares or rectangles, reheating and wiping the knife as needed between each cut; this hot knife technique truly makes all the difference for clean, professional-looking slices.
Unlock the Secrets: Pro Tips for Flawless Caramel Chocolate Crispy Bars
Master the Parchment Paper Sling: The parchment paper with an overhang isn’t just for easy removal; it’s your best friend for achieving straight, even cuts. By lifting the entire slab, you get a stable surface to work on, minimizing breakage and ensuring every bar looks perfect.
The Power of Firm Pressing: Don’t be shy when pressing the crispy rice base! A tightly packed foundation prevents crumbling and creates a sturdy canvas for your decadent layers. This initial firmness is critical for the overall structural integrity of your no-bake bars.
Chill, Chill, Chill (It’s Non-Negotiable!): Both chilling steps are absolutely essential. The first chill sets the caramel for clean layering, and the final, extended chill ensures all layers are firm, preventing stickiness and smudging when you cut. Patience here is rewarded with perfection.
The Hot Knife Technique is Your Ally: This simple trick transforms messy cuts into clean, professional slices. Heating the knife slightly warms the chocolate and caramel just enough to glide through without dragging or cracking. Always wipe the knife clean and hot between each cut for consistently sharp edges.
Don’t Overcook Your Caramel: When melting the caramel, stick to short microwave bursts and stir diligently. Overcooking can make the caramel too hard and difficult to spread, or even cause it to seize. You’re aiming for a smooth, pourable consistency.
Mind Your Microwave Settings: For chocolate, use medium power and frequent stirring to prevent it from seizing or burning. If melting on the stovetop, a double boiler is always best to ensure gentle, even melting, which is particularly important for delicate chocolate.
Troubleshooting Common Crispy Bar Challenges
My Caramel Chocolate Crispy Bars are sticking to the pan.
Ensure you’ve greased both the pan and the parchment paper thoroughly, especially in the corners. The parchment paper sling is designed to lift the entire creation easily, so make sure it has sufficient overhang.
Additionally, allow for adequate chilling time. A well-chilled bar will naturally release more easily from the parchment.
My layers are falling apart or smudging when I cut them.
Insufficient chilling is the most common culprit here. Make sure your Caramel Chocolate Crispy Bars are completely firm, ideally chilled for 1-2 hours or even longer if your kitchen is warm.
The hot knife technique is also your best defense against smudging. A warm, clean knife cuts through layers cleanly rather than dragging them.
The chocolate topping seized up when melting.
Chocolate can seize if exposed to even a tiny amount of water or if overheated. Always use completely dry bowls and utensils. When microwaving, use short intervals and stir frequently to avoid scorching.
If your chocolate starts to seize, sometimes stirring in an extra teaspoon of coconut oil or a neutral oil can help smooth it out, but prevention is key.
My caramel layer is too hard or overly chewy.
This usually indicates the caramel was slightly overcooked during the melting process. Make sure to only melt until just smooth, using the specified amount of heavy cream. Adding a bit more cream (1/2 to 1 teaspoon) to the melting caramel can help maintain its chewiness.
Serving, Storing, and Enjoying Your Crispy Bar Creation
Presentation Perfect: How to Serve Caramel Chocolate Crispy Bars
These Caramel Chocolate Crispy Bars are stunning on their own, but you can elevate their presentation further. Arrange them on a platter with a dusting of flaky sea salt or a few sprinkles of chopped nuts for added texture and visual appeal.
They make excellent additions to dessert platters for parties, bake sales, or holiday gatherings, showcasing their beautiful layers.
Keeping Them Fresh: Optimal Storage Solutions
Store your Caramel Chocolate Crispy Bars in an airtight container at room temperature for up to 3-4 days, especially if your home is cool. For a firmer texture and extended freshness, they can be stored in the refrigerator for up to a week.
Ensure they are kept away from direct sunlight or heat to prevent the chocolate from melting and the bars from becoming sticky.
Make-Ahead Magic: Prepare for Any Occasion
These bars are fantastic for making ahead! They need ample chilling time anyway, so preparing them a day or two in advance is ideal for entertaining or busy schedules. Simply cut them when fully chilled, then store as directed.
For longer storage, freeze the uncut slab or individual bars tightly wrapped in plastic wrap and then foil for up to 2-3 months. Thaw in the refrigerator overnight before serving.
Frequently Asked Questions About Caramel Chocolate Crispy Bars
Can I use different types of chocolate for the topping?
Absolutely! While semi-sweet provides a classic balance, feel free to experiment. Milk chocolate will make a sweeter bar, while dark chocolate will offer a richer, more intense flavor. White chocolate chips could also create a lovely contrast, just ensure to melt carefully.
What if I don’t have a microwave for melting?
No problem! You can melt the butter, marshmallows, caramel, and chocolate using a double boiler on the stovetop. Place the ingredients in a heat-safe bowl set over a saucepan of simmering water, stirring until smooth. This method offers gentle, controlled melting.
Can I make these Caramel Chocolate Crispy Bars gluten-free?
Yes, simply ensure you use a certified gluten-free crispy rice cereal. Most other ingredients like marshmallows, caramel candies, chocolate chips, and butter are naturally gluten-free, but always double-check labels to be certain.
How long do Caramel Chocolate Crispy Bars last, and can they be frozen?
When stored in an airtight container at room temperature, they last about 3-4 days. Refrigerated, they’ll stay fresh for up to a week. Yes, they freeze beautifully! Wrap individual bars or the entire slab tightly in plastic wrap, then foil, and freeze for up to 2-3 months. Thaw in the refrigerator or at room temperature.
Ready to Impress? Share Your Caramel Chocolate Crispy Bars Masterpiece!
You now have all the insider knowledge to create truly stunning Caramel Chocolate Crispy Bars that will earn you rave reviews. Say goodbye to sticky, messy dessert bars and hello to perfectly proportioned, delightfully layered treats!
Don’t stop here – if you love no-bake delights, you might also enjoy my recipe for No-Bake Peanut Caramel Bars or even these incredible Amazing No-Bake Peanut Butter Bars That Never Fall Apart. Get in the kitchen, create some magic, and share your beautiful creations with us!
Caramel Chocolate Crispy Bars
Course: DessertCuisine: American CuisineDifficulty: easy4
24 bars30
minutes10
minutes180
minutesAmerican Cuisine
Ingredients
6 cups crispy rice cereal
1/4 cup unsalted butter, plus more for greasing
1 (10 ounce) bag mini marshmallows
1 (11 ounce) bag soft caramel candies, unwrapped
2 tablespoons heavy cream, divided
1 cup semi-sweet chocolate chips
1 teaspoon coconut oil (optional, for smoother chocolate)
Directions
- Prepare your pan: Lightly grease a 9×13 inch baking pan. This is crucial for easy removal. Line the pan with parchment paper, leaving an overhang on all sides. This parchment “sling” is your first secret weapon for perfectly cut bars. Lightly grease the parchment paper as well.
- Make the crispy base: In a large microwave-safe bowl, melt 1/4 cup butter. Add marshmallows and microwave for 1 to 2 minutes, stirring halfway through, until melted and smooth. Add the crispy rice cereal and stir until fully coated.
- Press the base: Transfer the crispy mixture to the prepared pan. Using a piece of greased parchment paper or your lightly buttered hands, press the mixture down very firmly and evenly into the pan. This tight base is key for neat layers and stability. Let it cool slightly while you prepare the caramel.
- Create the caramel layer: In a microwave-safe bowl, combine the unwrapped caramel candies and 1 tablespoon of heavy cream. Microwave in 30-second intervals, stirring well after each, until the caramels are completely melted and smooth. This typically takes 2 to 3 minutes total.
- Layer the caramel: Pour the melted caramel evenly over the crispy rice base. Using an offset spatula or the back of a spoon, gently spread it all the way to the edges. Chill the pan in the refrigerator for at least 30 minutes to allow the caramel to firm up completely. This chilling step is vital for clean separation of layers when cutting.
- Add the chocolate top: In another microwave-safe bowl, combine the semi-sweet chocolate chips and coconut oil (if using). Microwave in 30-second intervals, stirring well after each, until the chocolate is fully melted and smooth. This usually takes 1 to 1.5 minutes.
- Spread the chocolate: Pour the melted chocolate over the chilled caramel layer, spreading it evenly to cover the entire surface.
- Drizzle with caramel (optional): If you want a caramel drizzle, melt a few extra caramel candies with a tiny splash of cream (about 1 teaspoon) until smooth. Drizzle over the chocolate layer while it’s still wet, then use a toothpick to swirl if desired.
- Final chill: Return the pan to the refrigerator and chill for at least 1 to 2 hours, or until the chocolate is completely firm and set. This extended chill time is the ultimate secret for those perfect, non-sticky cuts.
- Cut the bars: Once completely chilled and firm, use the parchment paper overhang to lift the entire slab of bars out of the pan and onto a cutting board. Heat a sharp knife by running it under hot water, then wipe it dry. Slice the bars into desired squares or rectangles, reheating and wiping the knife as needed between cuts. This hot knife technique makes all the difference for clean, precise slices without cracking or sticking!
Notes
- Key to neat cuts: use parchment paper, chill thoroughly, and heat your knife before slicing.