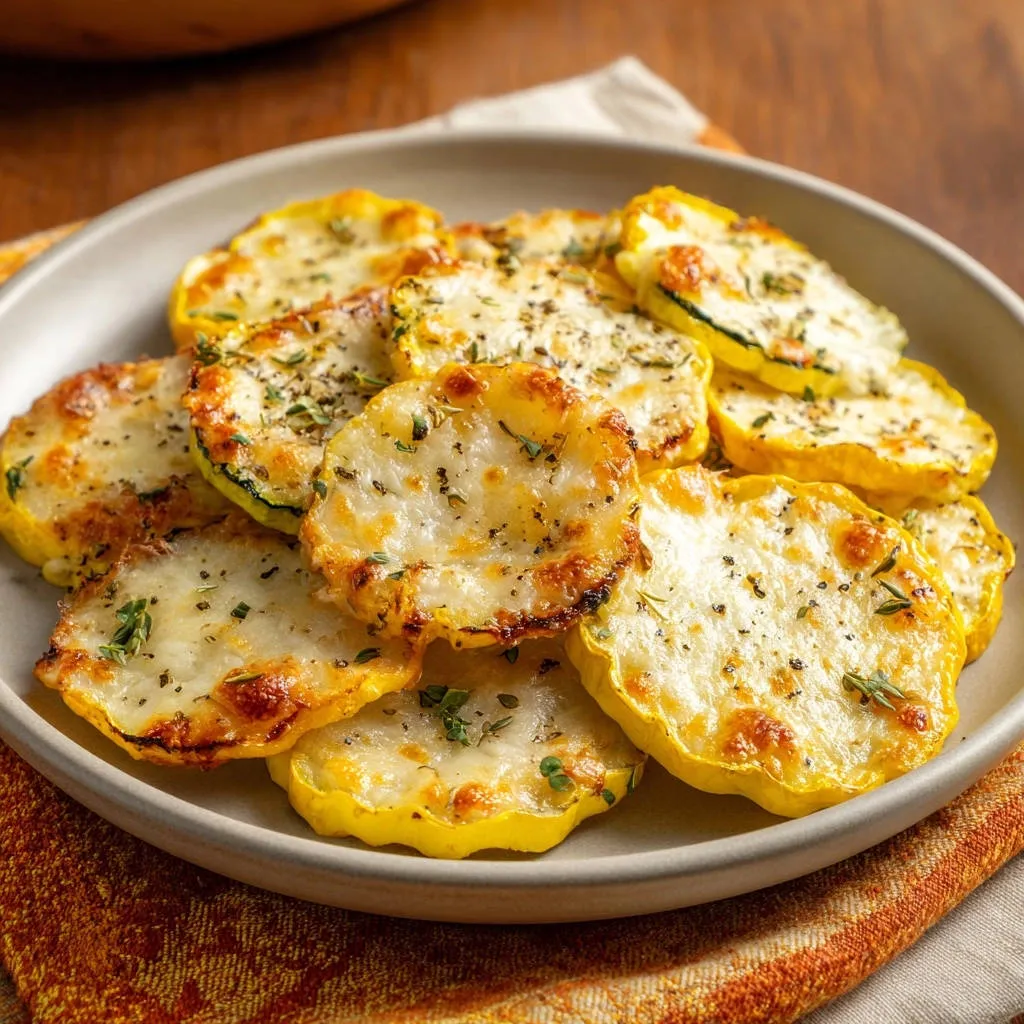
Dread baking squash only to find a watery, sad mess on your plate? I’ve been there countless times! But after years in the kitchen, I’ve cracked the code to perfectly tender, never-soggy Cheesy Herb Baked Squash, complete with a golden, bubbling cheese crust. This simple moisture-removal trick truly changes everything for your side dish game.
The Secret to Perfectly Tender Cheesy Herb Baked Squash (No More Soggy Sides!)
This recipe isn’t just another side dish; it’s a revelation for anyone who loves squash but despises its watery tendencies. We tackle the common problem head-on, delivering a flavorful experience every time.
Banish Watery Squash for Good: Our Unique Moisture-Removal Method
The biggest challenge with baked squash is excess moisture. Our secret involves an initial salting and thorough drying process that actively draws out water before baking, guaranteeing a firm, tender texture instead of a soggy one.
This critical step ensures your Cheesy Herb Baked Squash roasts beautifully, concentrating its natural sweetness and allowing the herbs and cheese to truly shine.
Flavorful & Fuss-Free: Why This Cheesy Herb Baked Squash Shines
Beyond its perfect texture, this dish stands out for its incredible flavor. Simple ingredients combine to create a savory profile, complemented by aromatic dried thyme and a generous layer of golden, bubbling mozzarella cheese.
It’s remarkably easy to prepare, relying on straightforward techniques that yield restaurant-quality results without the fuss.
The Perfect Side Dish for Any Occasion (and Any Cook!)
Whether you’re a seasoned chef or a kitchen novice, this Cheesy Herb Baked Squash recipe is incredibly forgiving and consistently delicious. Its comforting flavors make it an ideal accompaniment for weeknight dinners or festive holiday meals.
It appeals to nearly everyone, making it a reliable crowd-pleaser that fits seamlessly into various menus.
Gathering Your Arsenal: Essential Ingredients for Cheesy Herb Baked Squash
High-quality ingredients are the foundation of any great dish. Here’s what you’ll need and how to choose them for the best Cheesy Herb Baked Squash.
The Star of the Show: Selecting Your Yellow Squash
Look for firm, unblemished yellow squash with vibrant skin. Avoid any that feel soft or have dark spots.
Medium-sized squash are best for even slicing and baking. Aim for pieces about 1/4-inch thick for optimal tenderness and browning.
Cheese Please! Choosing Your Mozzarella for the Perfect Melt
Low-moisture part-skim mozzarella is ideal here; it melts beautifully and doesn’t release too much water, which can contribute to sogginess.
While pre-shredded works, shredding your own from a block often provides a creamier melt and avoids anti-caking agents found in some packaged varieties.
Aromatic Herbs and Seasonings: Thyme and Beyond
Dried thyme adds an earthy, savory depth that perfectly complements the squash and cheese. Fresh thyme can also be used for garnish.
Don’t underestimate the power of salt and black pepper; they enhance all the other flavors. Consider a pinch of dried oregano or rosemary for a nuanced herbal twist.
Oils and Salts: The Unsung Heroes of Texture and Flavor
Olive oil is essential for roasting, providing a rich flavor and helping the squash achieve those desirable golden edges.
The initial salt application is crucial for drawing out moisture. This extra salt, rinsed off later, ensures your squash is perfectly seasoned without being overly salty.
Gearing Up: Must-Have Tools for Cheesy Herb Baked Squash Perfection
Having the right tools makes all the difference in preparing this delectable dish efficiently and effectively.
Draining & Drying Essentials: Your Key to Non-Soggy Squash
A colander is indispensable for the initial salting step, allowing excess moisture to drain away.
Clean kitchen towels or a stack of paper towels are vital for thoroughly patting the squash dry. This step cannot be skipped for the best results.
Baking Sheet and Oven Considerations
A large, sturdy baking sheet is essential to spread the squash in a single layer. Non-stick sheets or parchment paper will ensure easy release.
Preheating your oven correctly ensures consistent baking and allows the squash to roast rather than steam, leading to crisper edges.
Basic Mixing Bowls and Utensils
You’ll need a large mixing bowl for tossing the squash with oil and seasonings. Tongs or a spatula are helpful for flipping the squash during baking.
Your Path to Golden Goodness: A Step-by-Step Guide to Cheesy Herb Baked Squash
Follow these detailed steps to achieve perfectly tender and flavorful Cheesy Herb Baked Squash every time.
- Preheat Your Oven:
Set your oven to 400°F (200°C) and allow it to preheat fully. A hot oven is crucial for achieving crisp edges on your Cheesy Herb Baked Squash.
- The Critical Moisture-Drawing Step:
Arrange the sliced squash in a colander. Sprinkle generously with about 1/2 teaspoon of extra salt. Let it rest for 20 to 30 minutes; this process actively draws out excess water, preventing a watery final dish.
- Thorough Drying is Key:
After resting, gently press down on the squash in the colander to release more liquid. Then, transfer the slices to a clean kitchen towel or several layers of paper towels and thoroughly pat them dry on both sides. This is the game-changer for non-soggy Cheesy Herb Baked Squash, removing surface moisture.
- Season and Toss:
In a large bowl, combine the thoroughly dried squash slices with olive oil, 1/2 teaspoon salt, and 1/4 teaspoon black pepper. Toss gently until every slice is evenly coated, ensuring maximum flavor penetrates each piece.
- Arrange for Optimal Roasting:
Spread the seasoned squash in a single layer on a large baking sheet. Crucially, ensure the slices do not overlap; this allows them to roast evenly and prevents steaming, further combating sogginess. Use two baking sheets if necessary for proper spacing.
- First Bake for Tenderness:
Bake for 15 minutes, then carefully flip each squash slice. Return to the oven and bake for another 5-7 minutes, until the squash is slightly tender and starts to show light golden edges.
- Add the Cheesy Herb Topping:
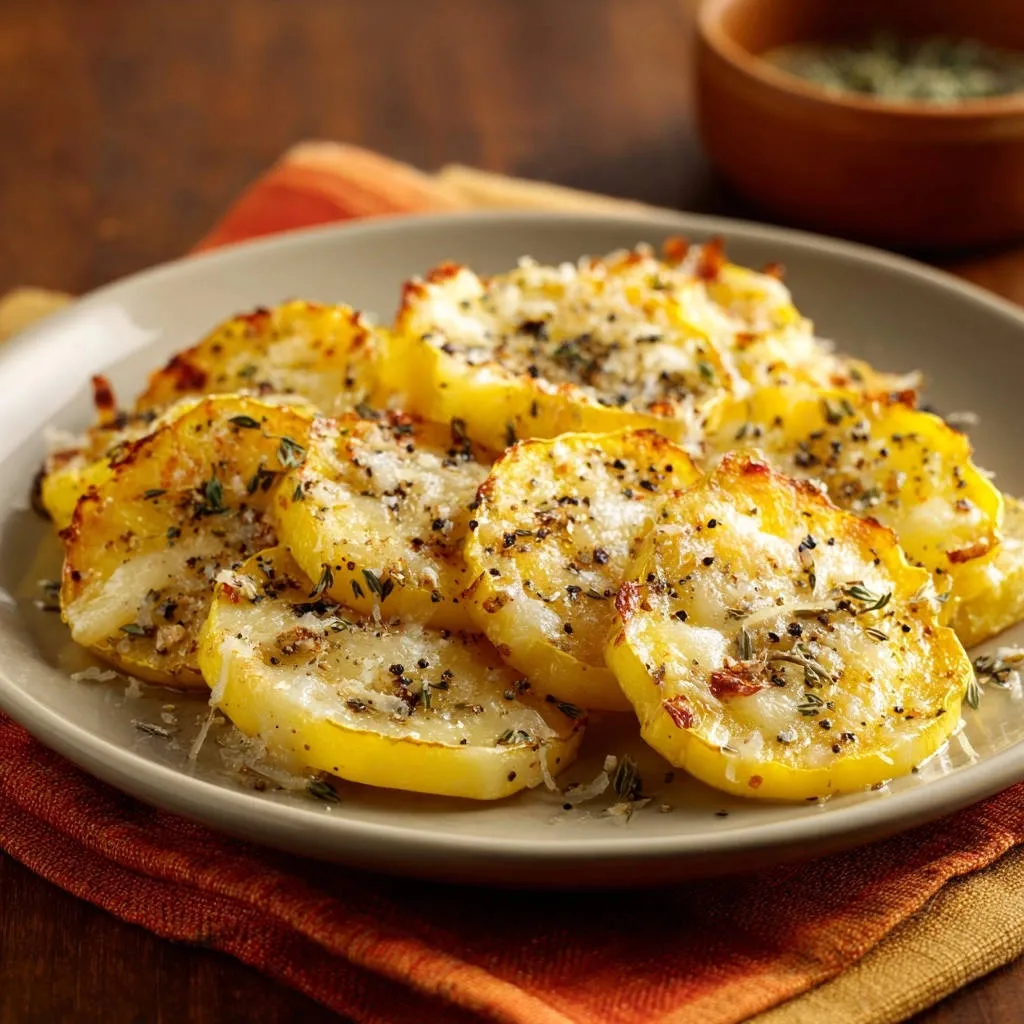
Remove the baking sheet from the oven. Evenly sprinkle the shredded mozzarella cheese over all the squash slices, followed by the dried thyme. This prepares your Cheesy Herb Baked Squash for its delicious golden crust.
- Final Bake for Golden Melt:
Return the baking sheet to the oven and bake for another 5-7 minutes, or until the cheese is beautifully melted, bubbly, and lightly golden brown. Keep a close eye on it to prevent over-browning and ensure perfect cheesy goodness.
- Garnish and Serve Immediately:
If desired, garnish your freshly baked Cheesy Herb Baked Squash with fresh thyme for an extra touch of aroma and presentation. Serve hot and enjoy this perfectly savory side dish!
Mastering Your Bake: Expert Tips & Common Pitfalls for Cheesy Herb Baked Squash
Even with a foolproof recipe, a few expert insights can elevate your dish and help you avoid common mistakes.
The Moisture-Removal Magic: Why It’s Non-Negotiable for Perfect Squash
Salting and thoroughly drying the squash slices is the single most important step. This process draws out cellular water, preventing it from leaching out during baking and turning your dish into a watery mess.
Skipping this will result in steamed, not roasted, squash, leaving it bland and soggy. Embrace the pat-dry! It’s the secret to truly tender and flavorful baked yellow squash.
Achieving Even Browning: Single Layer, Every Time
Crowding your baking sheet is the enemy of crispy, golden vegetables. When squash slices overlap, they steam each other instead of roasting.
Ensure every piece of Cheesy Herb Baked Squash has enough space to allow air to circulate. Use two baking sheets if necessary to guarantee even browning and a superior texture.
Customizing Your Herbs and Spices
While dried thyme is classic, feel free to experiment. A blend of Italian herbs, a pinch of dried oregano, or finely chopped fresh rosemary would also be delicious.
For a subtle kick, add a tiny pinch of red pepper flakes to the seasoning mix, creating a delightful contrast with the rich cheese.
When is it Done? Visual Cues for Perfection
The squash is perfectly cooked when it’s fork-tender but still holds its shape, with light golden edges. The cheese should be fully melted, bubbly, and a beautiful golden-brown on top.
Don’t rely solely on the timer; ovens vary. Trust your eyes for that ideal golden cheesy squash.
“My Squash is Still Watery!” – Troubleshooting Tips
This usually means the moisture-removal step wasn’t sufficient. Ensure you used enough salt and allowed ample resting time.
Additionally, make sure you pressed down firmly to release liquid and thoroughly patted the squash dry. Overcrowding the baking sheet can also contribute to unwanted moisture.
“The Cheese Isn’t Golden Enough (Or It Burned!)” – Oven Watch Advice
Oven hot spots or inaccurate temperatures are often culprits. Check your oven with an external thermometer if unsure.
For golden cheese, position your baking sheet on the upper-middle rack. If it’s browning too quickly, move it down a rack; if not browning enough, a quick minute under the broiler can help, but watch it very closely to prevent burning.
“My Squash is Mushy/Too Firm” – Texture Control
Mushy squash typically results from slicing the rounds too thin or over-baking. Aim for a consistent 1/4-inch thickness.
If your squash is too firm, it likely needs more time in the oven. Ensure your oven temperature is accurate and give it an extra 2-3 minutes, checking frequently for tenderness.
Elevate Your Meal: Serving & Pairing Your Cheesy Herb Baked Squash
This versatile side dish shines on its own but also complements a wide array of main courses and can be creatively repurposed.
Classic Pairings for a Weeknight Dinner
Our Cheesy Herb Baked Squash is the perfect companion for simple proteins. Serve it alongside a perfectly roasted chicken, pan-seared fish, or a juicy pork tenderloin for a balanced and satisfying meal.
It also pairs beautifully with a hearty beef dish, like our Lemon Herb Roast Chicken or a comforting pot roast.
Creative Ways to Enjoy Leftovers
Leftover roasted squash with cheese can be surprisingly versatile. Chop it roughly and stir it into a frittata or omelet for a delicious breakfast or brunch.
Add it cold to a grain bowl or a mixed green salad for extra flavor and nutrients. You can even blend it into a creamy vegetable soup for a savory boost.
Garnishing for Impact: Beyond Fresh Thyme
For an extra layer of flavor and texture, consider a sprinkle of grated Parmesan cheese right before serving. A drizzle of high-quality balsamic glaze adds a tangy counterpoint.
Crispy toasted breadcrumbs can provide a satisfying crunch, while a tiny sprinkle of chopped parsley or chives adds a fresh burst of color and flavor to your savory squash side.
Plan Ahead: Storing and Reheating Your Cheesy Herb Baked Squash
Practical tips for maximizing the freshness and deliciousness of your baked squash, even after it’s been cooked.
Can You Prep Cheesy Herb Baked Squash in Advance?
Absolutely! You can slice and salt the squash, then pat it dry, several hours before baking. Store the dried slices in an airtight container in the refrigerator.
However, it’s best to toss with oil, season, and bake the squash just before you plan to serve it for optimal texture and flavor.
Proper Storage for Maximum Freshness
Store any leftover Cheesy Herb Baked Squash in an airtight container in the refrigerator for up to 3-4 days. Allow it to cool completely before storing to prevent condensation.
Best Ways to Reheat Without Losing Texture
To maintain the best texture, reheat leftover squash in the oven or air fryer at 350°F (175°C) for 10-15 minutes, or until warmed through and the cheese is re-crisped.
While the microwave can heat it, it may result in a softer, less desirable texture. Avoid it if possible to keep those golden edges intact.
Your Burning Questions Answered: Cheesy Herb Baked Squash FAQs
Can I use other types of squash for this recipe?
Yes! This technique works wonderfully with other firm squash varieties. Zucchini is an excellent substitute, requiring similar slicing and drying steps. Acorn or butternut squash would also work, though they might need slightly longer baking times and may be harder to slice into thin rounds.
For other fantastic vegetable ideas, consider our Cheesy Vegetable Bake, which uses similar principles for delicious results.
What if I don’t have fresh thyme, or want to use other herbs?
Dried thyme is perfectly suitable for this recipe, using a 1:1 ratio. If you’re out, dried oregano or an Italian herb blend can be used as a substitute, offering a slightly different but equally delicious flavor profile.
For fresh herb alternatives, finely chopped rosemary or chives are excellent choices to sprinkle on at the end.
Can I make this Cheesy Herb Baked Squash dairy-free or vegan?
Yes, you can! Simply substitute the mozzarella cheese with your favorite brand of dairy-free shredded mozzarella. Many plant-based cheese alternatives melt quite well, ensuring you still get that bubbly, golden topping.
Is this recipe suitable for meal prep?
This recipe is decent for meal prep. While it’s best served fresh for peak texture, leftovers hold up well in the refrigerator and can be reheated. The initial moisture-removal and baking help prevent it from becoming overly soggy later.
How can I make this Cheesy Herb Baked Squash spicier?
To add a touch of heat, sprinkle a pinch of red pepper flakes into the olive oil and seasoning mix before tossing the squash. A dash of your favorite hot sauce or a tiny amount of cayenne pepper can also be mixed in for a spicier kick.
Ready to Transform Your Side Dish? Try This Cheesy Herb Baked Squash!
You’ve now uncovered the secrets to perfectly tender, never-watery Cheesy Herb Baked Squash. No more dreading soggy squash – only golden, cheesy perfection awaits!
We encourage you to try this game-changing recipe and experience the difference for yourself. Share your creations with us on social media using #CheesyHerbBakedSquash and let us know your favorite ways to serve it!
For more delicious and foolproof vegetable side dishes, explore our collection of easy side dish recipes.

Cheesy Herb Baked Squash
Course: Side DishCuisine: American CuisineDifficulty: easy4
servings45
minutes25
minutes70
minutesAmerican Cuisine
Ingredients
2 medium yellow squash, sliced into 1/4-inch rounds
2 tablespoons olive oil
1/2 teaspoon salt, plus more for draining
1/4 teaspoon black pepper
1 cup shredded mozzarella cheese
1 teaspoon dried thyme, plus more for garnish (optional)
Directions
- Preheat your oven to 400°F (200°C).
- Place the sliced squash in a colander. Sprinkle generously with about 1/2 teaspoon of extra salt. Let the squash sit for 20 to 30 minutes to draw out excess moisture.
- This is the key step to prevent watery squash: After resting, gently press down on the squash in the colander to release more liquid. Then, transfer the squash slices to a clean kitchen towel or several layers of paper towels and thoroughly pat them dry on both sides. This removes the surface moisture that can make baked squash soggy.
- In a large bowl, toss the dried squash slices with the olive oil, 1/2 teaspoon salt, and 1/4 teaspoon black pepper until evenly coated.
- Arrange the squash in a single layer on a large baking sheet. Ensure the slices are not overlapping; this allows them to roast rather than steam, further preventing sogginess. If needed, use two baking sheets.
- Bake for 15 minutes, then flip the squash slices and bake for another 5-7 minutes, until they are slightly tender and have light golden edges.
- Remove the baking sheet from the oven. Sprinkle the shredded mozzarella cheese evenly over the squash slices, followed by the dried thyme.
- Return to the oven and bake for another 5-7 minutes, or until the cheese is melted, bubbly, and lightly golden brown.
- Garnish with fresh thyme if desired and serve immediately.
Notes
- The key to non-watery squash is thoroughly draining and patting dry to remove excess moisture.