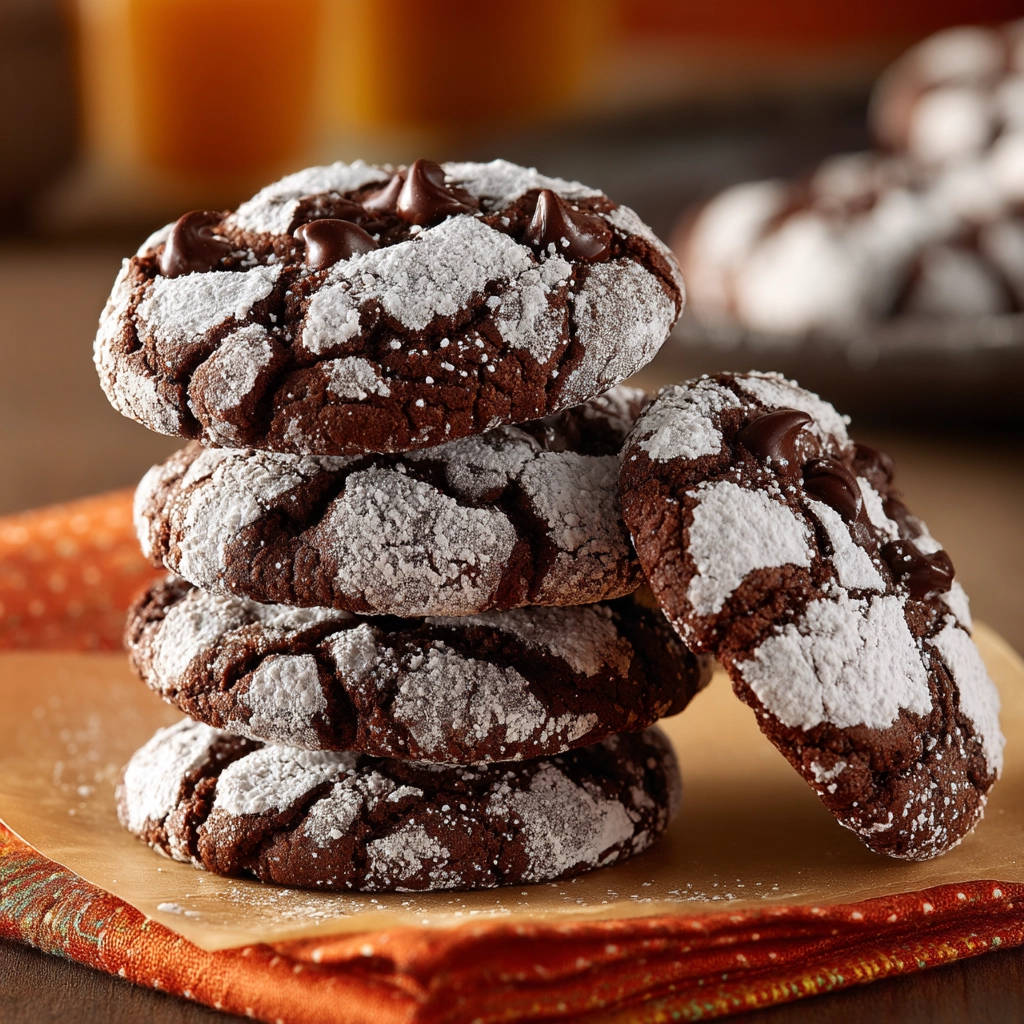
There’s something truly magical about Chocolate Crinkle Cookies. That stunning contrast between the deep, dark chocolate cookie and the snowy white powdered sugar, with all those beautiful cracks running through the surface. They look like edible winter landscapes or miniature volcanic eruptions! But let’s be honest, achieving those perfect cracks and ensuring the centers stay wonderfully chewy can feel like a baker’s mystery sometimes.
If you’ve ever baked a batch that turned out dry or lacked that dramatic crackle, you’re not alone. I’ve certainly had my share of disappointing attempts in the past. Over the years, through trial and error, I’ve discovered the key techniques that make all the difference. This recipe for Chocolate Crinkle Cookies is the result – consistently yielding gorgeously cracked, deeply chocolatey, and delightfully chewy cookies every single time. Get ready to bake a batch that will impress everyone!
Why You’ll Love These Chocolate Crinkle Cookies
These aren’t just any cookies; they are the quintessential crinkle cookie experience. Here’s why they’re destined to become your go-to:
- Guaranteed Cracks: We use a double-roll method in powdered sugar that practically guarantees those beautiful, defining crinkles.
- Perfectly Chewy Centers: The combination of oil and a specific baking time ensures a soft, fudgy interior that contrasts perfectly with the slightly crisp exterior.
- Rich Chocolate Flavor: Using a good amount of unsweetened cocoa powder delivers a deep, intense chocolate taste that isn’t overly sweet.
- Simple Ingredients: You likely have most, if not all, of these pantry staples on hand right now.
- Holiday Favorite: Their festive, snow-dusted appearance makes them a must-bake for cookie platters, parties, and gifting during the holiday season.
Gathering Your Ingredients for Chocolate Crinkle Cookies
Creating that signature crinkle cookie magic starts with understanding the role each ingredient plays. This recipe relies on a simple yet effective blend to achieve that desirable fudgy texture and striking appearance.
The base of our cookie dough is built on the interaction of fats and sugars. We use vegetable oil rather than solid butter, which contributes significantly to the chewy texture of the finished cookie. Paired with granulated sugar, this forms the initial wet mixture that creates the sweetness and helps the cookies spread just right in the oven. Vanilla extract is our flavor enhancer, adding a warm depth that complements the chocolate.
Eggs bind everything together and add richness, while the dry ingredients provide structure and lift. All-purpose flour gives the cookie its main body. Unsweetened cocoa powder is crucial for that deep, dark chocolate color and flavor – the quality of your cocoa can really shine through here. Baking powder provides the necessary leavening to help the cookies rise and, importantly, contributes to the expansion that causes the sugar coating to crack. A touch of salt balances the sweetness and enhances the chocolate notes.
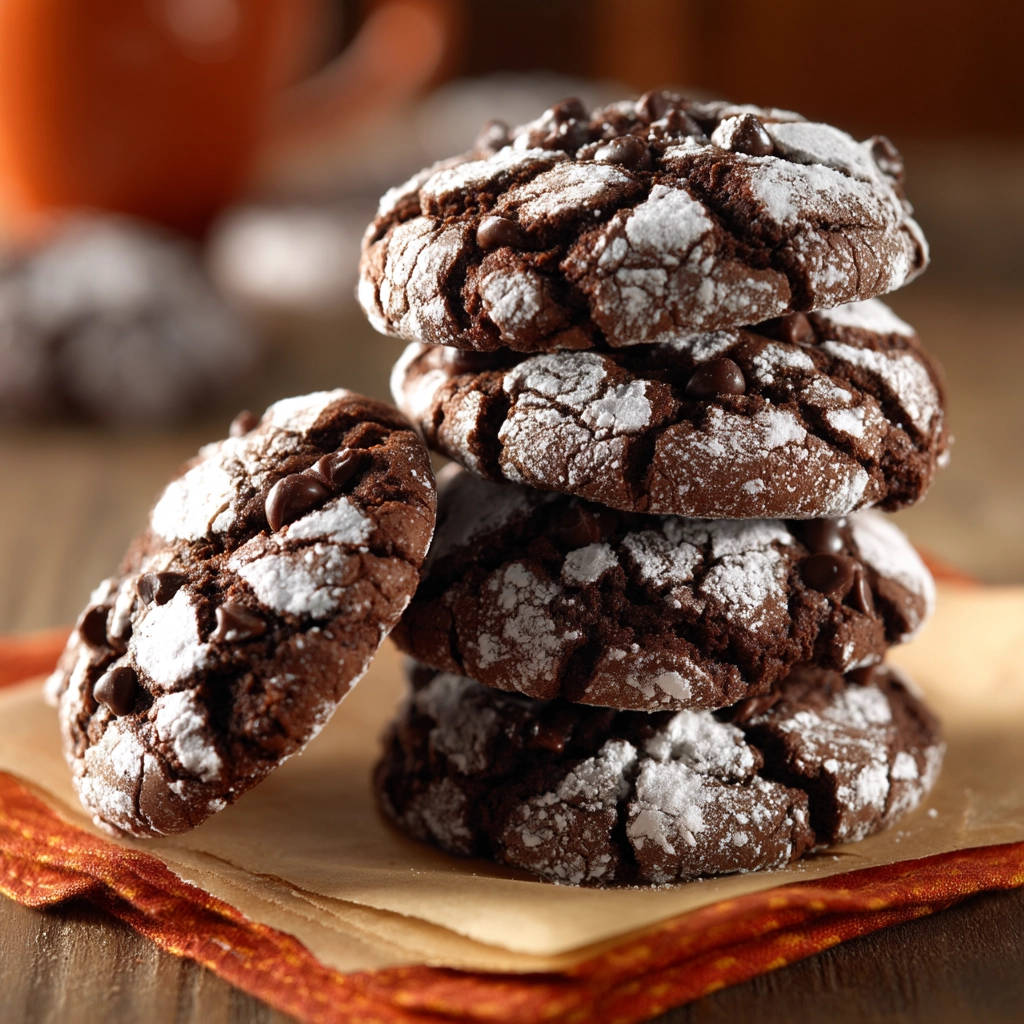
Finally, the stars of the show for the appearance are the sugars used for rolling. Confectioners’ (powdered) sugar creates that iconic white coating and is essential for the cracking effect. We’ll talk more about the technique for using it shortly! Optionally, you might add chocolate chips into the tops before baking for an extra burst of melty chocolate.
Here’s a simple list of what you’ll need:
- 1/2 cup vegetable oil
- 1 1/2 cups granulated sugar
- 2 teaspoons vanilla extract
- 2 large eggs
- 2 cups all-purpose flour
- 3/4 cup unsweetened cocoa powder
- 2 teaspoons baking powder
- 1/2 teaspoon salt
- 1 cup confectioners’ (powdered) sugar, for rolling
- 1/2 cup chocolate chips (optional)
Crafting Your Chocolate Crinkle Cookies: Step-by-Step
Making these cookies is straightforward, but paying attention to a few key details, especially the chilling and the rolling in sugar, will ensure picture-perfect results. Follow these steps for chewy, cracked cookie success:
- Begin by preparing your wet ingredients. In a large mixing bowl, measure out the vegetable oil, granulated sugar, and vanilla extract. Whisk these together thoroughly. Combining them well at this stage ensures that the sugar begins to dissolve slightly and the flavors are evenly distributed. Once that’s smooth, beat in the large eggs one at a time, mixing until each egg is fully incorporated and the mixture takes on a glossy, smooth texture. Don’t rush this part; it’s building the foundation of your dough.
- In a separate, medium-sized bowl, combine all of your dry ingredients: the all-purpose flour, unsweetened cocoa powder, baking powder, and salt. Give these a good whisk to ensure the leavening agent, salt, and cocoa are evenly distributed throughout the flour. This prevents pockets of leavener or salt in your cookies. Now, gradually add this dry mixture to your wet ingredients. Mix on low speed or with a spatula until the dry ingredients are just incorporated. Stop mixing as soon as you no longer see streaks of dry flour. Overmixing can develop the gluten too much, resulting in tougher cookies. The dough will be quite soft, sticky, and wet-looking at this point – this is exactly what you want for that fudgy texture later on.
- This next step is absolutely crucial for achieving the right texture and, more importantly, the beautiful cracks: chilling the dough. Cover the bowl tightly with plastic wrap, pressing the wrap directly onto the surface of the dough to prevent a skin from forming. Transfer the bowl to the refrigerator and chill for at least 4 hours. Ideally, chill it until it is firm enough to easily handle and roll into balls without sticking excessively to your hands. Chilling solidifies the fat (oil, even though liquid at room temp, thickens in the cold) and makes the dough much easier to work with. It also helps the cookies hold their shape initially in the oven, contributing to the cracking effect.
- Once your dough is sufficiently chilled, it’s time to get ready for baking. Preheat your oven to 350 degrees F (175 degrees C). This moderate temperature allows the cookies to bake through evenly without drying out. Line your baking sheets with parchment paper. Parchment paper prevents sticking, makes cleanup a breeze, and helps the bottoms of your cookies bake evenly without scorching.
- Set up your rolling station. Pour the confectioners’ (powdered) sugar into a shallow bowl – a cereal bowl or a pie plate works well. Retrieve the chilled dough from the refrigerator. Scoop rounded teaspoons or small balls of dough. Aim for a size of about 1 inch in diameter for consistent baking time and cookie size. A small cookie scoop can be very helpful here for uniformity.
- Now for the signature step! You have an option here: you can roll each dough ball in granulated sugar first for extra sweetness and texture, though this isn’t traditionally shown in the classic look and wasn’t the focus in the original recipe description you provided. For the classic cracked look that defines Chocolate Crinkle Cookies, proceed straight to the powdered sugar. This is where the magic happens. Roll each ball generously in the confectioners’ sugar. You want a thick, opaque coating that completely covers the dough. Don’t be shy with the sugar! Here’s the pro tip for guaranteed, prominent cracks that don’t melt away into the cookie surface: once the ball is well coated, roll it again in the powdered sugar right before you place it on the baking sheet. This double layer of sugar is key to getting those deep, beautiful fissures as the cookie bakes and spreads.
- Arrange the sugar-coated dough balls on your prepared baking sheets. Leave about 2 inches of space between each ball to allow for spreading during baking. If you’re adding optional chocolate chips as a topping, gently press a few into the top of each dough ball at this stage. They’ll melt slightly and look lovely once baked.
- Place the baking sheets in the preheated oven. Bake for 9 to 12 minutes. Keep a close eye on them. The cookies are done when the edges look set and slightly firm, but the centers still appear a little soft and puffy. This slightly underbaked center is what gives them their wonderfully chewy texture. Pulling them out even a minute too late can result in a drier cookie, so err on the side of caution if you’re unsure. They will continue to set up as they cool.
- Once they come out of the oven, leave the cookies on the hot baking sheets for a few minutes. This allows them to finish baking slightly from the residual heat and firm up enough to be moved without breaking. As they sit, and then later as they cool completely, the dough will continue to spread slightly, and the thick powdered sugar coating will crack, creating those iconic crinkles. After a few minutes on the sheet, carefully transfer the cookies to a wire rack to cool completely. Resist the urge to stack them until they are fully cooled to prevent the sugar coating from getting messy.
Tips for Perfect Chocolate Crinkle Cookies Every Time
You’ve got the basic steps down, but a few extra tips can elevate your crinkle cookie game from great to absolutely perfect:
- Measure Your Flour Correctly: Using too much flour is a common cause of dry cookies. Fluff your flour with a fork, then gently spoon it into your measuring cup and level off the excess with a straight edge. Don’t scoop directly from the bag, which can compact the flour.
- Don’t Skip the Chill Time: Seriously, that minimum of 4 hours in the fridge is non-negotiable for proper handling and cracking. If the dough is too warm and sticky, the powdered sugar will just dissolve and won’t create the dramatic contrast and cracks you’re looking for.
- Be Generous with Powdered Sugar: I mentioned it in the steps, but it bears repeating! Roll those balls heavily. You want a thick, visible layer. The double roll right before baking is a technique that truly works wonders for pronounced cracks. If you roll them ahead of time, the sugar can absorb into the dough. A second dip ensures a fresh, thick coating.
- Monitor Baking Time Closely: Ovens vary, so use the suggested time range as a guide. Look for visual cues – set edges, slightly soft center. When in doubt, underbake slightly for maximum chewiness.
- Proper Storage: Store cooled cookies in an airtight container at room temperature. They stay fresh and chewy for several days. To keep the powdered sugar looking its best, you can add a piece of wax paper between layers if stacking, though often the sugar adheres quite well once set.
- Consider Cocoa Quality: While any unsweetened cocoa works, a high-quality cocoa powder can significantly impact the depth and richness of the chocolate flavor. Natural cocoa (like Hershey’s) and Dutch-process cocoa will behave slightly differently due to their acidity, but this recipe is designed for standard unsweetened cocoa. Using a good one just makes the flavor pop!
- Looking for other easy-to-bake chocolate treats? You might love our Molten Chocolate Lava Cake or our Silky Smooth Chocolate Mousse Recipe.
Serving Suggestions for Chocolate Crinkle Cookies
These rich, chewy Chocolate Crinkle Cookies are delightful on their own, but here are a few ways to enjoy them:
- Classic pairing: With a cold glass of milk or a warm mug of coffee or tea.
- Dessert platters: They look stunning on a holiday cookie tray alongside other favorites like Soft Sugar Cookie Bars or perhaps some festive shortbread like Cranberry Pistachio Shortbread.
- Simple dessert: Warm one up slightly and serve with a scoop of vanilla ice cream.
- Gifting: Stack them in festive tins or bags for a thoughtful homemade gift.
Your Chocolate Crinkle Cookies Questions Answered (FAQ)
Here are some common questions people have when baking Chocolate Crinkle Cookies:
Why aren’t my chocolate crinkle cookies cracking?
The most common culprits are insufficient chilling time or not enough powdered sugar coating (or both!). The dough needs to be firm when it goes into the oven. The thick layer of powdered sugar provides resistance as the cookie spreads, forcing the surface to crack. If the sugar layer is too thin or dissolves because the dough was too warm, you won’t get those defined crinkles. Try the double-roll method right before baking!
My cookies turned out dry. What went wrong?
Overbaking is the primary reason for dry cookies. Chocolate cookies can be tricky because you can’t easily see when they are golden brown. Rely on the time range and the visual cues: edges that look set, centers that are still slightly soft. Remember they will continue to firm up as they cool on the baking sheet.
Can I make the dough ahead of time?
Absolutely! The dough can be made up to 2-3 days in advance and stored, tightly covered, in the refrigerator. In fact, a longer chill time can sometimes enhance the flavors. Just ensure it’s well-chilled before rolling.
Can I freeze Chocolate Crinkle Cookies?
Yes, you can freeze both the dough and the baked cookies. To freeze dough, shape the balls, roll them in powdered sugar (maybe do the second roll just before baking), and place them on a baking sheet in the freezer until firm. Transfer the frozen balls to an airtight container or freezer bag. Bake from frozen, adding a minute or two to the bake time. Baked cookies can be frozen in an airtight container for up to 3 months. Thaw at room temperature.
What kind of cocoa powder should I use?
This recipe calls for unsweetened cocoa powder. Standard natural unsweetened cocoa (like Hershey’s or Ghirardelli) works perfectly. Dutch-process cocoa is less acidic and results in a darker, milder chocolate flavor, but may interact differently with the baking powder in some recipes. For this recipe, sticking to standard unsweetened cocoa will give you the intended result.
Why is chilling the dough so important for these cookies?
Chilling serves two main purposes. First, it makes the sticky dough firm and easy to handle, scoop, and roll in the sugar without turning into a sticky mess. Second, and most importantly for the crinkle effect, the cold dough holds its shape longer in the hot oven. As the cookie slowly warms and spreads, the outer layer of powdered sugar (which doesn’t melt as quickly as the dough spreads) is pulled apart, creating the cracks. Warm dough would spread too rapidly, and the sugar would absorb or melt without cracking.
Enjoy Your Homemade Chocolate Crinkle Cookies!
There you have it – the secrets to baking perfect Chocolate Crinkle Cookies with those beautiful cracks and irresistible chewy centers. This recipe is simple, reliable, and delivers on that classic chocolate cookie experience we all love. They’re wonderful for sharing, perfect for a cozy night in, or just because you need a rich, fudgy treat.
Give this recipe a try and let me know how your cookies turn out! Did you get spectacular cracks? Were the centers perfectly chewy? Share your experience in the comments below! Happy baking!
Chocolate Crinkle Cookies

Ingredients
- 1/2 cup vegetable oil
- 1 1/2 cups granulated sugar
- 2 teaspoons vanilla extract
- 2 large eggs
- 2 cups all-purpose flour
- 3/4 cup unsweetened cocoa powder
- 2 teaspoons baking powder
- 1/2 teaspoon salt
- 1 cup confectioners’ (powdered) sugar, for rolling
- 1/2 cup chocolate chips (optional, for topping as seen in image)
Directions
- In a large bowl, whisk together the vegetable oil, granulated sugar, and vanilla extract until well combined. Beat in the eggs one at a time until the mixture is smooth.
- In a separate bowl, whisk together the flour, cocoa powder, baking powder, and salt. Gradually add the dry ingredients to the wet ingredients, mixing until just combined. The dough will be soft and sticky.
- Cover the dough tightly with plastic wrap and refrigerate for at least 4 hours, or until firm enough to handle. Chilling is key for texture and handling.
- Preheat oven to 350 degrees F (175 degrees C). Line baking sheets with parchment paper.
- Place the confectioners’ sugar in a shallow bowl. Remove the chilled dough from the refrigerator. Scoop rounded teaspoons or small balls of dough (about 1 inch in diameter).
- Roll each dough ball first in the granulated sugar (if using, for extra sweetness and texture not shown in image, but common) or just proceed straight to the powdered sugar as seen in the image. This is the critical step for the cracks: Roll each ball generously in the confectioners’ sugar, ensuring it is completely coated thick layer. For best results guaranteeing visible cracks that don’t melt away, roll the ball again in the powdered sugar right before placing it on the baking sheet.
- Place the sugar-coated balls about 2 inches apart on the prepared baking sheets. Gently press a few chocolate chips into the top of each cookie dough ball if desired, as shown in the image.
- Bake for 9 to 12 minutes, or until the edges are set but the centers are still slightly soft. Do not overbake if you want chewy centers.
- Let cookies cool on the baking sheets for a few minutes before transferring to a wire rack to cool completely. As they bake, the dough will spread and the sugar coating will crack, creating the classic crinkle look.