Have you ever dreamed of biting into a homemade donut that’s impossibly light, airy, and utterly melt-in-your-mouth, rather than dense and heavy? I’ve been there, tirelessly perfecting the art of the fluffy donut. This recipe for Chocolate Peanut Butter Cup Stuffed Donuts is the culmination of that journey, promising bakery-quality results right in your kitchen.
It’s the secret to transforming humble ingredients into a truly unforgettable treat, guaranteed to impress every single time. Get ready to experience donut bliss that perfectly balances rich chocolate and creamy peanut butter.
The Secret to Undeniably Fluffy Stuffed Donuts (Beyond Basic!)
This recipe isn’t just about making donuts; it’s about mastering the art of the perfect texture combined with irresistible flavor. We’ll unveil the specific techniques and ingredient considerations that elevate these treats from good to truly exceptional.
Achieving That Melt-in-Your-Mouth Lightness
Our method prioritizes meticulous yeast activation and precise dough hydration, ensuring maximum rise and an incredibly soft crumb. Proper kneading develops the gluten just enough for structure without making the donuts tough.
Crucially, we emphasize two distinct proofing stages. These allow the dough ample time to develop flavor and achieve that signature airy, pillowy softness you crave in a truly great donut.
Irresistible Flavor Fusion: Chocolate & Peanut Butter Bliss
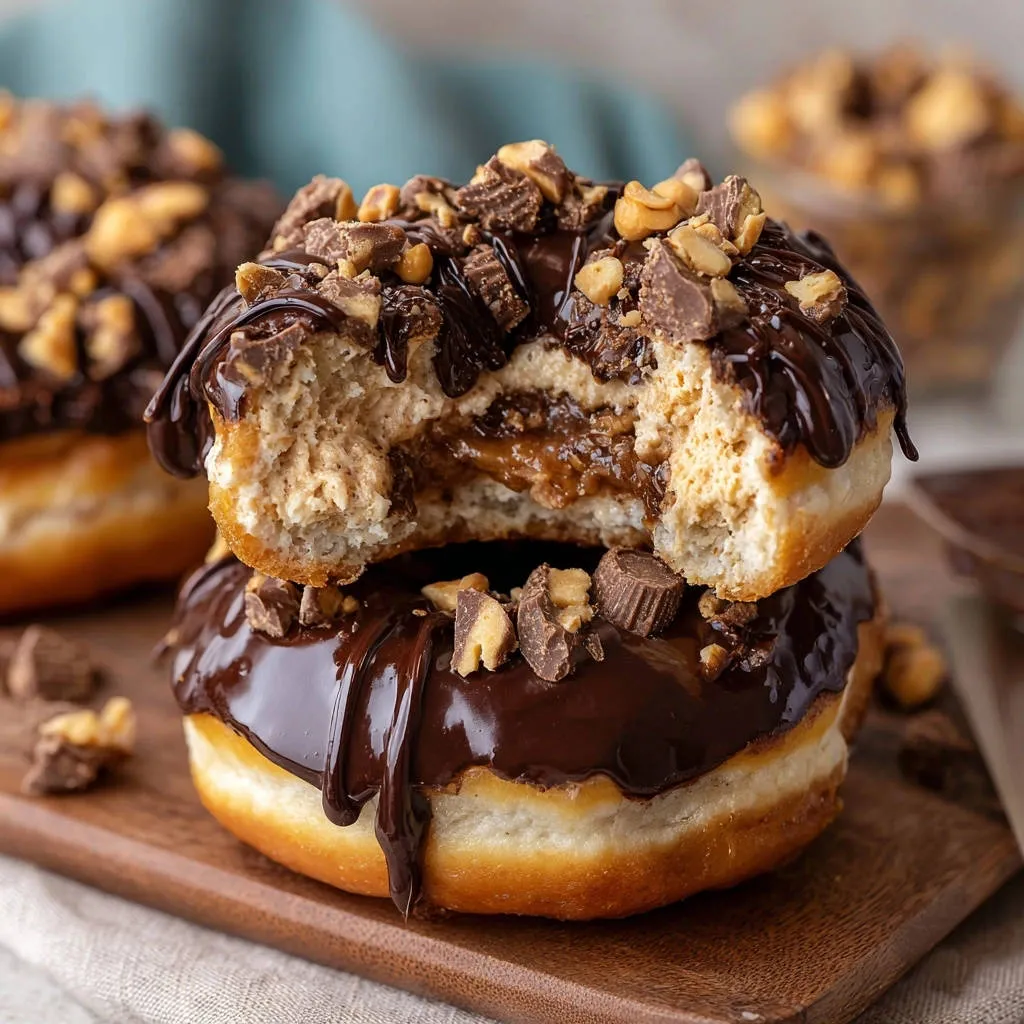
The timeless pairing of rich chocolate and creamy peanut butter is a classic for a reason. In these Chocolate Peanut Butter Cup Stuffed Donuts, the decadent filling is perfectly balanced by a glossy chocolate glaze and crunchy peanut butter cup topping.
Each bite offers a symphony of sweet and salty, smooth and slightly crisp textures. This careful layering of flavors ensures a truly indulgent experience without being overly sweet.
Homemade Doesn’t Mean Hard: Simplicity in Every Step
Despite their impressive appearance and gourmet taste, these Chocolate Peanut Butter Cup Stuffed Donuts are surprisingly approachable. We break down each step into clear, manageable actions.
With a little patience and attention to detail, even novice bakers can achieve stunning results. You’ll find the process rewarding and the outcome utterly delicious.
Gathering Your Delights: Essential Ingredients & Tools
Success begins with understanding your ingredients and having the right equipment. Here’s what you’ll need to create your incredible Chocolate Peanut Butter Cup Stuffed Donuts.
Pantry Staples for Your Perfect Donut Dough
For the ultimate fluffy base, warm milk activates the yeast, while sugar provides essential food for its growth. All-purpose flour forms the structure, balanced by a touch of salt for flavor depth.
A room temperature egg adds richness and helps with emulsification, creating a smoother dough. Melted and cooled unsalted butter contributes tenderness, while vanilla extract infuses a warm, inviting aroma.
Crafting the Dreamy Peanut Butter Filling & Chocolate Glaze
Creamy peanut butter forms the luscious, rich core of these stuffed donuts. Powdered sugar sweetens and thickens the filling, with milk or cream providing the perfect consistency for piping.
Semi-sweet chocolate chips and heavy cream melt into a glossy, decadent glaze. Chopped peanut butter cups and roasted peanuts add a delightful crunch and intensify the iconic flavor profile.
Beyond the Bowl: Essential Tools for Donut Success
Stand Mixer (or Strong Arm): Facilitates proper kneading for optimal gluten development, which is crucial for a tender, fluffy donut.
Kitchen Thermometer: Absolutely crucial for perfectly fried, non-greasy donuts by maintaining consistent oil temperature. Inconsistent temperatures lead to either burnt or greasy results.
Round Donut Cutter (or Glass): Ensures uniform donut shapes for even cooking and a professional appearance.
Piping Bag with Nozzle: Essential for neat and efficient filling of your Chocolate Peanut Butter Cup Stuffed Donuts, ensuring every bite is packed with creamy goodness.
Wire Rack: Allows excess oil to drip away after frying, preventing soggy donuts and promoting even cooling.
Your Journey to Donut Perfection: A Detailed Guide
Follow these steps closely to create your softest, most delicious Chocolate Peanut Butter Cup Stuffed Donuts yet.
- Activate the Yeast:
In a large bowl, combine 1 cup warm milk (about 105-115°F), 2¼ teaspoons active dry yeast, and 1 tablespoon of the granulated sugar. Let it sit for 5-10 minutes until foamy. This crucial step confirms your yeast is active, ensuring your donuts will rise beautifully.
- Form the Dough:
Add the remaining granulated sugar, 3½ cups all-purpose flour, 1 teaspoon salt, 1 large room temperature egg, ¼ cup melted and cooled unsalted butter, and 1 teaspoon vanilla extract to the yeast mixture. Mix with a spoon or a stand mixer with a dough hook until a shaggy dough forms, just barely coming together.
- Knead for Elasticity:
Turn the dough onto a lightly floured surface and knead for 8-10 minutes. If using a stand mixer, knead on medium-low speed for 6-8 minutes. Proper kneading develops the gluten, which is vital for the structure and signature fluffiness of your donuts, allowing them to stretch and expand as they rise.
- First Rise for Flavor:
Lightly grease a clean bowl. Place the dough in the bowl, turning to coat all sides, then cover with plastic wrap or a clean kitchen towel. Let it rise in a warm, draft-free place for 1 to 1.5 hours, or until doubled in size. This initial rise is key for developing deep flavor and starting the aeration process, giving your donuts their light texture.
- Prepare the Peanut Butter Filling:
While the dough rises, prepare the creamy filling. In a medium bowl, whisk together 1 cup creamy peanut butter, ½ cup powdered sugar, and ¼ teaspoon salt. Gradually add milk or cream, one tablespoon at a time, until the mixture is smooth and a thick, pipeable consistency is achieved. Set aside for later.
- Shape the Donuts:
Once the dough has doubled, gently punch it down to release the air. Turn it out onto a lightly floured surface. Gently roll the dough to about ½ inch thick. Using a 3-inch round cutter (or a glass), cut out donut shapes. You should get about 12-15 donuts. Gently re-roll any scraps once to cut more donuts, but avoid overworking the dough.
- The Crucial Second Rise (Proofing):
Carefully transfer the cut donuts to a baking sheet lined with parchment paper, ensuring ample space between each as they will rise again. Loosely cover the baking sheet with plastic wrap or a clean towel. Let the donuts rise again in a warm spot for another 30-45 minutes, or until visibly puffed and light. This crucial second rise is what guarantees a truly fluffy, airy donut, so do not rush this step!
- Set Up Your Frying Station:
While the donuts proof, prepare your frying station. In a large heavy-bottomed pot or Dutch oven, pour about 3-4 inches of vegetable oil. Heat the oil over medium heat to 350-375°F. Use a kitchen thermometer to monitor the temperature; maintaining the correct temperature is vital for fluffy, non-greasy donuts.
- Fry to Golden Perfection:
Once the oil is at temperature and the donuts have fully puffed, carefully lower 2-3 donuts into the hot oil. Do not overcrowd the pot, as this will drop the oil temperature and lead to greasy donuts. Fry for 1-2 minutes per side, until beautifully golden brown and cooked through.
- Drain and Cool:
Using a slotted spoon or spider, carefully remove the fried donuts and place them on a wire rack set over a baking sheet to drain any excess oil. Repeat with the remaining donuts. Allow them to cool completely before filling and glazing – patience here prevents a melty mess and ensures the glaze sets properly.
- Make the Chocolate Glaze:
To make the luscious chocolate glaze, combine 1 cup semi-sweet chocolate chips and ½ cup heavy cream in a microwave-safe bowl. Microwave in 30-second intervals, stirring after each, until smooth and glossy. Alternatively, melt over a double boiler for a silky finish.
- Fill and Glaze:
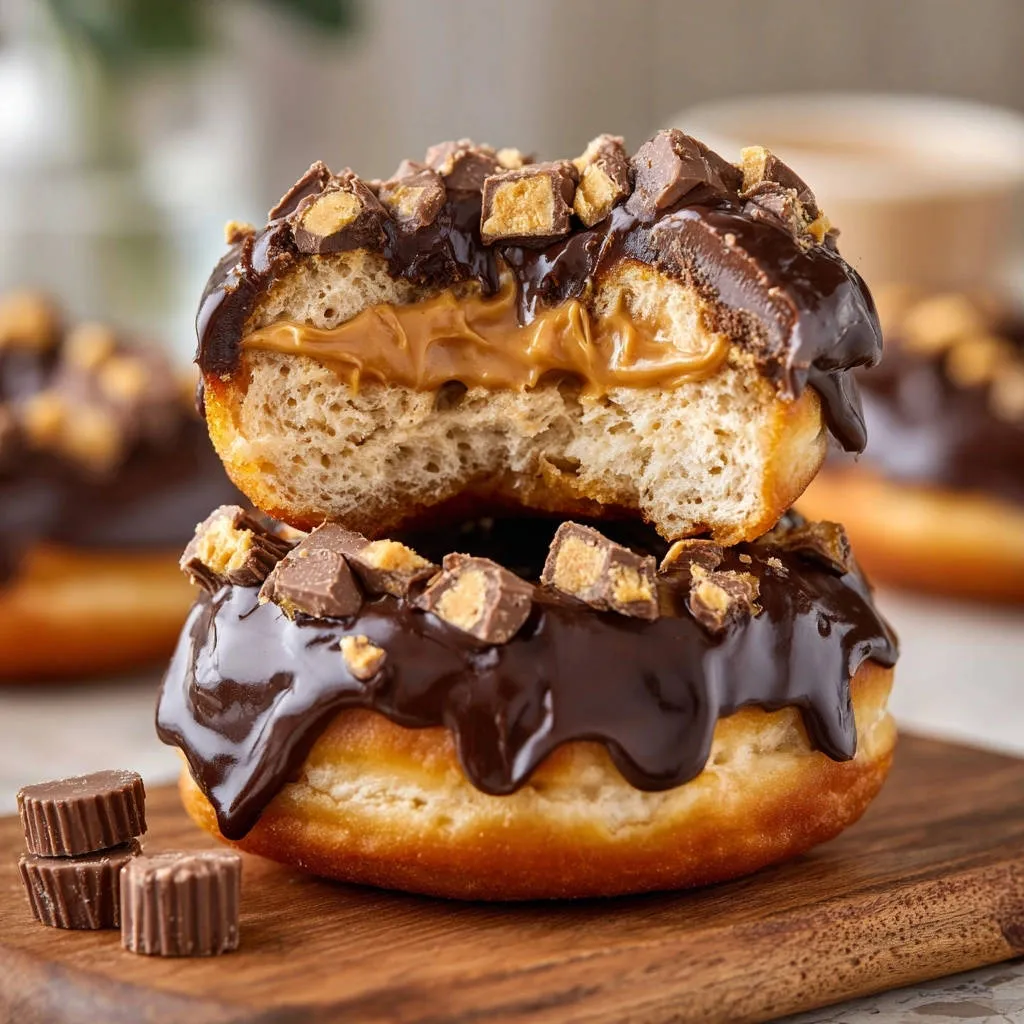
Once the donuts are completely cool, use a long, thin piping nozzle or a small knife to create a hole in the side of each donut. Fill a piping bag with the peanut butter filling and carefully pipe the filling into each donut until it feels adequately full.
Dip the top of each filled donut into the chocolate glaze, allowing excess to drip off. Immediately sprinkle with 1 cup chopped peanut butter cups and ¼ cup chopped roasted peanuts (optional). Serve immediately and enjoy the guaranteed fluffy perfection!
Chef’s Secrets: Elevate Your Chocolate Peanut Butter Cup Stuffed Donuts Game
Unlock even greater success with these expert tips, ensuring your homemade Chocolate Peanut Butter Cup Stuffed Donuts are consistently perfect.
Perfect Proofing Environment: For optimal rising, find a warm, draft-free spot. A slightly warmed (then turned off) oven can be an ideal, consistent environment for your dough, especially in cooler kitchens.
The Finger-Dent Test for Proofing: To check if your donuts are perfectly proofed for frying, gently poke one with a floured finger. If the indent slowly springs back halfway, it’s ready. If it springs back completely, it needs more time; if it collapses, it’s over-proofed and should be fried immediately to salvage.
Don’t Overcrowd the Fryer: Frying too many donuts at once will significantly drop the oil temperature, leading to greasy, dense donuts instead of light, fluffy ones. Fry in small batches, typically 2-3 at a time, to maintain consistent heat.
Temperature Matters for Filling & Glaze: Ensure donuts are completely cool before filling and glazing to prevent the chocolate from melting and the peanut butter from becoming runny. A cool donut provides a stable base for your delicious toppings.
Fresh Oil for Best Flavor: For the cleanest taste, use fresh vegetable oil for frying. Used oil can impart off-flavors to your delicate donuts.
Troubleshooting Your Donuts: Common Hurdles & Smart Solutions
Even experienced bakers encounter challenges. Here are solutions to common issues you might face when making Chocolate Peanut Butter Cup Stuffed Donuts.
Why Are My Donuts Dense or Heavy?
This is often due to inactive yeast, insufficient kneading, or rushing the proofing times. Ensure your yeast is foamy before proceeding, indicating it’s alive and active. Knead until the dough is smooth and elastic, allowing proper gluten development.
Most importantly, allow ample time for both the first and crucial second rises; under-proofed dough will always result in a dense texture. Cold ingredients can also hinder yeast activity, so ensure your egg is at room temperature and milk is adequately warm.
My Donuts Are Greasy. What Went Wrong?
Greasy donuts usually result from oil that’s too cool. If the oil isn’t hot enough, the donuts absorb too much oil instead of frying quickly. Ensure your frying oil maintains the correct temperature (350-375°F) using a reliable thermometer.
Additionally, don’t overcrowd the pot, which also causes the oil temperature to drop rapidly. Frying in small batches helps maintain consistent heat, leading to a perfectly crisp exterior and fluffy interior.
The Peanut Butter Filling is Too Runny or Stiff.
Adjust the consistency of your peanut butter filling as needed to achieve that perfect pipeable texture. If it’s too runny, add a bit more powdered sugar, a tablespoon at a time, until it thickens.
If the filling is too stiff, add milk or cream, a teaspoon at a time, mixing well after each addition until it reaches a smooth, workable consistency. The goal is a thick but easily pipeable texture that holds its shape inside the donut.
Your Top Questions About Chocolate Peanut Butter Cup Stuffed Donuts Answered
Can I prepare the donut dough ahead of time?
Yes, you can prepare the dough the night before. After the first rise, gently punch it down, cover it tightly with plastic wrap, and refrigerate overnight. On baking day, bring the dough to room temperature for about 30 minutes before proceeding with step 6 (shaping and the second rise).
How do I store leftover Chocolate Peanut Butter Cup Stuffed Donuts?
Store filled and glazed donuts in an airtight container at room temperature for up to 2-3 days. For the absolute best texture and freshness, they are truly best enjoyed within 24 hours of frying, when they are at their peak fluffiness.
Can I use different fillings or glazes?
Absolutely! While this recipe celebrates the classic chocolate peanut butter cup combo, feel free to get creative and customize. You can substitute the peanut butter filling with fruit jam, vanilla bean custard, or a simple vanilla cream. For the glaze, a plain powdered sugar glaze, a coffee glaze, or even a cream cheese glaze would also be delicious.
To discover more delightful donut variations and inspire your next baking adventure, be sure to explore our fluffy blueberry donuts recipe and other sweet treats.
Is it possible to bake these donuts instead of frying?
While this recipe is specifically optimized for frying to achieve that classic light, airy, and melt-in-your-mouth texture, you can bake them for a different result. Place proofed donuts on a baking sheet and bake at 375°F (190°C) for 10-12 minutes, or until golden.
However, note that baked donuts will have a more cake-like texture rather than the traditional fried donut’s signature fluffy chewiness. For general tips on mastering other light, leavened doughs, you might find our guide to easy fluffy biscuits helpful.
Serving & Enjoying Your Stuffed Donut Masterpiece
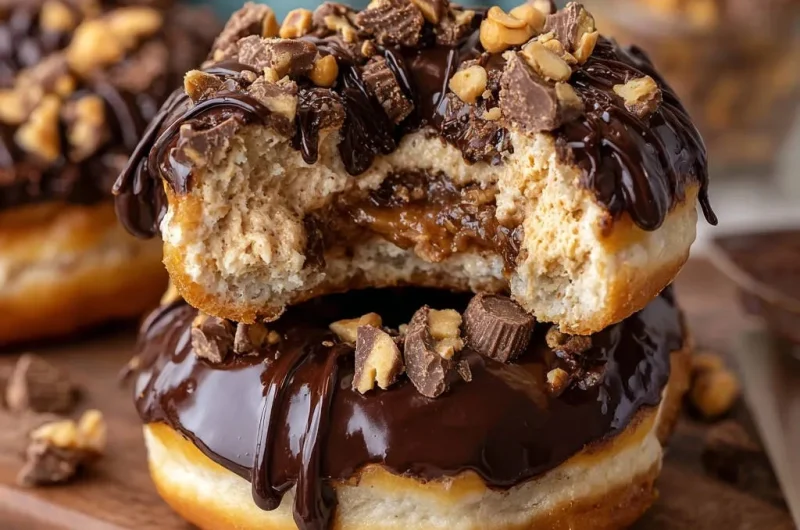
These Chocolate Peanut Butter Cup Stuffed Donuts are truly best served fresh and slightly warm, allowing the chocolate glaze to have a soft set and the creamy peanut butter filling to be perfectly luscious. Arrange them artfully on a platter for an impressive presentation that invites everyone to indulge.
They make an unforgettable dessert for special occasions, a delightful treat for weekend brunches, or simply a comforting indulgence with your morning coffee or a cold glass of milk. Pair them with a scoop of vanilla ice cream for an extra decadent experience.
Ready to Bake Your Best Batch Yet?
We hope this comprehensive guide empowers you to create the most incredible, fluffy, and utterly delicious Chocolate Peanut Butter Cup Stuffed Donuts you’ve ever tasted. Don’t be intimidated by homemade donuts; with these expert tips and precise techniques, bakery-quality success is truly within your reach.
We’d love to see your creations! Share your donut masterpieces with us on social media using #StuffedDonutPerfection, or drop a comment below with your experience and any unique twists you tried. Happy baking, and get ready for rave reviews from everyone who tries these irresistible treats!
Chocolate Peanut Butter Cup Stuffed Donuts
Course: DessertCuisine: American CuisineDifficulty: easy4
12-15 donuts1
hour30
minutes180
minutesAmerican Cuisine
Ingredients
For the Dough:
1 cup warm milk (about 105-115°F)
2 and 1/4 teaspoons active dry yeast (one packet)
1/4 cup granulated sugar
3 and 1/2 cups all-purpose flour, plus more for dusting
1 teaspoon salt
1 large egg, at room temperature
1/4 cup unsalted butter, melted and cooled
1 teaspoon vanilla extract
Vegetable oil, for frying
For the Peanut Butter Filling:
1 cup creamy peanut butter
1/2 cup powdered sugar
2 tablespoons milk or cream, as needed
1/4 teaspoon salt
For the Chocolate Glaze:
1 cup semi-sweet chocolate chips
1/2 cup heavy cream
For the Topping:
1 cup chopped peanut butter cups
1/4 cup chopped roasted peanuts (optional)
Directions
- In a large bowl, combine the warm milk, yeast, and 1 tablespoon of the granulated sugar. Let it sit for 5-10 minutes until foamy. This step is crucial for activating your yeast and ensures your donuts will rise properly.
- Add the remaining granulated sugar, flour, salt, egg, melted butter, and vanilla extract to the yeast mixture. Mix with a spoon or in a stand mixer with a dough hook until a shaggy dough forms.
- Turn the dough out onto a lightly floured surface and knead for 8-10 minutes until it’s smooth, elastic, and springs back when lightly pressed. If using a stand mixer, knead on medium-low speed for 6-8 minutes. Proper kneading develops the gluten that gives donuts their structure and fluffiness.
- Lightly grease a clean bowl. Place the dough in the bowl, turning to coat. Cover with plastic wrap or a clean kitchen towel and let it rise in a warm, draft-free place for 1 to 1 and a half hours, or until doubled in size. This first rise is key for flavor and initial aeration.
- While the dough rises, prepare the peanut butter filling. In a medium bowl, whisk together the peanut butter, powdered sugar, and salt. Gradually add milk or cream, one tablespoon at a time, until the mixture is smooth and a thick, pipeable consistency. Set aside.
- Once the dough has doubled, gently punch it down to release the air. Turn it out onto a lightly floured surface. Gently roll the dough to about 1/2 inch thick. Using a 3-inch round cutter (or a glass), cut out donut shapes. You should get about 12-15 donuts. Gently re-roll scraps once to cut more donuts.
- Carefully transfer the cut donuts to a baking sheet lined with parchment paper. Leave enough space between each donut as they will rise again. Loosely cover the baking sheet with plastic wrap or a clean towel. Let the donuts rise again in a warm spot for another 30-45 minutes, or until visibly puffed and light. This crucial second rise is what guarantees a truly fluffy, airy donut. Do not rush this step!
- While the donuts proof, prepare your frying station. In a large heavy-bottomed pot or Dutch oven, pour about 3-4 inches of vegetable oil. Heat the oil over medium heat to 350-375°F. Use a kitchen thermometer to monitor the temperature; maintaining the correct temperature is vital for fluffy, non-greasy donuts.
- Once the oil is at temperature and the donuts have fully puffed, carefully lower 2-3 donuts into the hot oil. Do not overcrowd the pot. Fry for 1-2 minutes per side, until golden brown.
- Using a slotted spoon or spider, carefully remove the fried donuts and place them on a wire rack set over a baking sheet to drain any excess oil. Repeat with the remaining donuts. Allow them to cool completely before filling and glazing.
- To make the chocolate glaze, combine the chocolate chips and heavy cream in a microwave-safe bowl. Microwave in 30-second intervals, stirring after each, until smooth and glossy. Alternatively, melt over a double boiler.
- Once the donuts are cool, use a long, thin piping nozzle or a small knife to create a hole in the side of each donut. Fill a piping bag with the peanut butter filling and carefully pipe the filling into each donut until it feels adequately full.
- Dip the top of each filled donut into the chocolate glaze, allowing excess to drip off. Immediately sprinkle with chopped peanut butter cups and chopped roasted peanuts. Serve immediately and enjoy the guaranteed fluffy perfection!
Notes
- For best results, use a kitchen thermometer to maintain precise oil temperature during frying.