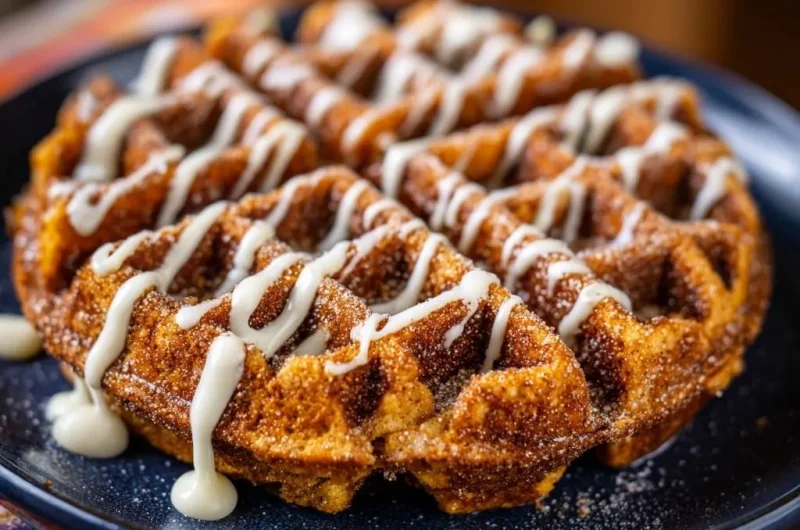
Imagine standing at a street corner in Madrid, the air thick with the scent of deep-fried dough and spicy cinnamon. You bite into a fresh churro, and the exterior shatters like glass before giving way to a cloud-like, tender center. Now, compare that to the sad, limp, rubbery waffles most of us pull out of a home iron on a Sunday morning. It’s a heartbreaking contrast, isn’t it?
The “Soggy Bottom” epidemic in home kitchens usually happens because we treat waffles like pancakes, but they’re actually closer to pastry. Most recipes fail because they trap steam inside the batter, turning your breakfast into a sponge the moment you pour on the syrup. We’re going to fix that today by engineering a waffle that stays shatteringly crisp, even under a heavy drizzle of glaze.
The secret to this structural integrity isn’t just the heat; it’s the science of the coating. By using a specific double-coating technique, we create a physical candy shell that acts as a moisture barrier. I’ve found that this method ensures every single square maintains its crunch from the first bite to the very last. Let’s get into how we turn a standard breakfast into a crispy masterpiece.
The Science of the Shatter-Crisp Waffle Exterior
To achieve that signature churro “snap,” we have to look at the chemistry of our dry ingredients. Standard all-purpose flour is great for structure, but it contains proteins that develop gluten, which can lead to a chewy or tough texture. By introducing cornstarch into the mix, we’re adding amylopectin. This starch inhibits gluten development, resulting in a brittle, delicate crust that crackles when you bite it.
We also have to fight the “Steam Trap” theory. When you stack hot waffles on a plate, you’re essentially creating a micro-sauna. The heat from the bottom waffle rises and gets trapped by the one above it, turning that beautiful crust into mush in seconds. Our method focuses on immediate evaporation to ensure the exterior hardens the moment it hits the air.
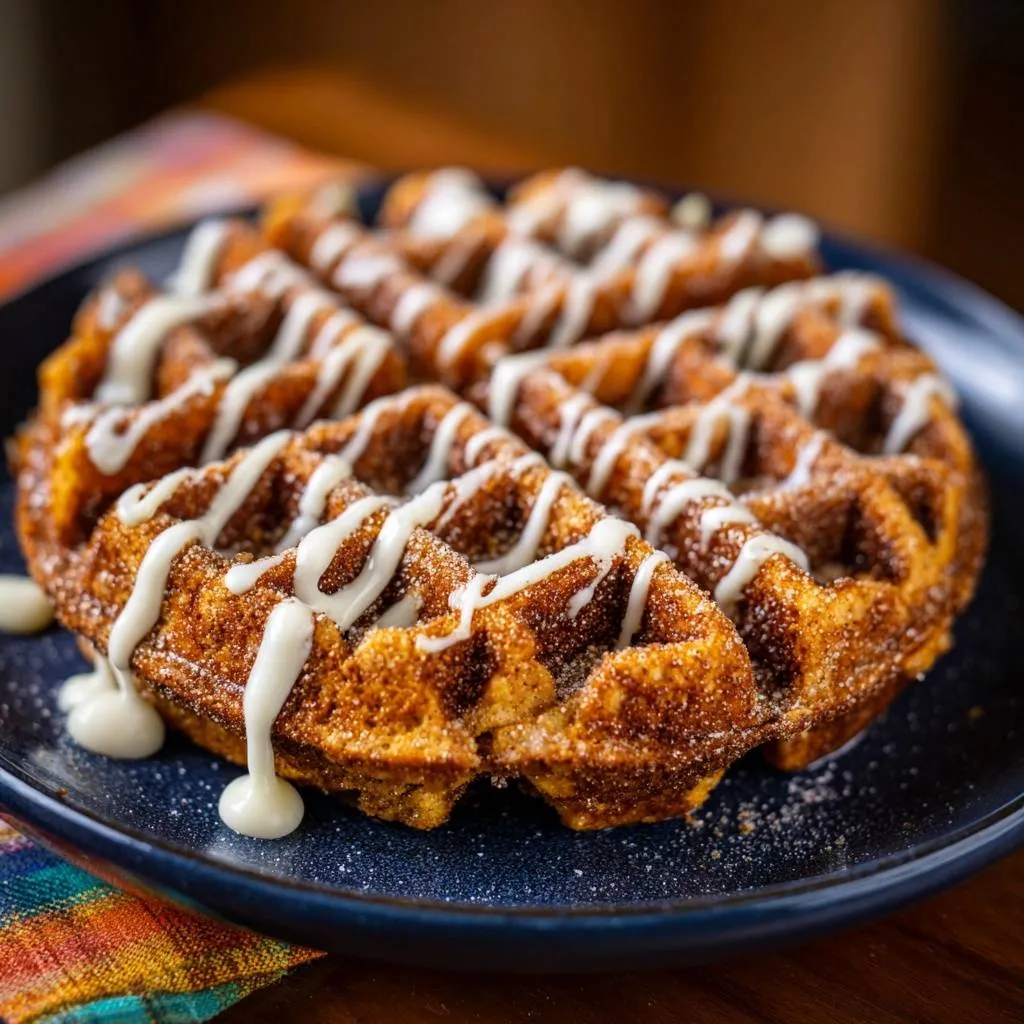
Finally, the cinnamon-sugar coating isn’t just for flavor. When you press a hot, buttered waffle into granulated sugar, the heat slightly melts the crystals, creating a microscopic seal. This layer prevents the interior moisture of the waffle from migrating outward and stops the glaze from soaking into the crumb. It’s a delicious piece of edible engineering.
Why Cornstarch Outperforms Flour Alone
Using a 100% flour base often results in a bread-like interior that absorbs humidity quickly. However, when you replace a portion of that flour with cornstarch, you shift the starch-to-protein ratio. This creates a “short” crumb that breaks easily rather than stretching, mimicking the texture of a deep-fried dough.
While cake flour is lower in protein than all-purpose, it lacks the specific “snap” that cornstarch provides. In this recipe, the cornstarch acts as a drying agent during the high-heat searing process. It allows the waffle to develop a golden-brown hue without becoming dense or heavy.
The Physics of Beaten Egg Whites
If you want a waffle that feels light as air, you cannot skip beating the egg whites. When you whip whites to stiff peaks, you’re creating millions of tiny air bubbles held together by protein strands. This creates an “internal scaffolding” inside the waffle that supports the weight of the batter.
Without these air pockets, the waffle will collapse under its own weight once the steam escapes. By gently folding the whites in at the very end, you ensure the interior remains porous. This contrast between the airy middle and the rigid, sugary crust is what makes the churro experience so addictive.
Essential Components for Cinnamon Sugar Churro Waffles
Quality ingredients are the foundation of this dish, and small choices make a huge difference in the final result. I always recommend using whole milk rather than skim or 2%. The higher fat content in whole milk aids in the Maillard reaction, which is the chemical process that gives the waffle its deep golden color and toasted flavor.
Furthermore, I prefer using unsalted butter for both the batter and the coating. This allows you to control the sodium profile perfectly. Since we’re using a sweet glaze and a heavy sugar dusting, you want just enough salt in the batter to balance the sugar without making the dish taste savory.
Dry Base and Leavening Agents
Your dry mix consists of all-purpose flour, cornstarch, baking powder, and a pinch of salt. It’s vital to check the expiration date on your baking powder before you start. Fresh leavening is non-negotiable because we need that immediate “lift” the moment the batter hits the hot iron to mimic the puff of a fried churro.
The salt might seem minor, but it’s the “volume knob” for all the other flavors. It makes the vanilla taste richer and the cinnamon taste warmer. Whisk these dry ingredients thoroughly to ensure the cornstarch is evenly distributed, preventing any gummy pockets in the finished product.
The Fat and Flavor Emulsion
The wet components involve egg yolks, melted butter, and vanilla extract. If you want to go the extra mile, use a high-quality vanilla bean paste. The tiny black specks look beautiful against the golden waffle, and the flavor is much more complex than imitation extracts, offering a true “bakery” aroma that fills your whole house.
When mixing your yolks and butter, make sure the butter has cooled slightly. You don’t want to scramble the eggs before they even hit the iron! This emulsion provides the richness that carries the spice of the cinnamon throughout every bite.
The Signature Churro Dusting and Glaze
For the coating, standard granulated sugar is best because the grit provides that classic churro mouthfeel. While Cassia cinnamon is common in most US pantries and offers a bold, spicy kick, you can try Ceylon cinnamon for a more delicate, floral note. Both work beautifully, but Cassia gives that nostalgic “cereal milk” vibe.
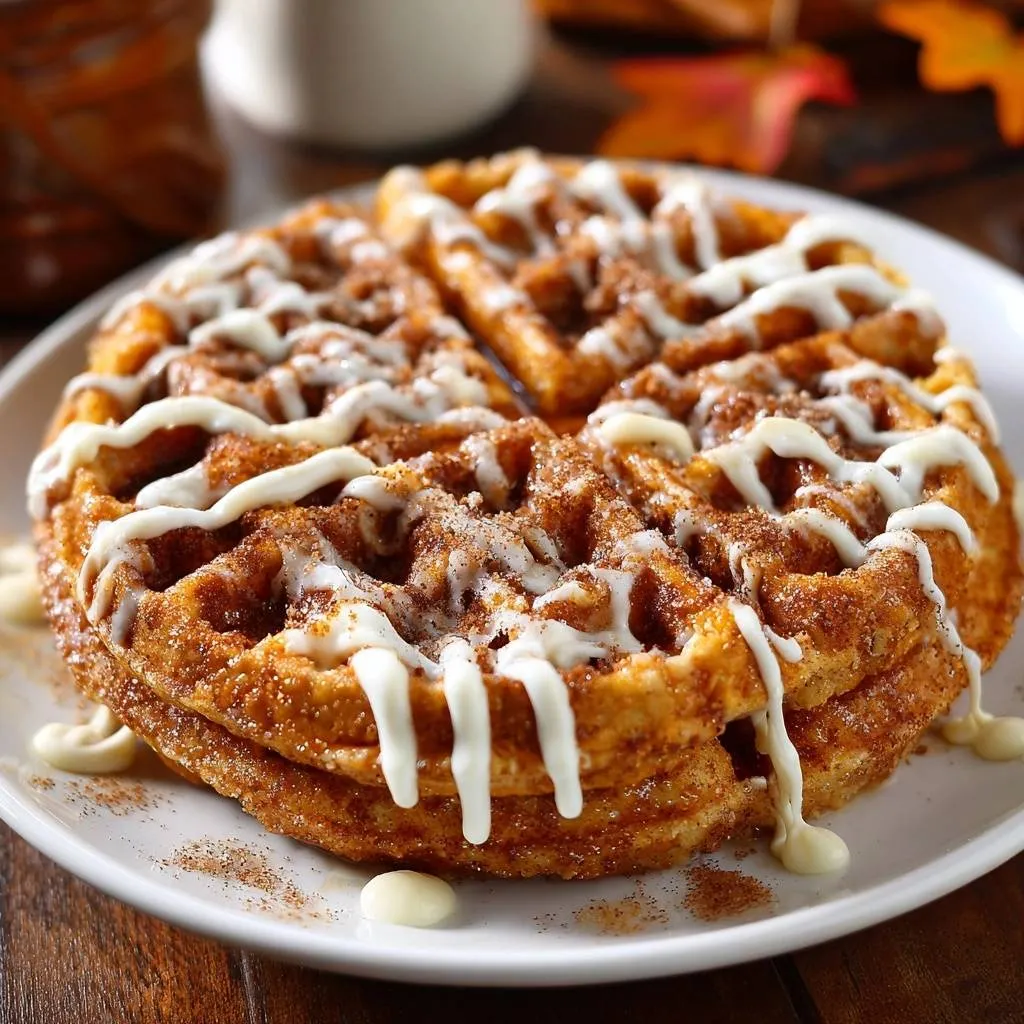
The glaze requires heavy cream rather than milk. The higher fat content in the cream creates a thick, opaque icing that sits proudly on top of the waffle ridges. If the glaze is too thin, it will simply run off or soak in, ruining that beautiful visual contrast we’re looking for.
Step-by-Step: Engineering the Perfect Churro Crunch
Success with this recipe depends on your technique during the cooking process. You aren’t just making breakfast; you’re performing a high-heat sear. Follow these phases closely to ensure you don’t end up with a soggy mess.
Phase 1: Preparing the High-Heat Iron
Most people start pouring batter as soon as the “Ready” light turns on, but that’s usually a mistake. The light indicates the sensors have reached the temperature, but the heavy metal plates often haven’t achieved true thermal saturation. Wait an additional five minutes after the light pops on.
A Belgian waffle iron with deep pockets is ideal for this recipe because it creates more surface area for the cinnamon sugar to cling to. However, a standard iron works too. Just ensure it’s screaming hot so the batter sizzles the instant it touches the surface.
Phase 2: Aerating the Batter
When beating your egg whites, look for them to become glossy and hold their shape when you lift the whisk. If the peaks droop over, keep going. Once they’re ready, fold them into the batter with a spatula using a gentle “over and under” motion.
Be careful not to over-mix at this stage. You should still see a few small streaks of white in the batter. If you stir too much, you’ll deflate the air you worked so hard to incorporate, and your waffles will turn out rubbery instead of crisp.
Phase 3: The Searing Process
As you pour the batter, you should hear a distinct, aggressive sizzle. This is the sound of the exterior searing and the cornstarch beginning to work. Don’t rely solely on a timer or the “done” light on your machine.
Instead, watch the steam. When the heavy clouds of steam stop billowing out from the sides of the iron, the waffle is likely done. You want a deep, dark golden brown color—much darker than a standard waffle—to ensure the crust is thick enough to handle the sugar coating.
Phase 4: The Critical Cooling Rack Interval
This is the most important “Anti-Soggy” step in the entire process. Immediately upon removing the waffle from the iron, place it on a wire cooling rack for exactly 30 seconds. Do not put it on a plate, and definitely do not put it on a paper towel.
The wire rack allows air to circulate around the bottom of the waffle, letting the residual steam escape. If you put it on a flat surface, that steam turns back into water droplets, which the waffle then re-absorbs. This 30-second rest allows the exterior to “set” and harden.
Phase 5: The Double-Coating Technique
While the waffle is still very hot, lightly brush it with a tiny bit of melted butter. This acts as your “glue.” Immediately press both sides of the waffle into your cinnamon-sugar mixture. You want to be firm here to ensure the sugar gets into every valley of the waffle.
The heat from the waffle will bond the sugar to the crust. This creates that “candy shell” I mentioned earlier. Once coated, drizzle your thick cream glaze over the top. The glaze will sit on the sugar layer rather than soaking into the dough, preserving the crunch.
Troubleshooting Common Waffle Texture Issues
If your waffles are sticking to the iron, it’s usually due to one of two things: the iron wasn’t hot enough, or there was too much sugar in the actual batter. Sugar caramelizes and sticks, which is why we save the bulk of the sweetness for the exterior coating. Always brush your iron with a little butter or oil between every single waffle.
If the sugar won’t stick to the outside, you likely waited too long to coat them. The waffle needs to be hot enough to slightly melt the sugar crystals upon contact. If they’ve cooled down, the sugar will just fall off. Keep your sugar bowl right next to the iron for a quick transition.
Lastly, if the middle of your waffle is raw while the outside is burnt, your iron is too hot. While we want high heat, every iron is different. If you see smoke or the outside browns in under two minutes, turn the dial down slightly to allow the interior scaffolding to set before the crust burns.
Equipment: Why a Wire Rack is Mandatory
I cannot stress enough how vital a wire cooling rack is for this recipe. In the world of physics, a hot waffle is a steam engine. If you place that waffle on a ceramic plate, the steam hits the cold surface, condenses into water, and is immediately wicked back into the crust.
Some people think a paper towel helps, but it actually makes things worse. The paper towel traps the moisture against the waffle and then holds it there like a wet blanket. A wire rack is the only way to ensure the bottom stays as crispy as the top. It’s a five-dollar tool that will completely change your breakfast game.
Flavor Variations and Ingredient Swaps
If you want to experiment, try a “Mexican Hot Chocolate” version by adding a tablespoon of cocoa powder and a tiny pinch of cayenne pepper to the dry ingredients. The heat of the pepper beautifully complements the sweetness of the cinnamon sugar. It’s a sophisticated twist that feels very “gourmet.”
You can also swap the cream glaze for a warm dulce de leche drizzle. If you need to avoid dairy, full-fat coconut milk is an excellent substitute for the whole milk in the batter. It actually adds a lovely tropical aroma and maintains a high fat content, which helps keep that crunch we’re after.
Make Ahead and Reheating for Maximum Retention
You can absolutely make these in bulk and freeze them. To do this, follow the recipe up until the cooling rack step, but do not apply the butter or cinnamon sugar. Let them cool completely on the rack, then freeze them in a single layer before transferring to a freezer bag.
When you’re ready to eat, the microwave is your absolute enemy; it will turn the waffle into a rubber tire. Instead, use a toaster oven or a standard oven at 350°F. Once the waffle is hot and crisp again, then you apply the butter and the cinnamon sugar coating. This “Toaster Oven Recovery” method ensures they taste exactly like they were just made.
Expert Tips for High-Volume Serving
If you’re cooking for a crowd, you don’t want the first person finished with their meal before the last waffle is even poured. To keep everything perfect, preheat your oven to 200°F and place a wire rack inside on top of a baking sheet. As each waffle is finished and coated, move it to the oven rack.
This low temperature keeps the waffles warm without continuing to cook them. Because they are on a rack, the air continues to circulate, and the sugar crust stays intact. This allows you to serve everyone at once with every single waffle at peak crispness.
Frequently Asked Questions
Can I use a pre-made pancake or waffle mix instead?
I don’t recommend it for this specific recipe. Most commercial mixes are designed for softness and fluffiness, meaning they have a high protein content and very little starch. They won’t achieve the “shatter-crisp” texture that defines a churro. To get the right crunch, you really need the specific ratio of flour to cornstarch provided here.
Why did my cinnamon sugar coating melt and turn into a syrup?
This usually happens if the waffle is still releasing too much steam when you coat it, or if the humidity in your kitchen is very high. Make sure you give the waffle that full 30-second rest on the wire rack before coating. This allows the initial “steam dump” to finish so the sugar stays crystalline rather than dissolving into the moisture.
Can I make the batter the night before to save time?
You can mix the dry ingredients and the wet ingredients (minus the egg whites) separately the night before. However, do not combine them or whip the egg whites until you are ready to cook. Baking powder begins to react the moment it hits liquid, and whipped egg whites will deflate overnight. For the best lift and crunch, the final mixing must happen right before the batter hits the iron.
What is the best oil for brushing the waffle iron?
While melted butter tastes the best, it has a lower smoke point and can burn over long cooking sessions. For the most consistent results, I recommend a neutral oil with a high smoke point, like avocado oil or grapeseed oil. If you really want that butter flavor without the burning, clarified butter (ghee) is the professional choice for high-heat waffle making.
How do I store leftovers so they don’t get hard?
Store any leftover coated waffles in an airtight container at room temperature for up to 24 hours. If you keep them longer, the sugar may start to soften the crust. For long-term storage, it is always better to freeze the “naked” waffles and apply the coating fresh after reheating in the toaster oven. Do not refrigerate them, as the humidity in the fridge will ruin the sugar crust almost instantly.
Cinnamon Sugar Churro Waffles
Course: BreakfastCuisine: AmericanDifficulty: easy4
servings10
minutes15
minutes25
Minutes450
kcalAmerican
Ingredients
2 cups all-purpose flour
1/4 cup cornstarch (The secret for extra crispness)
1 tablespoon baking powder
1/2 teaspoon salt
2 tablespoons granulated sugar
2 large eggs, separated
1 1/2 cups whole milk
1/3 cup melted unsalted butter
1 teaspoon vanilla extract
Coating: 1/2 cup granulated sugar mixed with 2 teaspoons ground cinnamon
Glaze: 1 cup powdered sugar mixed with 2 tablespoons heavy cream and 1/4 teaspoon vanilla
Directions
- Preheat your waffle iron to its highest setting. This is the first step to preventing sogginess; a lukewarm iron steams the batter instead of searing it.
- In a large bowl, whisk together the flour, cornstarch, baking powder, salt, and 2 tablespoons of sugar.
- In a separate bowl, whisk the egg yolks, milk, melted butter, and vanilla until combined.
- In a clean bowl, beat the egg whites until stiff peaks form. This creates internal air pockets that prevent a dense, soggy interior.
- Fold the wet yolk mixture into the dry ingredients until just combined. Gently fold in the beaten egg whites. Do not overmix.
- Generously brush the waffle iron with melted butter or oil. Pour the batter in and cook until the waffle is deep golden brown and feels firm to the touch.
- The Anti-Soggy Secret: Immediately upon removing the waffle, do not stack it. Place it on a wire cooling rack for 30 seconds. This allows steam to escape from both sides so the exterior hardens.
- While still hot, brush the waffle lightly with a tiny amount of additional melted butter, then press both sides into the cinnamon sugar mixture. The residual heat and butter will bond the sugar to the waffle, creating a crunchy candy shell that acts as a moisture barrier.
- Whisk the glaze ingredients until thick and opaque. Drizzle generously over the ridges and serve immediately for the ultimate crunch.
Notes
- The secret to preventing sogginess is placing the waffles on a wire cooling rack for 30 seconds before coating to allow steam to escape.