There’s nothing quite as disheartening as slicing into a freshly baked, aromatic apple pie, only to find a watery, runny filling spilling onto the plate. I’ve been there countless times, but after years of perfecting, I discovered the simple, yet revolutionary trick to achieving a perfectly set, deliciously firm Classic Apple Pie filling every single time.
This recipe isn’t just about baking; it’s about crafting a timeless dessert that holds its beautiful shape and delivers an unparalleled balance of sweet, tart, and spice in every forkful, guaranteeing a truly satisfying experience.
Why THIS Classic Apple Pie Recipe? No More Soggy Slices!
This recipe stands apart not just for its incredible flavor and perfectly flaky crust, but for its foolproof method to eliminate the dreaded watery filling. It’s a game-changer that ensures your pie slices are always picture-perfect and structurally sound.
Unveiling the “No Watery Filling” Secret
The genius of this recipe lies in a simple, intentional step: allowing the sliced, seasoned apples to rest and then draining their released juices before baking. This crucial technique removes excess moisture upfront, preventing it from turning your pie into a soupy mess during baking.
By draining the liquid, we eliminate the primary cause of soggy bottom crusts and runny fillings, ensuring that every bite delivers firm, perfectly cooked apple slices enveloped in a rich, thickened sauce.
Beyond the Basics: Flavor, Texture, and Ease
Beyond the perfectly set filling, this recipe shines with its balanced blend of sweet and tart apples, harmonized with classic warming spices. The result is a filling that’s vibrant and complex, not overly sweet.
The homemade pie crust, made with very cold butter, bakes up incredibly flaky and tender, providing a delightful contrast to the soft apple filling. Despite its impressive outcome, the steps are broken down to be straightforward and approachable for any home baker.
Essential Tools for Your Classic Apple Pie Journey
Having the right kitchen tools makes the pie-making process much smoother and more enjoyable. Here’s what you’ll need to create your perfect Classic Apple Pie.
Crust Preparation Essentials
These tools are fundamental for achieving that coveted flaky pie crust.
Large Mixing Bowl: Essential for combining flour and butter, providing ample space for proper dough development.
Pastry Blender (or your fingertips): Crucial for cutting cold butter into the flour mixture, creating pea-sized pieces vital for flakiness.
Rolling Pin: Necessary for evenly rolling out your pie dough to the perfect thickness for both the bottom and top crusts.
Filling & Baking Must-Haves
These items ensure your pie is filled, baked, and cooled correctly for the best results.
9-inch Pie Plate: The standard size for most pies, ensuring even baking and a beautiful presentation.
Baking Sheet: Placed under the pie during baking, it catches any potential drips and helps promote an evenly browned bottom crust.
Sharp Knife or Apple Slicer: For efficiently peeling, coring, and slicing apples into uniform pieces, ensuring consistent cooking.
Wire Rack: Critical for cooling the pie completely, allowing air circulation underneath which prevents a soggy bottom and ensures the filling sets.
Gather Your Ingredients: Building the Perfect Classic Apple Pie
Quality ingredients are the foundation of any exceptional pie. Here’s a breakdown of what you’ll need and why each component is vital.
For the Flaky Pie Crust
The crust is just as important as the filling, providing that essential crisp, buttery texture.
All-Purpose Flour: The primary structural component, providing the necessary gluten for a tender yet manageable dough.
Salt: Enhances the flavor of the butter and balances the richness of the pie, preventing a bland crust.
Very Cold Unsalted Butter (cubed): Absolutely critical for flakiness. The cold butter creates steam pockets during baking, resulting in distinct layers.
Ice Water: Helps hydrate the flour and bring the dough together without over-developing the gluten, ensuring a tender and flaky texture.
The Star of the Show: Apple Filling Components
A careful selection of apples and spices ensures a robust and perfectly textured filling.
Baking Apples (Granny Smith, Honeycrisp): A blend offers a perfect balance of tartness and sweetness. Granny Smiths provide firm structure and tartness, while Honeycrisps add sweetness and a pleasing texture that holds up well during baking.
Granulated Sugar & Light Brown Sugar: The combination provides a balanced sweetness and a subtle caramel note. Brown sugar adds depth and moisture.
All-Purpose Flour (for coating): After draining, this flour acts as a light binder, thickening any residual apple juices into a lovely, syrupy consistency.
Ground Cinnamon & Nutmeg: These warm, aromatic spices are the hallmark of classic dessert recipes like apple pie, adding incredible depth and fragrance.
Lemon Juice: Brightens the overall apple flavor, prevents the apples from browning, and adds a touch of acidity to balance the sweetness.
Unsalted Butter (cut into small pieces): Dotting the top of the filling with butter adds richness and helps create that desirable bubbly, luscious texture as it bakes.
The Sweet Glaze Finish
An optional, but delightful, topping that adds an extra layer of sweetness and visual appeal.
Powdered Sugar: The finely milled sugar dissolves easily, creating a smooth, elegant glaze.
Milk: Used to thin the powdered sugar to a pourable, drizzling consistency, allowing you to control the thickness.
Vanilla Extract: Infuses the glaze with a comforting, sweet aroma that complements the apple pie beautifully.
Baking Your Masterpiece: A Step-by-Step Guide
Follow these detailed instructions to create a Classic Apple Pie that will impress everyone.
Crafting the Perfect Pie Crust
In a large bowl, whisk together the flour and salt until well combined. This ensures even seasoning throughout the crust.
Cut in the very cold, cubed butter using a pastry blender or your fingertips. Work quickly until the mixture resembles coarse crumbs with some pea-sized pieces of butter remaining. These pockets of butter are what create a truly flaky crust.
Gradually add ice water, one tablespoon at a time, mixing until the dough just comes together. Be careful not to overmix, as too much handling will develop gluten and lead to a tough crust. The dough should still look a little shaggy.
Divide the dough in half, flatten each into a disk, wrap tightly in plastic, and refrigerate for at least 30 minutes. This chilling period allows the gluten to relax, making the dough easier to roll out and preventing shrinkage during baking.
Prepping the Apples (The Game-Changer Step!)
In a large bowl, combine the peeled, cored, and uniformly sliced apples with the granulated sugar, brown sugar, cinnamon, nutmeg, and lemon juice. Toss gently to ensure all apple slices are thoroughly coated with the spice mixture.
Let the mixture sit for 30 minutes at room temperature. This crucial resting period encourages the apples to naturally release their excess liquid. This is the absolute secret to preventing a watery filling, so do not skip this step!
Draining the Juices & Final Filling Prep
After the apples have rested, carefully drain all the liquid that has accumulated in the bowl. This liquid is largely water and would otherwise make your pie soggy. You can discard it or save it for another use, like a sweet syrup.
Add the 2 tablespoons of flour to the drained apples and toss to coat evenly. This light flour coating will now work to lightly thicken any remaining natural apple juices into a perfect, luscious consistency as the pie bakes.
Assembling Your Pie with Precision
Preheat your oven to 400°F (200°C). On a lightly floured surface, roll out one disk of the chilled pie dough into a 12-inch circle. Carefully transfer this rolled dough into a 9-inch pie plate, gently pressing it into the bottom and sides.
Trim the edges of the bottom crust, leaving about a 1/2-inch overhang. This extra dough provides enough for a decorative crimped edge.
Pour the drained, flour-coated apple filling into the prepared pie crust, mounding it slightly in the center. Dot the top of the filling evenly with the small pieces of unsalted butter; this adds incredible richness and a beautiful bubbly texture as it melts.
Roll out the second disk of dough into another 12-inch circle. Carefully place it over the apples, aligning it with the bottom crust. Trim the top crust, then crimp the edges of both crusts together tightly to seal the pie, using your fingers or a fork for a decorative finish.
Cut several slits in the top crust – about 4-6 evenly spaced cuts. These vents are essential for allowing steam to escape during baking, preventing the crust from becoming soggy and ensuring even cooking of the apples.
Baking to Golden Perfection
Place the assembled pie on a sturdy baking sheet. This step is important as it catches any potential drips and makes it easier to transfer the hot pie in and out of the oven.
Bake for 15 minutes at 400°F (200°C). This initial high temperature helps to set the crust quickly and encourages a beautiful golden color. Then, reduce the oven temperature to 375°F (190°C) and continue baking for another 45-55 minutes.
The pie is ready when the crust is deeply golden brown and the filling is visibly bubbling through the top vents, indicating the apples are tender and the sauce has thickened. If the crust edges start to brown too quickly, loosely tent them with aluminum foil to prevent burning.
The Grand Finale: Cooling and Glazing
Once baked, carefully transfer the pie from the oven to a wire rack. Let it cool completely for at least 2-3 hours before slicing and serving. This cooling time is absolutely critical for the filling to fully set, ensuring clean, beautiful slices.
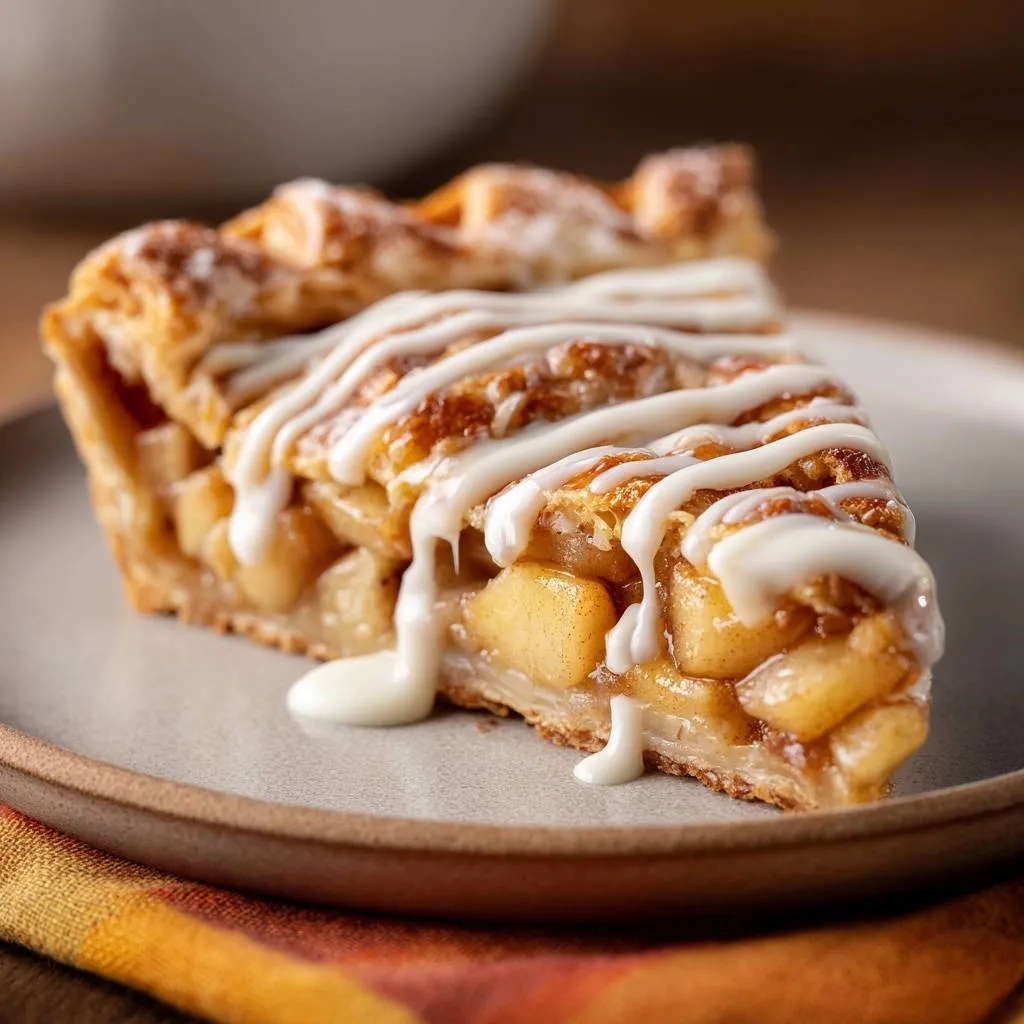
For the optional glaze: In a small bowl, whisk together the powdered sugar, milk, and vanilla extract until smooth and free of lumps. Adjust the milk amount for your desired drizzling consistency.
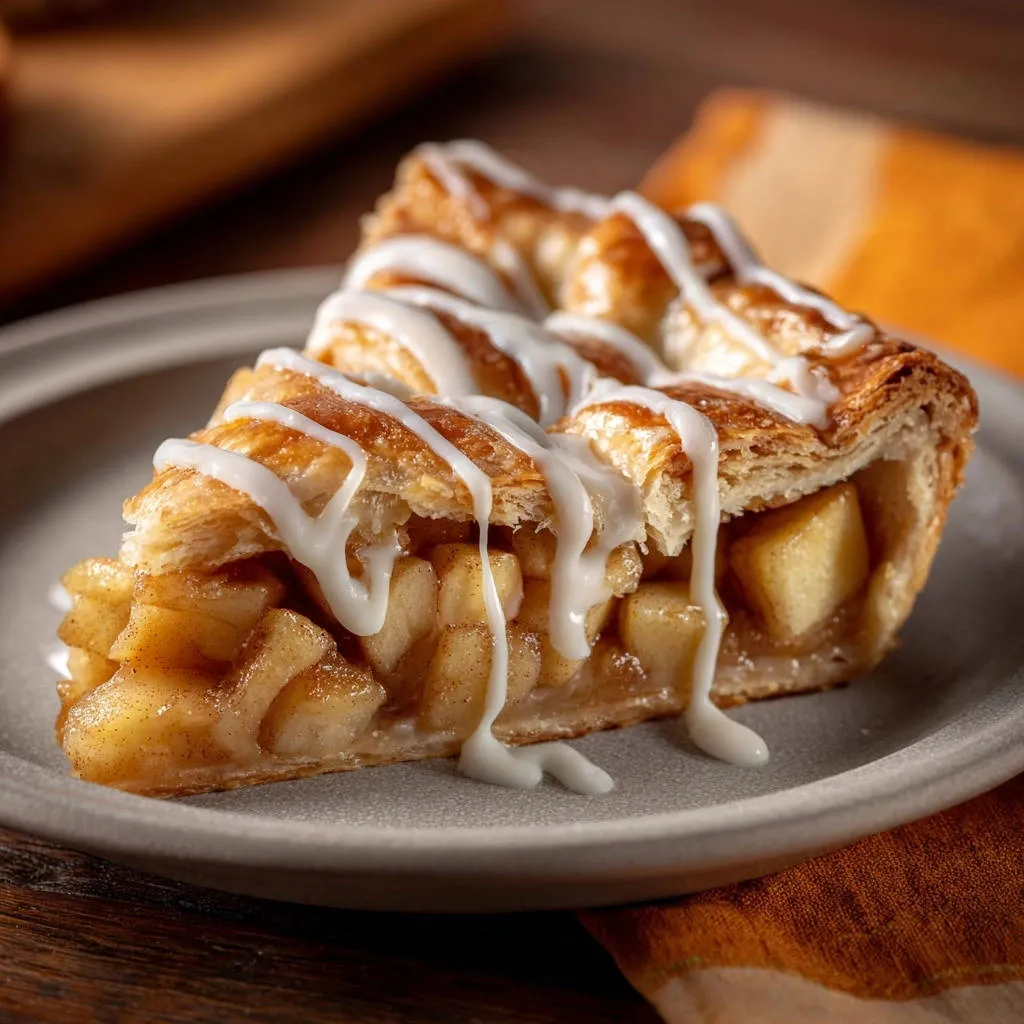
Drizzle the glaze generously over the cooled pie just before serving. This adds a lovely sweet finish and an appealing visual touch to your homemade Classic Apple Pie.
Chef’s Secrets: Elevating Your Classic Apple Pie Game
Achieving pie perfection involves a few clever tricks that can take your baking from good to extraordinary.
Mastering the Crust: Flakiness Guaranteed
Keep Everything Cold: Beyond just cold butter, ensure your hands are cool, and even chill your flour for 15-20 minutes before mixing. The colder the ingredients, the less the butter melts into the flour prematurely, resulting in those coveted flaky layers. You might also find success with other flaky baked goods like easy fluffy biscuits using similar principles.
Don’t Overwork the Dough: Handle the dough minimally. Overmixing develops gluten, which makes the crust tough and less tender. Mix only until the dough just comes together, leaving some visible butter chunks.
Blind Bake (Optional): For an exceptionally crisp bottom crust, especially with very juicy fillings, consider a quick blind bake. Prick the bottom crust with a fork, line with parchment paper, fill with pie weights, and bake for 10-15 minutes before adding the filling. This pre-baking sets the crust structure.
Optimizing Your Apple Filling
Apple Blend is Best: Don’t stick to just one type of apple. Combining tart varieties like Granny Smith with sweeter, slightly softer ones like Honeycrisp, Fuji, or Braeburn offers a more complex flavor profile and varied texture in every bite.
Uniform Slices: Aim for consistent 1/4-inch slices for all your apples. This ensures that every piece cooks evenly; too thick and some will remain hard, too thin and they can turn to mush.
Flavor Boosters: A tiny pinch of allspice or a grating of fresh ginger can add an unexpected layer of warmth and complexity. For a sophisticated touch, a tablespoon of apple cider vinegar (not alcohol) can brighten the apple flavor even further.
Presentation & Flavor Boosters
Egg Wash for Shine: For a professional, golden, and glossy crust, brush the top with an egg wash (one egg beaten with one tablespoon of water) before baking. This also helps any added sugar stick.
Sprinkle with Sugar: After applying the egg wash (if using), sprinkle the top crust generously with coarse sugar (like turbinado or demerara sugar). This adds a beautiful sparkle, a delightful crunch, and an extra touch of sweetness to the crust.
Classic Apple Pie Common Questions & Quick Fixes
Even experienced bakers encounter challenges. Here are solutions to common apple pie problems.
Why is my pie crust tough or crumbly?
A tough crust is almost always a result of overworking the dough, which develops too much gluten. Ensure your butter is very cold, and handle the dough minimally, mixing just until it forms a cohesive mass. If it’s crumbly, you might need a tiny bit more ice water, added just a teaspoon at a time.
My filling is still watery! What went wrong?
The most frequent cause of a watery filling is skipping or inadequately performing the crucial step of draining the apples after they’ve released their juices. Ensure you allow the full 30 minutes for the apples to rest and then thoroughly drain all liquid before adding the flour and assembling the pie.
How to prevent a burnt crust or edges?
If your pie crust, particularly the edges, starts browning too quickly, simply create a loose tent of aluminum foil over the entire pie or just the edges. Specialty pie shields are also available for this purpose. Always monitor your pie and adjust as needed.
Dealing with a soggy bottom crust
A soggy bottom crust is often linked to a watery filling (which our draining method prevents!) or insufficient baking time. Placing your pie on a preheated baking sheet helps conduct more heat to the bottom, promoting a crispier crust. Ensuring the filling is visibly bubbling also indicates thorough cooking and thickening.
Your Burning Classic Apple Pie Questions Answered
Let’s clarify some common queries about this beloved dessert.
Which apples are best for pie?
For the best Classic Apple Pie, a mix is highly recommended! Tart varieties like Granny Smith provide essential structure and tang, while sweeter, slightly softer apples such as Honeycrisp, Fuji, or Braeburn contribute balanced sweetness and a pleasant texture. Avoid very soft or mealy apples that tend to turn into mush.
Can I make this Classic Apple Pie ahead of time?
Yes, absolutely! You can prepare the pie dough disks up to two days in advance and keep them tightly wrapped and refrigerated. You can also assemble the entire unbaked pie, wrap it well, and refrigerate for up to 24 hours before baking. For optimal results, let the assembled pie come to room temperature for about 30 minutes before baking.
How long does homemade Classic Apple Pie stay fresh?
A homemade Classic Apple Pie, stored loosely covered at room temperature, will remain fresh and delicious for 2-3 days. If you need it to last longer, refrigerate it for up to 4-5 days. Always ensure the pie is completely cool before covering it, to prevent condensation which can lead to sogginess.
Can I freeze Classic Apple Pie?
Yes, freezing is a great option for enjoying pie later! You can freeze either a baked or an unbaked pie. For an unbaked pie, wrap it tightly in plastic wrap and then aluminum foil, and freeze for up to 3 months. Bake from frozen, adding an extra 20-30 minutes to the baking time. Baked pies can also be frozen, then thawed at room temperature and gently reheated.
Gluten-Free or Dairy-Free Substitutions?
For a gluten-free crust, substitute the all-purpose flour with a high-quality gluten-free all-purpose flour blend (ensure it’s designed for baking and contains xanthan gum). For a dairy-free pie, use a plant-based butter alternative for both the crust and dotting the filling, and a dairy-free milk (like almond or oat milk) for the glaze. Textures may vary slightly, but the flavor will still be wonderfully delicious.
Serving Suggestions, Storage, & Make-Ahead Tips
Make your Classic Apple Pie experience even more delightful with these thoughtful accompaniments and smart preparation strategies.
The Perfect Companions: What to Serve with Classic Apple Pie
While truly magnificent on its own, a slice of warm Classic Apple Pie is heavenly when paired with a generous scoop of premium vanilla bean ice cream that slowly melts into the warm filling. A dollop of freshly whipped cream, perhaps infused with a hint of cinnamon, also provides a delightful contrast. For a truly traditional experience, a thin slice of sharp cheddar cheese served alongside your pie offers a surprisingly delicious sweet and savory balance.
Storing Your Classic Apple Pie
Once your Classic Apple Pie has completely cooled, cover it loosely with plastic wrap or aluminum foil. It can be stored at room temperature for up to 2-3 days without losing its quality. For extended freshness, especially in warmer climates, refrigerate the pie for up to 5 days. You can gently warm individual slices in the oven at a low temperature or briefly in the microwave for that fresh-baked feel.
Prep Ahead for Effortless Entertaining
To make your baking day stress-free, prepare the pie crust dough disks up to two days in advance and keep them tightly wrapped in the refrigerator. The apple filling mixture (excluding the crucial draining and flour coating step) can also be prepared a few hours ahead of time. This forward planning allows for quick and easy assembly when you’re ready to bake, leaving you more time to enjoy the delightful aromas and company.
Your Culinary Triumph Awaits: Share Your Classic Apple Pie!
There’s nothing quite like the aroma and taste of a homemade Classic Apple Pie, especially one that holds its shape beautifully with every slice. We encourage you to try this recipe, embrace the simple “draining” trick, and delight your family and friends with a pie that truly impresses.
Share your pie pictures and experiences with us on social media – we love seeing your culinary triumphs! Looking for more timeless dessert ideas? Explore our collection for another amazing treat like our perfect cheesecake, for your next baking adventure!

Classic Apple Pie
Course: DessertCuisine: American CuisineDifficulty: easy8
servings1
hour1
hourAmerican Cuisine
Ingredients
For the Pie Crust:
2 1/2 cups all-purpose flour
1 teaspoon salt
1 cup (2 sticks) unsalted butter, very cold and cubed
1/2 cup ice water (plus more if needed)
For the Apple Filling:
6-8 medium baking apples (like Granny Smith or Honeycrisp), peeled, cored, and sliced 1/4 inch thick
1/2 cup granulated sugar
1/4 cup packed light brown sugar
2 tablespoons all-purpose flour
1 teaspoon ground cinnamon
1/4 teaspoon ground nutmeg
1 tablespoon lemon juice
1 tablespoon unsalted butter, cut into small pieces
For the Glaze:
1 cup powdered sugar
2-3 tablespoons milk
1/2 teaspoon vanilla extract
Directions
- Prepare the Pie Crust: In a large bowl, whisk together the flour and salt. Cut in the cold, cubed butter using a pastry blender or your fingertips until the mixture resembles coarse crumbs with some pea-sized pieces of butter remaining. Gradually add ice water, one tablespoon at a time, mixing until the dough just comes together. Do not overmix. Divide the dough in half, flatten each into a disk, wrap in plastic, and refrigerate for at least 30 minutes.
- Prepare the Apple Filling: In a large bowl, combine the sliced apples, granulated sugar, brown sugar, cinnamon, nutmeg, and lemon juice. Toss gently to coat. Let the mixture sit for 30 minutes at room temperature. This crucial step allows the apples to release their natural juices.
- Drain the Apples: After the apples have rested, carefully drain all the liquid that has accumulated in the bowl. This is the key to preventing a watery filling. You can discard the liquid or save it for another use. Add the 2 tablespoons of flour to the drained apples and toss to coat evenly.
- Assemble the Pie: Preheat your oven to 400°F (200°C). On a lightly floured surface, roll out one disk of pie dough into a 12-inch circle. Carefully transfer it to a 9-inch pie plate. Trim the edges, leaving about a 1/2-inch overhang.
- Fill and Top: Pour the drained, flour-coated apple filling into the pie crust. Dot the top of the filling with the small pieces of butter. Roll out the second disk of dough. Place it over the apples. Trim and crimp the edges of both crusts together to seal. Cut several slits in the top crust to allow steam to escape.
- Bake the Pie: Place the pie on a baking sheet (to catch any drips). Bake for 15 minutes at 400°F (200°C), then reduce the oven temperature to 375°F (190°C) and continue baking for another 45-55 minutes, or until the crust is golden brown and the filling is bubbling. If the crust browns too quickly, loosely cover the edges with foil.
- Cool and Glaze: Let the pie cool completely on a wire rack for at least 2-3 hours before slicing. This allows the filling to set properly.
- Make the Glaze: In a small bowl, whisk together the powdered sugar, milk, and vanilla extract until smooth. Drizzle the glaze over the cooled pie just before serving.
Notes
- The crucial step of draining the apples after they sit prevents a watery filling and ensures a perfectly set pie.