There’s nothing quite like the comforting aroma of a homemade pie, but a common baking heartbreak is cutting into a beautiful Classic Berry Crumble Pie only to find a disappointing, soggy bottom crust. I’ve been there countless times, but after years of experimenting, I’ve perfected a game-changing method that guarantees a perfectly crisp, golden crust every single time.
This recipe not only delivers on that promise but also brings together the ideal balance of juicy, tart berries with a sweet, buttery crumble. Get ready to bake a Classic Berry Crumble Pie that stands tall, tastes incredible, and becomes your new go-to for any occasion.
The Ultimate Classic Berry Crumble Pie: Why This Recipe Is a Game-Changer
Say Goodbye to Soggy Bottoms: Our Secret Weapon Revealed
The nemesis of many home bakers is a pie with a delicious filling but a wet, underbaked bottom crust. This often happens because the juicy fruit filling saturates the pastry before it has a chance to fully cook and crisp up.
Our recipe for Classic Berry Crumble Pie tackles this head-on with a crucial step: partial blind baking. This pre-cooks and creates a protective barrier for your bottom crust, ensuring it emerges golden, flaky, and perfectly crisp, no matter how juicy your berries are.
The Perfect Balance: Sweet, Tart, and Texturally Divine
Imagine biting into a pie where every forkful offers a symphony of textures and flavors. This Classic Berry Crumble Pie delivers just that, expertly balancing sweet and tart notes.
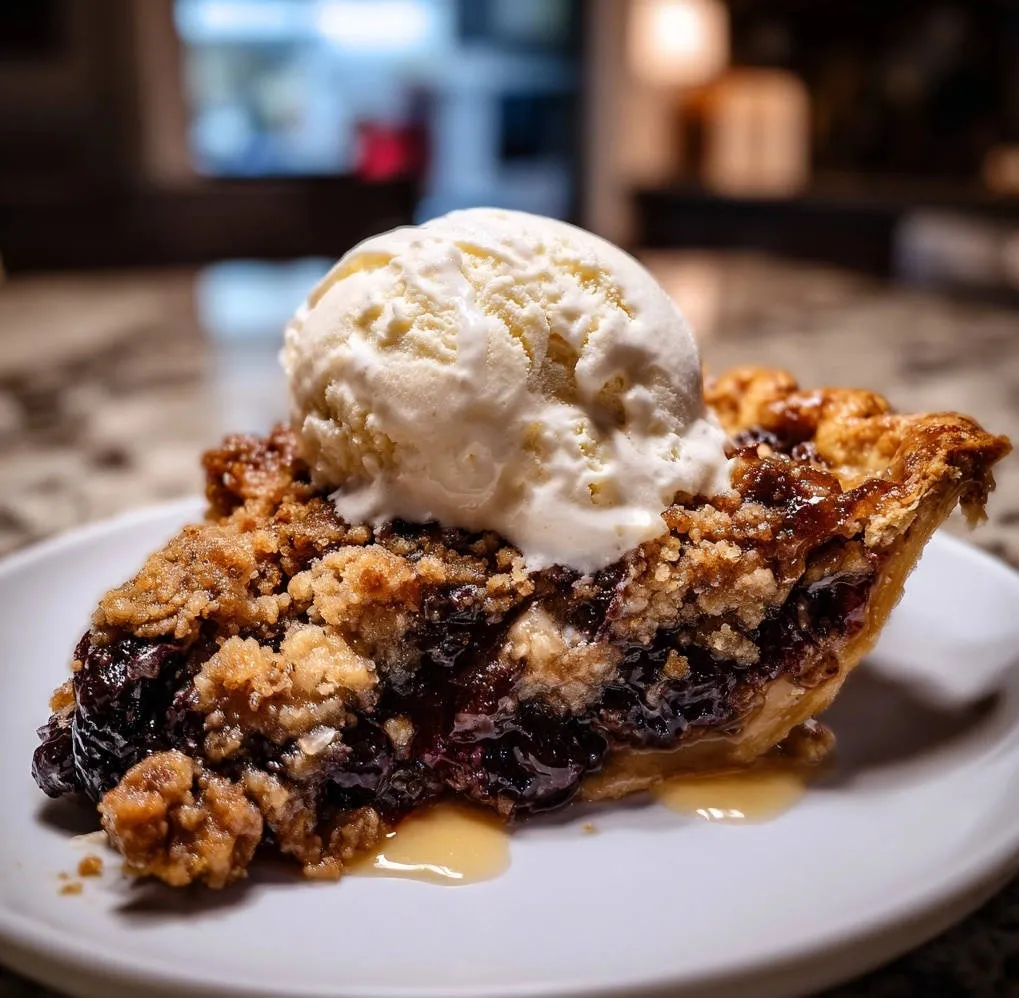
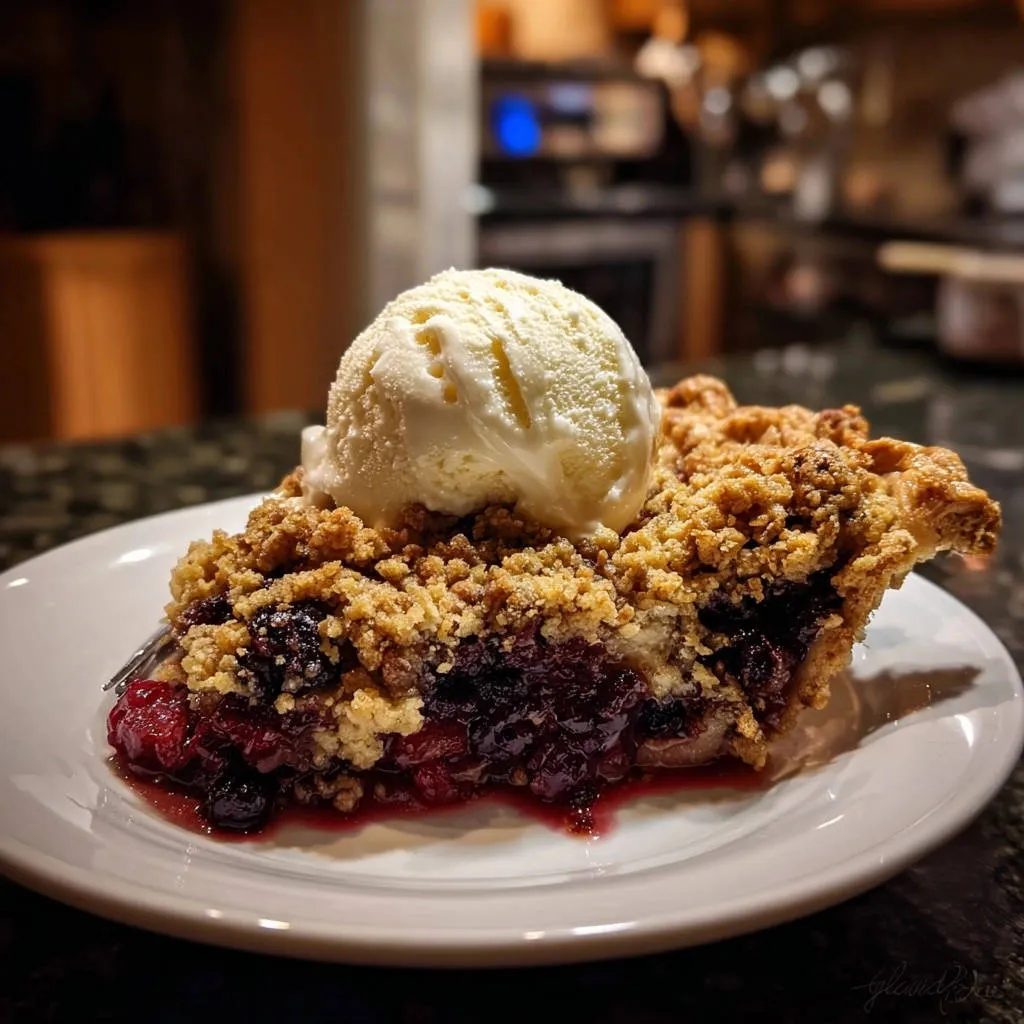
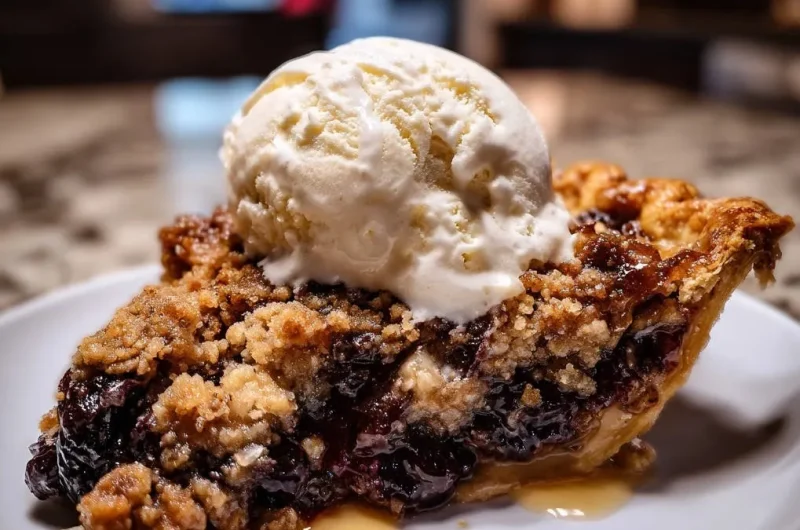
You’ll experience the vibrant burst of mixed berries, complemented by a substantial, golden-brown crumble topping that offers an irresistible crunch. Beneath it all lies a truly flaky and firm pie crust, providing the perfect foundation for this delightful dessert.
Effortless Elegance for Any Occasion
While elegant enough for a special dinner party or holiday gathering, this Classic Berry Crumble Pie is surprisingly straightforward to prepare. Its rustic charm makes it ideal for casual family meals or a comforting treat on a lazy Sunday afternoon.
It’s the kind of dessert that looks impressive without demanding hours of intricate work, allowing you more time to enjoy with loved ones.
Gather Your Goodies: Essential Ingredients for Your Berry Crumble Pie
For the Flaky, Crisp Pie Crust
1¼ cups All-Purpose Flour: This provides the fundamental structure for a sturdy yet tender crust.
½ teaspoon Salt: A small but mighty addition, balancing the overall flavors of the pie.
½ cup (1 stick) Unsalted Butter: Crucially, this must be very cold and cubed. Cold butter creates pockets of steam, which are essential for achieving truly flaky layers.
4-5 tablespoons Ice Cold Water: Used sparingly, ice water helps bind the dough without activating too much gluten, keeping your crust tender.
Bursting with Flavor: Crafting the Berry Filling
5 cups Mixed Berries: Use fresh or frozen (blueberries, raspberries, blackberries are a classic blend). The mix offers a wonderful variety of tartness and sweetness.
½ cup Granulated Sugar: Adjust this amount based on the natural sweetness of your berries; you can always add more to taste.
¼ cup Cornstarch: This is your secret weapon for a perfectly set filling. It thickens the berry juices, preventing a watery consistency and ensuring a clean slice.
1 tablespoon Fresh Lemon Juice: A splash of lemon brightens the berry flavors and adds a welcome hint of acidity, balancing the sweetness.
1 teaspoon Vanilla Extract: Enhances the overall warmth and depth of the berry filling.
That Irresistible Golden Crumble Topping
1 cup All-Purpose Flour: Forms the base of your crumbly, golden topping.
½ cup Granulated Sugar: Contributes to the topping’s sweetness and crispness.
¼ cup Light Brown Sugar, packed: Adds a lovely molasses note and helps create a slightly chewier, more caramel-like texture in the crumble.
½ cup (1 stick) Unsalted Butter: This butter should also be cold and cubed to achieve the ideal coarse, crumbly texture rather than a pasty one.
½ teaspoon Ground Cinnamon (optional): Provides a comforting warmth that pairs beautifully with mixed berries.
The Perfect Pairing: Serving Suggestions
A generous scoop of creamy vanilla ice cream is the absolute classic accompaniment. Its cool, melting sweetness perfectly complements the warm, fruity Classic Berry Crumble Pie.
You could also serve it with a dollop of fresh whipped cream or a drizzle of crème anglaise.
Your Baking Arsenal: Essential Tools for Pie Perfection
Must-Have Equipment for a Smooth Baking Journey
9-inch Pie Plate: Glass or ceramic pie plates are excellent for even baking and showcasing your pie’s beautiful crust.
Large Mixing Bowls: You’ll need at least two, one for the crust and one for the filling/crumble ingredients.
Pastry Blender or Fork: Crucial for cutting cold butter into the flour for both the crust and the crumble without melting the butter with your hands.
Measuring Cups & Spoons: Accurate measurements are key to baking success, ensuring perfect ratios for your Classic Berry Crumble Pie.
Rolling Pin: Essential for rolling out your pie dough to an even thickness.
Optional Gadgets to Elevate Your Pie Game
Pie Weights or Dried Beans: These are incredibly helpful for blind baking, preventing the crust from shrinking or bubbling up.
Baking Sheet: Placing your pie on a baking sheet provides stability, catches any potential drips, and helps ensure even browning on the bottom crust.
Wire Rack: Critical for cooling your pie. It allows air to circulate around the entire pie, preventing a soggy bottom even after baking.
Baking Brilliance: Step-by-Step Guide to Your Classic Berry Crumble Pie
Crafting the Flaky Foundation: Your Pie Crust Prep
- Combine Dry Ingredients:
In a large bowl, whisk together the all-purpose flour and salt until well combined. This ensures the salt is evenly distributed for consistent flavor throughout the crust.
- Cut in Cold Butter:
Add the very cold, cubed unsalted butter to the flour mixture. Using a pastry blender or your fingertips, cut the butter into the flour until it forms pea-sized crumbs. The key is to work quickly to keep the butter as cold as possible; these cold pockets will create flaky layers in the oven.
- Add Ice Water:
Gradually add the ice-cold water, one tablespoon at a time, mixing gently with a fork or your hands. Stop mixing as soon as the dough just comes together into a cohesive ball. Overworking the dough develops gluten, which can lead to a tough, rather than tender, crust.
- Chill the Dough:
Form the dough into a flat disk, wrap it tightly in plastic wrap, and refrigerate for at least 30 minutes. Chilling allows the gluten to relax and solidifies the butter, making the dough easier to roll and ensuring maximum flakiness.
The Game-Changing Step: Partial Blind Baking for Crispness
- Preheat and Roll:
Preheat your oven to 400°F (200°C). On a lightly floured surface, roll out the chilled pie dough into a 12-inch circle. Aim for an even thickness for uniform baking and a crisp crust.
- Transfer and Crimp:
Carefully transfer the rolled dough into a 9-inch pie plate. Trim any excess dough, leaving about a ½-inch overhang, and crimp the edges decoratively. This creates a beautiful, finished look and helps hold the filling securely.
- First Bake with Weights:
Line the pie crust with parchment paper and fill it generously with pie weights or dried beans, ensuring they reach the edges. Bake for 15 minutes. The weights prevent the crust from shrinking and puffing up during baking, ensuring a perfectly shaped base for your Classic Berry Crumble Pie.
- Second Bake for Golden Finish:
Carefully remove the parchment paper and pie weights. Return the crust to the oven for another 5-7 minutes, until it’s lightly golden brown. This crucial partial blind bake pre-cooks and protects the bottom crust, creating an impenetrable barrier against the juicy berry filling and guaranteeing no soggy bottom. Immediately reduce the oven temperature to 375°F (190°C) after this step.
Mixing the Berry Medley: A Burst of Flavor
- Combine Ingredients:
In a large bowl, gently combine the mixed berries, granulated sugar, cornstarch, fresh lemon juice, and vanilla extract. Toss carefully to ensure all berries are evenly coated without crushing them.
- The Cornstarch Secret:
The cornstarch is essential here; it thickens the berry juices as the pie bakes, preventing a watery filling and contributing to a beautifully set slice of this Classic Berry Crumble Pie.
Assembling the Golden Crumble Topping
- Whisk Dry Ingredients:
In a separate bowl, combine the all-purpose flour, granulated sugar, packed light brown sugar, and ground cinnamon (if using). Whisk them together to ensure even distribution of flavors.
- Cut in Cold Butter:
Using a pastry blender or your fingertips, cut in the cold, cubed unsalted butter until a coarse, crumbly mixture forms. You’re aiming for varying sizes of crumbs for an interesting and appealing texture.
Bringing It All Together: Assembling Your Masterpiece
- Fill the Crust:
Pour the prepared berry filling evenly into your partially baked pie crust, spreading it gently to ensure an even layer.
- Add Crumble:
Evenly sprinkle the coarse crumble topping over the berries, ensuring good coverage for that signature crunch and golden finish.
The Grand Finale: Baking to Golden Perfection
- Prepare for Baking:
Place the pie plate on a baking sheet. This acts as a safety net for any potential drips and helps promote even heating of the pie’s bottom crust, further preventing sogginess.
- Bake Until Golden:
Bake at 375°F (190°C) for 50-60 minutes. The pie is done when the berry filling is visibly bubbly around the edges and the crumble topping is beautifully golden brown. These are your clear visual cues that the pie is perfectly cooked through.
- Prevent Burning:
If you notice the crust edges starting to brown too quickly, you can loosely cover them with strips of aluminum foil to shield them from direct heat, allowing the rest of the pie to bake evenly.
Patience is a Virtue: Cooling for the Perfect Slice
- Critical Cooling Time:
This step is absolutely vital for success! Let the pie cool completely on a wire rack for at least 3-4 hours before attempting to slice it. Resist the urge to cut too soon!
- Why It Matters:
Cooling allows the hot, liquid filling to set and firm up properly. This prevents it from running out when sliced and further ensures a glorious, non-soggy bottom, showcasing your expert Classic Berry Crumble Pie.
Chef’s Secrets: Elevate Your Classic Berry Crumble Pie Experience
Mastering the Crust: Dough Handling Tips
Keep it Cold: The colder your butter and water, the flakier your crust will be. If your kitchen is warm, consider chilling your flour and mixing bowl before you start.
Don’t Overwork: Mix the pie dough just until it comes together. Excessive handling develops gluten, which can result in a tough, chewy crust rather than a tender, flaky one.
Repairing Cracks: If your rolled-out crust cracks, simply pinch the edges back together or gently patch with a small piece of excess dough. It’s a forgiving process!
Berry Brilliance: Enhancing Your Filling Flavors
Adjust Sweetness: Taste your berries before adding sugar. If they’re particularly tart, add a tablespoon or two more granulated sugar. If very sweet, you can reduce it slightly.
Add Zest: For an extra burst of aromatic citrus, grate in a teaspoon of lemon or orange zest along with the lemon juice. It brightens the entire pie and adds subtle complexity.
A Hint of Spice: A tiny pinch of nutmeg, allspice, or ground ginger can beautifully complement the mixed berries, adding a comforting layer of warmth to your Classic Berry Crumble Pie.
Perfect Crumble, Every Time
Cold Butter is Key: Just like with the pie crust, cold butter is essential for achieving a crumbly, not greasy, topping. It helps maintain distinct crumbs during baking.
Varying Textures: Don’t strive for perfectly uniform crumbs. A mix of fine and slightly larger clumps adds wonderful textural interest to the topping, creating a more dynamic bite.
Temperature Tweaks for Optimal Results
Know Your Oven: Oven temperatures can vary significantly. If your pie browns unevenly, rotate it halfway through the baking process for a uniform golden finish.
Listen and Look: The filling should be visibly bubbling vigorously not just at the edges, but also in the center, to ensure it’s fully cooked and thickened before you remove it from the oven.
Pie Problems Solved: Common Challenges & Quick Fixes
Why is My Pie Bottom Still Soggy?
A soggy bottom crust is almost always due to insufficient blind baking or not allowing the pie to cool adequately. Ensure your crust is a true light golden brown and feels dry before adding the filling. Also, commit to the full 3-4 hours of cooling time for the filling to set properly.
Filling Too Runny?
A runny filling typically indicates either insufficient cornstarch or that the pie was cut into too soon. Double-check your cornstarch measurement for the next bake, and extend the cooling time to ensure the juices have fully thickened and set.
Crumble Too Pale or Too Dark?
If your crumble is too pale, it simply needs more time in the oven; tent the crust edges with foil if they are already perfect. If it’s too dark, your oven might be running hot, or it was overbaked; consider reducing the temperature slightly or covering the top with foil earlier in the baking process.
Crust Edges Burning?
This is a very common issue! The best fix is to loosely cover the edges of your pie crust with strips of aluminum foil once they reach your desired golden-brown color. This shields them from direct heat, allowing the rest of the pie to continue baking without overbrowning the crust.
Creative Twists: Customizing Your Classic Berry Crumble Pie
Seasonal Swaps: Beyond Mixed Berries
While mixed berries are undeniably delicious, don’t hesitate to experiment with other fruits depending on the season. A delightful apple crumble cream pie or a vibrant peach and raspberry combination makes for excellent alternatives.
For a taste of pure summer, consider a solo berry pie, like a luscious strawberry crumble cake, focusing on peak-season berries for maximum flavor and sweetness. Remember to adjust sugar levels based on the fruit’s natural sweetness.
Dietary Alternatives: Gluten-Free & Dairy-Free Options
To create a gluten-free Classic Berry Crumble Pie, simply substitute the all-purpose flour in both the crust and crumble with a high-quality 1:1 gluten-free baking blend. Look for one that contains xanthan gum for the best texture.
For a dairy-free version, use a plant-based butter alternative in both the pie crust and the crumble topping. Ensure it’s very cold and solid to achieve the desired flaky crust and crumbly topping texture.
Flavor Boosters: Spices and Zests
Beyond the classic cinnamon, try a pinch of allspice or ground ginger in the crumble for an extra layer of warmth and complexity. A tablespoon of fresh orange zest added to the berry filling can provide a bright, unexpected lift that beautifully complements the fruit.
A tiny splash of almond extract, used in conjunction with the vanilla, offers another dimension of nuanced flavor that pairs exceptionally well with most berries.
Enjoying Your Creation: Storage & Make-Ahead Tips
Storing Leftovers for Lasting Freshness
Once your Classic Berry Crumble Pie has cooled completely, cover it loosely with plastic wrap or aluminum foil. It will keep beautifully at room temperature for up to 2 days, or refrigerated for up to 4 days.
For longer enjoyment, individual slices can be wrapped securely and frozen for up to 2-3 months. Just be aware that the crumble topping might lose a tiny bit of its original crispness after freezing.
Baking Ahead: Planning for Effortless Entertaining
You can prepare the pie crust dough up to 2 days in advance and store it, tightly wrapped, in the refrigerator. The crumble topping can also be made ahead and kept chilled in an airtight container for up to 3 days, making assembly a breeze.
For ultimate convenience, you can bake the entire pie, cool it completely, then wrap it tightly and freeze it. Thaw overnight in the refrigerator before reheating for a nearly fresh-baked experience.
Reheating for That Fresh-Baked Feel
To reheat a whole pie, place it in a 300°F (150°C) oven for about 20-30 minutes, or until warmed through. This low temperature helps to re-crisp the crust without overcooking the filling.
Individual slices can be quickly reheated in a microwave for 30-60 seconds, or for a crisper crust and crumble, use a toaster oven for about 5-10 minutes.
Your Classic Berry Crumble Pie Questions Answered
Can I use frozen berries without thawing them first?
Yes, you absolutely can! In fact, using frozen berries directly can sometimes be beneficial as they release their juices slower during baking, which can help prevent a watery filling. There’s no need to thaw them beforehand; just toss them with the sugar and cornstarch as usual.
What if I don’t have pie weights for blind baking?
No pie weights? No problem at all! You can easily use dried beans, uncooked rice, or even granulated sugar as a substitute. Simply line your pie crust with parchment paper, then fill it with your chosen weights to cover the bottom and sides evenly. These can be stored and reused for future blind-baking.
How can I make this pie gluten-free?
To make your Classic Berry Crumble Pie entirely gluten-free, simply substitute the all-purpose flour in both the pie crust and the crumble with a reputable 1:1 gluten-free baking flour blend. Most blends work wonderfully in crumble and pie crusts, ensuring a delicious result that everyone can enjoy.
Can I prepare the pie ahead of time and bake it later?
You can certainly assemble the entire pie, including the filling and crumble topping, and refrigerate it unbaked for up to 24 hours. When you’re ready to bake, add an extra 10-15 minutes to the baking time to account for the chill from the refrigerator.
Your Kitchen Awaits: Share Your Classic Berry Crumble Pie Masterpiece!
Now that you’re armed with the definitive secrets to a perfectly crisp crust and a lusciously juicy filling, it’s time to create your very own show-stopping Classic Berry Crumble Pie. This recipe is more than just a dessert; it’s a guaranteed crowd-pleaser and a testament to truly expert baking.
Don’t be shy – we encourage you to try this recipe, share your baking triumphs, your favorite berry combinations, or any questions you might have in the comments below. We can’t wait to see your golden-brown masterpieces, free from any hint of a soggy bottom!
Classic Berry Crumble Pie
Course: DessertCuisine: American CuisineDifficulty: easy8
servings30
minutes1
hour360
minutesAmerican Cuisine
Ingredients
Pie Crust:
1 1/4 cups all-purpose flour
1/2 teaspoon salt
1/2 cup (1 stick) unsalted butter, very cold and cubed
4-5 tablespoons ice cold water
Berry Filling:
5 cups mixed berries (fresh or frozen, like blueberries, raspberries, blackberries)
1/2 cup granulated sugar (adjust to berry sweetness)
1/4 cup cornstarch
1 tablespoon fresh lemon juice
1 teaspoon vanilla extract
Crumble Topping:
1 cup all-purpose flour
1/2 cup granulated sugar
1/4 cup light brown sugar, packed
1/2 cup (1 stick) unsalted butter, cold and cubed
1/2 teaspoon ground cinnamon (optional)
For Serving:
Vanilla ice cream
Directions
- Prepare the Pie Crust: In a large bowl, whisk together the all-purpose flour and salt. Cut in the very cold, cubed unsalted butter using a pastry blender or your fingertips until pea-sized crumbs form. Gradually add the ice cold water, one tablespoon at a time, mixing gently until the dough just comes together. Do not overmix. Form the dough into a disk, wrap it tightly in plastic wrap, and refrigerate for at least 30 minutes.
- Partial Blind Bake the Crust (Your Secret to No Soggy Bottom!): Preheat your oven to 400°F (200°C). On a lightly floured surface, roll out the chilled pie dough into a 12-inch circle. Carefully transfer it to a 9-inch pie plate. Trim any excess dough and crimp the edges decoratively. Line the pie crust with parchment paper and fill it with pie weights or dried beans. Bake for 15 minutes. Carefully remove the parchment paper and pie weights, then bake for another 5-7 minutes, until the crust is lightly golden brown. This crucial step pre-cooks and protects your bottom crust for ultimate crispness. Reduce oven temperature to 375°F (190°C).
- Make the Berry Filling: In a large bowl, gently combine the mixed berries, granulated sugar, cornstarch, fresh lemon juice, and vanilla extract. Toss carefully to ensure all berries are evenly coated. The cornstarch is essential for thickening the berry juices and preventing a watery filling.
- Prepare the Crumble Topping: In a separate bowl, combine the all-purpose flour, granulated sugar, packed light brown sugar, and ground cinnamon (if using). Cut in the cold, cubed unsalted butter using a pastry blender or your fingertips until a coarse, crumbly mixture forms.
- Assemble the Pie: Pour the prepared berry filling evenly into the partially baked pie crust. Evenly sprinkle the crumble topping over the berries.
- Bake the Pie: Place the pie plate on a baking sheet (this helps catch any potential drips and ensures even bottom heating). Bake at 375°F (190°C) for 50-60 minutes, or until the berry filling is bubbly around the edges and the crumble topping is golden brown. If the crust edges start to brown too quickly, you can cover them loosely with aluminum foil.
- Cool and Serve: This part is critical for the filling to set. Let the pie cool completely on a wire rack for at least 3-4 hours before slicing. This allows the filling to firm up properly, further preventing any possibility of a soggy bottom. Serve warm with a generous scoop of vanilla ice cream.
Notes
- Crucial to cool completely for 3-4 hours to ensure filling sets and prevents a soggy bottom.