For years, the quest for a truly perfect, crack-free cheesecake seemed like an impossible dream. I often found myself frustrated with grainy textures or dreaded fissures marring my efforts. Through countless attempts, I finally unlocked the simple secrets to creating an unbelievably creamy and elegant Classic Chocolate-Topped Cheesecake that consistently impresses.
This recipe isn’t just about baking; it’s about understanding the subtle nuances that transform basic ingredients into a masterpiece. Prepare to create a dessert that will be remembered for its exquisite texture and rich flavor, proving that a show-stopping cheesecake is truly within reach.
Beyond Basic: Why This Classic Chocolate-Topped Cheesecake Belongs in Your Recipe Box
Many cheesecakes promise perfection, but this particular recipe delivers on every front. It’s designed to eliminate common baking anxieties, guiding you to a reliably exceptional result every time.
Unveiling the “No-Crack, Silky Smooth” Secret
The core promise of this recipe is its consistently flawless texture and crack-free surface. This achievement hinges on a few crucial yet simple techniques.
We’ll emphasize the importance of room temperature ingredients, gentle mixing, and a gradual cooling process. These steps are meticulously woven into the instructions to ensure your success.
More Reasons to Fall in Love with This Recipe
Despite its impressive appearance, this cheesecake is surprisingly approachable for home bakers. The thoughtful steps ensure a rewarding experience, even for those new to cheesecake making.
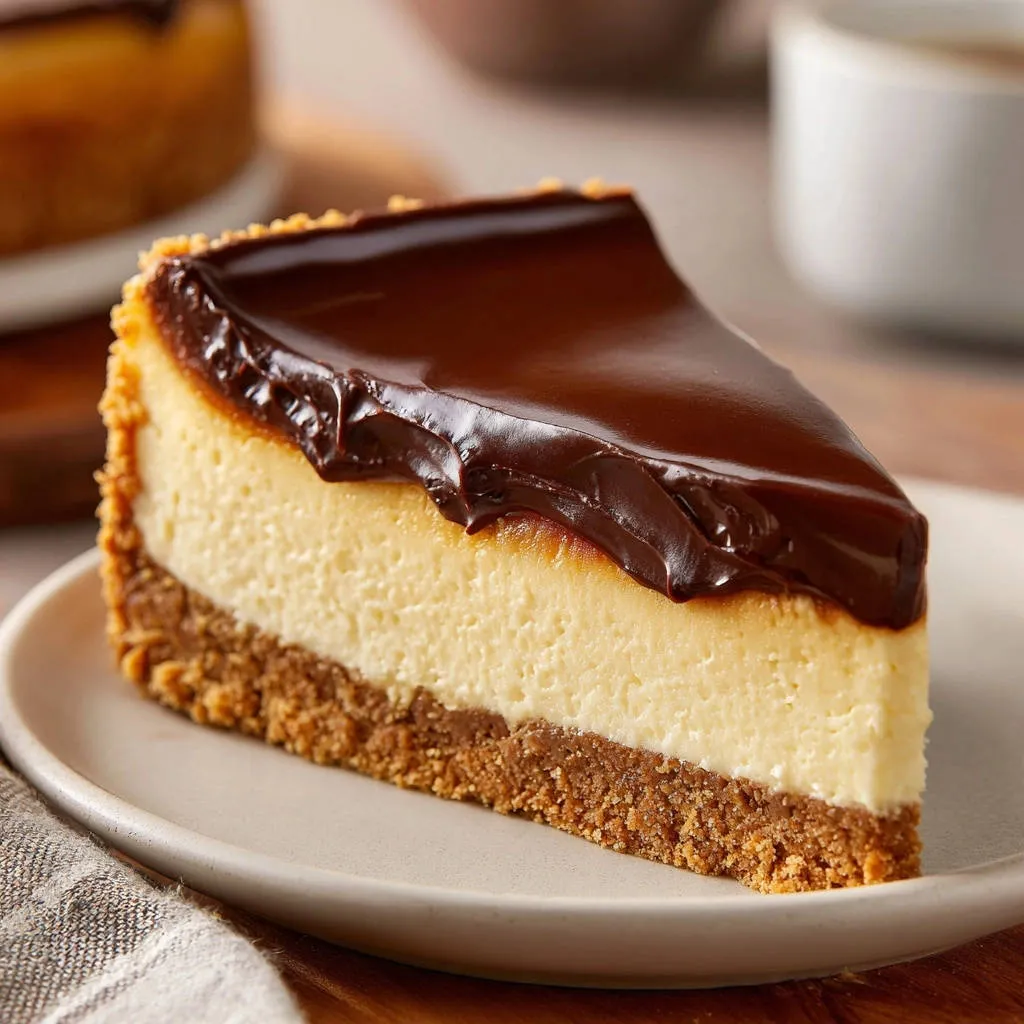
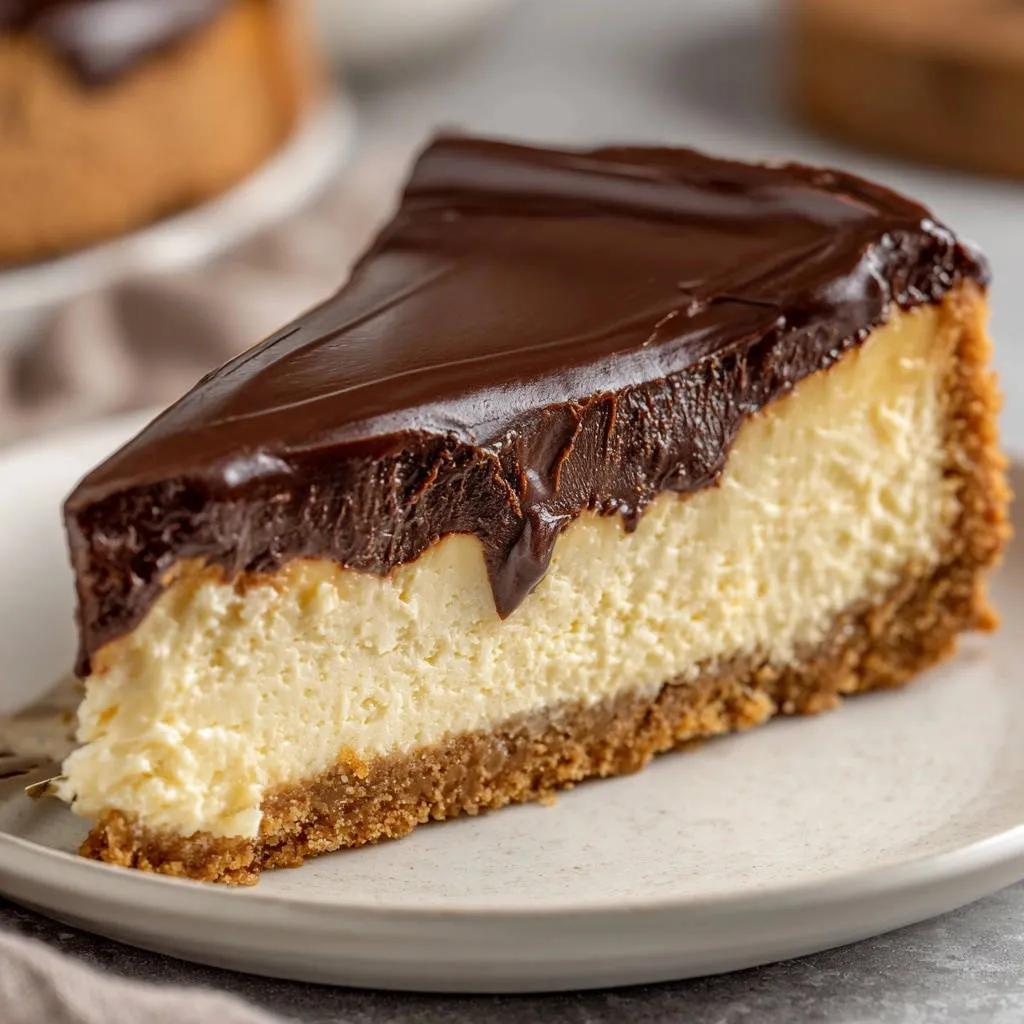
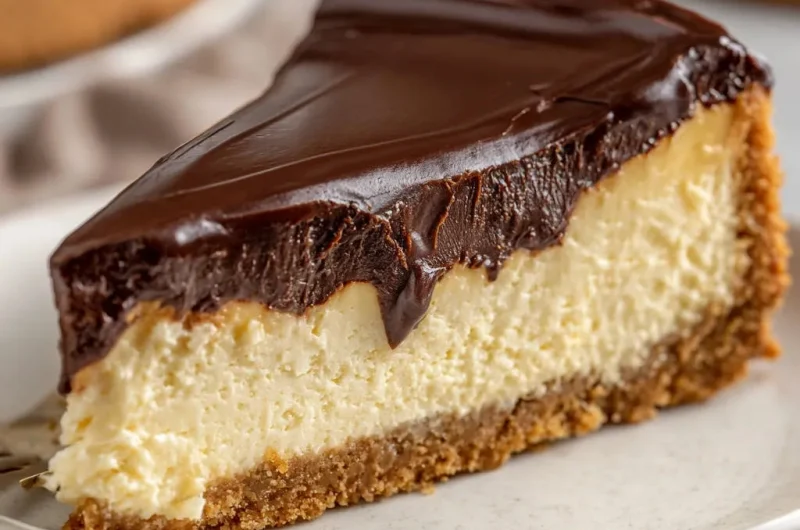
Its harmonious blend of tangy cheesecake and rich chocolate ganache makes it an irresistible crowd-pleaser. This dessert offers that perfect balance of decadence without being overly sweet.
Gathering Your Essentials: Ingredients for a Decadent Delight
Quality ingredients are the foundation of any outstanding dessert. Here’s a closer look at what you’ll need and why each component matters for this Classic Chocolate-Topped Cheesecake.
The Perfect Foundation: Graham Cracker Crust Components
Graham Cracker Crumbs: These provide a sturdy, slightly sweet, and perfectly crunchy base. Ensure they are finely crushed for an even crust.
Granulated Sugar: A small amount adds just enough sweetness to the crust, balancing the buttery richness.
Unsalted Butter, Melted: Butter binds the crumbs together, ensuring the crust holds its shape beautifully. Using unsalted allows you to control the overall saltiness.
The Heart of the Matter: Creamy Cheesecake Filling Core
Full-Fat Cream Cheese, Softened to Room Temperature: This is non-negotiable for a truly silky smooth texture. Full-fat provides richness and structure, while room temperature prevents lumps and overmixing.
Granulated Sugar: Sweetens the filling, balancing the tang of the cream cheese. Its fine texture dissolves easily, contributing to smoothness.
Large Eggs, Room Temperature: Eggs act as a binder and provide richness. Crucially, room temperature eggs emulsify better with the cream cheese, preventing a grainy texture.
Sour Cream, Room Temperature: Adds a delightful tang and contributes significantly to the cheesecake’s signature creamy texture. Its acidity also helps prevent cracking.
Vanilla Extract: A classic flavor enhancer that deepens the richness of the cheesecake, complementing both the dairy and chocolate notes.
The Finishing Touch: Decadent Chocolate Ganache Topping
Semi-Sweet Chocolate Chips: These melt smoothly to create a rich, slightly bitter chocolate layer. High-quality chips will yield the best flavor and shine.
Heavy Cream: Essential for transforming chocolate chips into a glossy, pourable ganache. The high fat content ensures a luxurious, stable topping.
Tools of the Trade: Equipping Your Cheesecake Journey
Having the right tools makes the cheesecake baking process smoother and more enjoyable. These essentials will help you achieve outstanding results.
9-inch Springform Pan: Absolutely critical for cheesecakes. Its removable sides allow for easy, damage-free release of your delicate dessert.
Large Mixing Bowls: You’ll need at least one for the crust and one for the cheesecake filling.
Electric Mixer (Stand or Handheld): Essential for thoroughly combining the cream cheese and sugar, achieving a smooth, lump-free batter.
Rubber Spatula: Perfect for scraping down the sides of the bowl, ensuring all ingredients are well incorporated without overmixing.
Heavy-Duty Aluminum Foil: Multiple layers are needed to securely wrap the springform pan, preventing water from seeping in during the water bath.
Large Roasting Pan: This holds the springform pan and the boiling water for the essential water bath. Ensure it’s large enough to comfortably fit your springform pan.
Wire Rack: For cooling the cheesecake completely after baking, allowing air circulation to prevent condensation and a soggy bottom.
Measuring Cups and Spoons: Accurate measurements are always important in baking.
Crafting Perfection: A Step-by-Step Journey to Your Best Cheesecake
Each step in this recipe for Classic Chocolate-Topped Cheesecake is designed for success. Follow these instructions carefully for a stunning result.
- Prepare for Success: Preheat & Pan Prep
Start by preheating your oven to 325°F (160°C). This ensures the oven is at a consistent temperature when the cheesecake goes in, which is vital for even baking.
- The Perfect Base: Crafting Your Graham Cracker Crust
In a medium bowl, combine the graham cracker crumbs, 1/4 cup granulated sugar, and melted butter. Mix these ingredients thoroughly until the crumbs are evenly moistened.
Press this mixture firmly and evenly into the bottom of a 9-inch springform pan. You can use the bottom of a flat glass or measuring cup to help compact it. For a crispier crust, you can bake it for 8-10 minutes, then cool, or simply chill it for 15 minutes before adding the filling.
- The Secret to Smoothness: Room Temperature Ingredients Are Key
This is arguably the most crucial step for a silky smooth cheesecake. Ensure all your cold ingredients-especially the cream cheese, eggs, and sour cream-are fully at room temperature before you begin mixing the filling.
Allowing them to warm up ensures they blend together effortlessly without lumps, forming a homogenous batter. It also reduces the need for excessive mixing, which can incorporate too much air.
- Blending the Cream Cheese Batter: Gentle Does It
In a large mixing bowl, using an electric mixer on medium speed, beat the softened cream cheese and 1 1/2 cups granulated sugar together. Mix just until they are smooth and combined, typically about 2-3 minutes. The goal is creamy and uniform, not airy.
Avoid overmixing at this stage, as incorporating too much air into the batter can lead to cracks during baking and a less dense, rich texture.
- Incorporating Eggs: One at a Time, Low and Slow
Add the eggs one at a time to the cream cheese mixture, mixing on low speed after each addition. Mix only until each egg is just incorporated into the batter.
Be sure to scrape down the sides of the bowl as needed to ensure everything is evenly blended. Do not beat excessively after adding the eggs, as this introduces more air than desired.
- The Final Fold: Sour Cream and Vanilla Harmony
Gently fold in the room temperature sour cream and vanilla extract. Continue folding just until they are blended into the batter.
The objective is a uniform, lump-free batter with minimal air bubbles. Overmixing here can also contribute to cracks.
- Setting Up the Water Bath: Your Anti-Crack Shield
Wrap the bottom and sides of your springform pan tightly with several layers of heavy-duty aluminum foil. This creates a secure barrier, preventing any water from seeping into the crust or cheesecake during baking.
Place the foil-wrapped springform pan into a larger roasting pan. This roasting pan will hold the water bath.
- Pour and Place: Filling the Pan and Starting the Bake
Carefully pour the prepared cheesecake batter into the crust-lined springform pan. Smooth the top gently with a spatula.
Transfer the roasting pan, with the cheesecake inside, to the preheated oven. Once in the oven, carefully pour boiling water into the roasting pan around the springform pan, making sure the water comes about halfway up the sides of the springform pan.
- Baking to Perfection: The Jiggle Test
Bake for 60-75 minutes, or until the edges of the cheesecake are set and lightly golden. The center should still have a slight wobble when the pan is gently shaken. This gentle jiggle is perfectly normal and indicates that the cheesecake is properly baked and will set fully during cooling.
- The Game-Changer: Gradual Oven Cooling for No Cracks
The secret to avoiding cracks and achieving that perfect texture lies in the cooling process. Once baked, turn off the oven, but leave the cheesecake inside.
Prop the oven door open slightly and allow the cheesecake to cool gradually inside the oven for 1 hour. This slow temperature transition prevents the sudden contraction that causes unsightly cracks.
- The Long Chill: Refrigeration for Ultimate Texture
After the oven cool-down, carefully remove the cheesecake from the water bath (discard the water) and place it on a wire rack to cool completely at room temperature. This takes a few hours.
Once cooled, transfer the cheesecake to the refrigerator for at least 4 hours, or preferably overnight, before adding the topping. This crucial chilling time allows the cheesecake to firm up beautifully, ensuring perfect slices and a dense, creamy texture. For more insights on achieving that ideal consistency, you might find our guide to perfect cheesecake baking helpful.
- Crafting the Decadent Chocolate Topping: Ganache Brilliance
In a microwave-safe bowl, combine the chocolate chips and heavy cream. Microwave on high for 30-second intervals, stirring well in between each interval, until the chocolate is completely melted and the mixture is smooth and glossy.
Allow the ganache to cool slightly at room temperature. It should thicken to a pourable yet cohesive consistency; if it’s too warm, it will run off the cheesecake.
- The Grand Finale: Topping and Final Set
Once the cheesecake is thoroughly chilled, pour the slightly cooled chocolate topping over it, spreading it evenly to the edges with an offset spatula or the back of a spoon. Don’t worry if it slightly drips down the sides; it adds to the rustic charm.
Refrigerate the cheesecake again for at least 30 minutes to allow the chocolate topping to set firmly. This final chill ensures the ganache holds its shape beautifully when sliced.
- Slice, Serve, and Savor!
Once the chocolate topping is set, carefully remove the springform pan sides. Use a hot, sharp knife (wiped clean between each cut) for the cleanest slices. Serve chilled and enjoy your magnificent Classic Chocolate-Topped Cheesecake!
Chef’s Secrets: Elevate Your Classic Chocolate-Topped Cheesecake Game
These expert tips delve into the ‘why’ behind the recipe’s best practices, ensuring your Classic Chocolate-Topped Cheesecake is nothing short of extraordinary.
The Room Temperature Advantage: Why It Matters So Much
Softened cream cheese, eggs, and sour cream are paramount for a perfectly smooth cheesecake batter. Cold ingredients, especially cream cheese, will not blend smoothly and will leave stubborn lumps, no matter how long you mix.
Beyond lumps, cold ingredients require more mixing time to combine, which inadvertently incorporates excessive air. This trapped air can expand during baking, leading to cracks as the cheesecake cools and contracts.
Mastering the Mix: Preventing Air Bubbles and Overworking
The “do not overmix” rule is critical for cheesecake success. Overmixing introduces too much air into the batter, which causes the cheesecake to puff up excessively in the oven and then fall dramatically, resulting in unsightly cracks.
Using low speed when incorporating eggs and sour cream ensures they are just blended without whipping unnecessary air. Aim for a smooth, homogenous batter that still has a rich, dense feel.
The Art of the Water Bath: Your Key to Even Baking
A water bath (bain-marie) is your best friend for a perfectly baked, crack-free cheesecake. The steam created by the hot water provides a moist, humid environment in the oven.
This even, gentle heat distribution cooks the cheesecake slowly and uniformly, preventing the edges from baking faster than the center and eliminating temperature extremes that cause cracking. It results in an incredibly creamy texture from edge to edge.
The Unbeatable Gradual Cooling Method: Your Crack-Proof Strategy
Sudden temperature changes are the primary culprits behind cheesecake cracks. Taking a hot cheesecake directly from the oven into a cooler kitchen can cause it to contract too rapidly.
Leaving it in the turned-off, propped-open oven allows the cheesecake to adjust to the ambient temperature gradually. This slow cooling process dramatically minimizes the risk of cracking, preserving its beautiful smooth surface.
Patience Pays Off: Chilling for Flawless Slices and Flavor
Adequate refrigeration time is not just for chilling; it’s essential for the cheesecake’s structure and flavor development. During this extended chill, the cheesecake fully sets, firms up, and becomes wonderfully dense.
The flavors also have time to meld and deepen, resulting in a richer, more complex taste. Rushing this step will lead to a softer, potentially messy slice and less defined flavor.
Troubleshooting Common Cheesecake Conundrums
Even with the best intentions, sometimes things go awry. Here’s how to address common issues when making your Classic Chocolate-Topped Cheesecake.
Why Does My Cheesecake Crack?
Cracks are often caused by overbaking, sudden temperature changes, or overmixing. Ensure you bake only until the edges are set and the center has a slight jiggle, then follow the gradual oven cooling method.
Remember to avoid whipping too much air into your batter by mixing on low speed and only until just combined.
Is My Cheesecake Grainy or Lumpy?
A grainy or lumpy texture almost always points to cold ingredients, particularly cream cheese. Ensure all dairy and eggs are at true room temperature before mixing.
It can also result from not beating the cream cheese and sugar sufficiently before adding other ingredients. Beat them until perfectly smooth initially.
My Crust is Soggy! How Can I Fix It?
A soggy crust is typically due to water seepage from the water bath or not being properly compacted. Make sure your springform pan is wrapped very tightly with multiple layers of heavy-duty foil.
Press the graham cracker crust firmly into the pan. Optionally pre-baking it for a few minutes can also help create a barrier against moisture.
What If My Cheesecake Still Jiggles Too Much?
A slight jiggle in the center is desirable, as it indicates a perfectly set, creamy cheesecake that will firm upon chilling. If it looks very liquid or sloshes like unset jelly, it might be undercooked.
If truly undercooked, you can sometimes return it to the oven for an additional 10-15 minutes, but be cautious of overbaking, which can lead to cracks.
Serving, Storage, and Make-Ahead Magic
Get the most out of your Classic Chocolate-Topped Cheesecake with these practical tips.
Achieving Picture-Perfect Slices
For clean, sharp slices, always use a long, sharp knife. Dip the knife in hot water and wipe it dry between each cut. This prevents sticking and ensures a smooth cut through both the cheesecake and the ganache.
Optimal Storage for Freshness and Flavor
Store leftover cheesecake tightly covered in the refrigerator. It will stay fresh and delicious for 3-4 days. Covering it prevents it from absorbing odors from other foods and keeps it from drying out.
Planning Ahead: Make-Ahead Tips for Stress-Free Entertaining
This Classic Chocolate-Topped Cheesecake is an ideal make-ahead dessert. You can bake the cheesecake, cool it completely, and refrigerate it for up to 2 days before serving.
Add the chocolate topping just a few hours before you plan to serve it, allowing it sufficient time to set. This approach minimizes stress on the day of your event.
Your Classic Chocolate-Topped Cheesecake Questions Answered
Can I substitute ingredients in this Classic Chocolate-Topped Cheesecake?
While this recipe is optimized for full-fat ingredients for the best texture, some substitutions are possible. Using low-fat cream cheese or sour cream will result in a less rich and potentially less firm cheesecake.
For the crust, other crumb types like chocolate wafers or shortbread can be used, adjusting butter if needed. For the chocolate topping, you can use dark or milk chocolate, but be aware it will alter the ganache’s sweetness and consistency slightly.
How do I know if my cheesecake is perfectly baked?
The perfect cheesecake is baked when the outer 2-3 inches appear set and slightly puffed, but the very center (about 2-3 inches in diameter) still has a slight, almost shimmering jiggle when gently nudged. This central jiggle will continue to set as the cheesecake cools.
Can I freeze this Classic Chocolate-Topped Cheesecake?
Yes, cheesecake freezes beautifully! Once completely chilled and the chocolate topping is set, wrap individual slices or the whole cheesecake (without the topping if possible, or add it after thawing) tightly in plastic wrap, then again in aluminum foil.
It can be frozen for up to 1-2 months. Thaw overnight in the refrigerator before serving. The texture should remain largely intact, though the ganache might slightly dull.
What’s the best way to transport a cheesecake without damaging it?
The key to transporting a cheesecake is to ensure it is thoroughly chilled and set, preferably overnight. Use a sturdy cake carrier or a box with a flat bottom that is slightly larger than the cheesecake.
Place a non-slip mat or towel under the cake box in your vehicle to prevent sliding. Keep it as level as possible during transit, and ideally, transport it in a cooler if the journey is long or temperatures are warm.
Is a water bath absolutely necessary for this recipe?
While some cheesecake recipes omit it, a water bath is highly recommended for this Classic Chocolate-Topped Cheesecake recipe. It provides the moist, even heat that is crucial for achieving that signature silky-smooth, crack-free texture.
Without it, your cheesecake is more likely to bake unevenly, develop a tougher texture, and crack on top. If you must skip it, you might increase the oven cooling time, but results may vary.
Your Masterpiece Awaits: Share and Savor!
You now possess the knowledge and the “secrets” to create an exceptional Classic Chocolate-Topped Cheesecake. Each slice offers a delightful balance of creamy tang and rich chocolate, a testament to your newfound baking expertise.
Don’t just make this recipe; make it yours. Share your beautiful creation with friends and family, savoring every compliment that comes your way. Happy baking, and happy indulging!
Classic Chocolate-Topped Cheesecake
Course: DessertCuisine: American CuisineDifficulty: easy12
servings45
minutes1
hour540
minutesAmerican Cuisine
Ingredients
For the Crust:
1 1/2 cups graham cracker crumbs
1/4 cup granulated sugar
1/2 cup unsalted butter, melted
For the Cheesecake Filling:
32 ounces full-fat cream cheese, softened to room temperature
1 1/2 cups granulated sugar
4 large eggs, room temperature
1 cup sour cream, room temperature
1 teaspoon vanilla extract
For the Chocolate Topping:
1 cup semi-sweet chocolate chips
1/2 cup heavy cream
Directions
- Preheat your oven to 325 degrees F (160 degrees C).
- For the crust: In a medium bowl, combine the graham cracker crumbs, 1/4 cup granulated sugar, and melted butter until well mixed. Press firmly and evenly into the bottom of a 9-inch springform pan. You can optionally bake this for 8-10 minutes, then let cool, or just chill it for 15 minutes before adding filling.
- For the cheesecake filling: This step is key for a silky smooth texture. Ensure all your cold ingredients, especially the cream cheese, eggs, and sour cream, are fully at room temperature. This allows them to blend without lumps or overmixing.
- In a large mixing bowl, using an electric mixer on medium speed, beat the softened cream cheese and 1 1/2 cups granulated sugar together until just smooth and combined, about 2-3 minutes. Avoid overmixing here, as incorporating too much air can lead to cracks.
- Add the eggs one at a time, mixing on low speed after each addition just until incorporated. Scrape down the sides of the bowl as needed. Do not beat excessively.
- Gently fold in the room temperature sour cream and vanilla extract until just blended. The goal is a uniform, lump-free batter with minimal air bubbles.
- Prepare a water bath: Wrap the bottom and sides of your springform pan tightly with several layers of heavy-duty aluminum foil to prevent water from seeping in. Place the foil-wrapped springform pan into a larger roasting pan.
- Pour the cheesecake batter into the prepared crust. Carefully transfer the roasting pan with the cheesecake to the oven. Pour boiling water into the roasting pan around the springform pan, making sure the water comes about halfway up the sides of the springform pan.
- Bake for 60-75 minutes, or until the edges are set and lightly golden, but the center still has a slight wobble when gently shaken. This slight jiggle is normal and will set during cooling.
- The secret to avoiding cracks and maintaining that perfect texture is in the cooling. Turn off the oven, prop the oven door open slightly, and let the cheesecake cool gradually inside the oven for 1 hour.
- Carefully remove the cheesecake from the water bath (discard the water) and place it on a wire rack to cool completely at room temperature. Once cooled, refrigerate the cheesecake for at least 4 hours, or preferably overnight, before adding the topping. This chilling time helps the texture firm up beautifully.
- For the chocolate topping: In a microwave-safe bowl, combine the chocolate chips and heavy cream. Microwave on high for 30-second intervals, stirring in between, until the chocolate is melted and smooth. Let the ganache cool slightly until it thickens to a pourable consistency.
- Pour the chocolate topping over the chilled cheesecake, spreading it evenly to the edges. Refrigerate the cheesecake again for at least 30 minutes to allow the chocolate topping to set. Slice and serve!
Notes
- Ensure all cold ingredients are at room temperature for a lump-free batter. The gradual cooling process is crucial for preventing cracks and achieving the perfect texture.