Is there anything more disheartening than spending time and effort baking a beautiful cake, pulling it from the oven, letting it cool, and then slicing into it only to find a dry, crumbly disappointment? It feels like a baking failure, right? I’ve been there more times than I care to admit, especially when tackling white cakes. Achieving that perfect, moist, tender crumb felt like some kind of baking magic reserved for professionals.
Well, I’m here to tell you that magic is real, and it’s surprisingly simple! After years of experimenting and perfecting, I discovered a technique that guarantees a moist Classic Coconut Cake every single time. This isn’t just another coconut cake recipe; it’s THE recipe that will banish dry cake blues forever and give you that dreamy, perfect slice that looks and tastes incredible.
Get ready to impress everyone with a bake that is not only stunning but boasts a deliciously soft texture bursting with sweet coconut flavor. Let’s dive into the secrets!
Why This Classic Coconut Cake is a Keeper
So, what makes this Classic Coconut Cake stand out from the rest? It all comes down to moisture and flavor. Here are just a few reasons why this recipe will become your new favorite:
- Unbeatable Moisture: Say goodbye to dry cake forever! We use a combination of ingredients and a specific mixing technique that locks in moisture.
- Tender Crumb: The texture is incredibly soft and delicate, melting in your mouth with every bite.
- Perfect Coconut Flavor: It has just the right amount of sweet coconut goodness, both in the cake layers and the luscious frosting.
- Simple Ingredients: You likely have most of these ingredients in your pantry already.
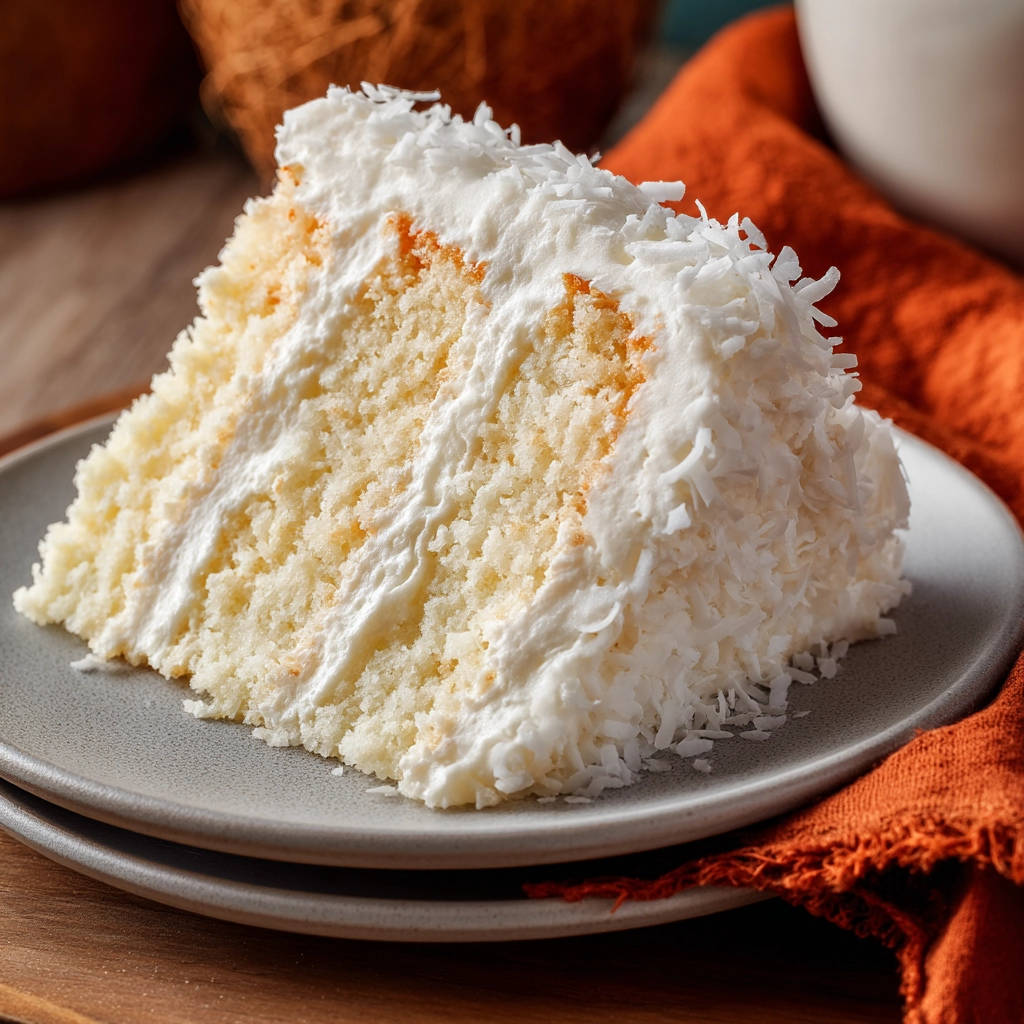
- Beautiful Presentation: It’s a stunning centerpiece for any celebration, effortlessly elegant.
This recipe isn’t just about avoiding dryness; it’s about creating a truly delightful dessert experience. It’s the kind of cake that gets rave reviews every single time.
Gathering Your Ingredients for the Moist Classic Coconut Cake
Baking is a science, but it’s also an art form, and starting with the right ingredients is key to a masterpiece. For this moist Classic Coconut Cake, we rely on a thoughtful combination of pantry staples and a couple of key players that ensure that tender, hydrated crumb we’re aiming for.
Our dry base starts with standard all-purpose flour, the foundation of the cake. We’ll be using a generous amount of granulated sugar, which not only sweetens but also helps retain moisture. Baking powder and baking soda work together as our leaveners, giving the cake its lift and airy texture, while a touch of salt balances all that sweetness and enhances the flavors.
For the wet components that bring everything together and contribute significantly to the cake’s moistness, we’re using a blend of fats and liquids. Softened unsalted butter provides classic cake richness and structure, while the addition of vegetable oil helps keep the cake soft and moist over time – a fantastic trick for preventing dryness. Using only large egg whites contributes to a lighter, brighter crumb characteristic of a classic white cake, and they should be at room temperature for optimal emulsification. Pure vanilla extract adds that essential warm, sweet aroma and flavor.
Now for the moisture heroes: room temperature buttermilk and sour cream. Buttermilk, with its acidity, reacts with the baking soda to aid in leavening and tenderness. Sour cream adds richness and a wonderful tang, but more importantly, its high fat content ensures an incredibly moist and tender cake crumb. Using both of these cultured dairy products at room temperature is crucial for creating a smooth, well-combined batter.
The frosting is a simple yet decadent American buttercream, elevated with the star ingredient. You’ll need softened unsalted butter as the base, powdered sugar for sweetness and structure, and a little milk or heavy cream to achieve the perfect consistency. A splash more vanilla extract enhances the overall sweetness, and of course, a cup of shredded sweetened coconut is folded in, bringing that signature tropical flavor and texture. Make sure to have a little extra shredded coconut on hand for decorating the outside!
Here is a summary of the ingredients you’ll need:
- 2 and 1/4 cups all purpose flour
- 1 and 3/4 cups granulated sugar
- 1 teaspoon baking powder
- 1/2 teaspoon baking soda
- 1/2 teaspoon salt
- 1/2 cup unsalted butter softened
- 1/4 cup vegetable oil
- 4 large egg whites room temperature
- 1 teaspoon vanilla extract
- 1 and 1/4 cups buttermilk room temperature
- 1/2 cup sour cream room temperature
For the Frosting:
- 1 cup unsalted butter softened
- 4 cups powdered sugar
- 1/4 cup milk or heavy cream
- 1 teaspoon vanilla extract
- 1 cup shredded sweetened coconut plus more for decorating
Using room temperature ingredients, especially the egg whites, buttermilk, and sour cream, is a step that truly makes a difference in the final texture of your cake. Cold ingredients don’t emulsify as well, leading to a less uniform batter and potentially a less tender cake. So, plan ahead and let them sit out for about 30-60 minutes before you begin baking.
Crafting Your Classic Coconut Cake: Step-by-Step
Now for the fun part – bringing all those wonderful ingredients together to create a truly spectacular cake! The process for this Classic Coconut Cake is straightforward, but paying attention to a couple of key steps will ensure that moist, tender result we’re aiming for. Precision in mixing is much more important than speed here.
- Preparation is Key: Begin by preheating your oven to a standard 350 degrees F (175 degrees C). This ensures your oven is at the correct temperature from the moment the cakes go in, promoting even baking. Prepare your cake pans meticulously. Grease two 8-inch round cake pans thoroughly. You can use butter or baking spray. After greasing, add a little flour to each pan, tilting and tapping it to coat the entire greased surface, then tap out any excess. This simple step is your best friend for preventing the cakes from sticking, ensuring they release cleanly after baking.
- Combine the Dry Elements: In a spacious large bowl, measure out your dry ingredients: the all-purpose flour, granulated sugar, baking powder, baking soda, and salt. Give them a good whisk together. This step isn’t just about mixing; it aerates the flour slightly and ensures that your leavening agents and salt are evenly distributed throughout the dry mix, which is vital for a consistent rise and flavor in your cake.
- Cream the Fats: In a separate, medium-sized bowl, cream together the softened unsalted butter and vegetable oil. Beat these together until the mixture is smooth and well combined. Creaming butter and sugar together is traditional, but incorporating the oil here helps distribute fat throughout the batter, leading to a more tender crumb. The goal is a uniform, slightly lighter mixture, not necessarily light and fluffy like when creaming butter and sugar alone.
- Incorporate the Eggs and Flavor: Gradually add the room temperature large egg whites to the creamed butter and oil mixture, beating them in one at a time. This allows each egg white to fully emulsify with the fat before the next is added. Once the egg whites are incorporated, stir in the vanilla extract. The mixture might look slightly curdled at this stage, and that’s perfectly normal – it will come together as you add the dry and wet ingredients.
- Whisk the Moisture Boosters: In a small bowl, whisk together the room temperature buttermilk and sour cream until they are smooth and thoroughly combined. This blend of acidic buttermilk and creamy sour cream is fundamental to the cake’s moistness and tender texture. Having them combined and ready helps prevent overmixing later.
- Begin Combining Wet and Dry (Phase 1): Now we start building the batter. Add about half of your whisked dry ingredients to the bowl with the wet ingredients (the creamed butter/oil/egg white mixture). Mix on low speed just until you no longer see streaks of dry flour. It’s important to mix only until barely combined at this stage. Overmixing here starts to develop gluten, which can make your cake tough.
- Add the Buttermilk Mixture: Pour the entire buttermilk and sour cream mixture into the batter. Again, mix on low speed only until it’s just combined. The batter will likely look thin and might seem a bit separated, but don’t worry, this is how it should be. The liquids are hydrating the dry ingredients, which is essential for moisture.
- Finish Combining (The Crucial Step!): Add the remaining half of the dry ingredients to the bowl. This is arguably the most critical stage for achieving a moist, tender cake. Mix on low speed ONLY until the last traces of dry flour disappear and the batter is just combined. Stop mixing as soon as you reach this point. A few small lumps of flour are absolutely fine – they will hydrate during baking. The more you mix after the flour is incorporated, the more gluten you develop, leading directly to a tougher, drier cake. Err on the side of slightly undermixed rather than overmixed.
- Divide the Batter: Carefully divide the cake batter evenly between the two prepared 8-inch cake pans. You can weigh the pans to ensure equal amounts for even layers. Gently smooth the tops with a spatula.
- Bake Until Done: Place the pans in the preheated oven and bake for 30-35 minutes. The baking time can vary depending on your oven, so start checking around 30 minutes. You’ll know the cakes are done when a wooden skewer or toothpick inserted into the center of a cake comes out clean with no wet batter attached (a few moist crumbs are okay). The cakes should also be lightly golden around the edges and spring back slightly when gently pressed in the center.
- Cooling Down: Once baked, remove the cakes from the oven and let them cool in their pans for 10 minutes on a wire rack. This allows them to set slightly before you attempt to handle them. After 10 minutes, carefully invert the cakes onto the wire rack to cool completely. Ensure they are fully cool before you even think about frosting them. Frosting a warm cake is a recipe for a melty, messy disaster!
- Whip Up the Frosting: While the cake layers are cooling, prepare the creamy coconut frosting. In a large bowl, beat the softened butter until it’s creamy and smooth, without any lumps. Gradually add the powdered sugar, alternating with the milk or heavy cream. Start and end with powdered sugar, adding small amounts at a time and beating until smooth and fluffy. The amount of liquid may vary slightly depending on your climate and the consistency you prefer for spreading. Finally, stir in the delightful cup of shredded sweetened coconut. This adds wonderful texture and intense coconut flavor to the frosting.
- Assemble the Layers: Once your cake layers are completely cool to the touch, place the first layer onto your serving plate or cake stand. Dollop a generous amount of the coconut frosting onto the center and spread it evenly almost to the edges. Gently place the second cake layer on top, trying to align it as best as possible.
- Frost the Cake: Use the remaining frosting to cover the top and sides of the entire cake. Don’t worry about getting it perfectly smooth unless you’re going for a specific look; the shredded coconut on the outside will cover any imperfections. For a classic look, use an offset spatula to create swirls or peaks.
- Add the Coconut Coating: Take your extra shredded coconut and gently press it onto the sides and top of the frosted cake. You can cup your hand filled with coconut and press it against the sides, rotating the cake as you go. Sprinkle coconut over the top. This adds beautiful texture, presentation, and extra coconut flavor!
- Chill Before Slicing: This final step is often skipped, but it makes a huge difference for presentation. Chill the frosted cake in the refrigerator for at least 30 minutes before you plan to slice it. This allows the frosting to firm up slightly, resulting in much cleaner, neater slices.
Taking your time with the mixing, especially after adding the flour, and ensuring your ingredients are at the correct temperature are the game-changers here. You’ve successfully baked a moist, flavorful Classic Coconut Cake!
Tips for Perfect Classic Coconut Cake Every Time
Even with a reliable recipe, a few extra tips can elevate your baking from good to absolutely spectacular. Here are some pro pointers for making the best moist Classic Coconut Cake:
- Room Temperature is Non-Negotiable: Seriously. Cold egg whites, butter, buttermilk, and sour cream won’t emulsify correctly, leading to a less cohesive batter and a denser, drier cake. Plan ahead!
- Measure Flour Correctly: The most common culprit for dry cake is too much flour. Fluff up the flour in its container, spoon it gently into your measuring cup, and level it off with a straight edge. Don’t scoop directly from the bag, as this compacts the flour.
- Do NOT Overmix: I cannot stress this enough. Once you add the flour, mix on the lowest speed possible and stop as soon as you see no more dry streaks. A few small lumps are preferable to overdeveloped gluten.
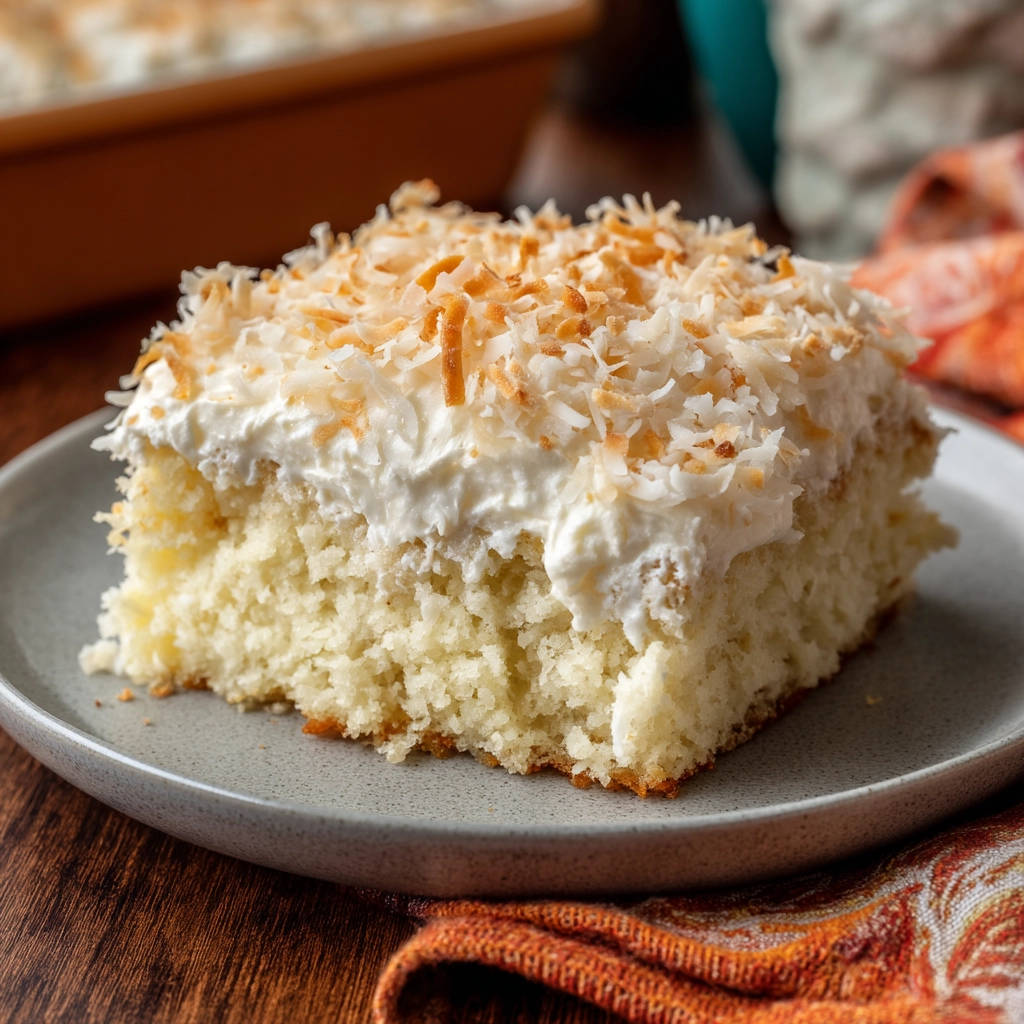
- Use Good Quality Coconut: Sweetened shredded coconut gives the best flavor and moisture for this recipe. Ensure it’s fresh. You can toast some extra coconut lightly in a dry pan for a few minutes until golden for an extra layer of flavor and texture for decoration.
- Pan Prep is Important: Properly greasing and flouring your pans ensures your beautiful cakes release easily. Parchment paper circles cut to fit the bottom of the pans are also a great insurance policy.
- Don’t Peek Too Early: Opening the oven door repeatedly lets out heat and can cause cakes to bake unevenly or even sink in the center. Wait until close to the end of the minimum baking time to check for doneness.
- Cool Completely: Be patient! Trying to frost warm cakes is a recipe for a mess. Let the layers cool entirely on a wire rack before even thinking about applying frosting.
Recipe Variations
Want to mix things up a bit? This moist Classic Coconut Cake recipe is a great base for some fun variations:
- Add Coconut Extract: For an extra intense coconut flavor, add 1/2 to 1 teaspoon of coconut extract along with the vanilla extract in the cake batter.
- Tropical Twist: Add a layer of pineapple curd or passion fruit puree between the cake layers before adding the frosting. Just be mindful of adding too much moisture.
- Toasted Coconut: Toast the shredded coconut for decoration until golden brown for a nuttier, more complex flavor and crunch.
- Make Cupcakes: This batter works beautifully for cupcakes. Fill lined cupcake tins about two-thirds full and reduce baking time to 18-22 minutes, checking with a toothpick.
Experimenting with flavors and textures is part of the joy of baking! If you enjoy experimenting with fruit flavors in baked goods, you might also like trying our Classic Peach Crumble or maybe our Raspberry Layer Cake.
Storage
Once frosted and chilled, store leftover Classic Coconut Cake in an airtight container in the refrigerator for up to 3-4 days. The moisture from the frosting helps keep the cake tender.
For longer storage, wrap individual slices or the entire cake tightly in plastic wrap, then foil, and freeze for up to 2-3 months. Thaw overnight in the refrigerator before serving.
Your Classic Coconut Cake Questions Answered (FAQ)
Here are some common questions about baking a moist Classic Coconut Cake:
Can I use liquid egg whites from a carton?
Yes, you can use liquid egg whites from a carton, but ensure you measure the correct volume equivalent to 4 large egg whites (usually around 1/2 cup). They should also be at room temperature.
What if I don’t have buttermilk? Can I make a substitute?
While real buttermilk provides the best result due to its specific acidity and texture, you can make a substitute. For 1 and 1/4 cups of buttermilk, measure out 1 and 1/4 cups of milk (preferably whole milk), remove 1 and 1/4 tablespoons, and then stir in 1 and 1/4 tablespoons of white vinegar or lemon juice. Let it sit for 5-10 minutes until it curdles slightly. This acidity helps, but the thickness of real buttermilk is preferable for moisture.
Can I substitute the sour cream?
Full-fat plain yogurt or Greek yogurt can sometimes be substituted for sour cream, cup for cup. However, sour cream provides a unique richness and tang that contributes significantly to the cake’s moistness and flavor. If you substitute, the texture might be slightly different, but it should still be a moist cake.
My cake sunk in the middle. What happened?
There are several possibilities: the oven wasn’t fully preheated, the oven temperature is inaccurate (consider an oven thermometer), you opened the oven door too early or too often, or the cake was underbaked when removed from the oven.
How can I make the frosting less sweet?
American buttercream is naturally quite sweet. You can try adding a tiny pinch of salt to the frosting to help balance the sweetness. Ensure your butter is unsalted so you can control the salt level yourself. You can also try using heavy cream instead of milk for a richer texture that sometimes makes it feel less sugary.
Why is it important to mix on low speed?
Mixing on low speed, especially after adding the flour, minimizes gluten development. Gluten provides structure, but too much makes cakes tough and dry. Low speed gives you more control and reduces the risk of overmixing.
Can I make this cake ahead of time?
Yes! The unfrosted cake layers can be baked, cooled completely, wrapped tightly in plastic wrap, and stored at room temperature for a day or two, or frozen for longer. The frosting can also be made a day ahead and stored in the refrigerator; let it come to room temperature and re-beat it before frosting. The assembled and frosted cake is best enjoyed within 3-4 days from baking.
Enjoy Your Homemade Classic Coconut Cake!
There you have it – the secrets to baking a Classic Coconut Cake that is unbelievably moist, tender, and packed with delightful coconut flavor. This recipe is proof that achieving baking perfection is within reach for anyone with a little patience and attention to technique, especially the crucial ‘do not overmix’ rule!
This cake is perfect for birthdays, holidays, potlucks, or simply because you deserve a truly wonderful treat. The combination of the light, moist cake layers and the rich, coconut-studded frosting is simply irresistible.
Give this recipe a try, and I promise you won’t go back to dry cake ever again! I’d love to hear how it turns out for you. Leave a comment below and let me know your favorite part of this Classic Coconut Cake.
Classic Coconut Cake

Ingredients
- 2 and 1/4 cups all purpose flour
- 1 and 3/4 cups granulated sugar
- 1 teaspoon baking powder
- 1/2 teaspoon baking soda
- 1/2 teaspoon salt
- 1/2 cup unsalted butter softened
- 1/4 cup vegetable oil
- 4 large egg whites room temperature
- 1 teaspoon vanilla extract
- 1 and 1/4 cups buttermilk room temperature
- 1/2 cup sour cream room temperature
- For the Frosting:
- 1 cup unsalted butter softened
- 4 cups powdered sugar
- 1/4 cup milk or heavy cream
- 1 teaspoon vanilla extract
- 1 cup shredded sweetened coconut plus more for decorating
Directions
- Preheat your oven to 350 degrees F. Grease and flour two 8 inch round cake pans.
- In a large bowl whisk together the flour sugar baking powder baking soda and salt.
- In a separate medium bowl cream together the softened butter and vegetable oil until smooth.
- Beat in the egg whites one at a time then stir in the vanilla extract.
- In a small bowl whisk together the buttermilk and sour cream.
- Add half of the dry ingredients to the wet ingredients and mix on low speed just until combined.
- Add the buttermilk mixture and mix on low speed just until combined.
- Add the remaining dry ingredients and mix on low speed until just combined. This is the key to preventing a dry cake; do not overmix. A few small lumps are okay. The more you mix after adding the flour the tougher and drier your cake will be.
- Divide the batter evenly between the prepared pans.
- Bake for 30-35 minutes or until a wooden skewer inserted into the center comes out clean.
- Let cakes cool in the pans for 10 minutes then invert onto a wire rack to cool completely.
- While cakes cool make the frosting: In a large bowl beat the softened butter until creamy. Gradually beat in the powdered sugar alternating with the milk or cream until smooth and fluffy. Stir in the vanilla extract and 1 cup shredded coconut.
- Once cakes are completely cool place one layer on a serving plate. Spread a generous layer of frosting on top. Place the second cake layer on top.
- Frost the top and sides of the cake with the remaining frosting. Press shredded coconut onto the sides and top of the cake.
- Chill cake for at least 30 minutes before slicing for cleaner cuts.