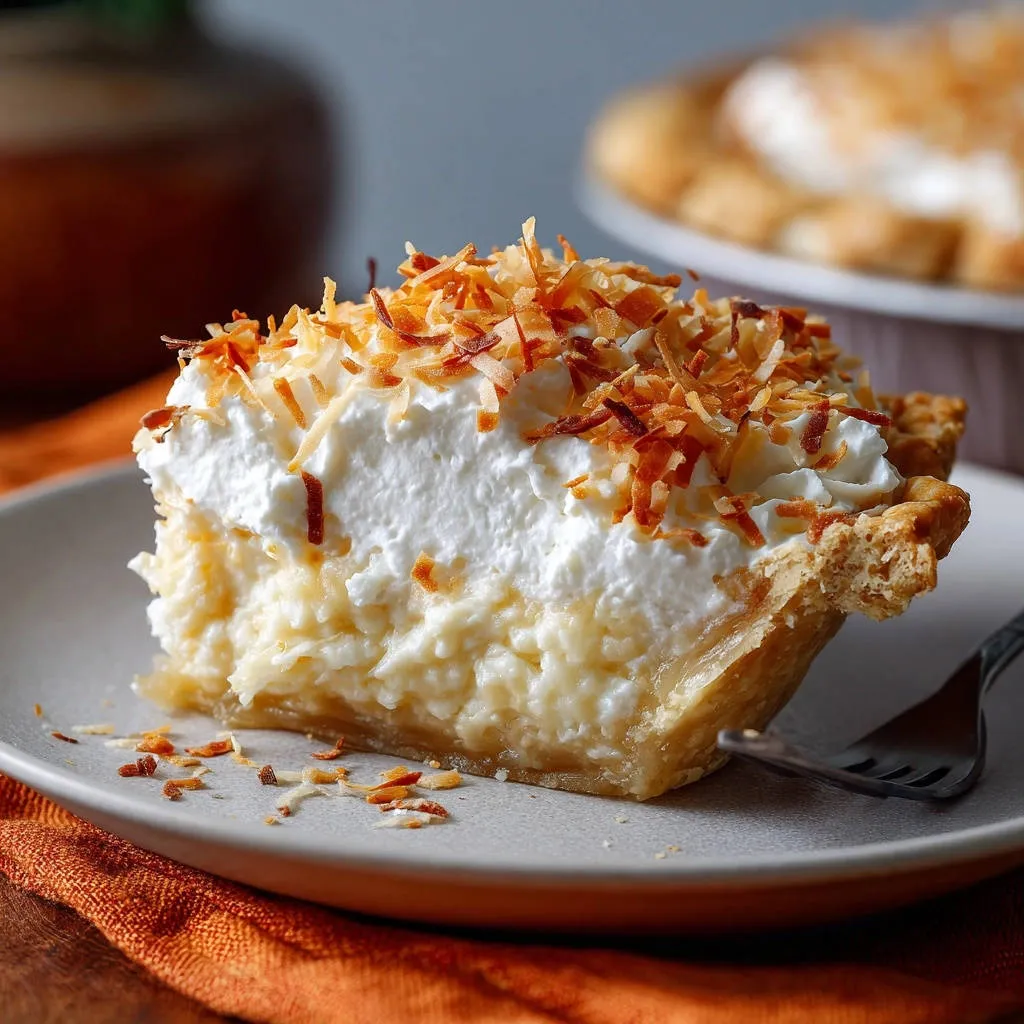
For years, I adored Classic Coconut Cream Pie but secretly dreaded the inevitable soggy crust. That disappointing texture at the bottom of an otherwise dreamy pie felt like an unsolvable puzzle. But I’ve cracked the code, and this recipe delivers a truly spectacular Classic Coconut Cream Pie with a perfectly crisp, golden crust that stands up to its luscious filling, every single time.
Get ready to impress everyone with a pie that combines velvety coconut custard with a cloud-like whipped topping, all supported by a flawless, never-soggy base. It’s the ultimate tropical indulgence, perfect for any occasion.
Unlock the Secret to a Perfectly Crisp Classic Coconut Cream Pie
Forget everything you thought you knew about difficult pies. This isn’t just another Classic Coconut Cream Pie recipe; it’s a foolproof method designed for success. We tackle the most common pie-making frustrations head-on, ensuring a truly exceptional dessert.
Why This Classic Coconut Cream Pie Recipe Is Your New Favorite
This recipe consistently yields a pie with a wonderfully crisp, flaky crust, guaranteeing no soggy surprises. It’s a game-changer for pie enthusiasts.
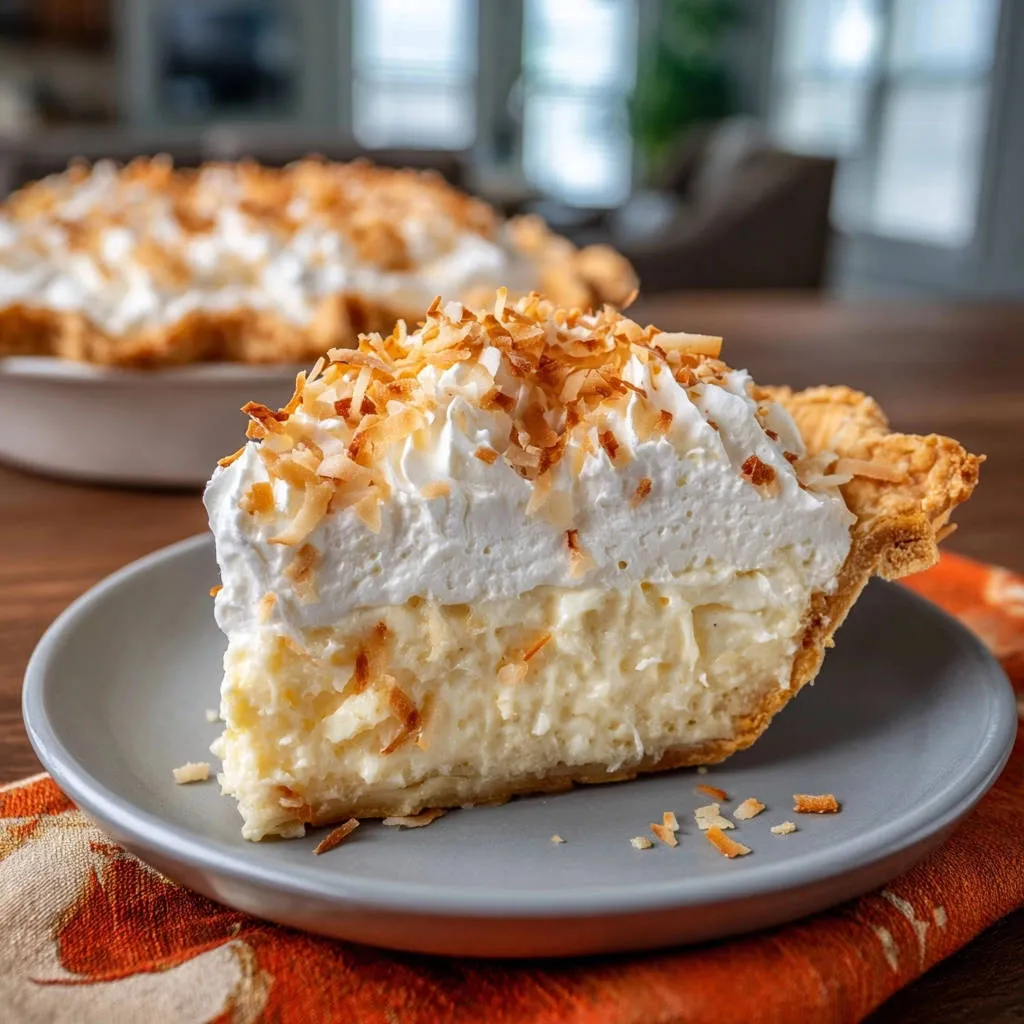
The filling is incredibly rich, smooth, and bursting with natural coconut flavor, striking the perfect balance between sweetness and creaminess.
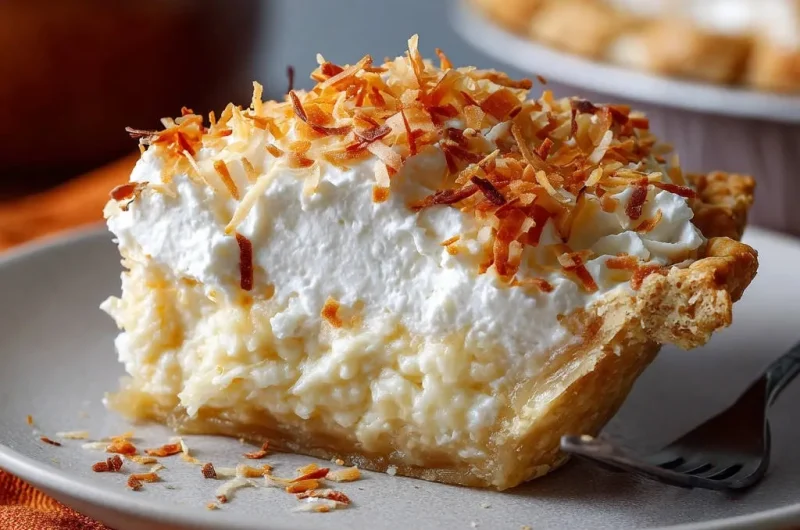
Each slice is a visual delight, crowned with billowy whipped cream and golden toasted coconut. It’s a dessert that tastes as good as it looks.
The “No Soggy Bottom” Pledge: How We Cracked the Code
Our secret lies in a meticulous double-baking technique for the pie crust. We don’t just blind bake; we ensure the crust is thoroughly dried and golden brown.
This creates an impenetrable moisture barrier, preventing the creamy filling from seeping in and making the crust soft. It’s a simple yet highly effective trick that guarantees a perfectly crisp foundation.
Pricking the crust and baking it again after removing the weights allows steam to escape, further ensuring maximum dryness and flakiness.
Gather Your Culinary Canvas: Ingredients for Perfect Pie
Success in baking often begins with understanding your ingredients. Here’s a closer look at what makes this Classic Coconut Cream Pie so extraordinary.
The Foundation: Your Chosen Pie Crust
Whether you opt for a high-quality store-bought crust or a delicate homemade one, a 9-inch pie crust is essential. Its quality will significantly impact the overall texture of your finished pie.
Building the Silky Coconut Custard Base
Whole Milk: Provides the rich, creamy base for our custard, contributing to its luxurious texture and mouthfeel.
Granulated Sugar: Balances the sweetness, enhancing the coconut flavor without overpowering it.
Cornstarch: Acts as our primary thickener, creating a stable and perfectly set custard that holds its shape beautifully.
Large Egg Yolks: Enrich the custard, adding silkiness, color, and contributing to its velvety consistency. They also help with thickening.
Enrichment and Flavor: Butter, Vanilla, and Coconut
Unsalted Butter: Stirred in at the end, it adds a luxurious sheen and an extra layer of richness to the warm custard.
Vanilla Extract: A crucial flavor enhancer, vanilla complements the coconut beautifully and adds aromatic depth.
Shredded Coconut (Sweetened or Unsweetened): The star of the show! Your choice depends on your preference for sweetness; both options will infuse the custard with authentic coconut flavor.
The Cloud-Like Crown: Whipped Cream Topping
Heavy Cream: Whips into a light, airy, and decadent topping. Ensure it’s very cold for the best results.
Powdered Sugar: Sweetens the cream and helps stabilize it, preventing a grainy texture.
The Finishing Touch: Toasted Coconut Garnish
Toasted Shredded Coconut: This isn’t just for looks; it adds an irresistible nutty crunch and deepens the coconut flavor profile of the entire pie.
Essential Gear for Your Classic Coconut Cream Pie Journey
Having the right tools at hand makes the baking process smoother and more enjoyable. Here’s what you’ll need to create your perfect pie.
Standard Kitchen Staples You’ll Need
9-inch Pie Plate: The vessel for your delicious creation, ensuring even baking and a beautiful shape.
Medium Saucepans (x2): One for the custard base, and a smaller one for tempering yolks or a backup if needed.
Whisks: Essential for combining ingredients smoothly, preventing lumps, and stirring the custard consistently.
Measuring Cups and Spoons: Accuracy is key for baking; these ensure precise ingredient ratios.
Small Bowl: For whisking egg yolks and tempering them effectively.
Specialized Tools for Pie Perfection
Parchment Paper: Crucial for lining the crust during blind baking, preventing sticking and easy removal of weights.
Pie Weights (or dried beans/rice): Absolutely necessary for weighing down the crust during blind baking to prevent shrinkage and puffing.
Electric Mixer: Makes whipping heavy cream to stiff peaks effortless and quick, ensuring a light and airy topping.
Wire Rack: For cooling your baked crust completely, allowing air circulation to maintain its crispness.
Your Step-by-Step Blueprint for Classic Coconut Cream Pie Perfection
Follow these detailed steps carefully to achieve a Classic Coconut Cream Pie that is nothing short of magnificent.
- Step 1: Prepare and Blind Bake Your Crust (The Foundation of Crispness)
Fit your chosen 9-inch pie crust into the plate, crimping the edges for a decorative finish. This initial shape sets the stage for a beautiful pie.
Line the crust with parchment paper, then fill generously with pie weights, dried beans, or rice. This critical step prevents the crust from shrinking and puffing up during baking, ensuring a flat, even base.
Bake in a preheated 400°F (200°C) oven for 15 minutes. This first bake begins the crucial drying process, which is essential for preventing sogginess.
- Step 2: The Double-Bake for Ultimate Crispness
Carefully remove the parchment and weights from the crust. Prick the bottom of the crust all over with a fork to release any trapped steam that could cause bubbles.
Return the crust to the oven and bake for another 10-15 minutes, or until it’s a deep golden brown and feels completely dry to the touch. This thorough second bake creates a robust moisture barrier, guaranteeing no soggy bottoms for your Classic Coconut Cream Pie.
Let the crust cool completely on a wire rack before proceeding. A fully cooled crust is essential to prevent the warm filling from creating steam and making the crust soggy.
- Step 3: Whisk the Dry Base for Your Custard
In a medium saucepan, thoroughly whisk together the granulated sugar and cornstarch until no lumps remain. This ensures a smooth, lump-free custard, which is key for a silky texture.
- Step 4: Gradually Incorporate Milk and Thicken
Gradually whisk in the whole milk until the mixture is smooth and fully combined. This step prevents lumps from forming when heat is applied.
Cook the milk mixture over medium heat, stirring constantly with a whisk, until it thickens significantly and comes to a gentle boil. Continuous stirring is crucial to prevent scorching at the bottom of the pan.
Continue to boil and stir for 1 minute to ensure the cornstarch is fully cooked and its thickening power is completely activated. This guarantees a stable, properly set custard.
Remove the saucepan from the heat once the mixture has reached the desired thickness and boiled for the full minute.
- Step 5: Master the Art of Tempering Egg Yolks
In a small separate bowl, vigorously whisk the egg yolks until they are light yellow and slightly frothy. Tempering prevents the yolks from scrambling when added to the hot milk mixture.
Slowly pour about half a cup of the hot milk mixture into the whisked egg yolks while continuously whisking. This gradual addition gently raises the temperature of the yolks, preparing them for the main custard.
- Step 6: Finalize the Rich Coconut Filling
Pour the tempered egg yolk mixture back into the saucepan with the remaining hot milk mixture. Whisk constantly to ensure even incorporation and a smooth texture.
Return the saucepan to medium heat and cook for 1-2 minutes more, stirring constantly, until the filling is very thick and creamy. Do not boil vigorously at this stage, as it can overcook the eggs.
Remove from heat and stir in the unsalted butter, vanilla extract, and shredded coconut until everything is well combined and smooth. The butter adds richness, and vanilla enhances the flavor profile of your Classic Coconut Cream Pie.
- Step 7: The Critical Chill for a Set Filling
Pour the warm coconut filling into your completely cooled, pre-baked pie crust. Ensure the crust is truly cold to avoid steam and potential sogginess underneath the filling.
Place a piece of plastic wrap directly onto the surface of the filling, gently pressing it down to prevent a skin from forming as it chills. This keeps the filling smooth and creamy.
Refrigerate for at least 4 hours, or preferably overnight, until the filling is thoroughly set. Patience here is rewarded with a firm, perfectly sliceable pie.
- Step 8: Whipping the Luscious Topping
In a clean, cold bowl, using an electric mixer, whip the heavy cream and powdered sugar on high speed until stiff peaks form. Cold equipment and ingredients are essential for stable whipped cream that holds its shape.
- Step 9: The Grand Finale: Assemble and Serve
Spread the luscious whipped cream evenly over the chilled pie. Create beautiful swirls or elegant peaks for an attractive finish that hints at the delight within.
Generously sprinkle with the toasted shredded coconut for a beautiful finish and added crunch. This elevates both the look and texture of your Classic Coconut Cream Pie.
Slice and serve immediately for the best experience, allowing everyone to savor the fresh, creamy goodness.
Phase 1: Achieving the Flawless Pie Crust
Phase 2: Crafting the Velvety Coconut Custard
Phase 3: Chilling and Assembling Your Masterpiece
Chef’s Notes: Elevating Your Classic Coconut Cream Pie
Toasting Coconut for Max Flavor: Don’t skip toasting your shredded coconut for garnish! A quick toast in a dry pan or oven brings out a deeper, nuttier flavor and adds a beautiful golden hue to your pie, making it visually more appealing.
The Power of Cold for Whipped Cream: Ensure your heavy cream, mixing bowl, and even your beaters are thoroughly chilled before whipping. This helps the cream whip up faster, achieve stiffer, and more stable peaks, which are less likely to deflate.
Patience with Chilling: While 4 hours is the minimum, chilling your pie overnight truly allows the custard to set perfectly, resulting in cleaner, more defined slices and a much more stable structure. Resist the urge to cut too soon!
Don’t Rush the Tempering: When tempering egg yolks, pour the hot mixture very slowly while continuously whisking. This gradual temperature increase is key to gently warming the yolks, preventing them from scrambling and ensuring a smooth custard.
Adjusting Sweetness: For a less sweet pie, you can slightly reduce the granulated sugar in the custard or opt for unsweetened shredded coconut. Taste and adjust to your preference to find your perfect balance.
When Pie Problems Arise: Classic Coconut Cream Pie Fixes
Problem: My Crust Isn’t Crisp (or is Soggy!)
Solution: The most common culprit is insufficient pre-baking. Ensure you’ve completed both stages of the crust bake until it’s a deep golden brown and completely dry to the touch. Proper pricking and adequate weights in the first stage are also crucial to prevent steam buildup and ensure an even bake.
Problem: The Custard Filling Didn’t Thicken Properly
Solution: This usually means the cornstarch wasn’t cooked long enough, or the heat was too low. Ensure the mixture comes to a gentle boil and continues to cook for a full minute, stirring constantly, to fully activate the cornstarch. You can return it to medium heat and continue to whisk until the desired thickness is achieved.
Problem: My Whipped Cream is Soupy
Solution: Lack of proper chilling for the cream and equipment is often the issue. Make sure everything is ice-cold before you begin whipping. Overwhipping can also turn cream grainy or buttery, so stop once firm, stiff peaks form and the cream holds its shape well.
Problem: The Filling Has a Skin on Top
Solution: This happens when the warm filling is exposed to air as it cools. Always press plastic wrap directly onto the surface of the filling before chilling to prevent a skin from forming. If a slight skin does form, you can gently peel it off before adding the whipped topping for a perfectly smooth surface.
Presenting & Preserving Your Divine Classic Coconut Cream Pie
Perfect Presentation for Your Pie
For the most stunning presentation, ensure your pie is well-chilled before slicing. Use a sharp, thin knife and clean it between each slice for crisp, defined edges. A light sprinkle of extra toasted coconut on each plate, or a delicate coconut curl, adds a professional touch.
Storing Leftover Classic Coconut Cream Pie
Store any leftover pie loosely covered with plastic wrap or in an airtight container in the refrigerator. The pie is best enjoyed within 3-4 days for optimal freshness and texture. The crust will soften slightly over time, but the flavors will remain delightful.
Can You Make Classic Coconut Cream Pie Ahead of Time?
Absolutely! This pie is an excellent make-ahead dessert. You can prepare the entire pie (crust, filling, and whipped topping) up to 24 hours in advance. Keep it well-chilled in the refrigerator. The flavors often meld and deepen overnight, making it even more delicious and convenient for entertaining.
Classic Coconut Cream Pie Common Questions: Answered!
Can I use unsweetened shredded coconut?
Yes, you absolutely can! If you prefer a less sweet pie or want more control over the sugar content, unsweetened shredded coconut is a great choice. You might find you want to add an extra tablespoon or two of sugar to the custard to compensate, or simply enjoy the more pronounced coconut flavor. For an equally delightful coconut treat, you might also enjoy our recipe for easy coconut bars.
Is it possible to make this pie gluten-free?
This recipe can easily be made gluten-free by simply using a pre-baked gluten-free pie crust. The filling itself is naturally gluten-free. Ensure you follow the same double-baking technique for the gluten-free crust to achieve a crisp bottom, as this is crucial for all pie crusts.
How long does the Classic Coconut Cream Pie need to chill?
The pie needs to chill for a minimum of 4 hours to allow the custard filling to fully set and firm up. For the best, most sliceable results, we highly recommend chilling it overnight (8+ hours). This ensures a firm texture that holds its shape beautifully when cut, preventing any messy slices.
Can I freeze Classic Coconut Cream Pie?
While you can freeze the pie, the texture of the custard and especially the whipped cream may change upon thawing, potentially becoming slightly watery or grainy. It’s best enjoyed fresh and chilled. If freezing, do so before adding the whipped cream topping, and freeze for no longer than one month. Thaw gradually in the refrigerator.
What if I don’t have pie weights for blind baking?
No problem! You can use dried beans or uncooked rice as a perfectly suitable substitute for pie weights. Just line your crust with parchment paper first, then fill generously with your chosen substitute. Make sure to use a generous amount to properly weigh down the crust and prevent shrinkage during baking.
Your Classic Coconut Cream Pie Adventure Awaits!
Now that you’re equipped with the secrets to a perfectly crisp crust and a luscious, creamy filling, there’s nothing stopping you from creating the ultimate Classic Coconut Cream Pie. This isn’t just a dessert; it’s a statement piece, a comforting classic, and a testament to the joy of homemade baking.
We encourage you to embark on this delicious journey and experience the delight of a pie that truly lives up to its promise. Share your creations with friends and family, and prepare for the rave reviews! If you’re eager to explore more creamy delights, our perfect cheesecake recipe is another fantastic option to master. Don’t forget to share your pie pictures and experiences in the comments below – we’d love to see your masterpieces.
Classic Coconut Cream Pie
Course: DessertCuisine: American CuisineDifficulty: easy1
(9-inch) pie, 8-10 servings40
minutes45
minutesAmerican Cuisine
Ingredients
1 pre-baked 9-inch pie crust (store-bought or homemade)
2 cups whole milk
1/2 cup granulated sugar
1/4 cup cornstarch
3 large egg yolks
2 tablespoons unsalted butter
1 teaspoon vanilla extract
1 1/2 cups shredded coconut (sweetened or unsweetened)
1 1/2 cups heavy cream
1/4 cup powdered sugar
1/2 cup toasted shredded coconut, for garnish
Directions
- Prepare your pie crust (The Secret to No Soggy Bottoms): This step is absolutely crucial. If using a raw crust, fit it into your 9-inch pie plate and crimp the edges. Line the crust with parchment paper and fill generously with pie weights, dried beans, or rice. Bake in a preheated 400°F (200°C) oven for 15 minutes.
- Achieve a perfectly crisp crust: Carefully remove the parchment and weights. Prick the bottom of the crust all over with a fork. Return the crust to the oven and bake for another 10-15 minutes, or until it’s a deep golden brown and feels completely dry. This thorough pre-baking creates a moisture barrier that prevents sogginess. Let the crust cool completely on a wire rack before proceeding.
- Make the coconut filling base: In a medium saucepan, whisk together the granulated sugar and cornstarch until no lumps remain. Gradually whisk in the whole milk until the mixture is smooth.
- Cook and thicken the custard: Cook the milk mixture over medium heat, stirring constantly with a whisk, until it thickens significantly and comes to a gentle boil. Continue to boil and stir for 1 minute to ensure the cornstarch is fully cooked. Remove the saucepan from the heat.
- Temper the egg yolks: In a small separate bowl, whisk the egg yolks. Slowly pour about half a cup of the hot milk mixture into the whisked egg yolks while continuously whisking. This tempering step prevents the yolks from scrambling.
- Finish the filling: Pour the tempered egg yolk mixture back into the saucepan with the remaining hot milk mixture. Return the saucepan to medium heat and cook for 1-2 minutes more, stirring constantly, until the filling is very thick and creamy. Remove from heat and stir in the unsalted butter, vanilla extract, and shredded coconut until everything is well combined and smooth.
- Chill the pie: Pour the warm coconut filling into your completely cooled, pre-baked pie crust. Place a piece of plastic wrap directly onto the surface of the filling to prevent a skin from forming as it chills. Refrigerate for at least 4 hours, or preferably overnight, until the filling is thoroughly set.
- Prepare the whipped topping: In a clean, cold bowl, using an electric mixer, whip the heavy cream and powdered sugar on high speed until stiff peaks form.
- Assemble and serve: Spread the luscious whipped cream evenly over the chilled pie. Generously sprinkle with the toasted shredded coconut for a beautiful finish and added crunch. Slice and serve immediately.
Notes
- Ensure the pie is thoroughly chilled, preferably overnight, for best setting and flavor.