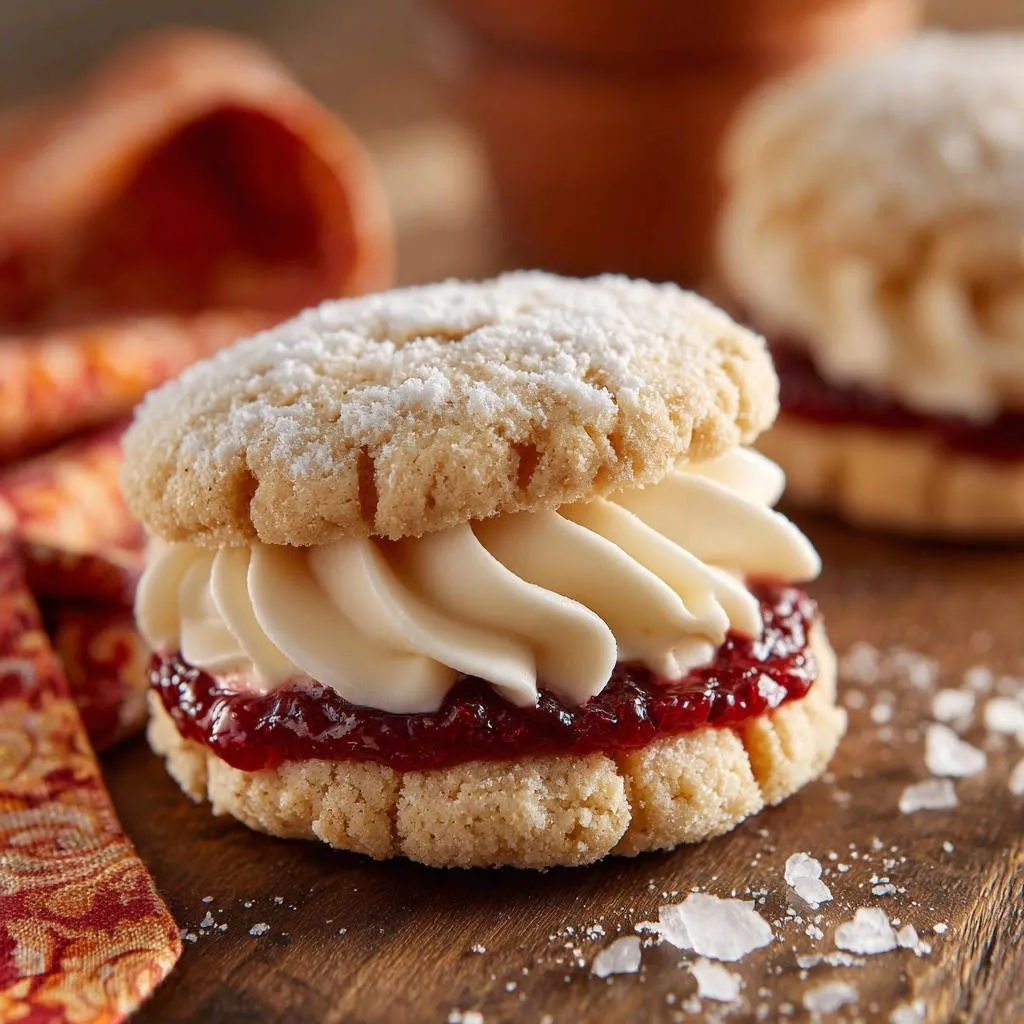
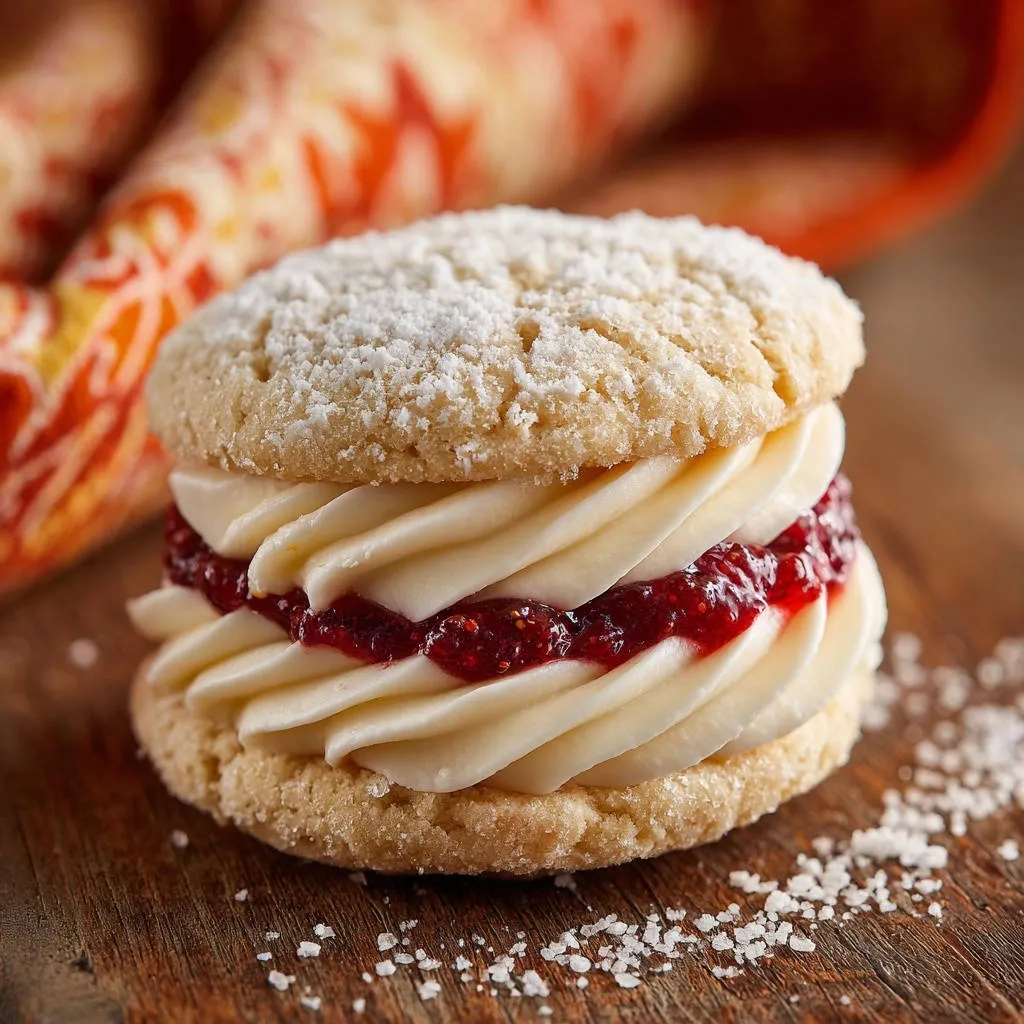
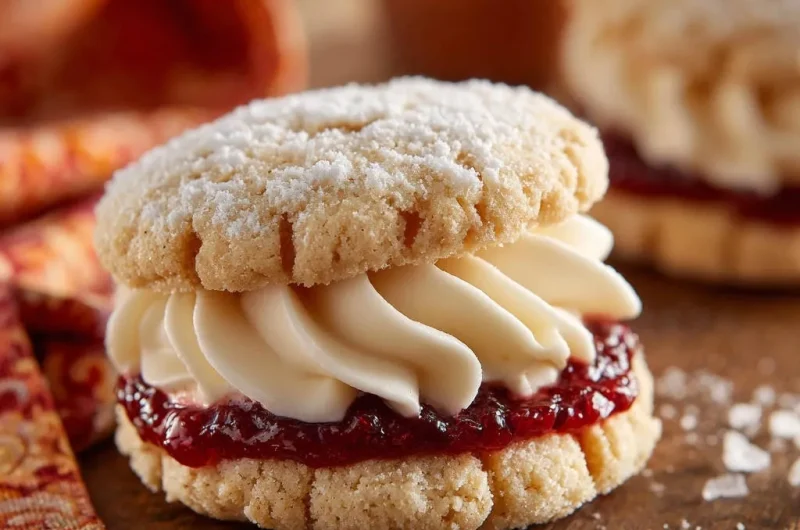
There’s a special joy in a perfect sandwich cookie, yet for years, my beautiful cream fillings would disappointingly soften and lose their shape. This frustrating experience was a common baking woe until I finally cracked the code to a luscious, stable filling that holds up beautifully. This recipe delivers those dream Classic Jam Sandwich Cookies you’ve always wanted, with a cream that truly stays put.
Beyond Basic: What Makes These Classic Jam Sandwich Cookies Exceptional?
Unveiling the Stable Cream Advantage
Unlike many recipes, this method focuses on a specific technique for preparing the butter, ensuring your cream filling remains perfectly firm and pipeable. Say goodbye to messy, squishy cookies and hello to elegant, stable treats.
A Joyful Treat for Every Occasion
These beautiful cookies are incredibly versatile, perfect for holiday platters, afternoon tea, or as a delightful homemade gift. Their charming appearance and delightful texture make them a crowd-pleaser for any gathering.
Simplicity Meets Deliciousness
Despite their professional appearance and flawless filling, these Classic Jam Sandwich Cookies are surprisingly straightforward to make. This recipe combines simple steps with expert tips, allowing even novice bakers to achieve stunning results.
The Building Blocks of Classic Jam Sandwich Cookies Perfection
For the Perfectly Tender Cookie
Unsalted Butter, softened: Using unsalted butter gives you control over the salt content, ensuring a balanced flavor. Softened butter creams easily, incorporating air for a light, tender crumb.
Granulated Sugar: Sugar sweetens the cookies and contributes to their tender texture, creaming with the butter to create a light base.
Large Egg Yolk: The egg yolk adds richness, tenderness, and helps bind the dough without making it too tough, ensuring a melt-in-your-mouth cookie.
Vanilla Extract: High-quality vanilla extract enhances the overall flavor profile, adding a warm, aromatic depth to the cookies.
All-Purpose Flour: The foundation of our cookie, all-purpose flour provides the necessary structure. Proper measuring is key to avoid a dense cookie.
Baking Powder & Salt: Baking powder provides a subtle lift, while a touch of salt balances the sweetness and brings out the other flavors.
Crafting the Signature Stable Cream
Unsalted Butter, softened but still cool to the touch: This is the most crucial ingredient for the stable cream. The cooler temperature allows the butter to whip into a robust, airy structure that holds its shape beautifully.
Powdered Sugar, sifted: Sifting ensures a lump-free, silky-smooth filling. Powdered sugar provides the bulk and sweetness for our buttercream.
Vanilla Extract: Just like in the cookies, vanilla adds essential warmth and flavor to the cream filling.
Milk or Heavy Cream: Added a tablespoon at a time, this liquid allows you to fine-tune the consistency of your buttercream until it’s perfectly pipeable yet firm.
The Sweet Finishing Touches
Raspberry or Strawberry Jam: A high-quality, slightly tart jam provides a lovely contrast to the sweet cookie and cream. Choose one with good body to prevent it from running out.
Powdered Sugar for dusting: A final dusting adds a delicate sweetness and a beautiful, classic presentation to your finished sandwich cookies.
Your Essential Baking Arsenal
Key Equipment for Cookie Dough
Large Mixing Bowls: Essential for keeping your wet and dry ingredients separate until combined, ensuring proper mixing.
Electric Mixer (Stand or Handheld): Crucial for creaming butter and sugar effectively, incorporating air for tender cookies and whipping the stable cream filling.
Measuring Cups & Spoons: For accurate ingredient proportions, which is vital for baking success.
Plastic Wrap: Needed for chilling the cookie dough, preventing it from drying out and making it easier to handle.
Rolling Pin: To evenly roll out your chilled dough to the perfect thickness, ensuring uniform baking.
Round Cookie Cutters: For creating beautifully shaped cookies. A 2-inch diameter is ideal for these sandwich cookies.
Cream Filling & Assembly Aids
Electric Mixer: Again, critical for achieving the ideal fluffy, stable texture of the cream filling.
Piping Bag with Star Tip (or Ziploc Bag): For neatly piping the cream filling onto your cookies, giving them a professional, elegant appearance.
Wire Rack: Necessary for cooling the cookies completely and evenly after baking, preventing sogginess.
Crafting Your Classic Jam Sandwich Cookies: The Method
- Creaming the Butter and Sugar:
In a large bowl, combine softened butter and granulated sugar.
Beat until light and fluffy, ensuring air is incorporated for a tender cookie. This step creates the foundation for a light crumb.
- Incorporating Wet Ingredients:
Add the egg yolk and vanilla extract to the creamed mixture.
Mix until just combined, ensuring even distribution of these flavor and binding elements.
- Mixing Dry Ingredients:
In a separate bowl, whisk together the all-purpose flour, baking powder, and salt.
This preliminary step prevents lumps and ensures that leavening agents are evenly distributed throughout the dough.
- Forming the Dough:
Gradually add the dry mixture to the wet ingredients, mixing on low speed until just combined and a soft dough forms.
Do not overmix, as this can develop gluten and lead to tough cookies.
- Chilling the Dough:
Divide the dough in half, flatten each half into a disc, wrap tightly in plastic wrap, and refrigerate for at least 30 minutes to an hour.
Chilling is crucial to prevent the cookies from spreading too much during baking and makes the dough much easier to roll and cut cleanly.
- Rolling and Cutting:
On a lightly floured surface, roll out one disc of chilled dough to about 1/4 inch thickness.
Use a round cookie cutter (about 2 inches in diameter) to cut out cookies and place them about 1 inch apart on the prepared parchment-lined baking sheets. Reroll any scraps quickly.
- Preheating the Oven:
Preheat your oven to 375°F (190°C) and line your baking sheets with parchment paper.
Proper oven temperature ensures even baking and prevents the cookies from spreading excessively.
- Baking the Cookies:
Bake for 8 to 10 minutes, or until the edges are lightly golden, but the centers still appear pale.
Do not overbake, as cookies will continue to firm up as they cool, and overbaking can result in a dry texture.
- Cooling Process:
Allow the cookies to cool on the baking sheets for a few minutes before carefully transferring them to a wire rack to cool completely.
Ensuring cookies are entirely cool before assembly is vital to prevent the cream filling from melting.
- Beating the Butter:
In a medium bowl, use an electric mixer to beat the softened but still cool to the touch unsalted butter on medium speed for 2 to 3 minutes until it’s lightened in color and very creamy.
This initial aeration of the butter is the absolute “secret” for a stable, fluffy filling that holds its shape beautifully and resists melting.
- Incorporating Powdered Sugar:
Gradually add the sifted powdered sugar, one cup at a time, beating well after each addition.
The mixture will become quite stiff as the sugar is incorporated, indicating proper consistency build-up.
- Achieving Fluffy Volume:
Once all the sugar is incorporated, beat the mixture on medium-high speed for another 3 to 5 minutes until the buttercream is noticeably light, fluffy, and has significantly increased in volume.
- Adding Flavor and Consistency:
Mix in the vanilla extract, then add the milk or heavy cream, one tablespoon at a time, beating after each addition.
Stop when you reach a smooth, pipeable consistency that is still firm and holds its shape perfectly.
- Preparing for Assembly:
Once cookies are completely cool, spread a thin, even layer of your chosen jam on the flat side of half of the cookies.
- Piping the Cream:
Transfer the stable cream filling to a piping bag fitted with a star tip (or a Ziploc bag with a corner snipped off).
Pipe a generous, elegant swirl of cream filling onto the jam-covered cookies, building up the center slightly.
- Creating the Sandwich:
Gently place the remaining plain cookies on top of the cream-piped halves, creating a beautiful sandwich.
- Final Touches:
Dust the assembled sandwich cookies generously with powdered sugar just before serving for an elegant finish.
For best stability, especially if preparing ahead, briefly chill the assembled cookies to help the cream set further, then let them come to room temperature for about 15 minutes before enjoying the perfect texture.
Preparing the Dough for Success
Chilling and Shaping Your Cookies
Baking to Golden Perfection
The Game-Changing Stable Cream Filling
Assembling Your Delightful Treats
Unlock Pro Secrets: Tips for Perfect Sandwich Cookies
Don’t Overmix the Dough: Overmixing develops gluten, which can lead to tough, chewy cookies instead of tender ones. Mix only until the dry ingredients are just incorporated.
Proper Chilling is Key: Never skip the refrigeration step for the dough. Chilling prevents spreading during baking and makes the dough firm enough for clean, precise cuts.
Flour Your Surface Lightly: When rolling out dough, use just enough flour to prevent sticking. Too much flour can be absorbed by the dough, resulting in dry or crumbly cookies.
Butter Temperature Matters: For the cream filling, your butter should be softened but still cool to the touch, not greasy. This specific temperature is paramount for achieving the stable, fluffy texture we’re aiming for.
Beat the Butter Extensively: The initial 2-3 minutes of beating the butter alone, before adding sugar, is vital. This step aerates the butter, creating the foundation for a truly stable and voluminous filling.
Add Liquid Gradually: When adding milk or cream to the filling, do so one tablespoon at a time. This precise control ensures you reach a pipeable consistency that remains firm and holds its shape beautifully, without becoming too thin.
Watch for Golden Edges: Your cookies are perfectly baked when their edges are lightly golden, but their centers remain pale. They will continue to firm up as they cool on the baking sheet.
Cool Completely: It’s absolutely crucial for the cookies to be entirely cooled before you add the jam and cream filling. Assembling them warm will cause your perfectly stable cream to melt and create a messy result.
Dough Do’s and Don’ts
Mastering the Cream Filling Consistency
Achieving Ideal Bake & Cool
Solving Common Baking Woes: Quick Fixes
Cookies Spreading Too Much?
This issue typically arises if your dough wasn’t sufficiently chilled, or if the butter in your dough was too warm. Ensure you adhere to the recommended chilling time, which helps the butter solidify and prevent excessive spreading.
Is Your Cream Filling Too Soft?
The stability of the filling hinges on proper butter preparation and gradual sugar incorporation. If your cream filling seems too soft, try beating in an additional tablespoon or two of sifted powdered sugar until it reaches the desired firm consistency.
Crumbly or Dry Cookies?
The most common culprits for crumbly or dry cookies are overmixing the dough or overbaking. Ensure you mix the dough only until the flour is just incorporated, and remove cookies from the oven when they reach the visual cues of lightly golden edges and pale centers.
Enjoying & Preserving Your Classic Jam Sandwich Cookies
Serving Suggestions for Maximum Delight
These exquisite cookies are wonderful on their own, offering a perfect balance of sweet and tart. They are also heavenly paired with a warm cup of coffee or tea, or a refreshing glass of cold milk. Present them on a beautiful platter for an elegant dessert or package them as thoughtful homemade gifts.
Storage Tips to Keep Them Fresh
For optimal freshness, store your assembled Classic Jam Sandwich Cookies in an airtight container at room temperature for up to 3-4 days. In warmer climates, or if you prefer a firmer cream, a brief period in the refrigerator might be beneficial; simply let them come to room temperature for about 15 minutes before serving for the best texture.
Making Ahead & Freezing Options
Planning ahead is easy with this recipe! You can prepare and freeze the unbaked cookie dough discs for up to 2 months; just thaw them overnight in the refrigerator before rolling and baking. Assembled cookies can also be frozen for up to 1 month; place them on a baking sheet to freeze solid, then transfer to an airtight freezer container. Thaw them slowly in the refrigerator, then allow them to reach room temperature before enjoying.
Your Classic Jam Sandwich Cookies Questions Answered
Can I Use Different Jams?
Absolutely! While raspberry and strawberry are traditional choices, feel free to get creative with other fruit preserves like apricot, peach, or even a zesty lemon curd. Just ensure the jam you choose is thick enough to hold its own and doesn’t run excessively, similar to the delightful filling in our Perfect Rhubarb Crumble Cookies.
What About Gluten-Free Flour?
Yes, you can substitute a cup-for-cup all-purpose gluten-free flour blend, especially one that contains xanthan gum. The texture might have a slight difference, but the cookies should still hold their shape well and be delicious.
How Long Do They Last?
When stored properly in an airtight container at room temperature, these Classic Jam Sandwich Cookies will remain wonderfully fresh and delicious for 3 to 4 days. The unique stability of the cream filling contributes significantly to their excellent shelf life.
Can I Freeze the Dough or Assembled Cookies?
Yes, both freezing options are convenient! The unbaked dough discs freeze beautifully for up to 2 months; simply thaw them in the refrigerator before use. For assembled cookies, flash freeze them on a baking sheet until firm, then transfer to an airtight container or freezer bag for up to 1 month. Thaw them slowly in the refrigerator, then bring to room temperature before serving for the best quality.
Ready to Bake? Share Your Classic Jam Sandwich Cookie Creations!
Now that you’re armed with the secret to perfectly stable and utterly delicious Classic Jam Sandwich Cookies, it’s time to bring this magic to your kitchen! We’re confident this recipe will quickly become a cherished favorite, bringing joy and sweet memories to your home and those you share them with.
Don’t forget to capture your beautiful creations and share them with our community on social media! Be sure to tag us and use #ClassicJamSandwichCookies to showcase your baking prowess. We can’t wait to see your delightful masterpieces!
Classic Jam Sandwich Cookies
Course: DessertCuisine: American CuisineDifficulty: easy4
18-24 cookies1
hour8
minutes60
minutesAmerican Cuisine
Ingredients
For the Cookies:
1 cup unsalted butter, softened
1/2 cup granulated sugar
1 large egg yolk
1 teaspoon vanilla extract
2 1/4 cups all-purpose flour
1/2 teaspoon baking powder
1/4 teaspoon salt
For the Cream Filling:
1/2 cup unsalted butter, softened but still cool to the touch
2 cups powdered sugar, sifted
1 teaspoon vanilla extract
1 to 2 tablespoons milk or heavy cream
For Assembly:
1/2 cup raspberry or strawberry jam
Powdered sugar for dusting
Directions
- In a large bowl, cream together the softened butter and granulated sugar until light and fluffy. Beat in the egg yolk and vanilla extract until well combined.
- In a separate bowl, whisk together the all-purpose flour, baking powder, and salt. Gradually add the dry ingredients to the wet ingredients, mixing on low speed until just combined and a soft dough forms. Do not overmix.
- Divide the dough in half, flatten each half into a disc, wrap in plastic wrap, and refrigerate for at least 30 minutes to an hour. This helps prevent the cookies from spreading too much during baking.
- Preheat your oven to 375 degrees F (190 degrees C). Line baking sheets with parchment paper.
- On a lightly floured surface, roll out one disc of chilled dough to about 1/4 inch thickness. Use a round cookie cutter (about 2 inches in diameter) to cut out cookies. Place them about 1 inch apart on the prepared baking sheets. Reroll any scraps.
- Bake for 8 to 10 minutes, or until the edges are lightly golden. The cookies should still be pale in the center. Let cool on the baking sheets for a few minutes before transferring to a wire rack to cool completely.
- For the Stable Cream Filling (the secret to no more melting cream!): In a medium bowl, use an electric mixer to beat the softened but still cool to the touch unsalted butter on medium speed for 2 to 3 minutes until it’s lightened in color and very creamy. This initial beating is key. Gradually add the sifted powdered sugar, one cup at a time, beating well after each addition. The mixture will be stiff. Once all the sugar is incorporated, beat on medium-high speed for another 3 to 5 minutes until the buttercream is light, fluffy, and noticeably increased in volume. Add the vanilla extract and then add the milk or heavy cream, one tablespoon at a time, until you reach a smooth, pipeable consistency that is still firm. The goal is a stiff, stable frosting that holds its shape beautifully.
- Once cookies are completely cool, spread a thin layer of jam on the flat side of half of the cookies.
- Transfer the cream filling to a piping bag fitted with a star tip (or a Ziploc bag with a corner snipped off). Pipe a generous swirl of cream filling onto the jam-covered cookies.
- Gently place the remaining half of the cookies on top, creating a sandwich.
- Dust the assembled sandwich cookies with powdered sugar just before serving. For best stability, if making ahead, briefly chill the assembled cookies to help the cream set further, then let them come to room temperature for about 15 minutes before enjoying.
Notes
- For best stability, briefly chill assembled cookies if making ahead, then bring to room temperature before serving.