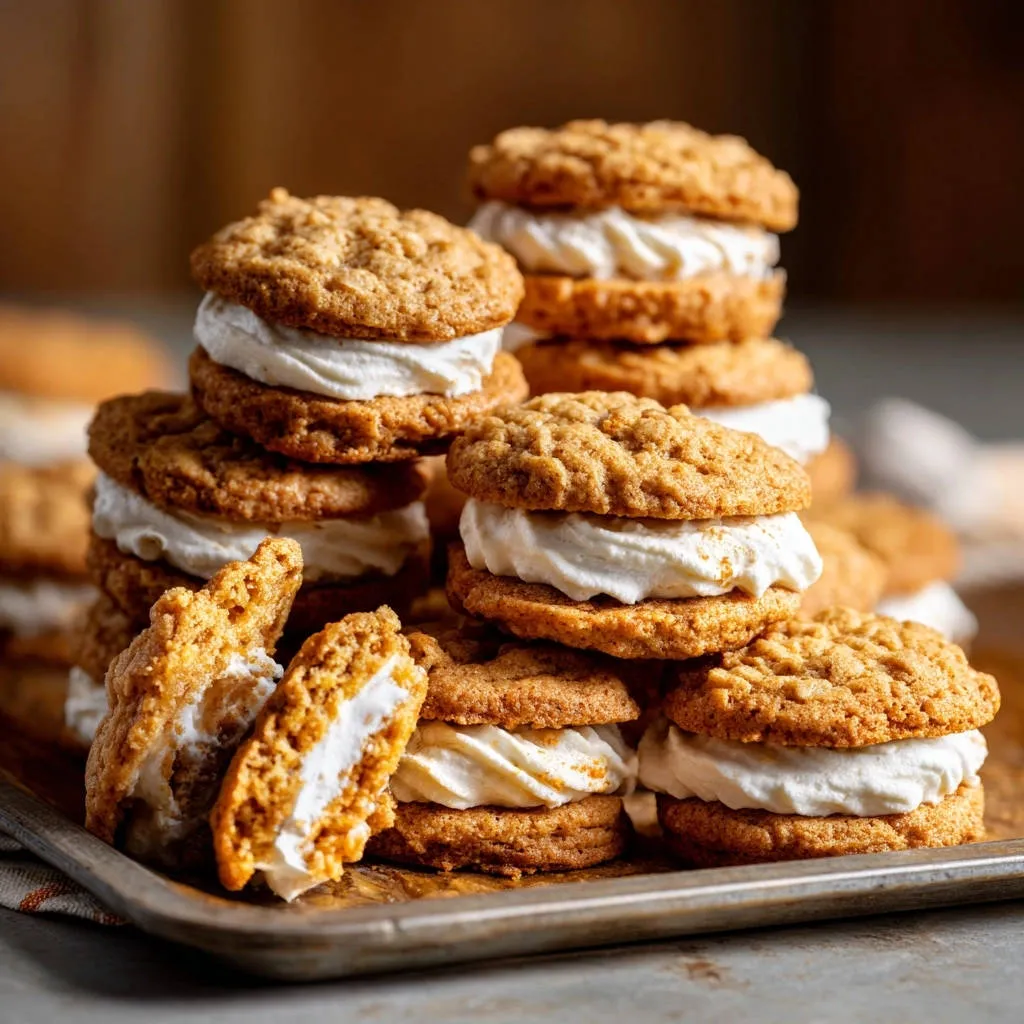
There’s nothing quite as disappointing as biting into an oatmeal cookie and finding it dry or hard. After years of perfecting, I finally cracked the code to truly exceptional Classic Oatmeal Cream Pies. This recipe guarantees that wonderfully soft, chewy texture every single time, making it a beloved treat that stands out.
Why Our Classic Oatmeal Cream Pies Stand Out (No More Dry Cookies!)
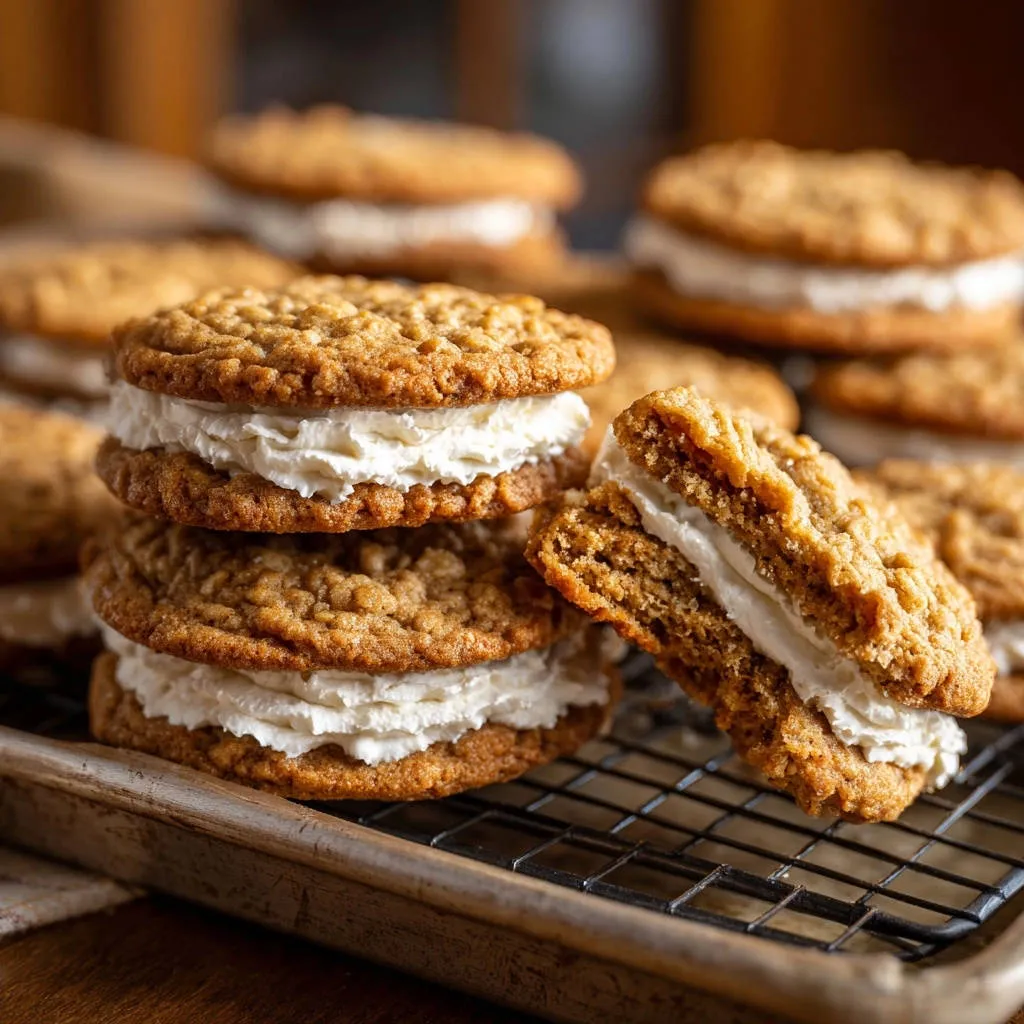
The Secret to That Irresistible Chewy Texture
The magic truly happens in the oven and on the cooling rack. Our precise baking time ensures the cookies are just set at the edges while remaining gloriously soft in the center.
The crucial cooling period on the warm baking sheet then allows them to firm up perfectly without ever losing their signature chew.
A Beloved Classic, Perfectly Reimagined
These aren’t just any oatmeal cream pies; they’re an homage to the classic, elevated. We capture that nostalgic flavor you remember, but with a superior, melt-in-your-mouth texture that store-bought versions often lack.
Each bite brings a wave of comforting sweetness, marrying the spiced oatmeal cookie with the luscious vanilla cream filling.
Beginner-Friendly Baking, Expert Results
Don’t let the professional-level outcome intimidate you. This recipe is designed with clarity and simplicity in mind, guiding you through each step.
Even novice bakers can achieve perfectly balanced, soft, and chewy Classic Oatmeal Cream Pies with ease.
The Essential Ingredients for Perfect Oatmeal Cream Pies
For the Irresistibly Chewy Oatmeal Cookies
Every ingredient plays a vital role in achieving that perfect cookie texture and flavor.
Unsalted Butter, Softened: Key for a rich, tender crumb. Softened butter creams beautifully with sugar, incorporating air for a light texture.
Light Brown Sugar (Packed): Provides moisture and a deeper, caramel-like flavor, essential for the cookies’ signature chewiness.
Granulated Sugar: Contributes to crisp edges and aids in the cookie’s spread.
Large Eggs & Vanilla Extract: Eggs bind the ingredients and add richness, while good quality vanilla enhances the overall warm, sweet flavor.
All-Purpose Flour, Baking Soda, Salt: These form the structural base. Baking soda provides lift, preventing dense cookies, and salt balances the sweetness.
Ground Cinnamon: A warm spice that complements the oats and enhances the nostalgic flavor profile of these oatmeal cream pies.
Old-Fashioned Rolled Oats: Crucial for the classic chewy texture. Avoid instant or steel-cut oats, as they absorb liquid differently and won’t yield the same result.
For the Cloud-Like Vanilla Cream Filling
The filling is the sweet, creamy heart of these delightful sandwiches.
Unsalted Butter, Softened: Forms the rich, creamy base of the filling. Ensure it’s truly softened for a smooth, lump-free cream.
Powdered Sugar: Essential for a smooth, velvety filling texture without any graininess. Sifting it ensures optimal smoothness.
Vanilla Extract: Delivers the classic, comforting vanilla flavor that pairs perfectly with the spiced oatmeal cookies.
Milk or Cream: Used to achieve the ideal fluffy, spreadable consistency. Add it gradually to control the thickness.
Tools for Your Classic Oatmeal Cream Pies Baking Journey
Essential Kitchen Gadgets
Having the right tools makes the baking process smooth and enjoyable.
Mixing Bowls: A large one for the cookie dough and a medium one for whisking dry ingredients and preparing the filling.
Electric Mixer: Handheld or stand mixer is vital for creaming butter and sugar, and for whipping the filling to a light, fluffy consistency.
Measuring Cups & Spoons: Accurate measurements are key for consistent results.
Rubber Spatula: Perfect for scraping down the sides of bowls and gently folding in oats.
Wire Rack: Essential for allowing cookies to cool completely and evenly, preventing sogginess.
Parchment Paper: A Non-Stick Lifesaver
Parchment paper is a non-negotiable for this recipe. It prevents the cookies from sticking to the baking sheet, ensuring easy removal and cleanup.
Additionally, it aids in the crucial cooling process by allowing for even heat distribution and preventing sticking as the cookies set.
Baking Bliss: Step-by-Step Classic Oatmeal Cream Pies Guide
- Prepare Your Workspace and Preheat:
Preheat your oven to 350°F (175°C) to ensure it’s at the correct temperature when your dough is ready. Line your baking sheets with parchment paper; this prevents sticking and makes cleanup simple.
- Cream Wet Ingredients:
In a large bowl, combine the softened butter, packed light brown sugar, and granulated sugar. Beat them together with an electric mixer until the mixture is light, fluffy, and pale, which typically takes 2-3 minutes.
- Incorporate Eggs and Vanilla:
Add the large eggs one at a time, beating well after each addition until fully incorporated. Stir in the vanilla extract, ensuring it’s evenly mixed throughout the wet ingredients.
- Whisk Dry Ingredients Separately:
In a separate medium bowl, whisk together the all-purpose flour, baking soda, salt, and ground cinnamon. This step ensures all dry ingredients are evenly distributed, preventing pockets of leavening or spice.
- Combine Wet and Dry (Do Not Overmix!):
Gradually add the whisked dry ingredients to the wet mixture, mixing on low speed until just combined. Overmixing at this stage can develop too much gluten, resulting in tough, cake-like cookies instead of the desired soft and chewy texture.
Fold in the old-fashioned rolled oats until they are evenly distributed throughout the dough.
- Portion the Cookie Dough:
Drop rounded tablespoons of cookie dough onto your prepared baking sheets. Leave about 2 inches of space between each cookie to allow for spreading during baking.
- Bake to Perfection:
Bake the cookies for 8 to 10 minutes, or until the edges are lightly golden, but the centers still appear slightly soft and underbaked. This underbaked center is the absolute key to a soft and chewy cookie, so avoid the temptation to bake them until they look fully set.
- The Critical Cooling Stage:
Immediately remove the baking sheets from the oven. Allow the cookies to cool undisturbed on the baking sheets for at least 5 minutes before attempting to transfer them to a wire rack. This crucial step allows them to set and develop that perfect chewiness without becoming hard or falling apart.
- Prepare the Fluffy Filling:
While your cookies cool completely, prepare the creamy filling. In a medium bowl, beat the softened butter until it’s light and creamy. Gradually add the powdered sugar, mixing until it’s well combined and smooth.
Finally, stir in the vanilla extract and 2 tablespoons of milk or cream, beating until the filling is smooth, light, and wonderfully fluffy. Adjust with a tiny bit more milk if needed for desired consistency.
- Assemble Your Classic Oatmeal Cream Pies:
Once the cookies are completely cool to the touch, spread a generous amount of the prepared filling onto the flat side of one cookie. Gently top it with another cookie to create a sandwich. Repeat this process with the remaining cookies and filling, creating a batch of irresistible treats.
Cookie Preparation: Mixing & Shaping
The Chewy Center Secret: Mastering Bake Time
Crucial Cooling: The Key to Structure and Chew
Crafting the Creamy Filling & Assembly
Expert Tips to Elevate Your Oatmeal Cream Pies
Achieving bakery-quality oatmeal cream pies is simple with these expert insights:
Ingredient Temperature Matters: Always ensure your butter for both the cookies and the filling is genuinely softened. Cold butter won’t cream properly, and melted butter will lead to greasy cookies that spread too much. It should be pliable but still cool to the touch.
The Golden Rule: Don’t Overmix! Once you add the dry ingredients to the wet, mix only until no streaks of flour remain. Overmixing develops gluten, which creates tough, dense cookies instead of the desirable soft and chewy ones.
Uniformity for Even Baking: Use a cookie scoop or measure each rounded tablespoon carefully. Cookies of uniform size bake more evenly, preventing some from being overdone while others are underbaked.
Patience During Cooling Pays Off: Resist the urge to move the cookies off the baking sheet too soon. The initial cooling time on the hot sheet is essential for their structure to set properly. Moving them too early can cause them to break or become misshapen.
Sift Powdered Sugar for Smoothness: For an exceptionally smooth, lump-free filling, take the extra step to sift your powdered sugar before adding it to the softened butter. This ensures a truly cloud-like cream.
Troubleshooting Your Oatmeal Cream Pies: Common Hiccups & Solutions
Why Are My Cookies Spreading Too Much?
Excessive spreading can often be attributed to butter that is too warm or even partially melted before creaming. Ensure your butter is softened, not greasy.
Another common cause is an oven temperature that is too low, preventing the cookies from setting quickly enough. Always ensure your oven is preheated properly and consider checking its accuracy with an oven thermometer.
My Cookies Are Dry or Hard! What Went Wrong?
The most common culprit for dry or hard cookies is overbaking. The recipe specifically calls for them to be slightly underbaked in the center.
Additionally, too much flour can lead to a dry dough. Always measure flour accurately, preferably by weight, or use the spoon-and-level method if using measuring cups.
Filling Too Runny or Too Stiff?
If your filling is too runny, gradually add more powdered sugar, a tablespoon at a time, mixing well until the desired fluffy, spreadable consistency is achieved.
If the filling is too stiff, add milk or cream in very small increments (half a teaspoon at a time), beating well after each addition until it loosens up to a smooth, pipeable or spreadable consistency.
Beyond the Classic: Creative Variations & Dietary Swaps
Spiced Up Oatmeal Cream Pies
Elevate the classic flavor by adding a pinch of nutmeg, a dash of ground ginger, or a hint of allspice to your cookie dough alongside the cinnamon. This creates a warmer, more complex spice profile, perfect for fall or winter gatherings.
To further explore how spices can elevate your baked goods, consider our amazing chewy spiced molasses cookies, which delve into rich spice blends.
Gluten-Free & Dairy-Free Adaptations
For gluten-free versions, use a 1:1 gluten-free all-purpose flour blend, ensuring it contains xanthan gum. The texture will be very similar. For dairy-free options, use high-quality dairy-free butter sticks and a neutral-flavored plant-based milk (like almond or oat milk) for both the cookies and the filling.
For other delicious chewy treats that can often be adapted, explore our recipe for chewy oatmeal bars, offering more versatile baking insights.
Miniature Bites vs. Grand Treats
You can easily adjust the size of these cookies for different occasions. For mini oatmeal cream pies, drop teaspoon-sized portions of dough and reduce the baking time slightly to 6-8 minutes. For larger, more indulgent treats, use a larger cookie scoop and extend the baking time by a minute or two, still ensuring centers remain soft.
Serving & Storage Tips for Peak Freshness
The Best Way to Serve Your Pies
These Classic Oatmeal Cream Pies are perfect served at room temperature, perhaps with a tall glass of cold milk or a warm cup of coffee. Their comforting nature makes them ideal for an afternoon treat or a satisfying dessert.
Keeping Your Oatmeal Cream Pies Fresh
Store assembled oatmeal cream pies in an airtight container at room temperature for up to 3 days. For longer freshness, refrigerate them for up to 5 days. Allow them to come to room temperature for about 15-20 minutes before serving for the best texture.
Can You Freeze Oatmeal Cream Pies?
Yes, both the cookies and the assembled pies can be frozen. To freeze assembled pies, place them on a baking sheet until firm, then transfer to an airtight freezer-safe container or bag for up to 2 months. Thaw in the refrigerator overnight or at room temperature for a few hours before enjoying.
Your Top Questions About Oatmeal Cream Pies, Answered!
What Kind of Oats Should I Use?
For these Classic Oatmeal Cream Pies, it’s essential to use old-fashioned rolled oats. They provide the perfect texture and chewiness without becoming mushy or disappearing into the cookie like quick oats might.
For more insights into different oat preparations and their uses, consider our guide on perfectly creamy oatmeal.
Can I Make the Cookie Dough or Filling Ahead of Time?
Absolutely! The cookie dough can be made ahead and refrigerated for up to 3 days. Bring it to room temperature for about 15-20 minutes before scooping. The filling can also be prepared 1-2 days in advance and stored in an airtight container in the refrigerator; let it come to room temperature and give it a quick whip before assembling.
How Long Do These Pies Last?
When stored properly in an airtight container at room temperature, these pies will remain fresh and delicious for about 3 days. Refrigeration extends their life to about 5 days.
Can I Use Margarine Instead of Butter?
While margarine can be used in a pinch, it will affect the flavor and texture. Butter offers a richer taste and contributes to a more tender, superior cookie. Margarine often contains more water, which can lead to a slightly different consistency in both the cookies and the filling.
Ready to Bake Your Best Classic Oatmeal Cream Pies Yet?
With these detailed insights and foolproof steps, you’re now equipped to create the most incredible Classic Oatmeal Cream Pies you’ve ever tasted. Say goodbye to dry, hard cookies and embrace the chewy, creamy perfection awaiting you.
Dive into your kitchen and let the comforting aroma fill your home. Don’t forget to share your baking successes and enjoy every blissful bite!
Classic Oatmeal Cream Pies
Course: DessertCuisine: American CuisineDifficulty: easy4
approximately 18-24 pies20
minutes10
minutes60
minutesAmerican Cuisine
Ingredients
For the Cookies:
1 cup (2 sticks) unsalted butter, softened
1 cup packed light brown sugar
1/2 cup granulated sugar
2 large eggs
1 teaspoon vanilla extract
1 1/2 cups all purpose flour
1 teaspoon baking soda
1/2 teaspoon salt
1 teaspoon ground cinnamon
3 cups old fashioned rolled oats
For the Filling:
1/2 cup (1 stick) unsalted butter, softened
3 1/2 cups powdered sugar
1 teaspoon vanilla extract
2 tablespoons milk or cream
Directions
- Preheat your oven to 350F (175C). Line baking sheets with parchment paper.
- In a large bowl, cream together the softened butter, brown sugar, and granulated sugar until light and fluffy.
- Beat in the eggs one at a time, then stir in the vanilla extract.
- In a separate medium bowl, whisk together the flour, baking soda, salt, and cinnamon.
- Gradually add the dry ingredients to the wet ingredients, mixing until just combined. Do not overmix. Stir in the old fashioned rolled oats until evenly distributed.
- Drop rounded tablespoons of dough onto the prepared baking sheets, leaving about 2 inches between cookies.
- The Chewy Center Secret: Bake for 8 to 10 minutes, or until the edges are lightly golden but the centers still look slightly soft and underbaked. This is key! Do not overbake.
- Remove the baking sheets from the oven. Crucial Cooling Step: Let the cookies cool on the baking sheets for at least 5 minutes before transferring them to a wire rack to cool completely. This crucial step allows them to set and develop that perfect chewiness without becoming hard.
- While the cookies cool, prepare the filling: In a medium bowl, beat the softened butter until creamy. Gradually add the powdered sugar, mixing until well combined. Stir in the vanilla extract and milk or cream until smooth and fluffy.
- Once the cookies are completely cool, spread a generous amount of filling onto the flat side of one cookie. Top with another cookie to create a sandwich. Repeat with the remaining cookies and filling.
Notes
- The key to perfect texture is to not overbake the cookies and allow them to cool completely on the baking sheet for at least 5 minutes before transferring.