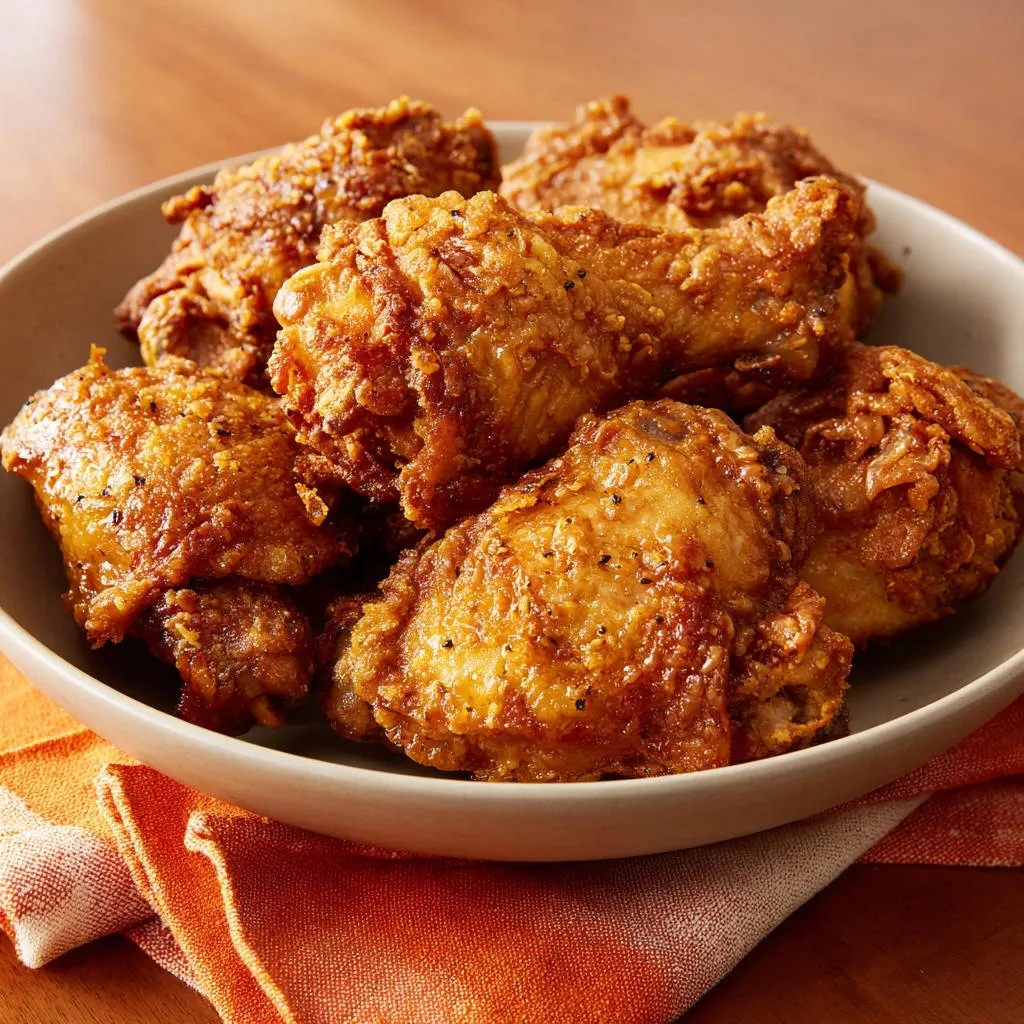
I remember the endless quest for that truly perfect Classic Southern Fried Chicken: a shatteringly crispy crust, deeply flavorful, yet always tender and juicy inside. For years, I faced the challenge of dry chicken or a coating that just wouldn’t stay put, but through countless batches, I finally cracked the code to achieve consistent, restaurant-quality results at home.
This recipe isn’t just about frying chicken; it’s about a methodical approach that guarantees success, from the buttermilk-infused tenderness to the perfectly seasoned, extra-crispy coating that clings to every succulent bite. Get ready to master the art of homemade fried chicken that will impress everyone.
Experience the Magic: Why This Classic Southern Fried Chicken Recipe is a Game-Changer
Say Goodbye to Dry, Hello to Juicy: The Tenderness Secret
Our method hinges on a strategic buttermilk brine. This isn’t just about flavor; it’s a powerful tenderizer that breaks down tough fibers and deeply infuses moisture.
The extended soak ensures your chicken remains incredibly juicy, even through the high heat of frying.
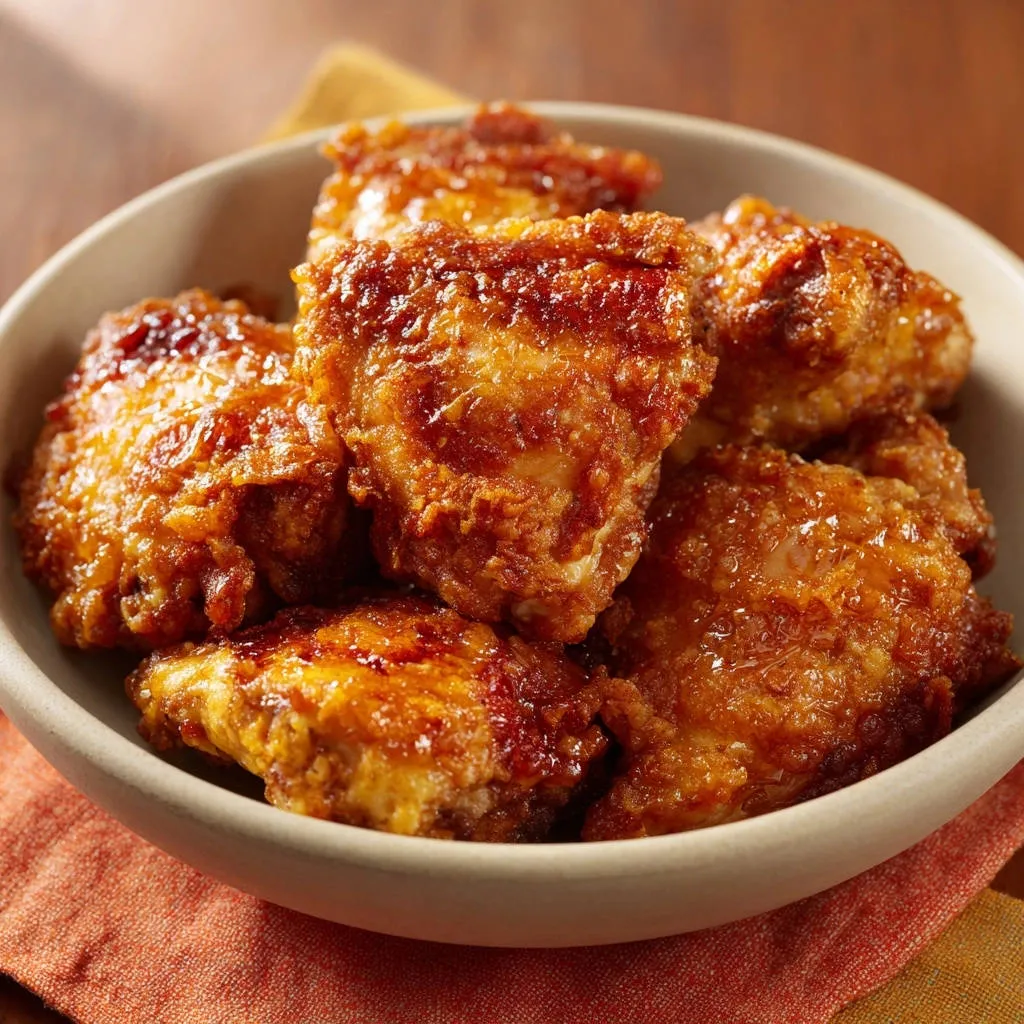
Your Quest for the Perfect Crispy Crust Ends Here
The secret to a non-flaking, extra crispy coating lies in a two-part process: firm dredging and a crucial resting period. This allows the seasoned flour to fully hydrate and bond with the chicken, creating a robust shield against the hot oil.
You’ll achieve a golden-brown exterior that delivers an audible crunch with every bite.
Beyond Basic: A Flavor Profile That Sings
Our carefully balanced spice blend goes beyond simple salt and pepper, adding layers of savory depth. Each bite delivers a harmonious blend of seasonings, complementing the chicken’s natural flavor.
This ensures your fried chicken isn’t just crispy and juicy, but truly unforgettable.
Gather Your Southern Essentials: The Flavor Foundation for Fried Chicken
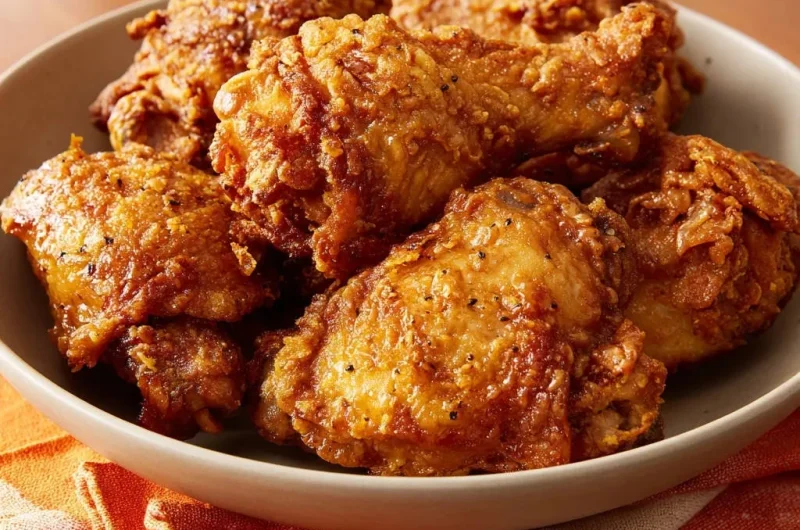
The Star: Selecting Your Chicken Pieces
Opt for 4-6 pieces of bone-in, skin-on chicken, ideally a mix of thighs and drumsticks. Bone-in cuts provide more flavor and help the meat stay juicy during frying.
The skin is essential for that signature crispy texture and rich flavor.
Buttermilk’s Embrace: The Tenderness and Moisture Infusion
One cup of full-fat buttermilk is crucial for tenderizing and adding a tangy depth. If you don’t have buttermilk, combine 1 cup of regular milk with 1 tablespoon of lemon juice and let it sit for five minutes until it slightly curdles.
This acidic soak is the bedrock of moist, flavorful chicken.
Crafting the Crispy Coating: Flour & Our Signature Spice Blend
Two cups of all-purpose flour form the base for our crispy crust. It provides structure and a canvas for our robust seasoning blend.
The blend includes 2 teaspoons of salt, 1 teaspoon each of black pepper and paprika, and 1/2 teaspoon each of garlic powder and onion powder. These spices create a balanced, savory profile that penetrates the crust and enhances the chicken.
The Heat Source: Choosing Your Frying Oil Wisely
You’ll need about 4-6 cups of high-smoke-point oil, such as vegetable oil or peanut oil. These oils are neutral in flavor and can withstand the necessary frying temperatures without burning, ensuring a clean taste.
Equip Your Kitchen: Essential Tools for Classic Southern Fried Chicken Success
The Right Vessel: Heavy-Bottomed Pot or Dutch Oven
A large, heavy-bottomed pot or Dutch oven is indispensable. Its thick construction distributes heat evenly, preventing hot spots that can burn your chicken or cause uneven cooking.
This stability is key to maintaining consistent oil temperatures, which directly impacts the crispiness and doneness of your chicken.
Temperature’s Guardian: A Reliable Meat and Oil Thermometer
Precision is paramount in frying. An accurate thermometer for both your oil and the chicken’s internal temperature is non-negotiable.
It ensures the oil stays at the sweet spot for crispiness without burning, and that your chicken is perfectly cooked through to 165°F (74°C) without becoming dry.
Beyond the Basics: Wire Racks and Tongs
Wire racks, ideally set over a baking sheet, are vital for allowing excess oil to drain after frying, preserving crispiness. They also provide a resting spot for dredged chicken.
Long-handled tongs are essential for safely maneuvering chicken in and out of hot oil, ensuring minimal splashing and even turning.
Your Path to Golden Perfection: Step-by-Step Classic Southern Fried Chicken
- Step 1: The Buttermilk Brine – A Deep Dive into Juiciness
Thoroughly pat chicken pieces dry with paper towels. Removing surface moisture is an often-overlooked first step for a truly crispy skin.
In a large bowl, whisk together the buttermilk and egg until fully combined. Add the chicken pieces, ensuring they are fully submerged in the mixture.
Cover the bowl and refrigerate for at least 4 hours, or preferably overnight. This extended soak tenderizes the chicken and deeply infuses moisture, guaranteeing succulent results and a robust flavor from your Classic Southern Fried Chicken.
- Step 2: The Seasoned Flour – Building Your Crispy Armor
In a shallow dish or a large resealable bag, combine the all-purpose flour, salt, black pepper, paprika, garlic powder, and onion powder.
Mix thoroughly with a fork or by shaking the bag to ensure every spice is evenly distributed throughout the flour. This creates a consistent, flavorful coating for your homemade fried chicken.
- Step 3: Dredging & The Critical Rest – Setting the Stage for Crunch
Remove chicken from the buttermilk mixture, allowing any excess liquid to drip off naturally. Do not pat the chicken dry at this stage, as the moisture helps the flour adhere.
Immediately dredge each piece liberally in the seasoned flour, pressing firmly with your hands to ensure the flour adheres to all surfaces and creates a thick, even coating.
Place the dredged chicken on a wire rack set over a baking sheet and let it rest at room temperature for 15-20 minutes. This crucial resting period allows the coating to properly adhere and bond with the chicken’s surface, preventing it from flaking off during frying and ensuring an extra crispy crust.
- Step 4: Oil Temperature Mastery – Heating for Success
In a large, heavy-bottomed pot or Dutch oven, pour enough vegetable or peanut oil to reach a depth of about 2-3 inches. This ensures sufficient depth for frying without overcrowding.
Heat the oil over medium-high heat until it reaches 325°F (160°C). Use a reliable thermometer to monitor the temperature; maintaining this precise temperature is key to avoiding dry chicken while achieving that desirable crispy coating.
- Step 5: The Fry – Achieving That Perfect Golden Hue
Carefully lower 2-3 pieces of chicken into the hot oil, using tongs, ensuring you do not overcrowd the pot. Overcrowding dramatically drops the oil temperature, leading to soggy and greasy chicken.
Fry for 6-8 minutes per side, turning occasionally, until a beautiful golden brown color is achieved. The internal temperature of the chicken should register 165°F (74°C) when checked with a meat thermometer at its thickest part.
Adjust the heat as needed throughout the cooking process to keep the oil consistently between 300-325°F. This steady temperature ensures thorough cooking without burning the exterior.
- Step 6: Drain, Season, & Rest – The Final Touch for Flavor & Tenderness
Once cooked, use tongs to carefully remove the chicken from the oil and transfer it to a clean wire rack set over paper towels or a baking sheet to drain any excess oil. If desired, sprinkle with a pinch of extra salt or your favorite seasoning blend immediately after frying to help it adhere.
Let the chicken rest for a few minutes before serving. This allows the internal juices to redistribute, guaranteeing maximum juiciness with every bite of your perfect Southern fried chicken.
Repeat the frying process with the remaining chicken pieces, always allowing the oil to return to the target temperature between batches for consistent results.
Unlock the Crispy Secrets: Expert Tips for Flawless Classic Southern Fried Chicken
The Power of the Initial Pat Dry: Before the brine, ensure your chicken is bone-dry using paper towels. This removes surface moisture that can hinder crispiness later on, creating a better base for your coating to adhere properly.
Embrace the Buttermilk Soak: Don’t shortchange the brining time; the longer the chicken soaks, the more tender and flavorful it will become. This step makes a significant difference in the final taste and texture of your Classic Southern Fried Chicken.
Don’t Skip the Post-Dredge Rest: This 15-20 minute resting period at room temperature is non-negotiable! It allows the flour coating to absorb moisture and bond with the chicken, dramatically reducing the chance of your delicious crust flaking off in the hot oil.
Maintain Consistent Oil Temperature: Fluctuating oil temperature is the enemy of fried chicken. Too low, and your chicken will be greasy; too high, and the outside will burn before the inside cooks. A thermometer and steady adjustments are your best friends for golden fried chicken.
Avoid Overcrowding the Pot: Resist the urge to fry too much chicken at once. Overcrowding drops the oil temperature too quickly, leading to an unevenly cooked, soggy, and greasy result. Fry in small batches for the best outcome every time.
Season Immediately After Frying: A sprinkle of extra salt (or your preferred seasoning blend) right when the chicken comes out of the hot oil helps the seasoning adhere best and boosts overall flavor. The hot oil helps the salt melt and stick.
The Unsung Hero: The Post-Fry Rest: Just a few minutes of resting after draining allows the internal juices to settle back into the meat. This guarantees every bite is moist and tender, preventing juices from escaping when you cut into it.
Tackling Frying Woes: Common Classic Southern Fried Chicken Challenges & Solutions
Why Is My Fried Chicken Soggy or Greasy?
This is often due to oil temperature being too low or overcrowding the pot. Ensure your oil stays consistently between 300-325°F (149-163°C) and fry in small batches, allowing the oil to recover its temperature between additions.
Proper draining on a wire rack also prevents excess oil from clinging to the crispy fried chicken’s surface.
Help! My Classic Southern Fried Chicken Is Dry Inside.
Dry chicken usually indicates overcooking or frying at too high a temperature. Always use a meat thermometer to ensure the internal temperature reaches 165°F (74°C) without exceeding it.
Consistent oil temperature (300-325°F) is crucial to cook thoroughly without drying out the interior while achieving a golden crust.
My Coating Won’t Stick to the Chicken!
The most common culprit is skipping or shortening the post-dredge resting period. This critical rest allows the flour to bond effectively with the chicken’s moist, brined surface.
Additionally, ensure you press the flour firmly onto the chicken during dredging for maximum adhesion, creating that resilient crispy coating.
The Chicken is Brown, But Not Cooked Through.
This happens when the oil is too hot, causing the exterior to cook rapidly and brown before the interior has a chance to reach a safe temperature. Use an oil thermometer to keep the temperature steady between 300-325°F.
Always verify doneness with a meat thermometer at 165°F (74°C) to ensure your homemade fried chicken is cooked perfectly throughout.
Round Out Your Meal: Serving Suggestions, Storage, & Make-Ahead Tips
Classic Southern Sides That Complement Your Fried Chicken
Pair your crispy chicken with traditional favorites for a complete meal. Creamy mashed potatoes, tangy coleslaw, or sweet corn on the cob are always winners.
For an extra touch of comfort, serve alongside easy fluffy biscuits and a generous drizzle of creamy country gravy.
Storing Your Leftover Classic Southern Fried Chicken Like a Pro
Allow any leftover fried chicken to cool completely before storing it in an airtight container in the refrigerator for up to 3-4 days. Proper cooling prevents condensation that can make the crust soggy.
For longer storage, wrap individual pieces tightly and freeze for up to 2-3 months. Thaw in the refrigerator overnight before reheating.
Reheating for Maximum Crispness
To revive that irresistible crispy crust, avoid the microwave at all costs! Reheat leftover fried chicken in a preheated oven (375°F/190°C) or an air fryer (350°F/175°C) until warmed through and crispy, about 10-15 minutes.
This method brings back much of the original texture, ensuring your leftover Classic Southern Fried Chicken is nearly as good as fresh.
Your Burning Questions Answered: Classic Southern Fried Chicken FAQs
What’s the best cut of chicken for frying?
Bone-in, skin-on thighs and drumsticks are generally preferred for frying. They tend to stay juicier and more flavorful due to their higher fat content and bone-in structure, which insulates the meat during cooking.
Can I use regular milk instead of buttermilk?
Yes, you can easily make a buttermilk substitute! Combine 1 cup of regular milk with 1 tablespoon of lemon juice or white vinegar. Let it sit for 5-10 minutes until it slightly curdles.
This acidity helps tenderize the chicken just like traditional buttermilk, crucial for tender Classic Southern Fried Chicken.
How can I make this Classic Southern Fried Chicken recipe gluten-free?
To make this recipe gluten-free, simply substitute the all-purpose flour with your favorite gluten-free all-purpose flour blend. Ensure your blend contains xanthan gum or add 1/2 teaspoon per cup of flour for better binding and crispiness.
Is it safe to reuse frying oil?
Yes, you can typically reuse frying oil 2-3 times for frying chicken, provided it hasn’t been overheated or discolored. Strain the cooled oil through a fine-mesh sieve or cheesecloth to remove any food particles, then store it in an airtight container in a cool, dark place.
Your Journey to Classic Southern Fried Chicken Mastery Continues!
You now possess the “cracked code” to truly exceptional Classic Southern Fried Chicken-crispy, juicy, and bursting with flavor. With patience, attention to detail, and these expert tips, you’re ready to transform simple ingredients into a meal that will earn rave reviews.
Don’t hesitate to dive in and make this iconic dish your own. Share your triumph with family and friends, or simply savor every irresistible bite yourself. What are you waiting for? Your golden, perfectly fried chicken masterpiece awaits!
Classic Southern Fried Chicken
Course: Main CourseCuisine: American CuisineDifficulty: easy4
servings45
hours30
minutes300
minutesAmerican Cuisine
Ingredients
4-6 pieces bone-in, skin-on chicken (a mix of thighs and drumsticks recommended)
2 cups all-purpose flour
2 teaspoons salt
1 teaspoon black pepper
1 teaspoon paprika
1/2 teaspoon garlic powder
1/2 teaspoon onion powder
1 cup buttermilk (or 1 cup milk with 1 tablespoon lemon juice, let sit for 5 minutes)
1 large egg
Vegetable oil or peanut oil, for frying (about 4-6 cups)
Directions
- Prep the Chicken: Pat the chicken pieces thoroughly dry with paper towels. This is crucial for crispiness. In a large bowl, whisk together the buttermilk and egg. Add the chicken pieces, ensuring they are fully submerged. Cover and refrigerate for at least 4 hours, or preferably overnight. This tenderizes the chicken and deeply infuses moisture for maximum juiciness.
- Prepare the Dredging Mixture: In a shallow dish or large resealable bag, combine the flour, salt, black pepper, paprika, garlic powder, and onion powder. Mix well to ensure all seasonings are evenly distributed.
- Dredge the Chicken: Remove chicken from the buttermilk mixture, letting any excess liquid drip off naturally. Do not pat the chicken dry at this stage. Immediately dredge each piece liberally in the seasoned flour, pressing firmly with your hands to ensure the flour adheres to all surfaces. Place the dredged chicken on a wire rack set over a baking sheet and let it rest at room temperature for 15-20 minutes. This crucial resting period allows the coating to set and bond with the chicken, preventing it from flaking off and ensuring an extra crispy crust.
- Heat the Oil: In a large, heavy-bottomed pot or Dutch oven, pour enough vegetable or peanut oil to reach a depth of about 2-3 inches. Heat the oil over medium-high heat until it reaches 325 degrees F (160 degrees C). Use a reliable thermometer to monitor the temperature; maintaining this precise temperature is key to avoiding dry chicken while achieving that desirable crispy coating.
- Fry the Chicken: Carefully lower 2-3 pieces of chicken into the hot oil, ensuring you do not overcrowd the pot. Overcrowding will cause the oil temperature to drop significantly, leading to soggy and greasy chicken. Fry for 6-8 minutes per side, turning occasionally, until a beautiful golden brown color is achieved and the chicken is cooked through. The internal temperature of the chicken should register 165 degrees F (74 degrees C) when checked with a meat thermometer. Adjust the heat as needed throughout the cooking process to keep the oil consistently between 300-325 degrees F.
- Drain and Rest: Once cooked, use tongs to carefully remove the chicken from the oil and transfer it to a clean wire rack set over paper towels or a baking sheet to drain any excess oil. If desired, sprinkle with a pinch of extra salt immediately after frying. Let the chicken rest for a few minutes before serving. This allows the internal juices to redistribute, guaranteeing maximum juiciness with every bite. Repeat the frying process with the remaining chicken pieces, allowing the oil to return to the target temperature between batches.
Notes
- Using a meat thermometer for oil temperature and chicken doneness is crucial for best results.