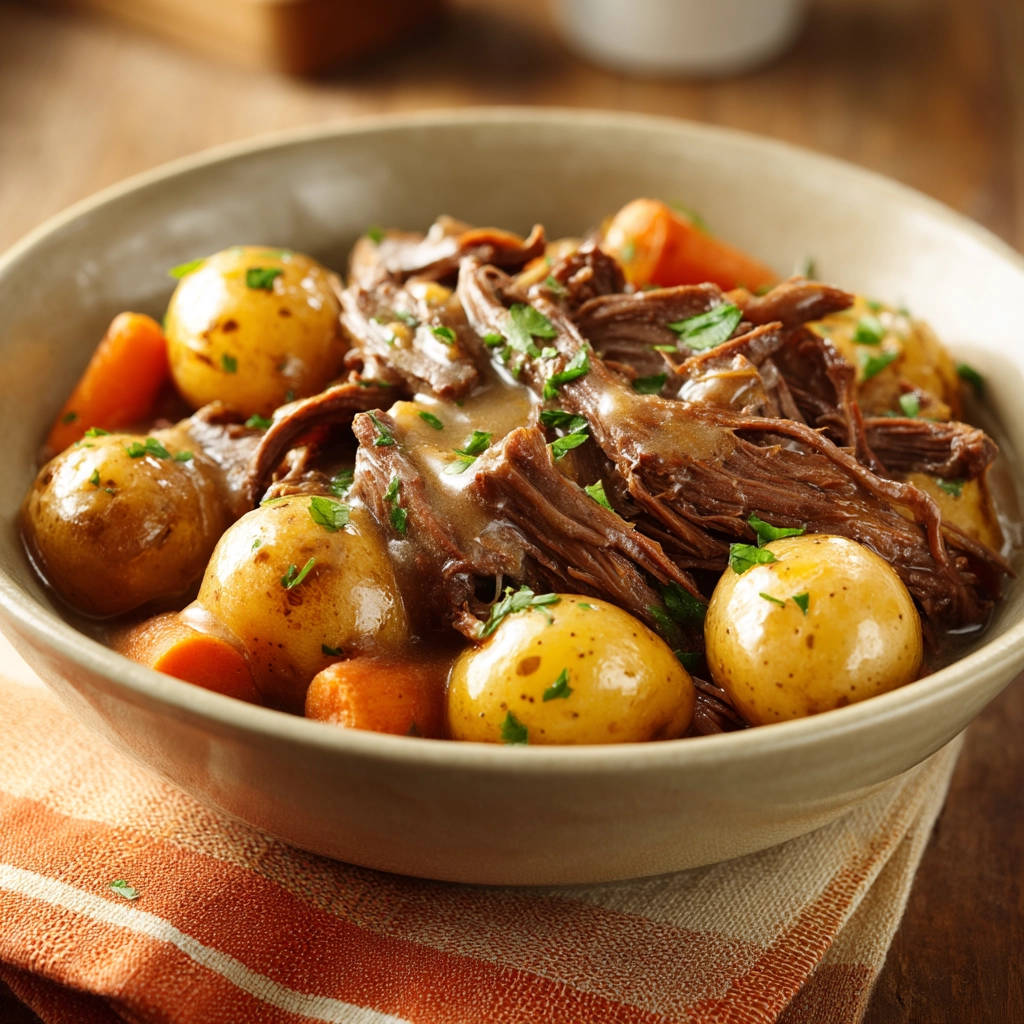
There are some meals that just wrap you in a warm hug, and a classic pot roast is definitely one of them. It’s the kind of dish you dream about on a chilly evening – tender, savory beef swimming in rich gravy, served alongside soft, comforting vegetables.
But let’s be honest, how many times have you lovingly prepared a pot roast, waited patiently, and ended up with meat that’s disappointingly tough? It’s happened to me more times than I care to admit! You follow the directions, add all the right ingredients, but the beef just doesn’t yield that magical, fall-apart texture you crave.
If you’ve struggled with achieving truly tender pot roast, you are not alone. For years, I tried different cuts of meat, varying oven temperatures, and countless recipes, all hoping for that elusive perfect result. I felt like I was missing some secret ingredient or technique.
Turns out, the secret isn’t complicated at all! It’s a simple combination of the right cut, the right environment, and most importantly, time. Once I unlocked this simple truth, my pot roasts went from occasionally tender to consistently, gloriously fall-apart tender every single time. Get ready for beef so soft, so succulent, that you can shred it with just a fork.
This Classic Comfort Pot Roast recipe is designed to remove the guesswork and deliver that dreamy texture alongside incredible flavor. It’s a complete meal cooked in one pot, making cleanup a breeze, and the aroma filling your kitchen as it simmers is simply divine.
Why You’ll Love This Classic Comfort Pot Roast
Beyond the sheer comfort factor, this pot roast recipe has several reasons why it’s become a staple in my kitchen:
- Guaranteed Tenderness: We focus on the technique that ensures your beef chuck roast will literally melt in your mouth.
- Incredible Flavor: Browning the meat and sautéing the aromatics builds a deep, rich base for the gravy and the overall dish.
- Complete Meal in One Pot: The vegetables cook right alongside the meat, absorbing all the wonderful flavors.
- Effortless Cooking (Mostly): Once you get it simmering low and slow, the oven or slow cooker does most of the work.
- Perfect for Gathering: It’s a hearty, satisfying meal that’s ideal for family dinners or entertaining friends.
Gathering Your Ingredients for the Perfect Pot Roast
Creating a truly memorable pot roast starts with selecting the right components. This recipe relies on classic ingredients that work together to build layers of savory flavor and achieve that signature tender texture.
Here’s what you’ll need, with a little insight into why each one plays a vital role:
- Boneless Beef Chuck Roast: This is your star ingredient! A 3-pound chuck roast is ideal. Chuck roast is a tougher cut with a good amount of connective tissue (collagen). While that sounds bad, this collagen is exactly what breaks down during long, slow cooking, transforming into gelatin. Gelatin is what makes the meat incredibly moist and tender, allowing it to fall apart easily. Don’t substitute leaner cuts like sirloin or round; they won’t achieve the same tenderness.
- Vegetable Oil: Just a couple of tablespoons are needed for searing the beef. Any neutral oil with a high smoke point works well here to get that beautiful, flavorful crust without burning.
- Large Onion, chopped: Onions provide a foundational sweetness and savory depth as they soften and caramelize slightly in the pot. They release aromatic compounds that infuse into the broth.
- Garlic Cloves, minced: Garlic is a must for that classic pot roast flavor. Adding it after the onions ensures it doesn’t burn, releasing its pungent aroma to complement the other ingredients.
- Beef Broth: Four cups of beef broth create the flavorful liquid base for braising the beef and cooking the vegetables. Choose a good quality broth for the best flavor. The liquid is crucial for keeping the meat moist and facilitating the breakdown of connective tissue.
- Salt and Black Pepper: Essential seasonings to enhance the natural flavors of the beef and vegetables. Seasoning the roast generously before searing is key to building flavor from the start.
- Baby Potatoes: About a pound of baby potatoes adds that classic starchy component. Using baby potatoes means less prep work; just halve them if they’re on the larger side. They absorb the delicious cooking liquid as they become tender. If you’re looking for other ways to enjoy potatoes, our guide on creamy potato salad might offer some fresh ideas!
- Carrots: One pound of carrots, peeled and cut into chunks, brings sweetness and color. Like the potatoes, they cook in the flavorful broth, becoming wonderfully tender. You could also explore our recipe for simple roasted root vegetables for more inspiration on preparing hearty sides.
- All-Purpose Flour: Used to create a slurry that will thicken the cooking liquid into a rich, velvety gravy.
- Cold Water: Mixed with the flour to form the slurry. Using cold water prevents lumps from forming.
- Fresh Parsley, chopped: An optional but highly recommended garnish. A sprinkle of fresh parsley adds a touch of bright color and freshness to the finished dish.
Crafting Your Pot Roast: Step-by-Step
Ready to make the most tender pot roast you’ve ever had? Follow these steps, paying special attention to the low and slow cooking time.
Prep the Roast: Begin by patting your boneless beef chuck roast completely dry using paper towels. This step is surprisingly important because excess moisture on the surface will prevent you from getting a good, deep sear later on. Once dry, season the roast generously all over with salt and black pepper. Don’t be shy here; a good amount of seasoning on the exterior builds the first layer of flavor.
Sear for Flavor: Heat the vegetable oil in a large Dutch oven or another heavy, oven-safe pot over medium-high heat. Once the oil is shimmering, carefully add the seasoned beef roast. Sear it on all sides until you achieve a deep, golden-brown crust. This searing step adds incredible depth of flavor through the Maillard reaction, but remember, while it boosts taste significantly, this isn’t the magic trick for tenderness itself. Once beautifully browned, remove the roast from the pot and set it aside.
Sauté the Aromatics: With the pot still hot (reduce heat slightly if needed), add the chopped onion. Cook, stirring occasionally, until the onion softens and becomes translucent, which should take about 5-7 minutes. Then, add the minced garlic and cook for just one minute more. You’ll notice the kitchen filling with a wonderful aroma as the garlic becomes fragrant. Be careful not to burn the garlic.
Add Liquid and Bring to Simmer: Return the seared beef roast to the pot, resting it on top of the softened onions and garlic. Pour in the beef broth. The liquid should come up at least halfway, preferably more, on the sides of the roast. This ensures the meat stays moist as it cooks. Bring the liquid in the pot up to a gentle simmer over medium heat.
The Crucial Low and Slow Cook: This is where the magic happens for tenderness! Once the broth is simmering, cover the pot tightly with a heavy, well-fitting lid. Immediately reduce the heat setting to low. The goal is for the liquid to maintain a very gentle, bare simmer – just a few occasional bubbles rising to the surface. Place the covered pot in a preheated oven (typically 325°F or 160°C, although oven temperatures can vary, so monitor) or keep it on the stovetop on the lowest possible setting, ensuring that gentle simmer continues. Cook for a minimum of 3 hours, or until the roast is exceptionally tender when you gently pierce it with a fork. The key here is patience and low heat; this extended, gentle cooking time slowly breaks down the tough connective tissues (collagen) in the chuck roast, converting them into rich, mouthwatering gelatin, which results in that desired fall-apart texture. If you prefer using a slow cooker, transfer everything to your slow cooker after searing and sautéing the aromatics (step 3), add the broth, cover, and cook on the LOW setting for 8-10 hours.
Add the Vegetables: After the meat has cooked for at least 3 hours and is starting to become tender, carefully add the baby potatoes and carrot chunks to the pot around the roast. Push them down gently so they are mostly submerged in the flavorful cooking liquid. Cover the pot again and continue to cook for another 45-60 minutes. The cooking time will vary depending on the size of your vegetables, but they are done when they are tender when pierced with a fork.
Rest the Meat and Veggies: Using a slotted spoon, carefully remove the incredibly tender beef roast and the cooked vegetables from the pot. Transfer them to a serving platter or dish and cover them loosely to keep them warm while you prepare the gravy.
Prepare the Gravy Base: Skim any excess fat that has risen to the surface of the cooking liquid remaining in the pot. Don’t worry about getting every last bit, but removing the majority helps create a smoother gravy. Bring the liquid remaining in the pot back to a simmer over medium heat on your stovetop.
Thicken the Gravy: In a small bowl, whisk together the 2 tablespoons of all-purpose flour and 1/4 cup of cold water until you have a smooth, lump-free mixture known as a slurry. While continuously whisking the simmering liquid in the pot, slowly pour the slurry into the pot. Keep stirring constantly as the gravy thickens. This should only take about 2-3 minutes. The gravy should coat the back of a spoon. Taste the gravy and add more salt or pepper if needed to adjust the seasoning to your preference.
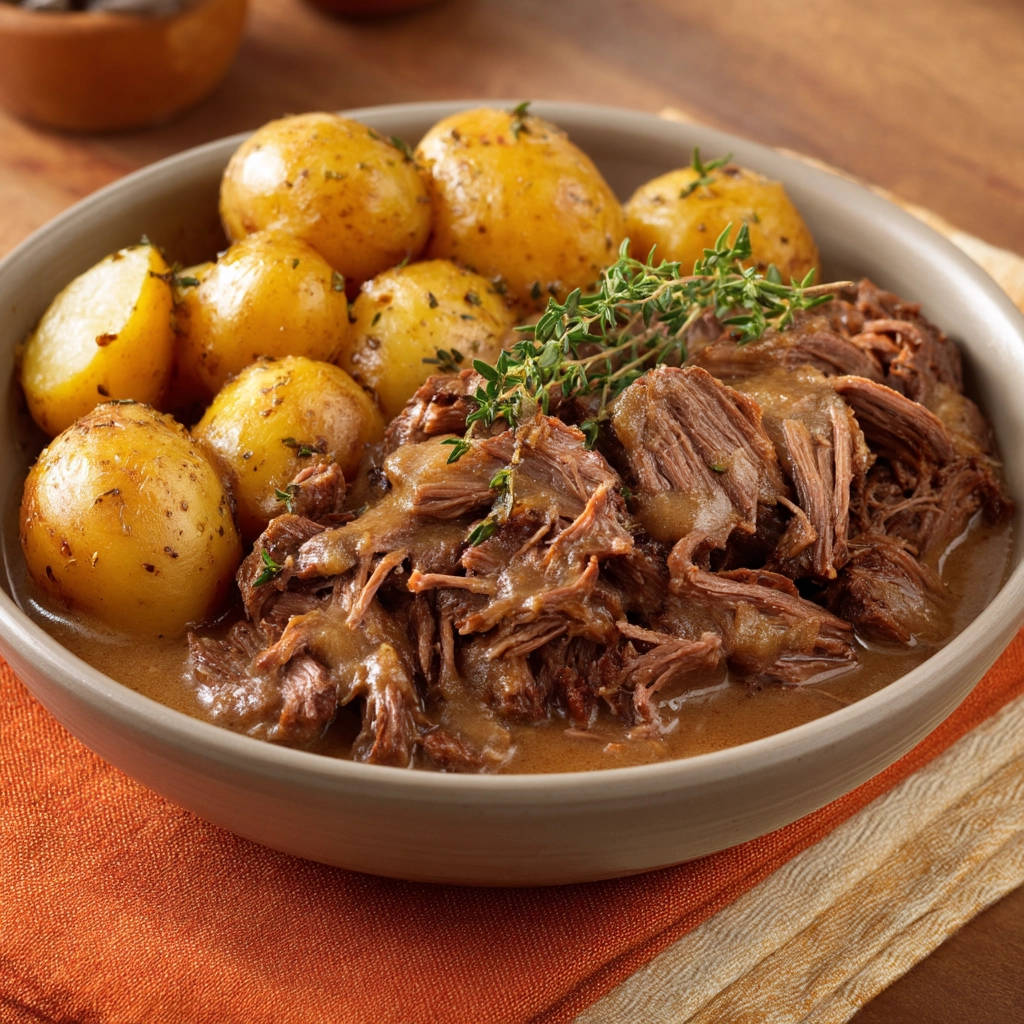
Combine and Serve: Using two forks, easily shred the fall-apart tender beef into large pieces or smaller shreds, whichever you prefer. Return the shredded meat and the cooked vegetables to the pot with the thickened gravy. Stir everything gently to coat the meat and vegetables evenly in the rich sauce.
Enjoy!: Ladle the pot roast and its delicious gravy and vegetables into bowls. Garnish with fresh chopped parsley for a burst of color and freshness. Serve hot and savor every bite of this truly comforting and guaranteed fall-apart tender pot roast!
Tips for Perfect Pot Roast Every Time
Making a fantastic pot roast is straightforward once you understand the key principles. Here are a few extra tips to ensure your success:
- Don’t Skip the Sear: While not for tenderness, searing is crucial for flavor. A deep brown crust adds complexity that permeates the entire dish.
- Low and Slow is Non-Negotiable for Chuck: The low simmering temperature over several hours is the absolute key to breaking down collagen in a chuck roast. Don’t try to rush this step by increasing the heat.
- Check Tenderness with a Fork: Your pot roast is done when a fork easily twists and pulls away from the meat with almost no resistance. If you feel significant resistance, it needs more time.
- Resting Improves Juiciness: Allowing the meat to rest for 10-15 minutes after removing it from the pot (before shredding) helps the juices redistribute throughout the meat, making it even more succulent.
- Flavor Boosters: Want to add more layers of flavor? Consider adding a sprig of fresh rosemary or thyme along with the beef broth in step 4. You could also add other vegetables like parsnips or celery chunks when you add the potatoes and carrots.
- Make Ahead: Pot roast is often even better the next day as the flavors meld. Cool completely before storing in an airtight container in the refrigerator for up to 3-4 days. Reheat gently on the stovetop or in the oven.
- Freezing: Leftover pot roast (meat, veggies, and gravy) freezes beautifully. Cool completely, then transfer to freezer-safe containers or bags. It can be frozen for up to 3 months. Thaw in the refrigerator overnight before reheating.
What to Serve With Your Pot Roast
This pot roast is a meal in itself with the beef, potatoes, and carrots all cooked together. However, a few simple additions can round out the plate beautifully:
- Crusty bread for soaking up the glorious gravy.
- A simple green salad with a light vinaigrette to cut through the richness.
- Extra mashed potatoes (because you can never have too many potatoes with pot roast!). If you love creamy sides, you might also enjoy our recipe for creamy scalloped potatoes.
- Steamed or roasted green beans. For another take on veggie sides, consider our roasted cauliflower steaks.
- Cornbread or biscuits, like our easy fluffy biscuits.
Your Pot Roast Questions Answered (FAQ)
Here are some common questions I hear about making pot roast:
What is the best cut of beef for pot roast?
Boneless beef chuck roast is widely considered the best cut for classic pot roast because it has enough connective tissue (collagen) that breaks down into gelatin during the long, slow cooking process. This is what makes the meat incredibly tender and moist. Other cuts like brisket or round roast can also be used, but they may require slightly different cooking times or techniques to achieve optimal tenderness.
Can I make this pot roast in a slow cooker instead of the oven?
Absolutely! A slow cooker is a fantastic way to make this pot roast. After completing step 3 (searing the beef and sautéing the aromatics) in a skillet or the slow cooker insert if it’s stovetop safe, transfer everything to the slow cooker. Add the beef broth, cover, and cook on the LOW setting for 8-10 hours. You’ll add the vegetables during the last 1.5 to 2 hours of cooking. Once the meat is tender and the vegetables are cooked, remove them and make the gravy on the stovetop as directed in steps 8 and 9 before combining everything back in the slow cooker or a serving dish.
My pot roast is still tough after cooking for several hours. What went wrong?
The most common reason for tough pot roast is not cooking it long enough or not cooking it at a low enough temperature. Chuck roast needs time for the collagen to break down. If it’s tough, it simply needs more time cooking at a low, gentle simmer. Cover it back up and continue cooking, checking for tenderness every 30-60 minutes, until a fork easily pierces the meat and twists to shred it.
Can I add other vegetables to this pot roast?
Yes, you can definitely add other root vegetables! Parsnips, celery, sweet potatoes, or even winter squash cut into chunks can be added along with the carrots and potatoes during the final cooking stage (step 6). Mushrooms are also a great addition, which you could sauté with the onions and garlic or add towards the end. Speaking of mushrooms, if you enjoy them, check out our recipe for creamy potatoes and mushrooms.
How do I make the gravy thicker or thinner?
If your gravy isn’t thick enough after adding the slurry and simmering for a few minutes, you can make another small slurry (1 tablespoon flour whisked with 2 tablespoons cold water) and whisk it slowly into the simmering gravy, cooking for another minute or two until thickened. If the gravy is too thick, simply whisk in a little more beef broth or water until it reaches your desired consistency.
Enjoy Your Homemade Comfort Pot Roast!
There you have it – the simple steps and the crucial secret to making a pot roast that is truly, unbelievably tender and packed with savory flavor. This recipe brings classic comfort to your table with minimal fuss and maximum deliciousness.
Whether you’re gathering your family on a Sunday or simply craving a soul-warming meal, this Classic Comfort Pot Roast is sure to become a favorite. Don’t hesitate to give it a try!
Did you make this recipe? How did it turn out? I’d love to hear about your experience in the comments below. Happy cooking!
Classic Comfort Pot Roast

Ingredients
- 3 pound boneless beef chuck roast
- 2 tablespoons vegetable oil
- 1 large onion, chopped
- 2 cloves garlic, minced
- 4 cups beef broth
- 1 teaspoon salt
- 1/2 teaspoon black pepper
- 1 pound baby potatoes, halved if large
- 1 pound carrots, peeled and cut into chunks
- 2 tablespoons all purpose flour
- 1/4 cup cold water
- Fresh parsley, chopped, for garnish
Directions
- Pat the chuck roast dry with paper towels. Season generously with salt and pepper.
- Heat the vegetable oil in a large Dutch oven or heavy pot over medium high heat. Add the beef roast and sear on all sides until deeply browned. This adds great flavor but is not the key to tenderness. Remove the roast from the pot.
- Add the chopped onion to the pot and cook, stirring, until softened, about 5-7 minutes. Add the minced garlic and cook for 1 minute more until fragrant.
- Return the beef roast to the pot. Pour in the beef broth. The liquid should come at least halfway up the roast, more is fine. Bring the liquid to a simmer.
- This is the crucial step for tenderness: Cover the pot tightly with a lid. Reduce the heat to low so the liquid just barely simmers. Cook for at least 3 hours, or until the roast is very tender when pierced with a fork. The low and slow cooking breaks down the tough connective tissues in the meat, making it fall apart. If using a slow cooker, cook on low for 8-10 hours.
- After the meat has cooked for at least 3 hours and is becoming tender, add the baby potatoes and carrot chunks to the pot. Ensure they are mostly submerged in the liquid. Continue to cook, covered, for another 45-60 minutes, or until the vegetables are tender.
- Carefully remove the meat and vegetables from the pot using a slotted spoon and set aside. Cover to keep warm.
- To make the gravy, skim any excess fat from the surface of the cooking liquid in the pot. Bring the liquid to a simmer over medium heat.
- In a small bowl, whisk together the flour and cold water until smooth to create a slurry. Slowly whisk the slurry into the simmering pot liquid. Cook, stirring constantly, until the gravy thickens, about 2-3 minutes. Taste and adjust seasoning if needed.
- Shred the beef with two forks. Return the shredded meat and the cooked vegetables to the pot with the gravy. Stir gently to coat.
- Serve the pot roast hot, garnished with fresh chopped parsley. Enjoy meat that is truly fall-apart tender!