For years, I faced the classic baker’s dilemma: the dreaded cheesecake crack. It felt like a rite of passage, yet always left me frustrated. But after countless experiments, I finally uncovered the simple, game-changing secret to achieving that perfectly smooth, pristine top every single time with this incredible Cookies and Cream Dream Cheesecake.
This isn’t just another cheesecake recipe; it’s your foolproof guide to a showstopping dessert that tastes as amazing as it looks. You’re about to discover the joy of baking a cheesecake that truly won’t crack, delivering pure cookies and cream bliss with every bite.
Discover the Joy of Foolproof Cookies and Cream Cheesecake
Creating an impressive dessert shouldn’t come with a side of stress. This recipe for Cookies and Cream Dream Cheesecake is meticulously designed to eliminate common baking anxieties, making it a joy from start to finish.
The Game-Changing Secret: No More Cracks!
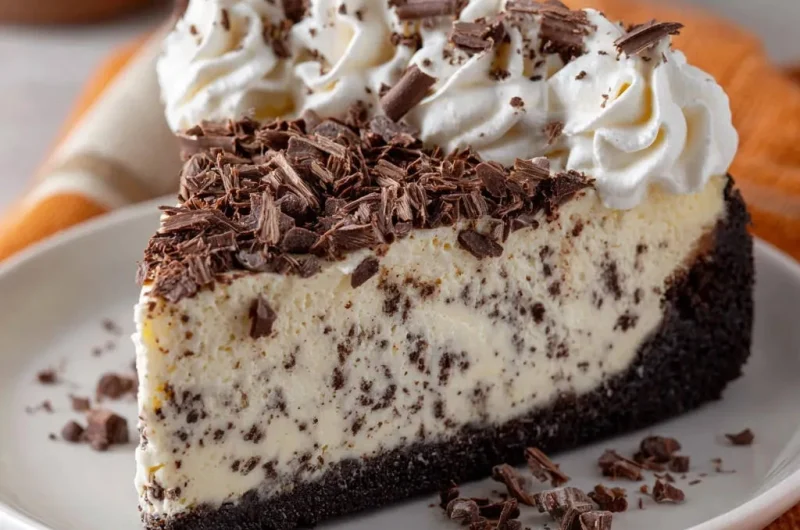
The ultimate innovation in this recipe lies in its unique cooling method. By turning off the oven and allowing the cheesecake to slowly cool within the water bath, we prevent the drastic temperature shifts that typically cause those frustrating cracks. This gentle transition results in an impeccably smooth surface.
Why This Recipe Stands Out from the Rest
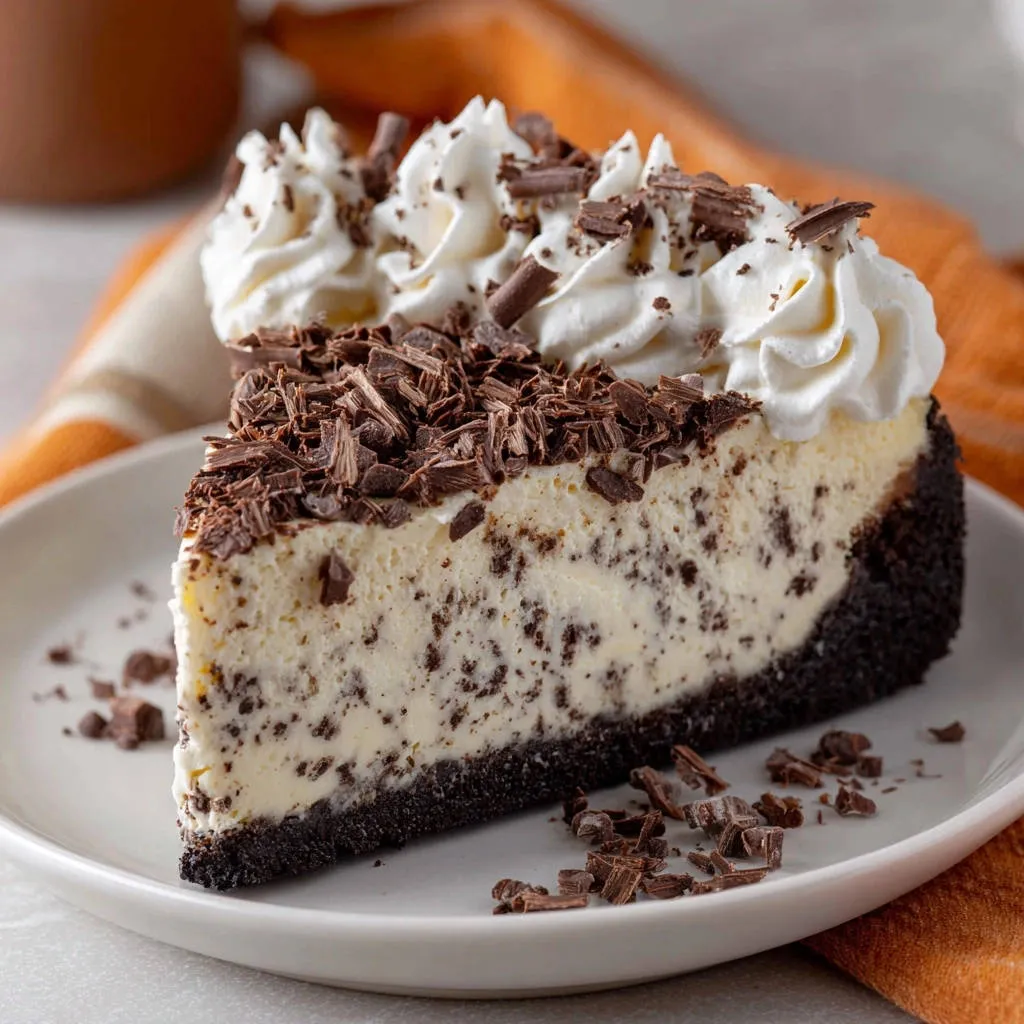
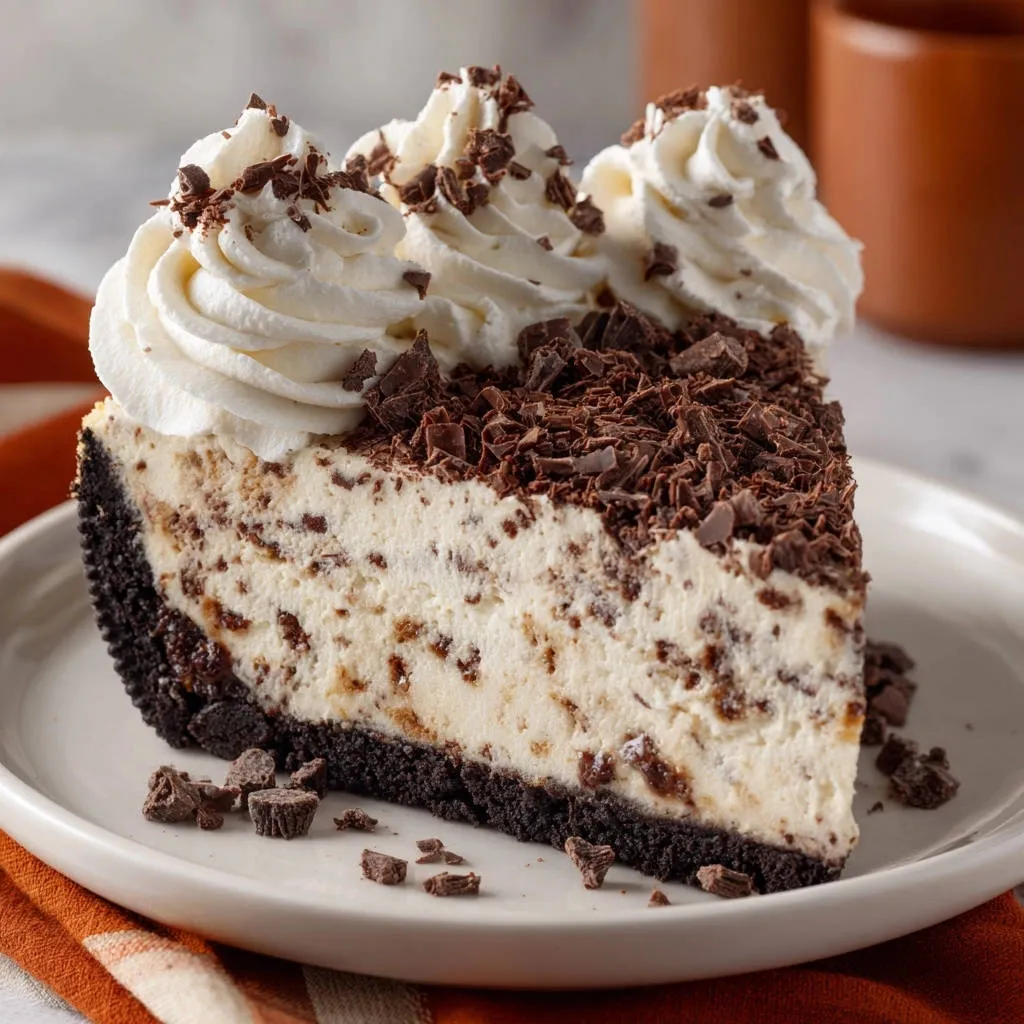
Beyond its crack-free promise, this cheesecake offers unparalleled decadence. The rich, creamy filling infused with crushed chocolate sandwich cookies creates a textural delight that’s both comforting and exciting.
It’s an incredibly satisfying dessert that appeals to everyone. Its straightforward steps ensure even novice bakers can achieve professional-level results, making it the perfect centerpiece for any gathering.
The Building Blocks of Decadence: Key Ingredients Revealed
Every exceptional dish begins with high-quality ingredients, and this Cookies and Cream Dream Cheesecake is no exception. Understanding the role of each component is key to achieving its signature flavor and texture.
Crust Essentials: Building the Foundation
For the crust, we use finely crushed chocolate sandwich cookies, providing that iconic “cookies and cream” flavor right from the base. Unsalted melted butter binds these crumbs together, creating a rich, stable foundation that will hold up beautifully.
Creamy Filling Components: Flavor & Texture
Softened cream cheese is non-negotiable for a velvety smooth filling, ensuring there are no lumps in your batter. Granulated sugar provides the perfect balance of sweetness, while a hint of vanilla extract enhances the overall richness.
Large eggs act as the binder and contribute to the cheesecake’s classic custardy texture. Finally, coarsely crushed chocolate sandwich cookies are folded in, adding delightful pockets of chocolatey crunch throughout the creamy filling.
Topping & Garnish: The Final Flourish
Chilled heavy cream, powdered sugar, and a touch more vanilla extract whip up into a light, airy topping that perfectly complements the cheesecake’s richness. Chocolate shavings or curls provide an elegant visual appeal and an extra hint of chocolatey goodness.
Tools of the Trade: Equipping Your Cheesecake Journey
9-inch Springform Pan: This specialized pan is essential for easy removal of your delicate cheesecake without disturbing its perfect shape and sides.
Large Roasting Pan: Critical for creating the water bath, which provides even, gentle heat and prevents cracks.
Electric Mixer: A hand mixer or stand mixer simplifies beating the cream cheese to a smooth consistency and whipping the cream for the topping.
Heavy-Duty Aluminum Foil: Multiple layers are vital to prevent any water from seeping into your springform pan during the water bath baking process.
Rubber Spatula: Ideal for gently folding in the crushed cookies without deflating the batter.
Wire Rack: Necessary for allowing the cheesecake to cool completely and evenly at room temperature before chilling.
Your Path to Perfect Slices: Step-by-Step Baking Guide
Crafting the Golden Crust: A Solid Foundation
Start by preheating your oven to 350°F (175°C). In a medium bowl, combine your finely crushed chocolate sandwich cookies with the melted unsalted butter. Ensure the crumbs are fully moistened for best results.
Press this mixture firmly into the bottom and slightly up the sides of a 9-inch springform pan. A firm, even base is crucial for structural integrity. Bake the crust for 8-10 minutes until lightly set, then remove it and let it cool completely; a cool crust helps prevent a soggy bottom.
The Water Bath Advantage: Your Cheesecake’s Best Friend
Once the crust is cool, reduce your oven temperature to 325°F (160°C). Tightly wrap the outside of your springform pan with several layers of heavy-duty aluminum foil. This creates a waterproof barrier, preventing any water from seeping into your cheesecake batter.
Place the foil-wrapped springform pan inside a larger roasting pan. This setup is the foundation for your water bath, which ensures a moist, evenly baked, and crack-free cheesecake.
Assembling the Silky-Smooth Filling: Avoiding Pitfalls
In a large bowl, use an electric mixer on low speed to beat the softened cream cheese until it is perfectly smooth. Avoid overmixing at this stage, as incorporating too much air can lead to cracks during baking.
Gradually add the granulated sugar and vanilla extract, mixing only until they are just combined. Beat in the eggs one at a time, continuing to use low speed and mixing only until each egg is fully incorporated before adding the next. This controlled mixing prevents excessive air from entering the batter.
Finally, gently fold in the coarsely crushed chocolate sandwich cookies using a spatula. This gentle action ensures the cookie pieces remain distinct and the batter isn’t overmixed.
The “Magic Hour” Bake & Chill: Unlocking Crack-Free Glory
Carefully pour your silky cheesecake batter over the cooled crust in the springform pan. Now, pour hot water into the larger roasting pan, around the springform, until it comes about halfway up the sides of the springform pan.
Carefully transfer the roasting pan with the cheesecake to your preheated oven. Bake for 60-75 minutes, or until the edges appear set but the center still jiggles slightly when gently shaken; this indicates it’s cooked through without being overbaked.
Here’s the crack-preventing secret: once baked, turn off the oven completely. Prop the oven door open slightly with a wooden spoon and let the cheesecake cool in the water bath, inside the oven, for 1 hour. This slow, gradual cooling prevents drastic temperature changes that cause cracks, ensuring a beautiful, smooth top.
Chilling for Perfection: Patience Pays Off
After the hour of slow cooling in the oven, carefully remove the roasting pan. Lift the springform pan out of the water bath, unwrap the foil, and transfer it to a wire rack to cool completely at room temperature.
Once the cheesecake is entirely cool to the touch, cover it tightly with plastic wrap and refrigerate for at least 6 hours, preferably overnight. This extended chilling time is vital, allowing the cheesecake to fully set and achieve its perfect creamy texture.
Whip Up the Creamy Topping: A Sweet Finale
Just before you’re ready to serve your Cookies and Cream Dream Cheesecake, prepare the topping. In a cold bowl, combine the chilled heavy cream, powdered sugar, and vanilla extract. Beat with an electric mixer until stiff peaks form; the cold bowl and cream are key to achieving a stable whipped cream.
Pipe or dollop the whipped cream onto individual slices of cheesecake as you serve them. For an extra touch of elegance and flavor, garnish generously with chocolate shavings or curls.
Beyond the Recipe: Expert Tips for Cheesecake Mastery
Never Overmix Your Batter (And Why It Matters)
Overmixing introduces too much air into the cream cheese mixture, which expands during baking and then collapses during cooling, leading to cracks. Always use a low speed and mix only until ingredients are just combined. This ensures a dense, creamy texture, free of air pockets.
The Gentle Fold: Incorporating Cookies Just Right
When adding the coarsely crushed chocolate sandwich cookies, use a rubber spatula and a gentle folding motion. Stirring vigorously can break up the cookies too much and also reintroduce air. The goal is even distribution without compromising the batter’s integrity.
Temperature is Your Friend: Softening Cream Cheese Correctly
Ensure your cream cheese is truly softened to room temperature before you begin. Cold cream cheese will result in a lumpy batter, no matter how much you mix it. Take it out of the fridge at least an hour before you plan to bake for the smoothest possible filling.
Ensuring a Secure Water Bath: Your Leak-Proof Checklist
The water bath is your best defense against cracks and ensures a moist cheesecake. Use heavy-duty aluminum foil and wrap your springform pan with at least 3-4 layers, extending well above the water line. If you’re concerned about leaks, you can place the wrapped pan inside an oven-safe bag before putting it in the roasting pan. This extra step provides absolute peace of mind.
Patience is Key: Don’t Rush the Cooling Process
The slow cool-down inside the turned-off oven is the most crucial step for preventing cracks. Resist the urge to pull the cheesecake out early. This gradual decrease in temperature allows the cheesecake to gently set and firm up, maintaining its beautiful surface. If you’re eager for more crack-free baking, explore our decadent chocolate chip cheesecake recipe, which also shares fantastic techniques!
Decoding Cheesecake Dilemmas: Common Issues & Solutions
Why Did My Cheesecake Crack?
Cracks are most often caused by sudden temperature changes, overbaking, or overmixing the batter. Our recipe specifically addresses these by emphasizing low-speed mixing, precise baking cues (the gentle jiggle), and the critical slow-cooling method in the oven. Following these steps carefully will prevent most cracking.
My Cheesecake Is Not Setting Properly
If your cheesecake seems too soft, it might need more baking time or more chilling time. Ensure the center has a slight jiggle, not a liquid wobble, before you turn off the oven. Always allow at least 6 hours, or preferably overnight, for thorough chilling; this is when the cheesecake truly sets.
The Crust Is Soggy
A soggy crust usually happens if it wasn’t pre-baked long enough, or if water seeped into the springform pan during the water bath. Ensure your foil wrapping is incredibly tight and multi-layered. Pre-baking the crust until lightly golden also helps create a barrier against moisture.
Presentation & Preservation: Enjoying Your Cheesecake Longer
Elegant Serving Suggestions for Every Occasion
For pristine slices, always use a sharp knife warmed under hot water and wiped clean between each cut. This creates clean lines and prevents sticking. Serve individual slices of your Cookies and Cream Dream Cheesecake with a dollop of fresh whipped cream and extra chocolate shavings.
You can also add a side of fresh berries, a drizzle of chocolate sauce, or a sprinkle of finely crushed cookies for extra flair. This cheesecake truly shines on its own, but these simple additions elevate the experience.
Storing Your Masterpiece: Freshness Guaranteed
Store leftover cheesecake, covered tightly with plastic wrap or in an airtight container, in the refrigerator for up to 5-7 days. The plastic wrap should directly touch the surface to prevent it from drying out or absorbing refrigerator odors.
Planning Ahead: Make-Ahead Tips for Easy Entertaining
This cheesecake is an ideal make-ahead dessert! You can bake the entire cheesecake up to 2-3 days in advance and keep it refrigerated. Prepare the whipped cream topping just before serving to ensure it’s fresh and fluffy.
Your Top Questions About Cookies and Cream Dream Cheesecake Answered
Can I Use Different Cookies for the Crust?
Absolutely! While chocolate sandwich cookies are iconic for this recipe, you can experiment. Graham crackers, vanilla wafers, or even shortbread cookies would make a delicious crust. Just ensure the quantity is adjusted to achieve a firm base.
How Do I Know When My Cheesecake is Done?
The key is a gentle wobble. The edges of the cheesecake should appear set and slightly puffed, but the very center (about a 2-inch circle) should still jiggle slightly when you gently shake the pan. It will continue to cook and set as it cools.
Can I Freeze This Cheesecake?
Yes, cheesecake freezes beautifully! Once completely cooled and chilled, you can freeze the entire cheesecake (without the whipped topping) by wrapping it tightly in several layers of plastic wrap, then a layer of aluminum foil. It can be frozen for up to 1 month. Thaw it overnight in the refrigerator before serving. For other amazing dessert ideas that store well, don’t miss our guide to perfecting any cheesecake!
What If I Don’t Have a Springform Pan?
While a springform pan is highly recommended for easy removal, you can use a regular 9-inch round baking pan. Line it with parchment paper, leaving an overhang on two opposite sides to create “slings” for easy lifting. Be aware that cutting and serving directly from the pan will be necessary.
Can I Make This Gluten-Free?
Yes! Simply substitute gluten-free chocolate sandwich cookies for the regular ones in both the crust and the filling. The rest of the ingredients are naturally gluten-free, making it an easy adaptation for those with dietary restrictions.
Ready to Share Your Cookies and Cream Dream?
You now possess the ultimate secret to baking a flawless Cookies and Cream Dream Cheesecake, guaranteed to impress every time. With its irresistible flavor and perfect, crack-free presentation, this recipe is set to become a cherished favorite in your kitchen.
Don’t just keep this triumph to yourself – share your baking success with friends and family, or perhaps even challenge yourself with another delightful creation like our creamy caramel crumble cheesecake bars. Happy baking!
Cookies and Cream Dream Cheesecake
Course: DessertCuisine: American CuisineDifficulty: easy10
servings30
minutes1
hour240
minutesAmerican Cuisine
Ingredients
For the Crust:
24 chocolate sandwich cookies, finely crushed
1/2 cup unsalted butter, melted
For the Filling:
3 (8-ounce) packages cream cheese, softened
1 cup granulated sugar
1 teaspoon vanilla extract
3 large eggs
1 cup crushed chocolate sandwich cookies, coarsely crushed
For the Topping:
1 1/2 cups heavy cream, chilled
1/4 cup powdered sugar
1/2 teaspoon vanilla extract
1/4 cup chocolate shavings or curls, for garnish
Directions
- Prepare Crust: Preheat oven to 350°F (175°C). In a medium bowl, combine the finely crushed cookies and melted butter. Press the mixture firmly into the bottom and slightly up the sides of a 9-inch springform pan. Bake for 8-10 minutes, then remove from oven and let cool completely.
- Prepare Water Bath: Reduce oven temperature to 325°F (160°C). Tightly wrap the outside of the cooled springform pan with several layers of heavy-duty aluminum foil to prevent any water from seeping in. Place the foil-wrapped pan inside a larger roasting pan.
- Make Filling: In a large bowl, using an electric mixer on low speed, beat the softened cream cheese until smooth. It is important to avoid overmixing here, as incorporating too much air can contribute to cracks later. Gradually add the granulated sugar and vanilla extract, mixing only until just combined. Beat in the eggs one at a time, mixing on low speed just until each egg is incorporated before adding the next. Gently fold in the coarsely crushed chocolate sandwich cookies using a spatula.
- Bake: Pour the cheesecake batter over the cooled crust in the springform pan. Carefully pour hot water into the larger roasting pan, around the springform pan, until it comes about halfway up the sides of the springform pan.
- Cook and Cool (The Crack-Preventing Steps): Carefully transfer the roasting pan with the cheesecake to the preheated oven. Bake for 60-75 minutes, or until the edges are set and the center jiggles slightly when gently shaken. Once baked, turn off the oven, prop the oven door open slightly with a wooden spoon, and let the cheesecake cool in the water bath inside the oven for 1 hour. This slow cooling prevents drastic temperature changes that cause cracks.
- Chill: Carefully remove the roasting pan from the oven. Remove the springform pan from the water bath, unwrap the foil, and transfer to a wire rack to cool completely at room temperature. Once entirely cool, cover the cheesecake with plastic wrap and refrigerate for at least 6 hours, preferably overnight, to allow it to fully set.
- Topping: Before serving, combine the chilled heavy cream, powdered sugar, and vanilla extract in a cold bowl. Beat with an electric mixer until stiff peaks form. Pipe or dollop the whipped cream onto individual slices of cheesecake. Garnish with chocolate shavings.
Notes
- Requires a minimum of 6 hours chilling time for best results, preferably overnight.