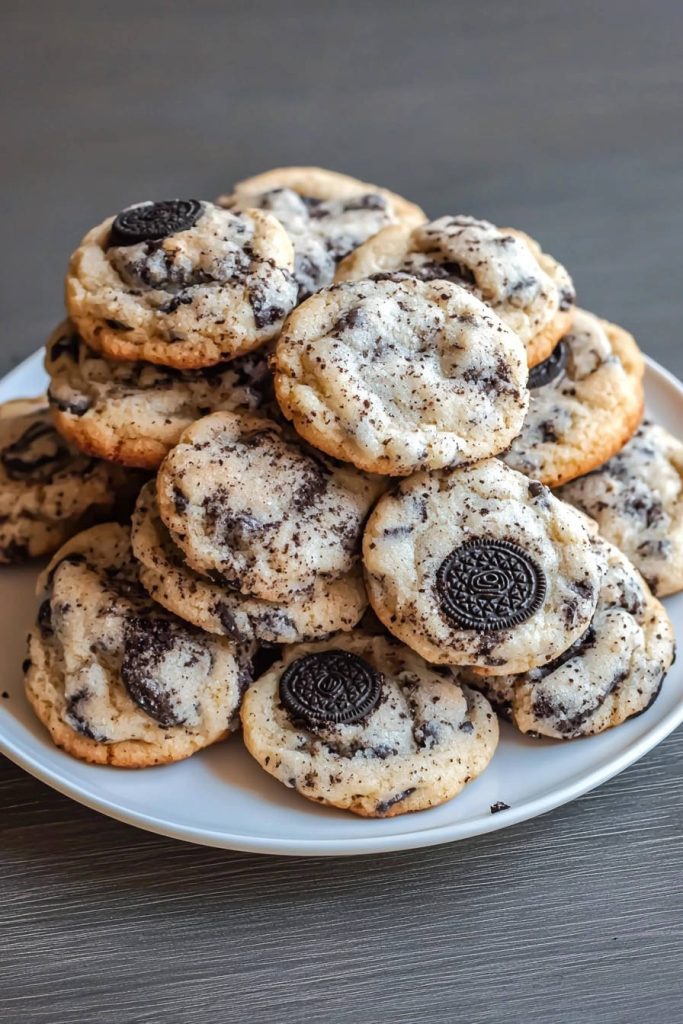
Imagine sinking your teeth into a perfectly soft, chewy cookie bursting with the flavors of cookies and cream, but with a secret twist. These Cookies & Cream Dream Cookies aren’t just your average dessert; they’re an experience. A vanilla bean infusion elevates the classic flavor combination to something truly extraordinary. Have you ever wondered what the key to a truly unforgettable cookie is? This is it!
These cookies are perfect for any occasion. From a cozy night in with family to a potluck gathering with friends, everyone will love the irresistible taste and texture of these treats. So, why settle for ordinary when you can bake something truly special? Let’s dive into the recipe and uncover the secrets behind these dreamy cookies!
Ingredients for Cookies & Cream Dream Cookies
Here’s what you’ll need to create these delectable cookies:
- 2 1/4 cups all-purpose flour: This forms the base of our cookies, providing structure and that classic chewy texture. You can also experiment with gluten-free blends for a gluten-free version.
- 1 teaspoon baking soda: This helps the cookies rise, giving them a light and airy texture.
- 1 teaspoon salt: Salt enhances the sweetness and balances the flavors in the cookies. Don’t skip it!
- 1 cup (2 sticks) unsalted butter, softened: Softened butter is crucial for creaming with the sugars, creating a light and fluffy base for the cookies. Make sure it’s truly softened, not melted.
- 3/4 cup granulated sugar: This adds sweetness and helps the cookies spread slightly during baking.
- 3/4 cup packed brown sugar: Brown sugar adds a molasses-like flavor and contributes to the cookies’ chewy texture. The “packed” measurement is important for accuracy.
- 1 teaspoon vanilla extract: A touch of vanilla extract enhances the overall flavor profile. Use pure vanilla extract for the best results.
- 1 vanilla bean, split and scraped (reserve pod for infusion): This is the secret ingredient! The vanilla bean infusion takes these cookies to a whole new level. Don’t throw away the pod; it has an important role to play!
- 2 large eggs: Eggs bind the ingredients together and add richness to the cookies.
- 1 package (14.3 ounces) chocolate sandwich cookies, coarsely chopped: These are the “cookies” in our “cookies and cream” dreams! Chop them coarsely for chunks of deliciousness in every bite.
- 4 chocolate sandwich cookies, for topping: These add a visual appeal and extra chocolatey goodness to the finished cookies.
- 1/2 cup heavy cream: This will be infused with the vanilla bean pod to create our special vanilla bean infused cream.
Step-by-Step Directions: Baking Your Dream Cookies
Ready to transform these ingredients into something magical? Follow these simple steps:
- Preheat oven to 375 degrees F (190 degrees C). Preheating ensures the cookies bake evenly. Don’t skip this step!
- Prepare the Vanilla Bean Infusion: In a small saucepan, heat 1/2 cup heavy cream over low heat. Add the reserved vanilla bean pod (from the scraped vanilla bean). Simmer for 5 minutes, then remove from heat and let steep for 30 minutes. Remove the vanilla bean pod. This is your vanilla bean infused cream. This infusion adds a subtle yet delightful vanilla flavor to the cookies, setting them apart from the rest. Be patient and allow the cream to steep for the full 30 minutes. The longer it steeps, the more intense the vanilla flavor will be.
- Combine Dry Ingredients: In a medium bowl, whisk together the flour, baking soda, and salt. Whisking ensures the ingredients are evenly distributed, preventing clumps and ensuring consistent texture.
- Cream Butter and Sugars: In a large bowl, cream together the softened butter, granulated sugar, and brown sugar until light and fluffy. This is a crucial step for achieving a light and airy texture. Use an electric mixer for best results, and be sure to scrape down the sides of the bowl occasionally.
- Add Vanilla: Beat in the vanilla extract and the vanilla bean seeds. The vanilla bean seeds add a visual and flavor pop.
- Incorporate Eggs and Infused Cream: Beat in the eggs one at a time, then gradually beat in 2 tablespoons of the vanilla bean infused cream until well blended. Adding the eggs one at a time ensures they are fully incorporated into the batter. The vanilla bean infused cream adds moisture and enhances the vanilla flavor. Don’t add more than 2 tablespoons, or the dough may become too wet.
- Combine Wet and Dry Ingredients: Gradually stir in the dry ingredients until just combined. Be careful not to overmix the dough, as this can result in tough cookies. Stir until the flour is just incorporated.
- Fold in Cookies: Fold in the coarsely chopped chocolate sandwich cookies. Gently fold them in to avoid breaking them into small pieces.
- Shape the Cookies: Drop by rounded tablespoons onto ungreased baking sheets. Using a cookie scoop ensures uniform size and even baking.
- Top with Cookies: Gently press a whole chocolate sandwich cookie onto the top of each cookie before baking. This adds a visual appeal and extra chocolatey flavor.
- Bake: Bake for 9-11 minutes, or until edges are lightly golden. Keep a close eye on the cookies, as baking times may vary depending on your oven.
- Cool: Let cool on baking sheets for a few minutes before transferring to a wire rack to cool completely. This prevents the cookies from breaking apart while they are still warm and delicate.
Expert Tips & Serving Suggestions for Dream Cookies
Want to take your Cookies & Cream Dream Cookies to the next level? Here are some expert tips and serving suggestions to help you create the perfect batch:
- Chilling the Dough: For even better texture and to prevent the cookies from spreading too much during baking, chill the dough for 30 minutes before baking. This allows the flavors to meld together and the butter to solidify, resulting in a thicker, chewier cookie.
- Vanilla Bean Grating: For an even more intense vanilla flavor, use a microplane to grate the vanilla bean directly into the butter and sugar mixture. This distributes the flavor more evenly throughout the dough.
- Serving Suggestions: These cookies are delicious on their own, but they are even better when paired with a cold glass of milk or a scoop of vanilla ice cream. You can also crumble them over yogurt or use them as a topping for ice cream sundaes.
- Storage Recommendations: Store the cookies in an airtight container at room temperature for up to 3 days. For longer storage, you can freeze them for up to 2 months.
- Reheating Techniques: To reheat the cookies, simply warm them in the microwave for a few seconds or in a preheated oven at 350 degrees F (175 degrees C) for a few minutes.
- Make-Ahead Ideas: You can prepare the cookie dough in advance and store it in the refrigerator for up to 2 days. When you’re ready to bake, simply scoop the dough onto baking sheets and bake as directed. You can also freeze the dough for up to 2 months.
Don’t be afraid to experiment with different flavors and ingredients. Try adding chopped nuts, chocolate chips, or a sprinkle of sea salt to your cookies. The possibilities are endless!
Ready to bake your own batch of Cookies & Cream Dream Cookies? Give this recipe a try and let me know what you think in the comments below! Share your baking adventures with us on social media using #DreamCookiesRecipe. We can’t wait to see your creations!
Frequently Asked Questions About Cookies & Cream Dream Cookies
Got questions? We’ve got answers! Here’s a comprehensive FAQ section to address any concerns you might have about making these delicious Cookies & Cream Dream Cookies:
1. Can I use a different type of flour?
Yes, you can substitute all-purpose flour with other types of flour, but the texture of the cookies may vary. For a gluten-free version, use a gluten-free all-purpose flour blend. Keep in mind that gluten-free flours often require additional binding agents, such as xanthan gum, to achieve a similar texture to traditional wheat flour. Experimenting with different flours can be a fun way to customize the recipe to your dietary needs and preferences.
2. Can I use salted butter instead of unsalted butter?
While it’s generally recommended to use unsalted butter for baking to control the amount of salt in the recipe, you can use salted butter if that’s what you have on hand. However, reduce the amount of salt you add to the dry ingredients by about 1/4 teaspoon to compensate for the salt in the butter. This will help prevent the cookies from being too salty.
3. Can I use a different type of sugar?
Yes, you can experiment with different types of sugar. Coconut sugar, for example, can be used as a substitute for granulated sugar, adding a slightly caramel-like flavor. Maple syrup or honey can also be used, but you may need to adjust the amount of liquid in the recipe to maintain the correct consistency of the dough. Using different sugars can significantly alter the flavor and texture of the cookies, so it’s best to start with small adjustments.
4. Can I make these cookies vegan?
Yes, these cookies can be made vegan with a few substitutions. Replace the butter with a vegan butter alternative, the eggs with flax eggs (1 tablespoon of ground flaxseed mixed with 3 tablespoons of water per egg), and ensure that the chocolate sandwich cookies you use are vegan-friendly. Be mindful of potential variations in texture when using vegan substitutes, and consider adjusting baking times accordingly.
5. Why are my cookies spreading too much?
Cookies spreading too much can be due to several factors. One common reason is that the butter was too soft or even melted. Make sure the butter is softened but still cool to the touch. Another reason could be that the oven temperature is too low. Check your oven temperature with an oven thermometer to ensure it’s accurate. Chilling the dough for at least 30 minutes before baking can also help prevent spreading.
6. Why are my cookies not spreading enough?
If your cookies are not spreading enough, it could be due to too much flour in the dough or not enough fat. Make sure you are measuring the flour accurately by spooning it into the measuring cup and leveling it off. Also, ensure that your butter is properly softened. Adding a tablespoon or two of milk or water to the dough can also help to loosen it up and promote spreading. You might also want to slightly flatten the cookie dough balls before baking.
7. Can I add other mix-ins to these cookies?
Absolutely! Feel free to customize these cookies with your favorite mix-ins. Chopped nuts, chocolate chips, dried fruit, or even sprinkles can be added to the dough. Just make sure not to add too many mix-ins, as this can affect the texture of the cookies. About 1/2 to 1 cup of additional mix-ins should be sufficient.
8. How do I prevent the chocolate sandwich cookies from burning on top?
To prevent the chocolate sandwich cookies from burning on top, you can try a few things. First, make sure your oven rack is positioned in the center of the oven. You can also try reducing the baking time by a minute or two. If the cookies are browning too quickly, you can tent them with aluminum foil during the last few minutes of baking. This will help to protect the tops from burning.
9. Can I freeze the cookie dough?
Yes, you can freeze the cookie dough for up to 2 months. Scoop the dough into individual balls and place them on a baking sheet lined with parchment paper. Freeze for about 30 minutes, or until the dough is solid. Then, transfer the frozen dough balls to a freezer-safe bag or container. When you’re ready to bake, simply thaw the dough in the refrigerator overnight and bake as directed.
10. How can I make these cookies chewier?
To make these cookies chewier, try using more brown sugar than granulated sugar. Brown sugar contains molasses, which adds moisture and chewiness to baked goods. You can also add a tablespoon of molasses to the dough for an extra boost of chewiness. Chilling the dough before baking can also help to develop the flavors and create a chewier texture.
11. Can I use a stand mixer instead of a hand mixer?
Yes, you can definitely use a stand mixer instead of a hand mixer. In fact, a stand mixer can make the creaming process even easier and more efficient. Just be sure to scrape down the sides of the bowl occasionally to ensure that all of the ingredients are evenly incorporated. Using a stand mixer can also help to prevent overmixing, which can result in tough cookies.
12. How do I store leftover cookies to keep them fresh?
To keep leftover cookies fresh, store them in an airtight container at room temperature. Adding a slice of bread to the container can also help to keep the cookies soft and moist. Avoid storing the cookies in the refrigerator, as this can dry them out. If you want to store the cookies for longer, you can freeze them in a freezer-safe bag or container for up to 2 months.
Conclusion: Bake Your Cookie Dreams into Reality!
So, there you have it – the secret to baking irresistible Cookies & Cream Dream Cookies with a delightful vanilla bean infusion. It’s more than just a recipe; it’s an invitation to create moments of joy and share them with loved ones. The subtle vanilla notes elevate this classic cookie to an entirely new level of deliciousness.
Don’t be afraid to get creative and personalize this recipe to your liking. Experiment with different flavors, mix-ins, and toppings to create your own unique version of these dream cookies. The most important thing is to have fun and enjoy the process of baking!
Now, it’s your turn to bake these cookies and experience the magic for yourself. Share your baking adventures with us in the comments below or on social media using #DreamCookiesRecipe. We can’t wait to see your delicious creations and hear your feedback. Happy baking!
Cookies & Cream Dream Cookies with Secret Vanilla Bean Infusion

Ingredients
- 2 1/4 cups all-purpose flour
- 1 teaspoon baking soda
- 1 teaspoon salt
- 1 cup (2 sticks) unsalted butter, softened
- 3/4 cup granulated sugar
- 3/4 cup packed brown sugar
- 1 teaspoon vanilla extract
- 1 vanilla bean, split and scraped (reserve pod for infusion)
- 2 large eggs
- 1 package (14.3 ounces) chocolate sandwich cookies, coarsely chopped
- 4 chocolate sandwich cookies, for topping
Directions
- 1. 1. Preheat oven to 375 degrees F (190 degrees C).
- 2. 2. In a small saucepan, heat 1/2 cup heavy cream over low heat. Add the reserved vanilla bean pod (from the scraped vanilla bean). Simmer for 5 minutes, then remove from heat and let steep for 30 minutes. Remove the vanilla bean pod. This is your vanilla bean infused cream.
- 3. 3. In a medium bowl, whisk together the flour, baking soda, and salt.
- 4. 4. In a large bowl, cream together the softened butter, granulated sugar, and brown sugar until light and fluffy.
- 5. 5. Beat in the vanilla extract and the vanilla bean seeds.
- 6. 6. Beat in the eggs one at a time, then gradually beat in 2 tablespoons of the vanilla bean infused cream until well blended.
- 7. 7. Gradually stir in the dry ingredients until just combined.
- 8. 8. Fold in the coarsely chopped chocolate sandwich cookies.
- 9. 9. Drop by rounded tablespoons onto ungreased baking sheets.
- 10. 10. Gently press a whole chocolate sandwich cookie onto the top of each cookie before baking.
- 11. 11. Bake for 9-11 minutes, or until edges are lightly golden.
- 12. 12. Let cool on baking sheets for a few minutes before transferring to a wire rack to cool completely.
- 13. Tip/Pairing:
- 14. Enjoy these cookies with a cold glass of milk or a scoop of vanilla ice cream.
- 15. Chef Tip:
- 16. To prevent the cookies from spreading too much, chill the dough for 30 minutes before baking. This will also enhance the flavors. For even better texture, use a microplane to grate the vanilla bean directly into the butter and sugar mixture; this distributes the flavor more evenly.