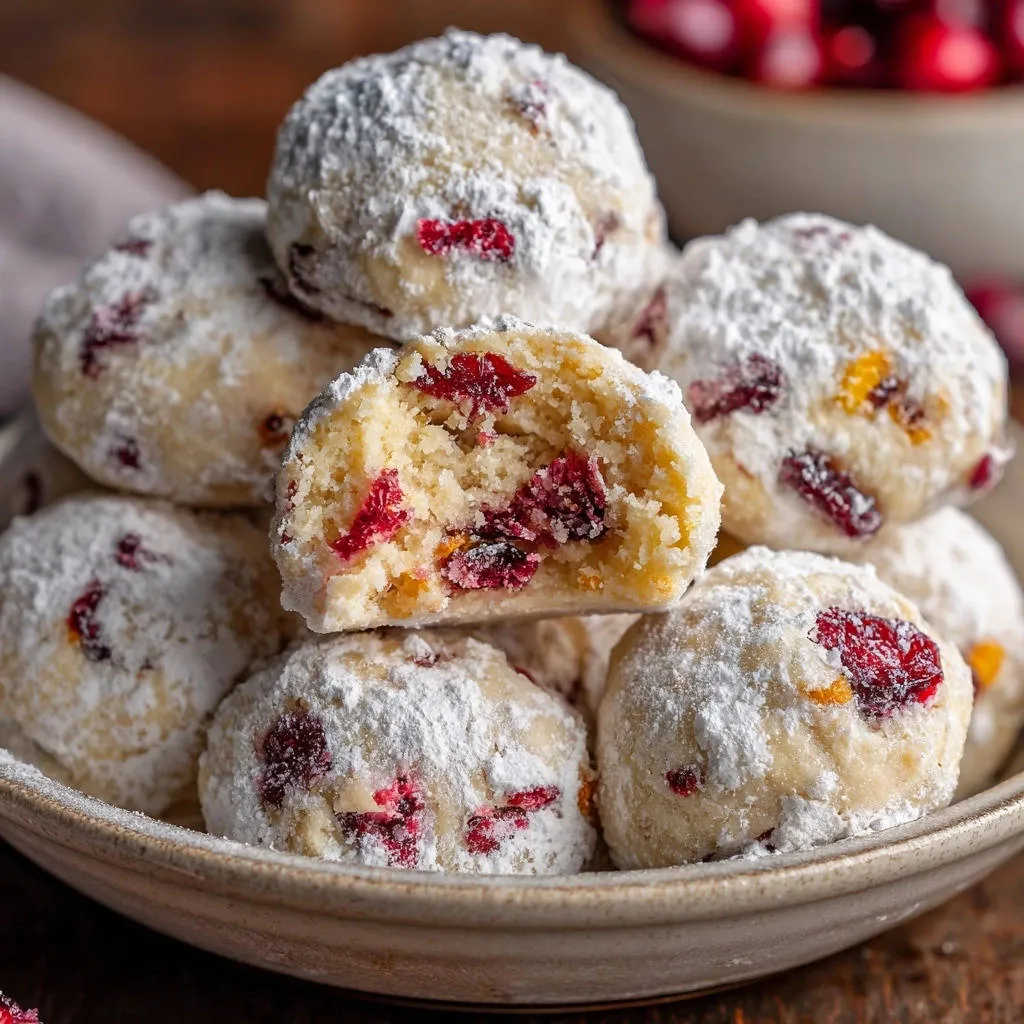
For years, I chased that elusive, perfect melt-in-your-mouth texture in my holiday baking, often ending up with Cranberry Snowball Cookies that were either too crumbly or disappointingly dry. This recipe finally cracks the code, delivering an irresistibly tender crumb that truly dissolves on your tongue. Get ready to create a truly unforgettable festive treat.
The Irresistible Allure: Why These Cranberry Snowball Cookies Stand Out
Achieving That Signature Melt-in-Your-Mouth Texture
The secret lies in precisely creaming the softened butter and powdered sugar. This process incorporates essential air, creating a light, delicate dough that bakes into an incredibly tender cookie. Careful mixing ensures the gluten development remains minimal.
Perfectly Balanced Sweetness with a Zesty Brightness
These cookies strike an ideal balance. The double coating of powdered sugar provides classic sweetness, beautifully complemented by the tartness of dried cranberries and the aromatic burst of fresh orange zest. This combination prevents any cloying sweetness.
Simple Ingredients, Stunning Results
Despite their elegant appearance and sophisticated flavor, these Cranberry Snowball Cookies rely on readily available, everyday pantry staples. You don’t need exotic items to create something truly spectacular.
A Holiday Favorite, Made Effortless
Snowball cookies are a cherished part of festive celebrations, and this recipe simplifies the process without compromising on taste or texture. It ensures a stress-free baking experience, perfect for busy holiday seasons.
The Heart of the Snowball: Key Ingredients Unveiled
Unsalted Butter: The Foundation of Tenderness
Unsalted butter allows you complete control over the cookie’s salt content. Ensuring it’s perfectly softened is paramount for proper creaming, which directly impacts the light and tender crumb.
Powdered Sugar: For Sweetness Inside and Out
This fine sugar serves a dual purpose, sweetening the dough and creating that iconic, ethereal “snow” coating. Its delicate texture contributes to the cookies’ melt-away quality.
All-Purpose Flour: Structure Without Toughness
All-purpose flour provides the necessary structure, but its interaction with liquids can lead to toughness if overmixed. Gentle handling ensures a tender cookie, not a dense one.
Dried Cranberries: Chewy Bursts of Festive Flavor
Dried cranberries offer a delightful chewy texture and a tart counterpoint to the sweetness. Their vibrant color also adds a beautiful festive touch to each cookie.
Fresh Orange Zest: The Secret Brightening Agent
Orange zest elevates these Cranberry Snowball Cookies beyond typical vanilla, infusing them with a bright, aromatic citrus note. This subtle hint of orange truly enhances the cranberry flavor.
Vanilla Extract & Salt: Essential Flavor Enhancers
Vanilla extract adds warmth and depth to the cookie’s base flavor. A touch of salt balances the sweetness and brings out all the other delightful notes in the recipe.
Essential Tools for Your Cranberry Snowball Cookies Adventure
Electric Mixer: Crucial for achieving the light and fluffy butter-sugar mixture, which is key to the melt-in-your-mouth texture.
Baking Sheets & Parchment Paper: For even baking and easy removal without sticking, ensuring your cookies maintain their perfect shape.
Wire Cooling Rack: Essential for proper air circulation during cooling, preventing soggy bottoms and preparing them for their final sugar coating.
Large Mixing Bowls: For combining ingredients efficiently and preventing spills, allowing ample space for creaming and mixing.
Measuring Cups & Spoons: For accurate ingredient proportions, ensuring consistent results and a perfect batch of Cranberry Snowball Cookies every time.
Baking Brilliance: Crafting Your Perfect Cranberry Snowball Cookies Step-by-Step
- Prepare Your Workspace:
Preheat your oven to 325°F (160°C). Line a baking sheet with parchment paper. This ensures even cooking and prevents sticking, making cleanup a breeze.
- Creaming the Butter & Sugar (The Texture Secret):
In a large bowl, using an electric mixer, cream together the softened butter and 1/2 cup powdered sugar until light and fluffy, about 2-3 minutes. This step is absolutely crucial for achieving that signature tender, melt-in-your-mouth texture by incorporating air into the mixture.
- Add Flavor Essentials:
Beat in the vanilla extract and salt until just combined. Ensure they are fully incorporated for a balanced flavor throughout the dough.
- Gradually Mix in Flour (Avoid Tough Cookies!):
Gradually add the all-purpose flour to the butter mixture, mixing on low speed until just combined and a soft dough forms. Be careful not to overmix, as this develops gluten and can lead to tough, crumbly cookies instead of tender ones.
- Fold in Festive Flavors:
Gently fold in the dried cranberries and orange zest until evenly distributed. A spatula is best for this to avoid overmixing the dough.
- Shape Your Snowballs:
Roll the dough into 1-inch balls and place them about 1 inch apart on the prepared baking sheet. Aim for uniform size for even baking, which ensures every cookie cooks perfectly.
- Bake to Pale Perfection (Don’t Overbake!):
Bake for 12-15 minutes, or until the edges are just set and the bottoms are very lightly golden. The cookies should still look pale on top. Avoiding overbaking is key to keeping them wonderfully tender and melt-in-your-mouth, as they will continue to firm up as they cool.
- First Powdered Sugar Coating (While Warm):
While the cookies are still warm (but not hot to the touch), gently roll them in some of the remaining 1 1/2 cups of powdered sugar until fully coated. The warmth helps the sugar adhere better and creates that initial snowy layer.
- Double Dusting for the Iconic Finish:
Let the cookies cool completely on a wire rack. Once fully cooled, roll them in powdered sugar a second time for a thicker, more even coating and that classic “snowball” look. Store in an airtight container at room temperature for optimal freshness.
Unlocking Perfection: Expert Tips for Your Snowball Cookies
Chill Your Dough (Optional, but Recommended): While not strictly necessary for this recipe, chilling the dough for 30 minutes to an hour can make it easier to handle and help prevent spreading, especially if your kitchen is warm.
Measure Flour Correctly: Too much flour is a common culprit for dry, crumbly cookies. Use the spoon-and-level method or a kitchen scale for accuracy, ensuring precise measurements.
Softened Butter is Key: Ensure your butter is truly softened (press your finger and it leaves an indent) but not melted. This is vital for proper creaming and achieving that exquisite melt-in-your-mouth texture.
Don’t Rush the Cooling: Allow the cookies to cool completely before the second powdered sugar roll. If they’re warm, the sugar will melt and disappear, compromising their snowy appearance.
Sift Your Powdered Sugar: For the final coating, sifting the powdered sugar can help prevent lumps and ensure a perfectly smooth, even finish. This creates a beautifully polished look for your Cranberry Snowball Cookies.
Solving Common Snowball Cookie Conundrums
Why Are My Cranberry Snowball Cookies Spreading Too Much?
Excessive spreading often comes from butter that’s too soft or melted, or an oven temperature that’s not quite accurate. Ensure your butter is softened, not greasy, and calibrate your oven if you suspect it runs hot or cold.
Why Are My Cookies Tough or Dry?
The primary culprits here are overmixing the flour or overbaking. Overmixing develops gluten, leading to a tough cookie. Overbaking simply dries them out, robbing them of their signature tender crumb. Always mix until just combined and remove them from the oven when still pale.
Why Isn’t the Powdered Sugar Sticking?
If your cookies are too cold for the first roll, the sugar won’t adhere properly. High humidity can also cause the sugar to absorb moisture and dissolve. Ensure cookies are warm for the first roll, and consider a slightly drier environment for the second if possible.
My Cookies Aren’t Melt-in-Your-Mouth! What Went Wrong?
This is usually due to insufficient creaming of the butter and sugar, or overworking the dough with flour. Remember, proper creaming incorporates air, and gentle mixing prevents gluten development, both vital for that desired tender texture.
Get Creative: Flavor Variations & Dietary Adaptations
Nutty Nuances: Adding Crunch and Richness
For an added layer of flavor and texture, fold in finely chopped nuts like pecans, walnuts, or almonds along with the cranberries. Toasting the nuts lightly beforehand can deepen their flavor significantly.
Citrus Zing: Exploring Other Zest Options
While orange zest pairs beautifully with cranberries, feel free to experiment with other citrus. Lemon zest adds a brighter, tangier note, while lime zest offers a more exotic, vibrant flavor profile.
Chocolate Lovers’ Twist: A Decadent Addition
Mini chocolate chips can be folded into the dough for a delightful chocolatey surprise. Alternatively, consider replacing a tablespoon or two of flour with cocoa powder for a subtle chocolate snowball cookie.
Gluten-Free Flour Swaps: Enjoying Without Gluten
This recipe can often be adapted using a good quality 1:1 gluten-free all-purpose flour blend. Look for blends designed for baking, and you might need a tiny bit more liquid or fat to maintain moisture.
Dairy-Free Alternatives: For Plant-Based Bakers
To make these cookies dairy-free, substitute a plant-based butter alternative that bakes well, such as a stick-style vegan butter. Ensure it has a similar fat content for best results and similar texture.
Keeping Your Cranberry Snowball Cookies Fresh & Fabulous
Perfect Serving Suggestions
These Cranberry Snowball Cookies are perfect on their own, but they also make a delightful addition to any holiday dessert platter. Pair them with a warm cup of coffee or a festive herbal tea for a cozy treat. You might also enjoy these with a batch of classic shortbread fingers for a delightful butter cookie assortment.
Optimal Storage for Maximum Freshness
Store your baked Cranberry Snowball Cookies in an airtight container at room temperature for up to 5-7 days. A tight seal prevents them from drying out and helps maintain their tender crumb and snowy coating.
Make-Ahead Tips for Stress-Free Baking
The dough for these cookies can be made ahead of time. Wrap it tightly in plastic wrap and refrigerate for up to 3 days. This is perfect for preparing in advance for holiday baking sessions.
Freezing Instructions: Baked & Unbaked Dough
Baked cookies can be frozen in an airtight container for up to 3 months; simply thaw at room temperature before serving. For unbaked dough, roll into balls, freeze on a baking sheet until firm, then transfer to a freezer bag for up to 3 months. Bake from frozen, adding a few extra minutes to the baking time.
Your Top Questions on Cranberry Snowball Cookies, Answered
Can I Use Fresh Cranberries Instead of Dried?
While dried cranberries are preferred for their concentrated flavor and chewy texture, you can substitute fresh. If using fresh, finely chop them and consider tossing them lightly with a teaspoon of flour to prevent them from sinking. Be aware that fresh cranberries will add more moisture and a tartness. For more ideas with cranberries, consider trying our perfectly chewy oatmeal cranberry cookies.
How Long Do Cranberry Snowball Cookies Last?
At room temperature in an airtight container, these cookies stay fresh for about 5 to 7 days. If you need to store them longer, they can be refrigerated for up to 2 weeks or frozen for up to 3 months.
Why Do My Cookies Look Pale? Are They Undercooked?
It’s intentional for these cookies to remain pale on top. Their signature melt-in-your-mouth texture comes from not overbaking them. Look for very lightly golden bottoms and edges that are just set, rather than a browned top, to confirm they are done.
Can I Skip the Second Roll in Powdered Sugar?
You can, but the second roll is key to their classic “snowball” appearance and enhances the delicate sweetness. Skipping it will still yield a delicious cookie, but it won’t have that iconic thick, even snowy coating.
What if I Don’t Have an Electric Mixer?
You can still make these cookies by hand! It will require more effort to cream the butter and sugar until light and fluffy. Use a sturdy whisk or a wooden spoon and persevere until the mixture is visibly lighter and airy before proceeding.
Bake, Share, and Savor: Your Cranberry Snowball Journey
Creating these Cranberry Snowball Cookies is more than just baking; it’s about crafting moments of pure, melt-in-your-mouth joy. With these expert tips and clear instructions, you’re now equipped to bake a batch that will truly impress. Go ahead, fill your home with the sweet aroma of holiday baking and share these delightful treats with loved ones.
Cranberry Snowball Cookies
Course: DessertCuisine: American CuisineDifficulty: easy4
about 3 dozen cookies20
minutes15
minutes45
minutesAmerican Cuisine
Ingredients
1 cup (2 sticks) unsalted butter, softened
1/2 cup powdered sugar, plus 1 1/2 cups for coating
1 teaspoon vanilla extract
1/4 teaspoon salt
2 cups all-purpose flour
1/2 cup dried cranberries
1 teaspoon orange zest
Directions
- Preheat your oven to 325°F (160°C). Line a baking sheet with parchment paper.
- In a large bowl, using an electric mixer, cream together the softened butter and 1/2 cup powdered sugar until light and fluffy, about 2-3 minutes. This step is crucial for achieving that signature tender, melt-in-your-mouth texture.
- Beat in the vanilla extract and salt until just combined.
- Gradually add the all-purpose flour to the butter mixture, mixing on low speed until just combined and a soft dough forms. Be careful not to overmix, as this can lead to tough cookies.
- Gently fold in the dried cranberries and orange zest until evenly distributed.
- Roll the dough into 1-inch balls and place them about 1 inch apart on the prepared baking sheet.
- Bake for 12-15 minutes, or until the edges are just set and the bottoms are very lightly golden. The cookies should still look pale on top. Avoid overbaking, as this is key to keeping them tender and melt-in-your-mouth.
- While the cookies are still warm, gently roll them in some of the remaining 1 1/2 cups of powdered sugar until fully coated.
- Let the cookies cool completely on a wire rack. Once fully cooled, roll them in powdered sugar a second time for a thicker, more even coating. Store in an airtight container at room temperature.
Notes
- Do not overbake for best melt-in-mouth texture. Store in an airtight container at room temperature.