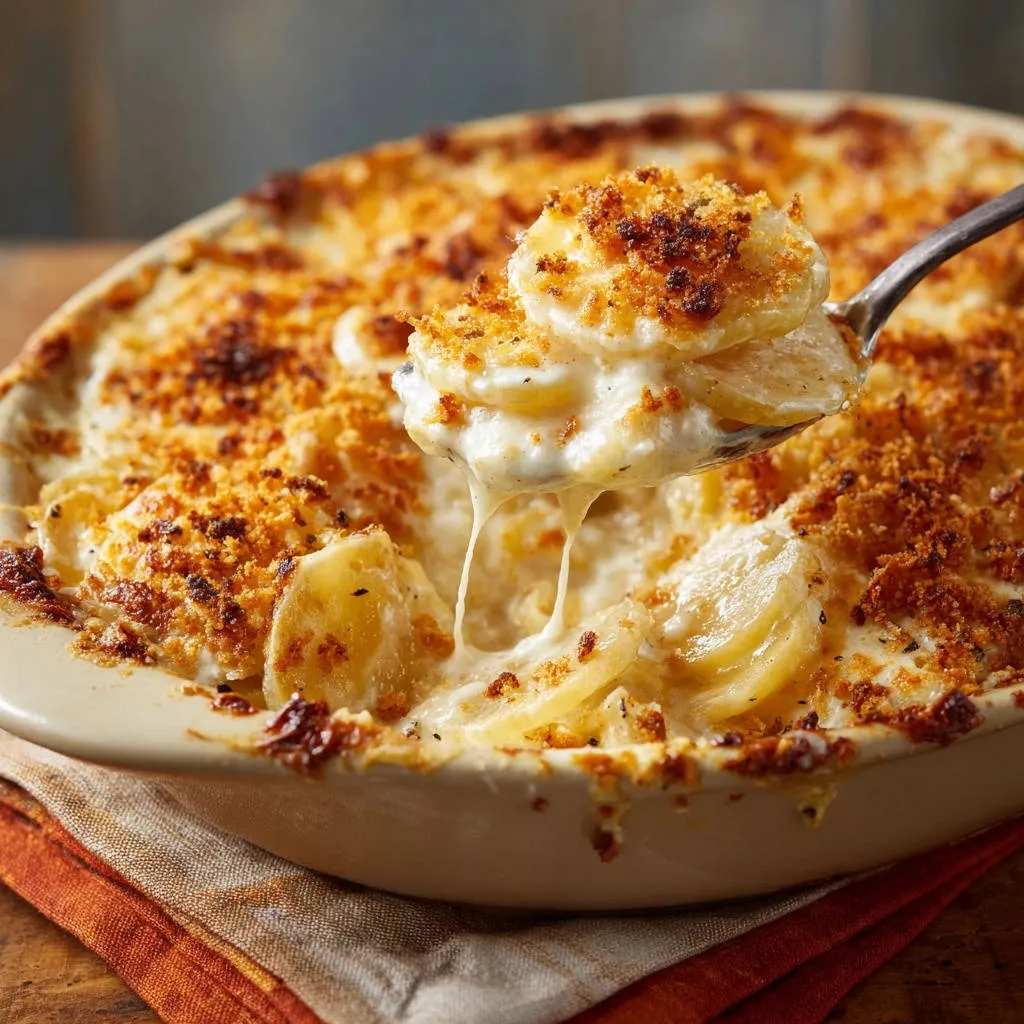
There’s nothing quite like a generous scoop of Creamy Scalloped Potatoes, but I’ve certainly experienced the disappointment of encountering firm, undercooked slices. That’s why I’ve perfected this recipe, guaranteeing tender, melt-in-your-mouth potatoes every single time. This rendition elevates a classic side dish into an unforgettable culinary experience, built on proven techniques for consistent results.
Beyond Basic: Why This Creamy Scalloped Potatoes Recipe Is a Keeper
Unlike many recipes that leave you with an uneven texture, our method for Creamy Scalloped Potatoes focuses on precise techniques to achieve unparalleled tenderness.
The secret lies in the meticulous preparation of the potato slices and a two-stage baking process. This ensures every bite is incredibly soft, infused with a rich, velvety sauce.
It’s a reliable recipe designed to eliminate guesswork, making it a staple for holiday meals or a comforting family dinner.
The Building Blocks of Flavor: Essential Ingredients for Creamy Scalloped Potatoes
Choosing the Best Potatoes: Russets vs. Yukon Golds
Russets and Yukon Golds are ideal for these Creamy Scalloped Potatoes due to their higher starch content. This starch breaks down during cooking, contributing to the wonderfully creamy texture of the dish.
Russets offer a fluffier result, while Yukon Golds lend a slightly richer, butterier flavor and maintain their shape a bit more readily.
Crafting the Velvety Roux and Sauce
A classic butter and flour roux provides the essential thickening base for our luxurious cream sauce. Cooking the flour properly eliminates any raw taste.
Whole milk is crucial for the sauce’s richness and body, ensuring it’s not thin or watery. Warming the milk before adding it helps create a perfectly smooth, lump-free consistency.
Aromatic Enhancements: Salt, Pepper, and Optional Thyme
Simple salt and black pepper are fundamental for seasoning the potatoes and sauce, bringing out their natural flavors. Adjust these to your personal preference.
A touch of dried thyme (optional) adds a subtle, earthy depth that complements the potatoes beautifully without overwhelming the dish.
The Golden Crown: Crispy Breadcrumbs
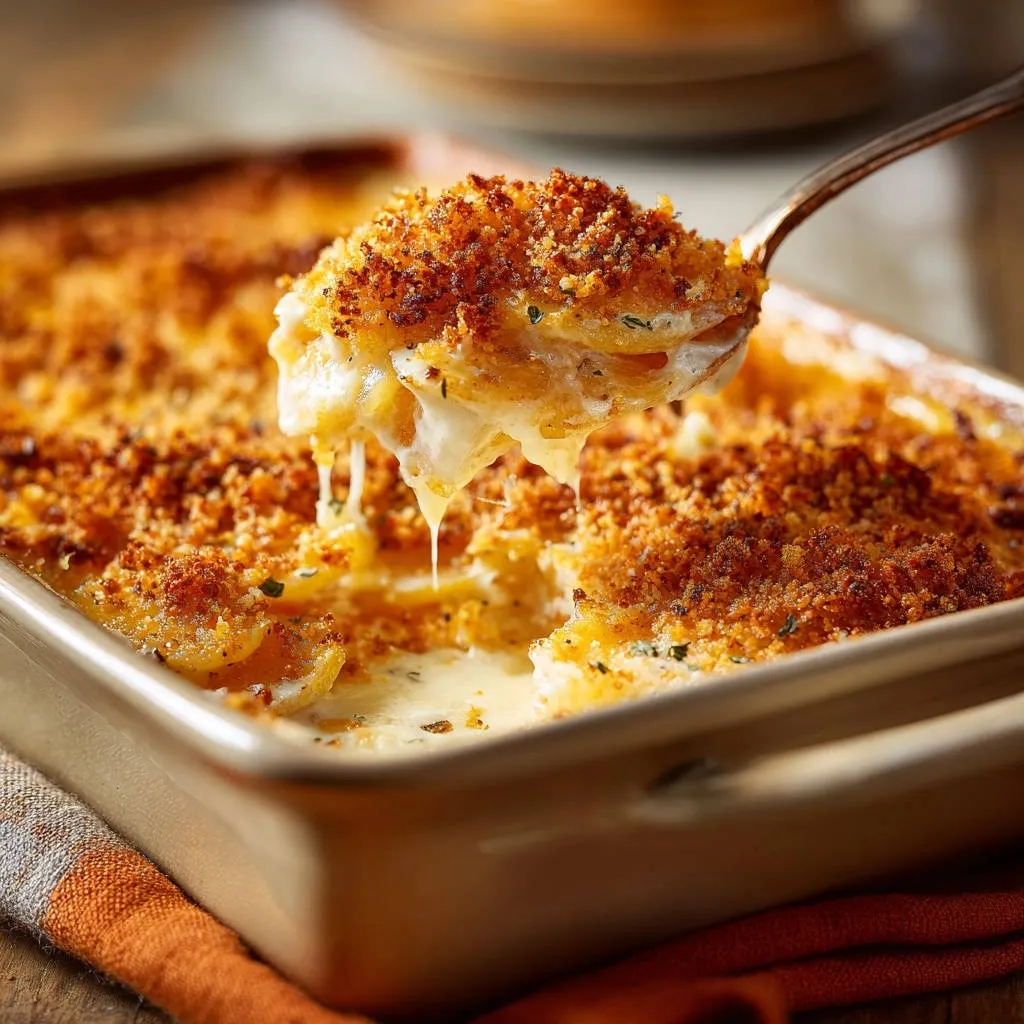
The final touch is a generous sprinkle of buttered breadcrumbs, which provides a crucial textural contrast. This topping bakes into a golden, crispy crust that perfectly balances the creamy interior.
Essential Tools for Your Creamy Scalloped Potatoes Adventure
Mandoline Slicer: The secret to perfectly thin, uniform potato slices, crucial for even cooking and a consistent, melt-in-your-mouth texture.
9×13 Inch Baking Dish: The ideal size for layering and even heat distribution, ensuring your scalloped potatoes cook perfectly.
Medium Saucepan & Whisk: Essential for expertly creating a smooth, lump-free cream sauce that forms the heart of this dish.
Your Path to Creamy Scalloped Potatoes Perfection: A Detailed Guide
- Prepare Your Workspace and Preheat Oven:
Preheat your oven to 375°F (190°C) and lightly grease a 9×13 inch baking dish. This prepares your cooking environment and prevents the delicious potatoes from sticking.
- The Key Step: Achieving Perfectly Thin Potato Slices:
Slice your peeled potatoes as thinly and evenly as possible, ideally to 1/8-inch thickness. A mandoline slicer is highly recommended for achieving this consistency, which is absolutely critical for even cooking.
If slicing by hand, take your time to create paper-thin slices; uneven thickness is a common culprit for firm spots in scalloped potatoes.
- Building the Velvety Roux:
In a medium saucepan, melt 4 tablespoons of unsalted butter over medium heat. Stir in the 4 tablespoons of all-purpose flour and cook for 1 minute, stirring constantly, to create a smooth roux.
This process cooks out the raw flour taste, ensuring a pleasant flavor in your sauce.
- Crafting the Rich Cream Sauce:
Gradually whisk in the 3 cups of warmed whole milk until the mixture is smooth and completely lump-free. Continue to cook, stirring frequently, for 5-7 minutes, until the sauce thickens slightly to a spoon-coating consistency.
Remove the saucepan from heat and stir in the 1 teaspoon of salt, 1/2 teaspoon of black pepper, and the optional 1/4 teaspoon of dried thyme. Warming the milk beforehand helps prevent lumps and speeds up the thickening process, resulting in a silkier sauce.
- Layering for Success: Potatoes and Cream:
Arrange about one-third of the thinly sliced potatoes in an even layer in your prepared baking dish. Pour about one-third of the rich cream sauce over the potatoes, spreading it evenly to coat every slice.
- Repeat and Submerge:
Repeat step 5 two more times, creating three distinct layers of potatoes and sauce. Ensure the final layer is sauce, making sure all potato slices are mostly submerged in the creamy liquid.
This crucial step prevents the top layer from drying out and ensures every potato slice becomes tender during baking.
- Adding the Golden Breadcrumb Topping:
In a small bowl, toss the 1 cup of breadcrumbs with 2 tablespoons of melted butter until evenly coated. Sprinkle this delicious mixture evenly over the top of the layered potatoes.
This creates a beautiful golden, crispy crust during the final bake, adding wonderful texture.
- The Secret to Tenderness: Initial Covered Bake:
To guarantee perfectly tender potatoes, cover the baking dish tightly with aluminum foil. Bake for 60 minutes. The foil traps steam, ensuring the potatoes soften gently without drying out.
- Finishing with a Golden, Crispy Top:
Remove the foil and continue to bake for another 20-30 minutes, or until the potatoes are very tender when pierced with a fork. The topping should be golden brown and wonderfully crispy.
Keep a close eye on the browning in this final stage to prevent over-browning.
- The Crucial Rest:
Let the Creamy Scalloped Potatoes rest for 10-15 minutes before serving. This allows the sauce to set and makes for cleaner, more cohesive scoops, preventing a runny dish.
Chef’s Secrets for Flawless Creamy Scalloped Potatoes
Don’t Rush the Roux: Cooking the flour for a full minute, stirring constantly, is essential. This fully eliminates any raw flour taste, ensuring your sauce has a clean, rich flavor.
Warm Your Milk: Adding cold milk to a hot roux can cause shocking and create stubborn lumps. Gently warming the milk beforehand ensures a silky smooth, cohesive sauce every time.
Embrace the Mandoline: While slicing by hand is feasible, a mandoline is a true game-changer. It provides truly uniform, paper-thin slices, which are paramount for even cooking and that coveted melt-in-your-mouth texture.
The Power of the Cover: The initial covered bake is absolutely non-negotiable for achieving tender potatoes. It steams them gently and thoroughly, ensuring they cook through perfectly before any browning begins.
Allow for Resting Time: Just like a perfectly roasted cut of meat, scalloped potatoes benefit immensely from resting. This allows the sauce to thicken and the flavors to meld beautifully, preventing a watery or soupy dish.
Common Scalloped Potato Challenges & Quick Fixes
Why Are My Scalloped Potatoes Watery?
This often happens if the potatoes aren’t sufficiently submerged in sauce during baking, or if the dish hasn’t rested long enough after cooking. Ensure adequate sauce coverage for all layers and always allow for the recommended resting time before serving.
My Potatoes Aren’t Tender Enough!
The most common culprit is uneven or overly thick potato slices. Using a mandoline for consistent, thin slices is key. Also, confirm the baking dish is tightly covered with foil during the first hour to steam the potatoes effectively.
Is the Top Getting Too Brown Too Fast?
If your topping is browning prematurely but the potatoes still need more time to tenderize, you can loosely tent the dish with aluminum foil. This protects the crispy crust while allowing the potatoes to finish cooking without burning.
Your Top Questions About Creamy Scalloped Potatoes, Answered
Can I Make Creamy Scalloped Potatoes Dairy-Free?
Yes, you absolutely can! Substitute unsalted butter with a high-quality dairy-free butter alternative. Replace whole milk with unsweetened plain non-dairy milk, such as oat, almond, or cashew milk. The texture might vary slightly, but the result will still be wonderfully delicious.
What About Adding Cheese?
While this recipe emphasizes the pure, creamy potato flavor, adding cheese is a fantastic variation. For cheesy scalloped potatoes, stir 1-2 cups of shredded Gruyere, white cheddar, or Parmesan into the cream sauce before layering. Alternatively, sprinkle cheese over the top with the breadcrumbs for the last 15-20 minutes of baking.
If you’re a fan of rich potato bakes with cheese, you might also love our creamy potato gratin recipe.
Can I Make This Recipe Ahead of Time?
Yes, you can assemble the dish for these Creamy Scalloped Potatoes up to a day in advance. Cover it tightly with plastic wrap and refrigerate. Before baking, let it sit at room temperature for about 30 minutes, then bake as directed, potentially adding 10-15 minutes to the initial covered baking time.
Can I Freeze Scalloped Potatoes?
Cooked scalloped potatoes can be frozen, though it’s worth noting the texture of the potatoes can become slightly mealy upon thawing. To freeze, let the cooked dish cool completely, then portion it into freezer-safe containers. Thaw overnight in the refrigerator and reheat gently in the oven or microwave.
Pairing Perfection: What to Serve with Scalloped Potatoes
Creamy Scalloped Potatoes are the ultimate comfort food side, pairing beautifully with a variety of main dishes. They are a timeless classic alongside a succulent roast ham or a perfectly cooked holiday roast.
For a hearty weeknight meal, serve them with simple roasted chicken, pan-seared pork chops, or a juicy steak. To balance the richness, offer a crisp green salad with a bright vinaigrette dressing, or some steamed green beans or asparagus, like our cheesy potato and asparagus gratin if you prefer another potato and veggie combination.
Planning Ahead: Storing and Reheating Your Creamy Scalloped Potatoes
Storage: Leftover Creamy Scalloped Potatoes can be stored in an airtight container in the refrigerator for up to 3-4 days. Ensure they are completely cooled before transferring to prevent condensation.
Reheating: For best results, reheat individual portions in the microwave until warmed through, stirring occasionally to ensure even heating. For larger amounts, place them back in a baking dish, cover loosely with foil, and warm in a preheated 300°F (150°C) oven for 20-30 minutes, or until hot and bubbly. If you desire to crisp up the topping again, remove the foil for the last 5-10 minutes of reheating.
Ready to Impress? Share Your Creamy Scalloped Potatoes Masterpiece!
With this perfected recipe, you’re now equipped to create Creamy Scalloped Potatoes that will earn rave reviews every single time. No more firm bites, just pure, melt-in-your-mouth bliss. Gather your ingredients, slice those potatoes thin, and prepare for a side dish that truly steals the show.
We’d love to see your creations! Share your photos and comments below, or tag us on social media. And for more delicious, foolproof recipes, be sure to explore our collection of comfort food classics.

Creamy Scalloped Potatoes
Course: Side DishCuisine: American CuisineDifficulty: easy8
servings30
minutes1
hour25
minutes120
minutesAmerican Cuisine
Ingredients
4 pounds Russet or Yukon Gold potatoes, peeled
4 tablespoons unsalted butter
4 tablespoons all purpose flour
3 cups whole milk, warmed
1 teaspoon salt
1/2 teaspoon black pepper
1/4 teaspoon dried thyme (optional)
1 cup breadcrumbs
2 tablespoons melted butter for topping
Directions
- Preheat your oven to 375 degrees F (190 degrees C). Lightly grease a 9×13 inch baking dish.
- To ensure perfectly tender potatoes, slice your peeled potatoes as thinly and evenly as possible. A mandoline slicer is ideal for this. If slicing by hand, aim for slices no thicker than 1/8 inch.
- In a medium saucepan, melt the 4 tablespoons of butter over medium heat. Stir in the flour and cook for 1 minute, stirring constantly, to create a roux.
- Gradually whisk in the warmed milk until smooth. Continue to cook, stirring frequently, until the sauce thickens slightly, about 5-7 minutes. Remove from heat and stir in the salt, pepper, and dried thyme, if using.
- Arrange about one-third of the sliced potatoes in an even layer in the prepared baking dish. Pour about one-third of the cream sauce over the potatoes, making sure to distribute it evenly.
- Repeat with two more layers of potatoes and sauce, ending with a layer of sauce on top. Make sure all potatoes are mostly submerged in the sauce.
- In a small bowl, toss the breadcrumbs with the 2 tablespoons of melted butter. Sprinkle this mixture evenly over the top of the potatoes.
- To guarantee tender potatoes, cover the baking dish tightly with aluminum foil. Bake for 60 minutes.
- Remove the foil and continue to bake for another 20-30 minutes, or until the potatoes are very tender when pierced with a fork and the topping is golden brown and crispy.
- Let the scalloped potatoes rest for 10-15 minutes before serving to allow the sauce to set.
Notes
- Allow to rest for 10-15 minutes after baking for best results.