
For years, I struggled to replicate that satisfying, golden crunch of a perfect burrito at home. Often, my homemade attempts would end up disappointingly soft or even soggy, a far cry from the delicious experience I craved. But I’ve cracked the code, and now I’m thrilled to share the definitive recipe for a truly exceptional Crispy Beef & Bacon Burrito.
This recipe isn’t just about combining delicious ingredients; it’s about mastering the technique that guarantees a glorious, crispy exterior every single time. Get ready to transform your weeknight meals into a restaurant-quality feast that will have everyone asking for more.
Why This Crispy Beef & Bacon Burrito Will Be Your New Favorite
Unlocking the Golden Crisp Exterior: No More Soggy Burritos!
The hallmark of this recipe is its unparalleled crispiness. We achieve this by a simple yet transformative pan-frying technique after assembly, creating a golden, satisfying crunch with every bite.
This method ensures the tortilla is perfectly toasted, providing an incredible textural contrast to the rich, savory filling inside. Say goodbye to soft, flimsy burritos forever.
Flavor Layers You’ll Crave: Beyond Basic Burrito Fillings
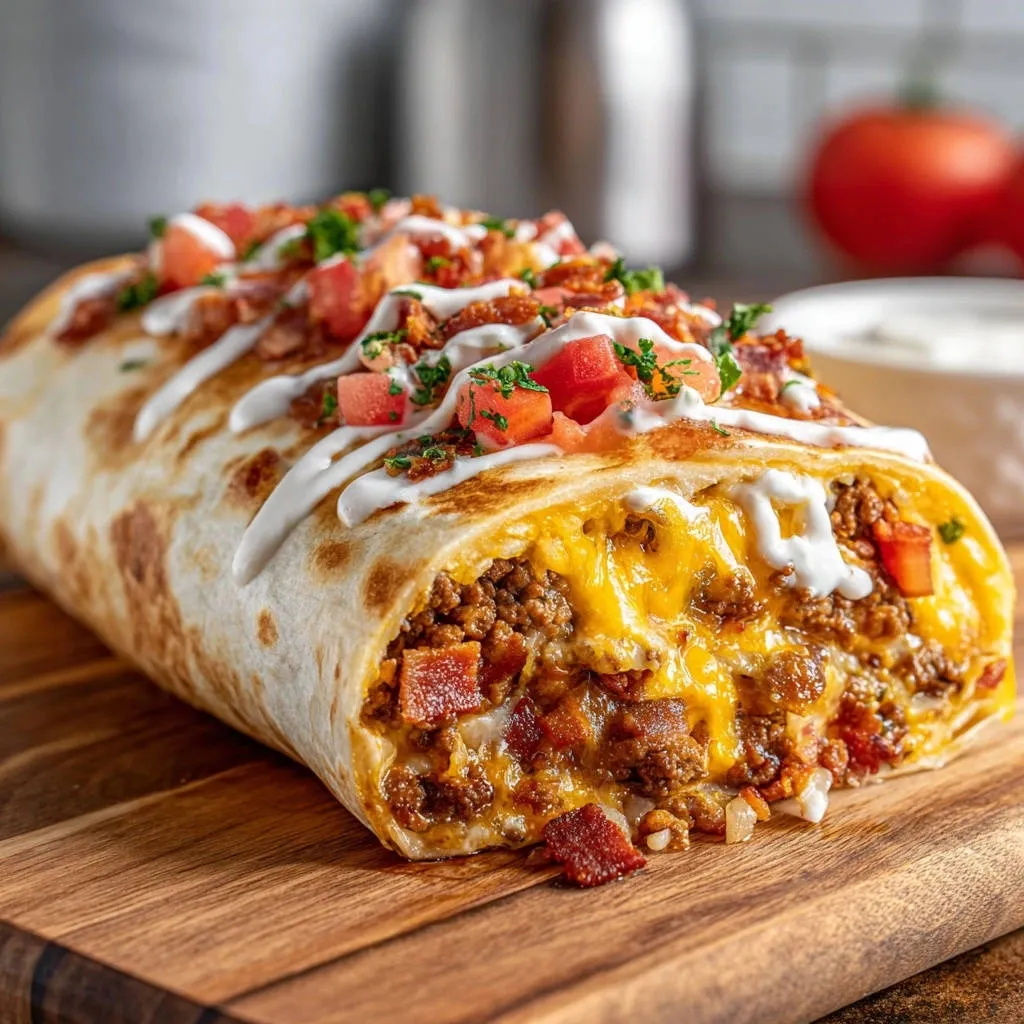
Our Crispy Beef & Bacon Burrito boasts a dynamic flavor profile, starting with perfectly seasoned ground beef. This savory base is beautifully complemented by the smoky, salty notes of crispy bacon.
Melted cheddar cheese and fresh diced tomatoes add a creamy, vibrant dimension, culminating in a deeply satisfying and balanced taste experience. Each bite delivers a harmonious blend of textures and bold flavors.
Effortless Mastery for Any Cook: Simple Steps, Stunning Results
Despite its gourmet appeal, this recipe is incredibly straightforward and accessible for cooks of all skill levels. The steps are intuitive, focusing on maximizing flavor and texture without unnecessary complexity.
You’ll be amazed at the restaurant-quality results you can achieve with minimal effort, making this an ideal choice for a quick weeknight dinner or a relaxed weekend meal.
Gathering Your Flavor Arsenal: Key Ingredients
The Savory Foundation: Beef & Spices
Ground Beef: Choose a lean ground beef (80/20 or 90/10) for rich flavor without excessive grease. This forms the hearty core of our burrito filling.
Chili Powder: Essential for that classic, warm, and slightly smoky Southwest flavor. It provides a foundational spice note.
Ground Cumin: Adds an earthy, aromatic depth that perfectly complements the beef. It’s a signature spice in many delicious, savory dishes.
Garlic Powder: Delivers a concentrated garlic punch, enhancing the overall savory profile. It blends seamlessly into the mixture.
Salt & Black Pepper: These foundational seasonings are crucial for balancing and elevating all the other flavors. Season to taste for optimal deliciousness.
The Essential Wrap: Perfect Tortillas
Large Flour Tortillas (Burrito Size): The size is important for holding all the delicious filling without tearing. Opt for fresh, pliable tortillas that are easy to roll.
Warming them slightly before assembly is key to preventing cracks and ensuring a tight, secure wrap.
Freshness & Finishing: Cheese, Veggies & Drizzles
Shredded Cheddar Cheese: Provides gooey, melt-in-your-mouth goodness that binds the filling together and adds a comforting, creamy texture. Freshly shredded cheese often melts best.
Diced Fresh Tomatoes: Offers a burst of fresh, juicy acidity and vibrant color. These add a crucial element of freshness to the rich beef and bacon.
Cooked and Crumbled Bacon: This is a star ingredient, delivering irresistible salty, smoky, and crispy bits. Ensure your bacon is cooked until truly crispy before crumbling.
Sour Cream or Ranch Dressing: A cool, creamy drizzle provides a delightful contrast to the warm, savory filling. It adds moisture and a tangy finish, completing the experience.
Essential Gear for Burrito Bliss
Skillet & Spatula: Your Crisping Companions
Large Skillet: A heavy-bottomed skillet, preferably cast iron or a quality non-stick pan, is crucial. It ensures even heat distribution for that perfect, golden crisp on your burritos.
Sturdy Spatula: You’ll need a good, flat spatula for pressing down on the burritos during cooking. This ensures maximum contact with the hot pan, promoting uniform browning and crispiness.
Beyond the Basics: Optional Prep Tools
Microwave: Helpful for quickly warming tortillas to make them pliable. Alternatively, a dry skillet works just as well.
Cutting Board & Knife: Essential for dicing tomatoes and for slicing your finished burritos in half if desired.
Crafting Your Crispy Beef & Bacon Burrito: A Step-by-Step Guide
- Preparing the Irresistible Beef Filling:
Start by heating one tablespoon of cooking oil in a large skillet over medium-high heat. Add your ground beef, breaking it up with a spoon as it cooks.
Continue cooking until the beef is fully browned, then drain off any excess grease. This prevents a soggy filling and keeps the flavors concentrated.
Stir in the chili powder, ground cumin, garlic powder, salt, and black pepper. Cook for an additional 1 to 2 minutes, stirring constantly, until the spices become wonderfully fragrant. Remove the skillet from the heat.
- Prepping Your Tortillas for Pliability:
Slightly warm your flour tortillas before assembly. You can do this in a microwave for 15 to 20 seconds each, or in a dry skillet for a few seconds per side.
This warming step is crucial as it makes the tortillas more flexible and much easier to fold without tearing, ensuring a neatly wrapped burrito.
- The Art of Folding a Perfect Parcel:
Lay a warm tortilla flat on your work surface. Spoon about one-quarter of the seasoned ground beef mixture onto the center of the tortilla.
Top the beef with one-quarter of the shredded cheddar cheese and a generous sprinkle of your diced fresh tomatoes. For extra flavor, consider adding a scoop of perfect pico de gallo here.
To fold, first, fold in the sides of the tortilla over the filling, ensuring they meet or overlap slightly. Then, fold up the bottom edge tightly over the filling, creating a secure base.
Finally, roll the tortilla up tightly from the bottom to the top. The goal is a compact, firm burrito that will hold its shape during cooking.
- The Ultimate Crisping Technique: Skillet Perfection:
This is the secret to the “crispy” in our Crispy Beef & Bacon Burrito! Heat a clean, dry skillet over medium heat. Do not add oil at this stage; we want dry heat for maximum crispiness.
Place your rolled burrito seam-side down in the hot skillet. Cook for 2 to 3 minutes, gently pressing down with a spatula to ensure even contact and browning. This seals the seam and starts the crisping process.
Once the seam side is golden brown and crispy, carefully flip the burrito to another side. Continue cooking and flipping, about 2 minutes per side, until all sides are beautifully golden brown and the cheese inside is melted and gooey.
- The Grand Finale: Garnish and Serve:
Remove the gloriously crispy burritos from the skillet. If desired, slice them in half on a diagonal to reveal the delicious layers within.
Drizzle generously with sour cream or ranch dressing. For an extra touch of flavor and texture, sprinkle with your cooked and crumbled bacon bits just before serving immediately. Enjoy your perfectly crispy creation!
Elevate Your Burrito Game: Pro Tips & Tricks
Achieving Max Crispy Goodness
Don’t Overcrowd the Pan: Cook burritos one or two at a time, depending on your skillet size. Overcrowding lowers the pan temperature, leading to steaming instead of crisping.
Maintain Medium Heat: Too high, and the tortilla burns; too low, and it won’t crisp. Medium heat allows for gradual browning and melty cheese without scorching.
Press Firmly: Use your spatula to press down on the burrito as it cooks. This ensures maximum contact with the hot surface, guaranteeing an even and deep golden crisp.
Customizing Your Flavor Profile
Spice It Up or Down: Adjust the amount of chili powder and cumin to suit your preference. For extra heat, add a pinch of cayenne pepper or a dash of hot sauce to the beef.
Add Aromatics: Sauté finely diced onions or bell peppers with the ground beef for added flavor and texture. Just be sure to cook them until soft before adding spices.
Cheese Varieties: Experiment with different cheeses like Monterey Jack, Colby Jack, or a Mexican blend for varying melt and flavor characteristics. You could even explore an ultimate beef and cheese melt inspired by other cheesy beef dishes.
Smart Prep for Speedy Meals
Pre-Cook the Beef: Prepare the seasoned ground beef mixture a day or two in advance. Store it in an airtight container in the refrigerator.
Portion Ingredients: Pre-measure cheese and dice tomatoes ahead of time. This streamlines the assembly process, making dinner preparation a breeze on busy nights.
Common Burrito Hiccups? We’ve Got Solutions!
“My Burrito Isn’t Crispy Enough!”
Ensure your skillet is truly hot before adding the burrito. Resist the urge to add oil during the crisping step; a dry skillet provides the best contact for browning.
Increase the cooking time slightly per side, and don’t forget to press down firmly with your spatula to maximize surface contact and create a beautiful crust.
“The Filling Keeps Falling Out!”
The key here is proper tortilla warming and a tight roll. Warm tortillas are more pliable and less likely to crack during folding.
Practice the folding technique: fold in the sides first, then pull the bottom up tightly over the filling before rolling firmly from bottom to top. A compact roll is a secure roll.
“Too Salty/Not Enough Flavor?”
Always taste your beef filling before assembling the burritos and adjust seasonings as needed. Remember, you can always add more salt, but you can’t take it away.
If it’s too salty, a squeeze of fresh lime juice or a dollop of extra sour cream can help balance the flavors. For more flavor, consider adding fresh cilantro or a dash of onion powder to the beef.
Serving Your Crispy Creation: Ideas & Pairings
Classic Companions for a Complete Meal
Pair your Crispy Beef & Bacon Burrito with traditional sides like fluffy Mexican rice or tender black beans. These complementary dishes create a satisfying and well-rounded meal.
A simple side salad with a light vinaigrette also offers a refreshing contrast to the richness of the burrito, adding essential greens to your plate.
Creative Twists and Topping Bar Fun
Elevate your meal with a “burrito bar” featuring an array of toppings for customization. Offer fresh guacamole, your favorite salsa, and various hot sauces for different spice levels.
Consider pickled jalapeños for a tangy kick, a sprinkle of fresh cilantro, or even some thinly sliced red onion. For a different but equally delicious option, you might also enjoy making gooey cheesy chicken burritos for variety.
Making Ahead & Storing Your Crispy Burritos
Can You Freeze These Burritos?
Yes, you can absolutely freeze these burritos! For best results, assemble them as directed but do not pan-fry. Wrap each uncooked burrito tightly in plastic wrap, then foil.
Freeze for up to 2-3 months. When ready to cook, thaw in the refrigerator overnight, then proceed with the crisping step as usual.
Reheating for Retained Crispiness
For refrigerated burritos, the best way to reheat and retain crispiness is in a dry skillet over medium heat, just like the initial cooking. Cook until heated through and re-crisped on all sides.
Alternatively, you can place them in a preheated oven at 375°F (190°C) for 15-20 minutes, or until hot and crispy. Avoid microwaving, as this will make them soft.
Meal Prep Strategies for Busy Weeks
Cook a larger batch of the seasoned ground beef filling at the beginning of the week. Store it in the refrigerator, and it’s ready to go when you are.
This allows for quick assembly and crisping on demand, turning dinner into a 10-15 minute affair. You can even prepare a large batch of the beef mixture and use some for loaded beef nachos on another night!
Your Crispy Beef & Bacon Burrito Questions, Answered
Can I Substitute Different Meats or Fillings?
Absolutely! While beef and bacon are delicious, feel free to experiment. Ground chicken or turkey can be used for a leaner option, or a hearty blend of black beans and corn for a vegetarian twist.
You can also add sautéed vegetables like bell peppers, onions, or corn to the filling for extra nutrition and flavor.
Are There Dairy-Free or Gluten-Free Options?
Yes! For dairy-free, use your favorite plant-based shredded cheese alternative and dairy-free sour cream or ranch. Many excellent options are available that melt beautifully.
For gluten-free, simply swap out the standard flour tortillas for your preferred brand of gluten-free large tortillas. The crisping method works just as well with them.
What About Baking Instead of Pan-Frying?
Baking can work, but pan-frying is superior for achieving that intense, golden crispness. Baking can result in a drier, more uniformly toasted exterior, but it often lacks the direct, intense contact needed for a true “crisp.”
If baking, a slightly oiled baking sheet and a higher oven temperature (around 400°F/200°C) are recommended to encourage browning.
Adjusting the Spice Level
To make it milder, reduce the chili powder and omit black pepper in the beef filling. For an extra kick, consider adding a pinch of cayenne pepper, a dash of hot sauce, or a few finely chopped pickled jalapeños to the beef or as a topping.
Ready to Roll? Your Crispy Beef & Bacon Burrito Awaits!
Now that you’re armed with the secrets to a perfectly crisp exterior and a flavor-packed filling, there’s no stopping you. This Crispy Beef & Bacon Burrito recipe is more than just a meal; it’s an experience that brings joy to your taste buds.
Dive in, create your own batch of burrito perfection, and savor every golden, crunchy bite. Don’t forget to share your delicious creations!

Crispy Beef & Bacon Burrito
Course: Main CourseCuisine: Mexican CuisineDifficulty: easy4
servings15
minutes20
minutes35
minutesMexican Cuisine
Ingredients
1 pound ground beef
1 tablespoon cooking oil (vegetable or canola)
1 teaspoon chili powder
1/2 teaspoon ground cumin
1/4 teaspoon garlic powder
Salt to taste
Black pepper to taste
4 large flour tortillas (burrito size)
2 cups shredded cheddar cheese
1/2 cup diced fresh tomatoes
1/2 cup cooked and crumbled bacon
1/4 cup sour cream or ranch dressing, for drizzling
Directions
- In a large skillet, heat the tablespoon of cooking oil over medium-high heat. Add the ground beef and cook, breaking it up with a spoon, until fully browned. Drain any excess grease.
- Stir in the chili powder, ground cumin, garlic powder, salt, and black pepper. Cook for another 1 to 2 minutes, stirring, until fragrant. Remove from heat.
- Warm the flour tortillas slightly in a microwave for 15 to 20 seconds each, or in a dry skillet for a few seconds per side. This makes them more pliable and easier to fold.
- To assemble each burrito: Lay a warm tortilla flat. Spoon about 1/4 of the seasoned ground beef mixture onto the center. Top with 1/4 of the shredded cheddar cheese and a sprinkle of diced tomatoes.
- Fold in the sides of the tortilla over the filling, then fold up the bottom edge tightly over the filling and roll it up tightly from bottom to top to create a compact burrito.
- This is the key to crispiness! Heat a clean, dry skillet over medium heat. Place the rolled burrito seam-side down in the hot skillet. Cook for 2 to 3 minutes, pressing down gently with a spatula to ensure even contact and browning.
- Once the seam side is golden brown and crispy, carefully flip the burrito to another side. Continue cooking and flipping, about 2 minutes per side, until all sides are golden brown and the cheese inside is melted and gooey.
- Remove the crispy burritos from the skillet. Slice them in half if desired, and drizzle generously with sour cream or ranch dressing. Sprinkle with cooked bacon bits before serving immediately.