Welcome back to the blog, friends! Today, we’re diving into the world of golden, crunchy goodness. Making crispy fried shrimp at home can sometimes feel like a culinary gamble, right? You picture perfectly crisp exteriors and tender, juicy centers, but sometimes you end up with… well, something less than ideal. I’ve been there! I’ve experimented with countless methods, tweaking batter ratios and frying times, trying to unlock the secret to truly crispy results without overcooking that delicate seafood. And guess what? I finally cracked the code.
This recipe for Crispy Fried Shrimp with Peppers isn’t just another way to fry shrimp; it’s THE way. It incorporates a simple but crucial step that makes all the difference, ensuring each bite is wonderfully crunchy on the outside and perfectly cooked within. Paired with vibrant, tender-crisp bell peppers and a delightful dipping sauce, this dish is a guaranteed hit for appetizers, a light main course, or even a fun party snack.
Why You’ll Fall in Love with This Crispy Fried Shrimp Recipe
So, what makes this specific recipe stand out from the rest? Plenty!
- Unmatched Crispiness: We focus on the technique that guarantees that satisfying crunch every single time. Say goodbye to soggy coatings!
- Perfectly Cooked Shrimp: The method ensures the shrimp cooks through just as the coating turns golden, preventing that rubbery texture nobody wants.
- Vibrant Flavor Pairing: The quick-sautéed bell peppers add a touch of sweetness and freshness that perfectly complements the rich, fried shrimp.
- Simple Ingredients: You likely have most of the pantry staples on hand.
- Quick & Easy: From start to finish, this recipe comes together faster than you might think, making it ideal for busy weeknights or last-minute entertaining.
- Versatile Serving: It’s fantastic on its own, over rice, or even tucked into tacos! Want another delicious way to enjoy shrimp? Check out our Grilled Shrimp Bowl.
Gathering Your Ingredients for Crispy Fried Shrimp with Peppers
Every great dish starts with quality ingredients, and this Crispy Fried Shrimp with Peppers is no exception. We’re using a mix of fresh seafood, pantry staples for the coating, colorful vegetables, and a few simple components for a creamy, flavorful dipping sauce. Let’s look at what you’ll need and why each element is important.
For the Star of the Show – The Shrimp:
- 1 pound large shrimp, peeled and deveined: Large shrimp are perfect for frying because they hold up well to the heat and offer a substantial, satisfying bite once cooked. Ensure they are fully peeled and deveined for ease of preparation and eating.
For the Golden, Crispy Coating:
- 1/2 cup all-purpose flour: This provides the initial dry layer, helping the egg wash adhere evenly.
- 1 teaspoon salt & 1/2 teaspoon black pepper: Simple seasoning for the flour layer, building flavor from the inside out.
- 2 large eggs, whisked: The essential binder that helps the breadcrumbs stick to the flour-coated shrimp. Whisking them well ensures a smooth, uniform application.
- 1 cup seasoned breadcrumbs or panko breadcrumbs: Here’s where the magic happens for ultimate crispiness! Panko (Japanese breadcrumbs) are flakier and absorb less oil, resulting in a much lighter, crispier texture than standard seasoned breadcrumbs. You can use seasoned breadcrumbs for convenience, but if you want that extra crunch, panko is the way to go.
For Frying:
- Cooking oil, for frying (vegetable or canola): You’ll need enough oil to submerge the shrimp about 1-2 inches deep. Vegetable or canola oil are excellent choices due to their high smoke points, which are necessary for frying at the required temperature.
For the Colorful Pepper Medley:
- 1 red bell pepper, sliced: Adds sweetness and vibrant color.
- 1 yellow bell pepper, sliced: Another layer of sweetness and sunshine-yellow appeal.
- 1 green bell pepper, sliced: Offers a slightly different, more vegetal flavor and a pop of green. Using multiple colors makes the final dish visually stunning.
For Finishing Touches & Serving:
- Fresh parsley, chopped, for garnish: A sprinkle of fresh green adds brightness and a hint of herbaceous flavor right before serving.
- 1 lemon, cut into wedges: A squeeze of fresh lemon juice over the hot shrimp is a classic pairing that cuts through the richness of the fry and enhances the seafood flavor.
For the Creamy Dipping Sauce:
- 1/2 cup mayonnaise: The base for our simple, creamy sauce.
- 1 tablespoon relish (optional, based on visual texture): Adds a little tang and texture. Its inclusion is noted as optional, possibly depending on your desired sauce consistency or preference for small pickle pieces.
- 1/2 teaspoon seasoning blend (like cajun or Old Bay, optional): Kicking up the sauce flavor with a seasoning blend adds complexity and a hint of spice or classic seafood seasoning notes. Adjust to your taste!
Crafting Your Crispy Fried Shrimp with Peppers: Step-by-Step
Alright, let’s turn these wonderful ingredients into a plate of crispy perfection. Follow these steps closely for the best results!
Prepare the Shrimp for Maximum Crisp: This is the absolute MOST crucial step! After peeling and deveining your shrimp, you MUST pat them thoroughly dry using paper towels. Any excess moisture on the surface will create steam in the hot oil, leading to a less crispy coating (or even making it slide off!). Get them as dry as possible. While they’re drying, set up your breading station: grab three shallow dishes or plates. In the first, combine the all-purpose flour with your salt and pepper. In the second, place the whisked eggs. In the third, add your chosen breadcrumbs (preferably panko for that extra crisp factor). Having this assembly line ready makes the process smooth.
Build the Crispy Layers: Take each dried shrimp and first dredge it in the flour mixture, ensuring it’s lightly coated. Shake off any excess flour – too much dry flour can create a gummy layer. Next, dip the flour-coated shrimp into the egg wash, letting any extra egg drip back into the dish. Finally, coat the shrimp generously in the breadcrumbs. Press the breadcrumbs gently onto the shrimp to help them adhere well. Place the coated shrimp on a wire rack set over a baking sheet. This keeps them from sticking and allows air circulation, preventing the bottom from getting soggy while you prep for frying. Don’t stack them!
Heat the Frying Oil: Pour about 1 to 2 inches of cooking oil into a large, heavy-bottomed skillet or pot. A heavy pot helps maintain a consistent temperature. Place it over medium-high heat. You’re aiming for an oil temperature of 350-375 degrees F (175-190 degrees C). If you have a kitchen thermometer, this is the best way to be accurate! If not, a simple test is to drop a tiny pinch of breadcrumbs into the hot oil. They should immediately sizzle vigorously and float to the surface within a second or two. If they just sit there, the oil isn’t hot enough; if they burn instantly, it’s too hot.
Quick Sauté the Peppers: While the oil is heating for the shrimp, grab a separate pan and add just a tiny bit of oil. Heat it over medium-high heat. Add your sliced red, yellow, and green bell peppers. Sauté them quickly, stirring frequently, for just 3 to 5 minutes. The goal here isn’t to make them mushy, but to soften them slightly while still keeping some of their vibrant color and a slight bite. This quick sauté makes them a perfect textural contrast to the crispy shrimp.
Fry the Shrimp in Batches: Once the oil is at the correct temperature, carefully add the coated shrimp to the hot oil. Do this in batches! This is critical – overcrowding the pan will dramatically lower the oil temperature, causing the shrimp to absorb too much oil and become greasy and soggy instead of crisp. Fry for about 2 to 3 minutes per side, or until they are a beautiful golden brown and the shrimp is cooked through (it will turn pink and opaque). Shrimp cooks very quickly, so keep a close eye on them to avoid overcooking, which makes them tough.
Drain and Rest: As the shrimp finish frying, use a slotted spoon or spider tool to remove them from the hot oil. Immediately transfer the fried shrimp back to the wire rack (the one you used after breading, perhaps with fresh paper towels underneath to catch drips). Letting them rest on a rack allows excess oil to drain away and air to circulate around the shrimp, helping them maintain their crispiness. Avoid placing them directly onto paper towels in a bowl, as this can trap steam and lead to sogginess.
Whip up the Dipping Sauce: While the shrimp rest for a moment, quickly mix together the mayonnaise, relish (if you’re using it), and your chosen seasoning blend (like cajun or Old Bay) in a small bowl. Taste and adjust the seasoning if needed. This creates a simple yet flavorful creamy dip that pairs wonderfully with the crispy shrimp and sweet peppers.
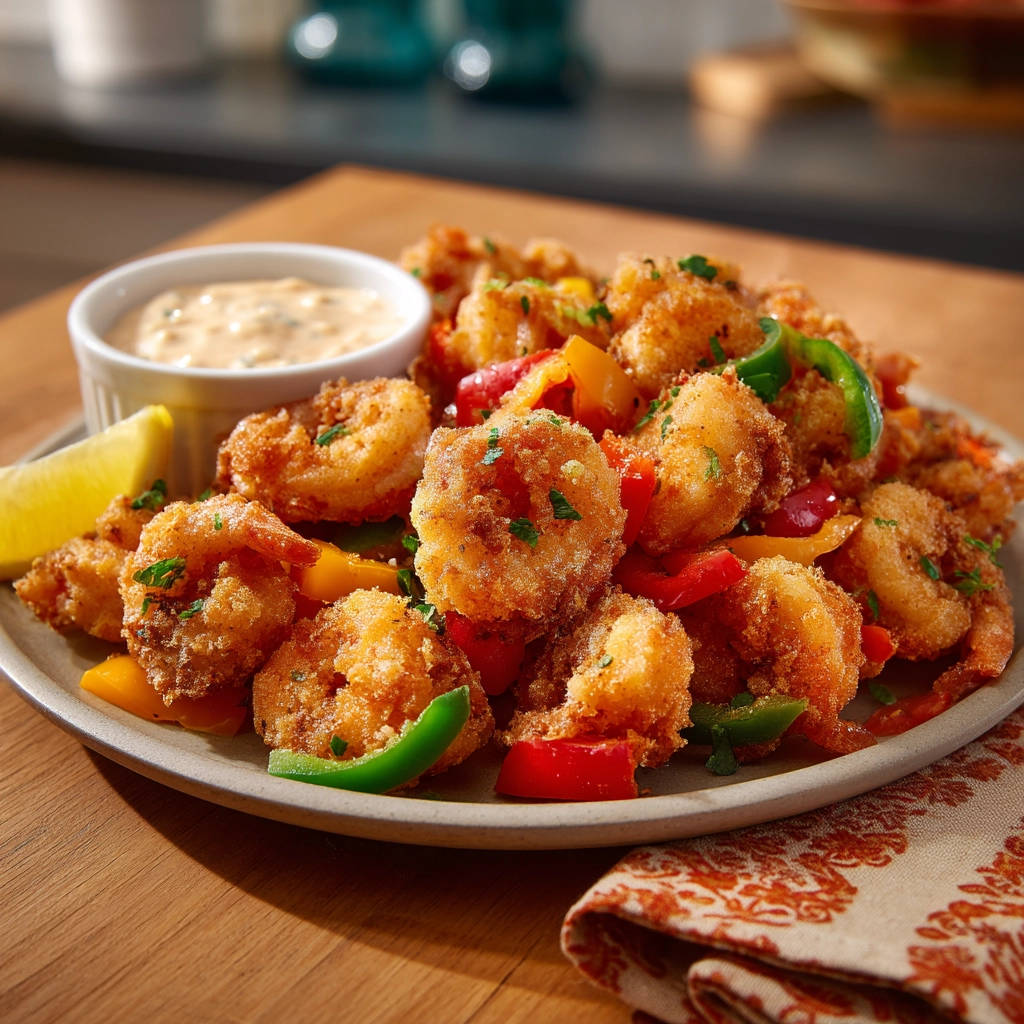
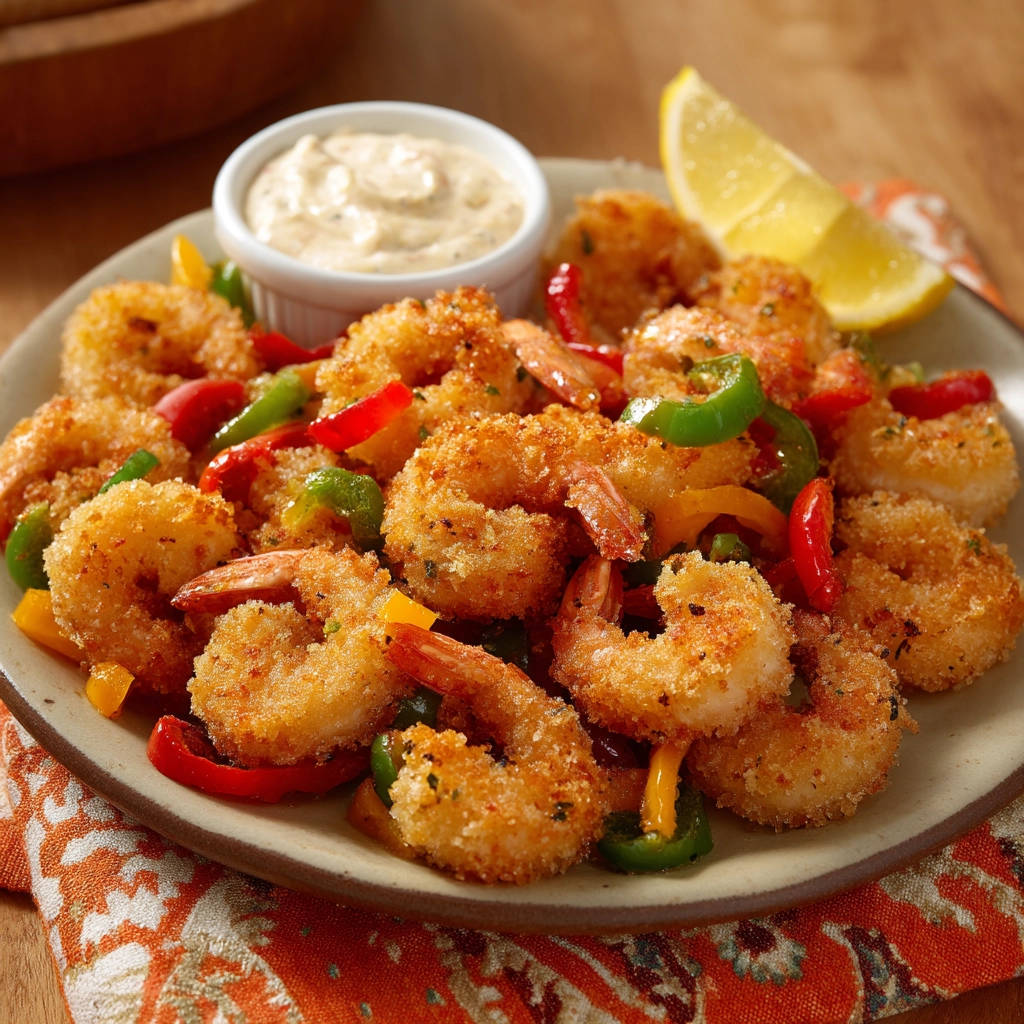
Assemble and Serve Immediately: Arrange the quickly sautéed bell peppers on a serving plate. Pile the hot, crispy fried shrimp over the peppers. Garnish generously with freshly chopped parsley and arrange the lemon wedges around the plate. Serve the crispy fried shrimp and peppers immediately with that delicious creamy dipping sauce on the side. The contrast of hot, crispy shrimp, tender-crisp peppers, and cool, creamy sauce is truly delightful!
Tips for Perfect Crispy Fried Shrimp Every Time
Want to ensure your Crispy Fried Shrimp with Peppers turn out absolutely perfect? Here are a few extra pointers from my kitchen:
- Dry, Dry, Dry!: I can’t stress this enough. Patting the shrimp dry is the number one secret to a truly crispy coating that stays put.
- Oil Temperature is Key: Investing in an inexpensive kitchen thermometer is a game-changer for frying. Maintaining the correct oil temperature prevents greasy, soggy results (oil too cool) and burnt coatings with raw insides (oil too hot).
- Don’t Crowd the Pot: This is the second major culprit for soggy fried food. Fry in batches! Your oil temperature will stay higher, leading to faster cooking and crispier results.
- Use a Wire Rack: After frying, always drain the shrimp on a wire rack set over paper towels. This allows air circulation and prevents the bottom of the shrimp from steaming and becoming soggy.
- Panko for the Win: While seasoned breadcrumbs work, panko truly delivers that light, airy, shattering crispness that makes fried food so appealing.
- Seasoning the Sauce: The optional seasoning blend in the sauce is a fantastic way to customize the flavor. Try Old Bay for a classic seafood vibe or Cajun seasoning for a bit of heat!
- Freshness Matters: Fried food is always best served immediately. The longer it sits, the more the coating can soften.
What to Serve With Your Crispy Fried Shrimp
While delicious on their own, Crispy Fried Shrimp with Peppers can be part of a larger meal. They pair beautifully with a variety of sides:
- Rice: Simple steamed rice or our flavorful Perfect Mexican Rice makes a great base to serve the shrimp and peppers over.
- Salad: A light, fresh green salad provides a nice contrast to the fried elements. Our Grilled Chicken Salad could easily be adapted by swapping the chicken for shrimp!
- Potatoes: Crispy fried shrimp is fantastic with some classic potato sides like Extra Crispy French Fries or Crispy Baked Hasselback Potatoes.
- Other Veggies: Round out the meal with additional vegetables. Roasted Cauliflower or Perfectly Roasted Veggies are simple and healthy options.
Your Crispy Fried Shrimp Questions Answered (FAQ)
Got questions about making the best crispy fried shrimp? Let’s tackle some common ones!
Can I use frozen shrimp?
Yes, absolutely! Just make sure they are completely thawed before you begin. Patting frozen shrimp dry is even more crucial, as they tend to hold more moisture after thawing. Allow them to drain in a colander first, then pat them vigorously with paper towels.
Can I make this recipe in an air fryer?
While you can cook breaded shrimp in an air fryer, the texture will be different than traditional deep frying. An air fryer will give you a crispy coating, but it typically won’t achieve the same level of golden richness and the lightning-fast cooking that keeps the inside so tender. If you want to try air frying, lightly spray the coated shrimp with cooking spray and air fry at around 390°F (200°C) for 6-8 minutes, flipping halfway, until golden and cooked through.
What’s the difference between seasoned breadcrumbs and panko?
Seasoned breadcrumbs are typically made from dried, ground bread loaves and contain added seasonings like herbs and garlic powder. Panko breadcrumbs are made from crustless white bread that is processed into large, airy flakes. These flakes absorb less oil and create a lighter, crispier coating, which is why they are preferred for maximum crispiness.
Can I substitute the bell peppers?
Certainly! While the mixed bell peppers offer a lovely color and sweetness, you could substitute other quick-cooking vegetables like thinly sliced onions, zucchini, or even mushrooms. Just be mindful of their cooking times in the sauté step.
Can I make the dipping sauce ahead of time?
Yes, the creamy dipping sauce can definitely be mixed ahead of time and stored in an airtight container in the refrigerator for a couple of days. The flavors might even meld nicely!
Enjoy Your Homemade Crispy Fried Shrimp with Peppers!
See? Making truly crispy fried shrimp at home doesn’t have to be intimidating! With the right technique – primarily, getting those shrimp nice and dry – you can achieve results that rival your favorite seafood restaurant. This Crispy Fried Shrimp with Peppers recipe is packed with flavor, boasts that satisfying crunch, and is surprisingly simple to execute.
Give this recipe a try and let me know what you think in the comments below! Did you use panko? What seasoning blend did you add to your sauce? I love hearing about your kitchen adventures. Happy cooking!
Crispy Fried Shrimp with Peppers

Ingredients
- 1 pound large shrimp, peeled and deveined
- 1/2 cup all-purpose flour
- 1 teaspoon salt
- 1/2 teaspoon black pepper
- 2 large eggs, whisked
- 1 cup seasoned breadcrumbs or panko breadcrumbs
- Cooking oil, for frying (vegetable or canola)
- 1 red bell pepper, sliced
- 1 yellow bell pepper, sliced
- 1 green bell pepper, sliced
- Fresh parsley, chopped, for garnish
- 1 lemon, cut into wedges
- 1/2 cup mayonnaise
- 1 tablespoon relish (optional, based on visual texture)
- 1/2 teaspoon seasoning blend (like cajun or Old Bay, optional)
Directions
- Pat the shrimp thoroughly dry with paper towels. This is crucial for a crispy coating. Set up three shallow dishes: one with the flour mixed with salt and pepper, one with the whisked eggs, and one with the breadcrumbs.
- Dredge each shrimp first in the flour, shaking off excess. Then dip in the egg wash, letting excess drip off. Finally, coat generously in the breadcrumbs, pressing gently to help them adhere. Place coated shrimp on a wire rack while you heat the oil.
- Heat about 1-2 inches of cooking oil in a large skillet or pot over medium-high heat until it reaches 350-375 degrees F. A simple test is to drop a pinch of breadcrumbs in; they should sizzle immediately.
- While the oil heats, quickly saute the sliced bell peppers in a separate pan with a little oil until slightly softened, about 3-5 minutes.
- Carefully add the coated shrimp to the hot oil in batches, making sure not to overcrowd the pan. Overcrowding lowers the oil temperature and leads to soggy shrimp. Fry for 2-3 minutes per side, or until golden brown and cooked through. Shrimp cooks quickly, so watch closely.
- Use a slotted spoon to remove fried shrimp from the oil and transfer to a wire rack set over paper towels to drain excess oil.
- For the dipping sauce, mix the mayonnaise with relish and seasoning blend (if using) in a small bowl.
- Arrange the sauteed bell peppers on a plate, top with the crispy fried shrimp. Garnish with chopped fresh parsley and a lemon wedge. Serve immediately with the creamy dipping sauce.